
How to Repair a Dryer that Won’t Start
The Maytag Bravos clothes dryer wouldn’t start. All of the lights would come on, but after pressing the start button, nothing happened! I used the following procedure to fix the problem. Follow along on this picture guide if you are having similar issues! I hope this can help you if you are suffering from a dryer that refuses to start…!
I’ll go through the 4 most common problems with a dryer not starting, but in the end, my problem ended up being a burnt out (shorted) relay switch on the control board. Replacing only the relay (instead of the whole board) turns a $150 repair into a $15 repair.
4 Most Common Reasons a Dryer Won’t Start
The unit used here is a Maytag Bravos which is similar to the Whirlpool Duet and Kenmore Elite, so most of these diagnoses and troubleshooting steps will apply to any of these dryers.

If your dryer turns on and lights up but won’t start a cycle, then the problem is likely that the thermal fuse has blown. You can replace the fuse, and the dryer may work for a cycle or even several cycles, but the fuse will likely blow again. There was something that caused the fuse to blow in the first place, and these are the most common four reasons, roughly in order of how common these things occur:
- The vent is clogged.
- The heater element is shorted out.
- The thermostat or thermal cut-off switch is bad.
- The heater relay switch on the control board is shorted out.
In this post, I’ll go through the process to diagnose each of these culprits as well as how to fix them!
Parts referenced in this article:
- 9AS1D22-12 30A Relay 240VAC or the 2-pack
- W10111620 Dryer Control Board
- 8544771 Dryer Heater Element
- 274 Dryer Thermistor Replacement
- 8557403 Thermal Cut-off Switch (280148) kit
- 3390719 Dryer Thermal Fuse
1. Clogged Vent
This one is pretty straight-forward. Over time, lint finds its way around the lint trap, and can clog the blower motor, the internal vents, or the exhaust vent leading from the dryer to the outside. With the vent clogged, hot air cannot escape quickly enough, and the dryer overheats, blowing the thermal fuse. Make sure all of these are clear and not kinked or clogged. This may require inspection and cleaning of the outdoor exhaust vent to make sure it has not been clogged by leaves or frozen shut, etc…!
2. Heater Element is Bad
The heater element in the dryer is the unit that provides the heat to dry the clothes. Voltage is sent to the heating element that looks like a coiled wire. This wire glows red-hot and a fan draws air across the coil to heat the air. As the dryer gets older, the heater element can fail from the repeated heating-cooling cycle. Problems occur when the heater element breaks – voltage can no longer pass through the wire and no heating occurs. Another common problem is that the wire coil sags, or the ceramic supports break, causing the wire to come into contact with the metal housing around it. This effectively ‘shorts’ the voltage to the housing, in which case, the heating element won’t turn off! The heating element continues to heat to a temperature much higher than the maximum, and the wire coil either breaks, or the thermal fuse blows, or both. The thermostat and thermal cut-off switch may also be damaged should this occur.
3. Dryer Thermistor, Thermostat or Thermal Cut-off Switch is Bad
The thermostat system exists in the dryer to maintain a safe warm temperature when drying clothes. As mentioned previously, the heater element provides the heat. The thermostat monitors the temperature and when the temperature reaches the top of the operating range, somewhere around 150-175 degrees F, thermal cut-off switch sends a signal back to the relay on the control board to turn off the voltage to the heating element. The element then cools down, and when it reaches the bottom of the set range (~120 deg F), this set of electronics sends a signal to turn the heating element back on. This cycle repeats until the timer ends the drying cycle.
If any of these components is not working properly, the dryer can potentially overheat and blow the thermal fuse.
4. Dryer Relay Switch is Shorted Out
Another problem exists when the relay switch on the control board shorts out. If this switch is stuck ‘on,’ it ignores the signal from the thermal cut-off switch and continually provides voltage to the heating element. The max temperatures are then reached, and the thermal fuse blows.
Okay, so these are the problems that can occur, now let’s go through the diagnosis, troubleshooting and repair steps for each.
How to Replace a Dryer Thermal Fuse
First, we’ll discuss the procedure to change the thermal fuse. If you are experiencing one of these problems, then the fuse will likely have blown, so this will need to be changed.
tools and supplies:
- paint scraper (or thin metal tool)
- 5/16″ socket
- dryer thermal fuse (pn 3390719)
The first step is to unplug the unit.
contro
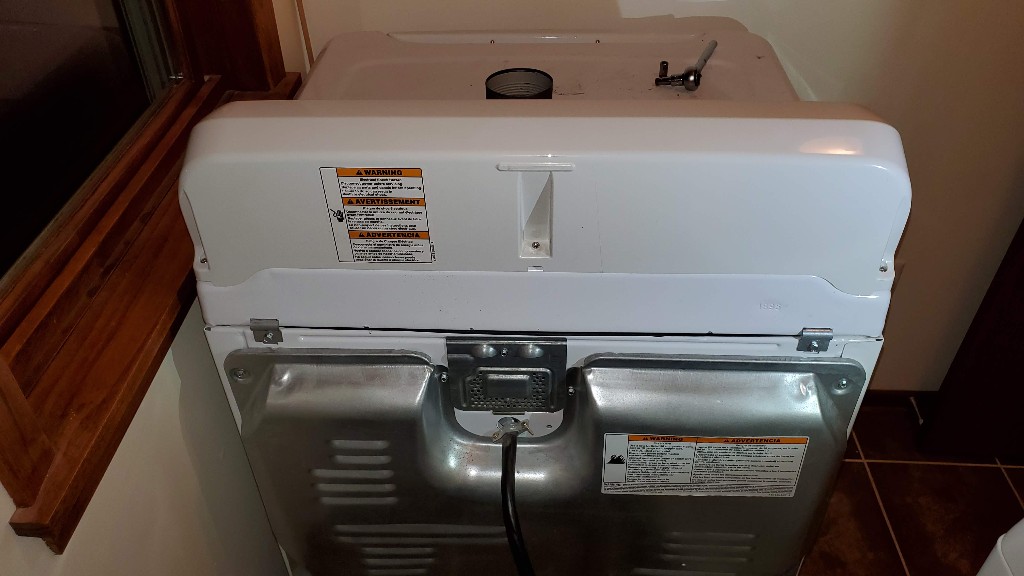
Then you will want to flip up the top of the dryer. In order to be able to do that, pull it out a little way from the wall. Then press the clips to release the top using the paint scraper.

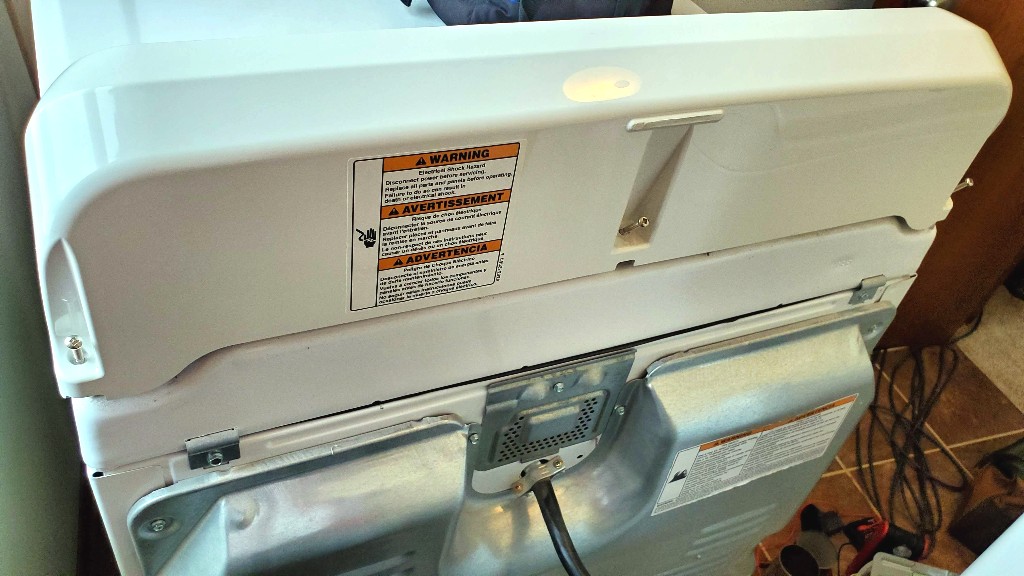
Press in the 2 tabs using a thin metal paint scraper to lift the top lid, as shown in the photo below. There are 2 tabs, one on either side of the door.

This is a close-up view of one of the metal tab (green) that you are pressing inward to release the top lid.

After the lid is flipped up, you need to remove 2 screws on the backside of the front panel, one on each side, with the 5/16th socket to take off the front panel. You can see the screw-head in the image below.

After the 2 screws are out, lift up on the front panel to unhitch it from the notches holding it in place on the bottom.
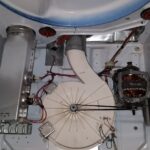
This is a view of the dryer with the top flipped up and the front panel removed.

This is a close up view of the tabs on the bottom that the front panel hitches in to.

The thermal fuse is located on the bottom right, in the picture above, on top of the white fan housing.
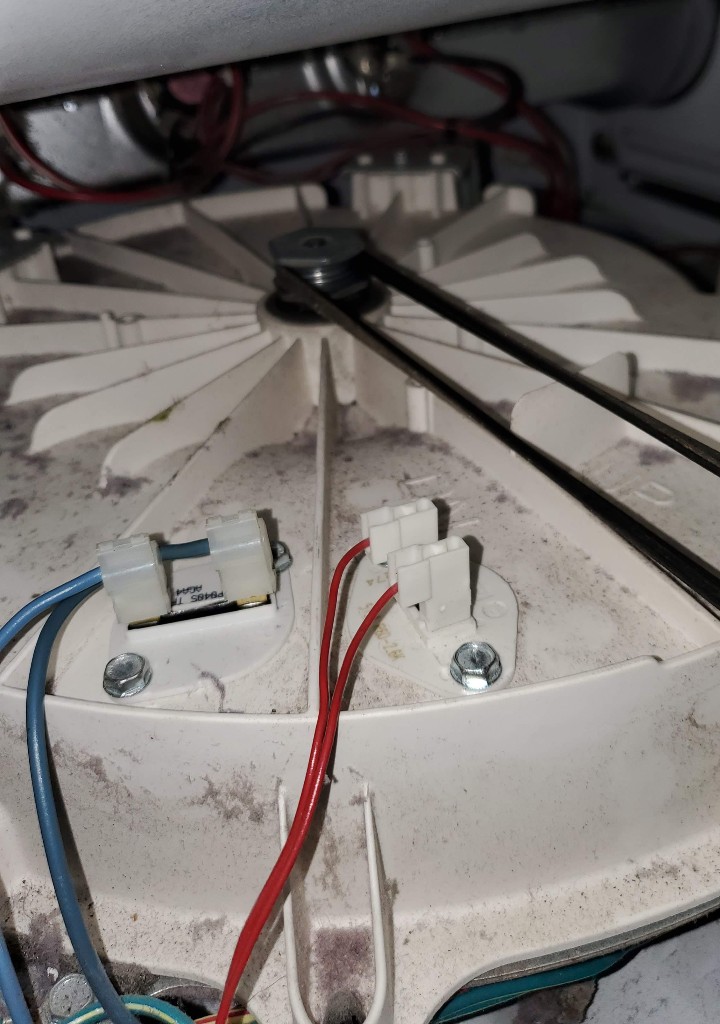
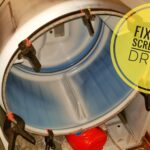
Here is a better view with the dryer drum removed (you don’t have to remove the drum for this, but I had removed it to replace the squealing wheels, and it give a great view of the thermal fuse…).
The thermal fuse is the one that is furthest down on the fan housing in this next photo, with the 2 blue wires running to it.

Remove the 2 screws holding the fuse using a 5/16″ socket.
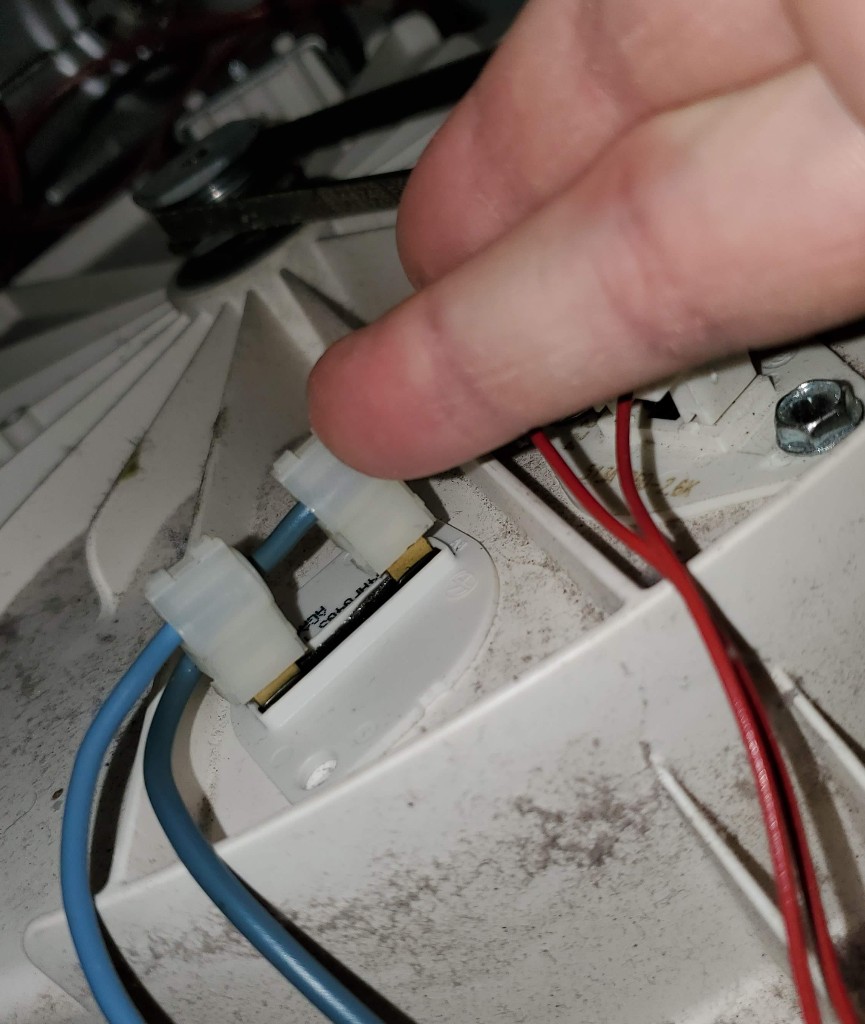
The connectors have plastic clips over them. I didn’t want to crack the plastic, so I pried them open with a small screwdriver.
Once the plastic clips are removed, it is easier to pry off the metal clips without destroying them.
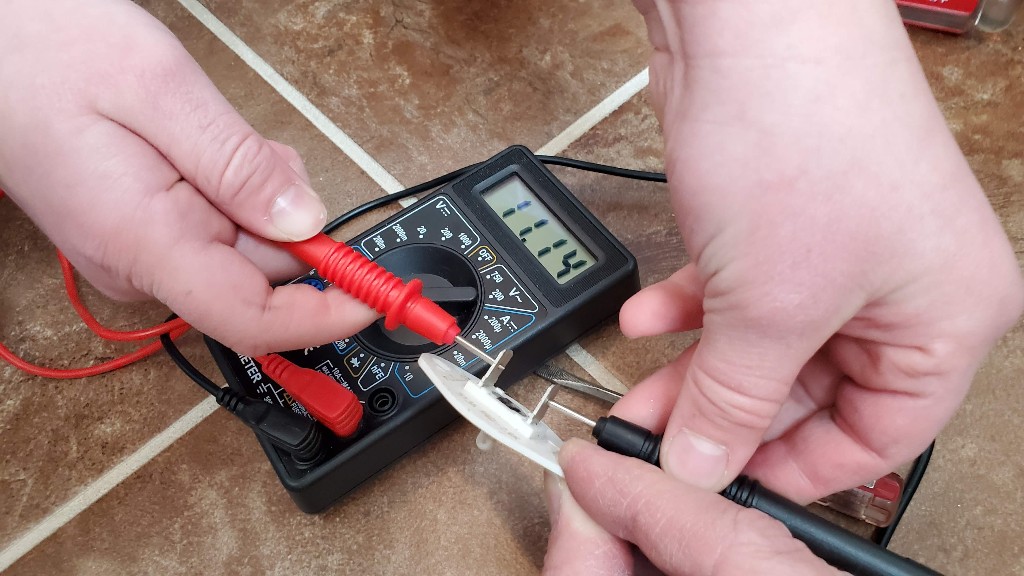
To verify that the fuse is blown, check it with your multi-meter. The fuse should have continuity through it. If it is an open circuit, it is bad and should be replaced.
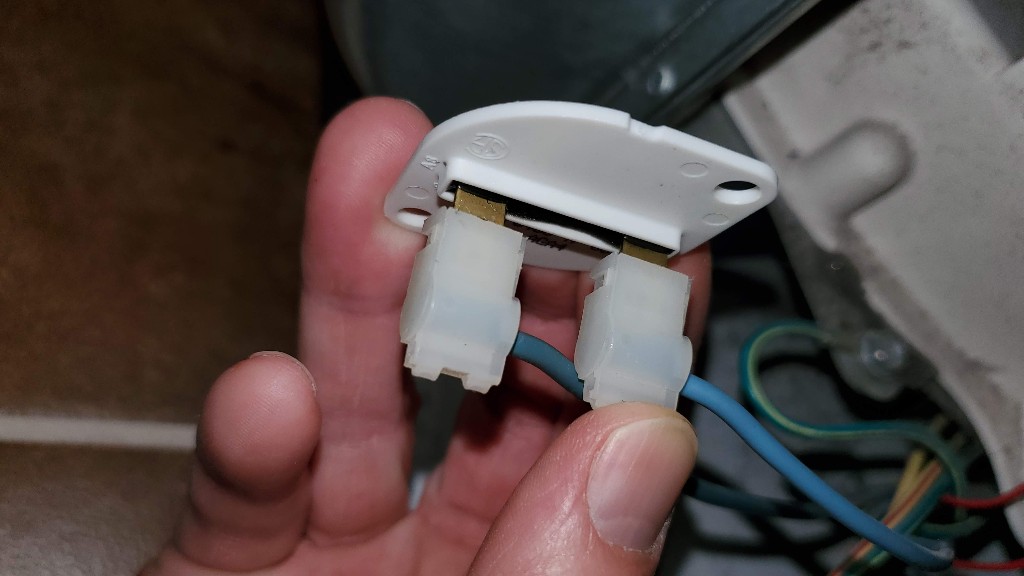
Take off the old fuse and reconnect the new fuse. I bought this two-pack of fuses off of amazon because two cost about $0.50 more than one, and then you have a backup.

Screw the new fuse back into place, and that’s it for replacing the fuse.
Remember: the fuse blew for a reason. It is a good idea to diagnose one of the remaining 4 causes to figure out what caused it to blow…
How to Clear Clogged Dryer Vents
The most common clogs in the vent occur in the tubing from the unit to the outside wall. Reach into the ducting as far as you can and clear out any debris. Make sure the flaps on the outside of the house are not clogged or stuck. Consider using a dryer duct cleaning kit to thoroughly clean the ducts.
Other common areas of clogs are the lint trap, debris that has made it past the lint trap, and the fan itself. Make sure all of these areas are clear.
How to Replace a Dryer Thermistor, Thermostat, or Thermal Cut-off Switch
Parts:
The thermistor is located near the thermal fuse. The one with the red wires running to it.
Remove the thermistor using a 5/16″ socket.

Before assuming it is bad, check its continuity. Remove at least one of the leads then use an ohmeter to check the continuity. At room temperature of about 72° F, it should read around 11 kohms. (Set your ohm meter to the 20 kohm range.)
- 60° F –> 15.2 kohms
- 70° F –> 11.8 kohms
- 80° F –> 9.1 kohms
If the thermistor is reading significantly different from these values, it has gone bad and should be replaced. Check the part number and order off of Amazon.
This is the thermistor for this dryer, 8577274 Dryer Thermistor Replacement.
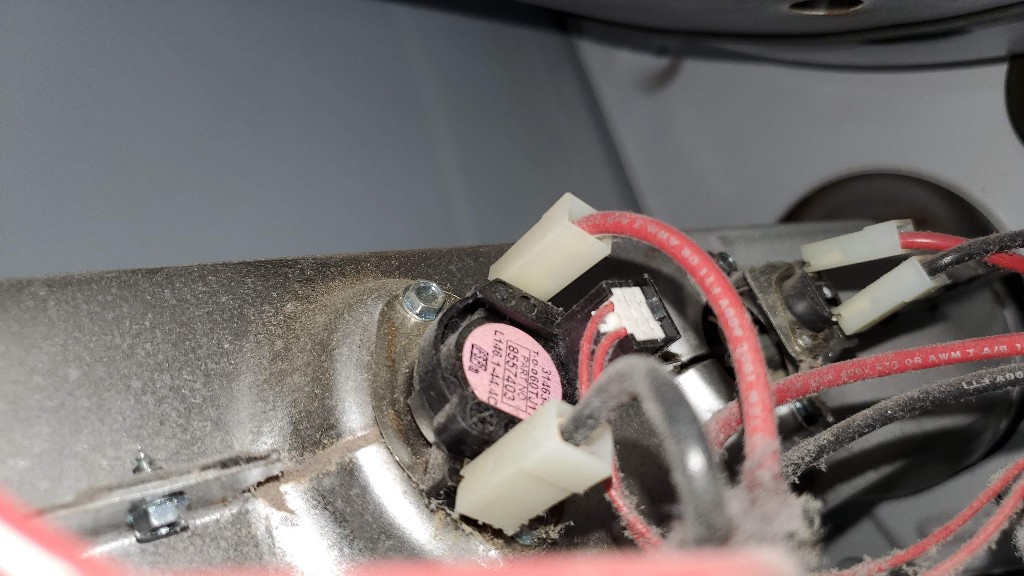
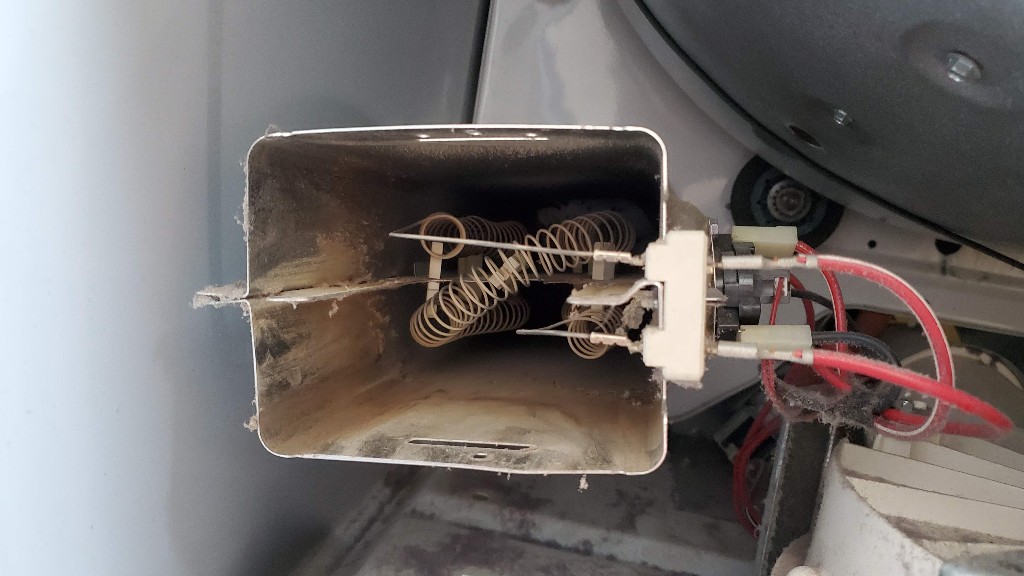
The thermostat and thermal cut-off switch are located on the heating element housing.
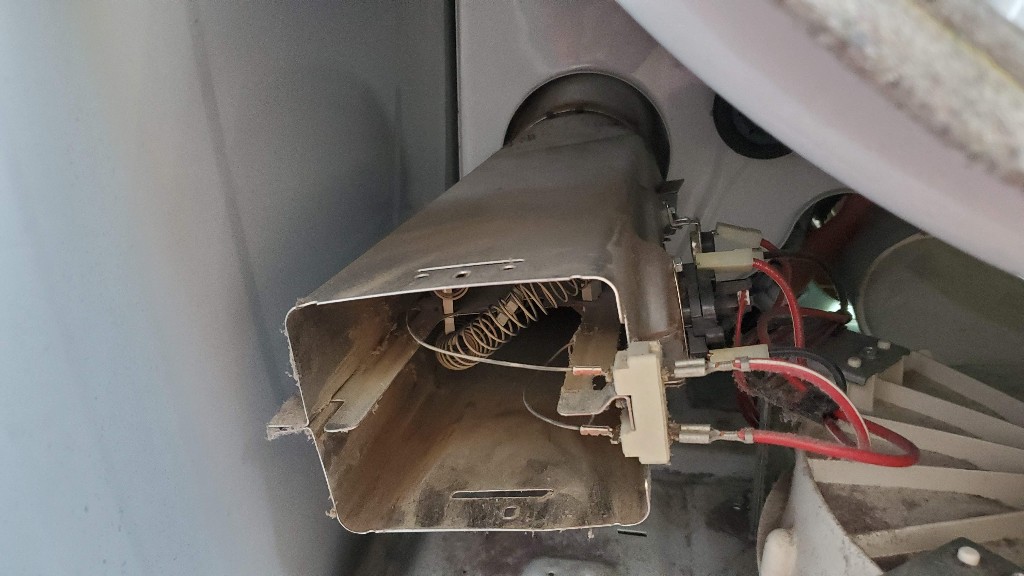
Here is a close-up view of the two. Remove one of the leads on each and check for continuity. If open circuit or high resistance, replace both of them, they come in a kit.
8557403 Thermal Cut-off Switch (280148) kit
How to Replace a Dryer Heater Element
Parts:
The heater element is in the metal housing on the left side of this photo.

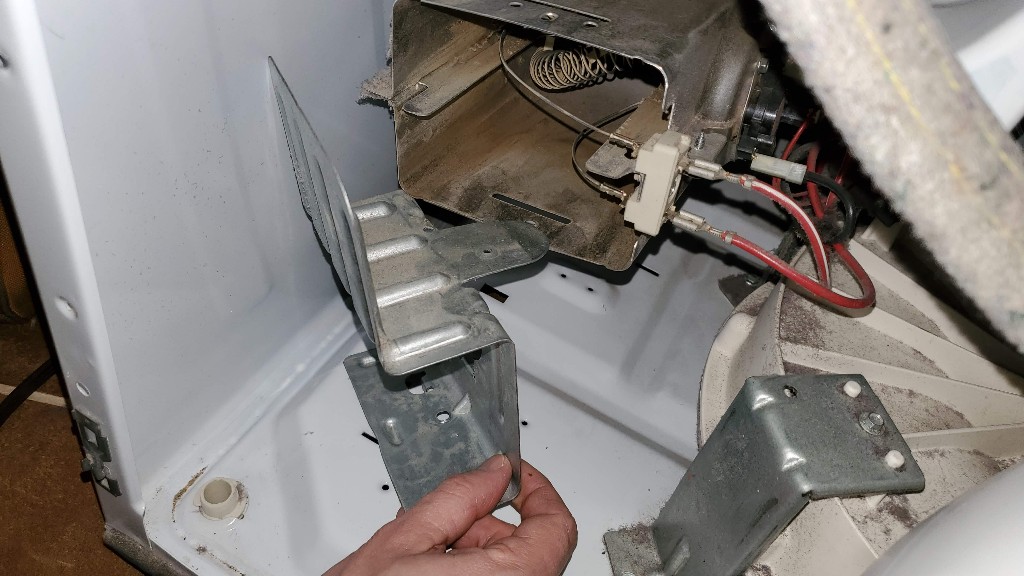
In order to get at the heater element a little better, remove the 5/16″ screw and 1/4″ screws holding the protective shield blocking the view.
To see if the heater element is bad, check the continuity of the heater element between its two leads. The resistance should be zero or very close to it.
Note: Again, make sure the dryer is unplugged for all of these tests!
Next, check the continuity between each of the leads and the metal housing. This should be an open circuit. If you are getting any continuity (resistance value) at all, you have a problem. The heater element is touching something it shouldn’t.
The replacement part number for the heating element is the following:
How to Replace a Blown Dryer Heater Relay
If the thermistor, thermostat, thermal cutoff switch and heating element all check out okay, then the problem may be on the control board. The relay switch may have shorted out causing the heater element to remain on the whole time the cycle is going on.
Parts used:
Unplug the dryer.
Note: Make sure the dryer is unplugged before you proceed!
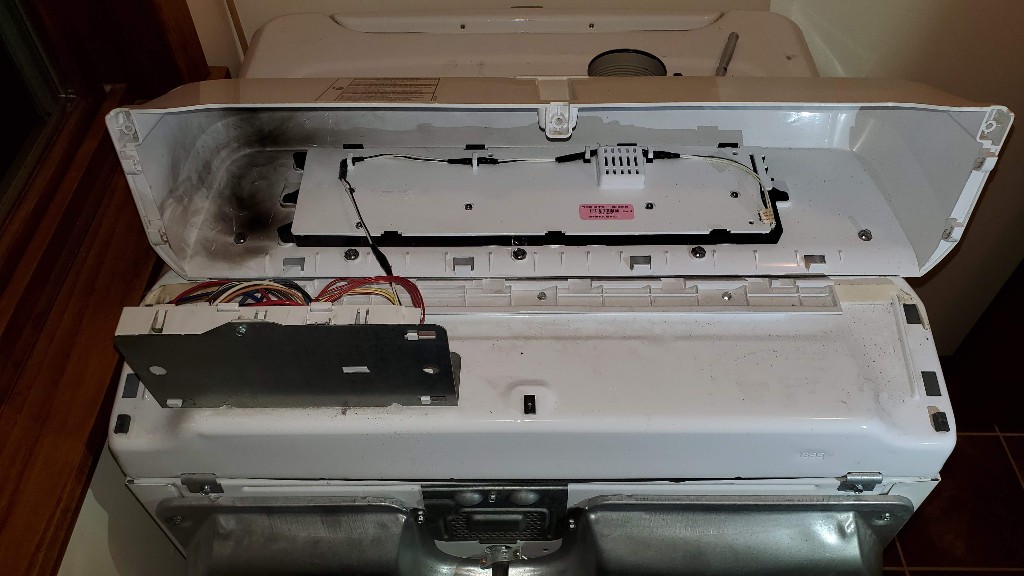
To check the control board, remove the 3 screws in the back holding the control panel in place. The screws can be removed with a Phillips screwdriver.
flip the control panel up to expose the control board.
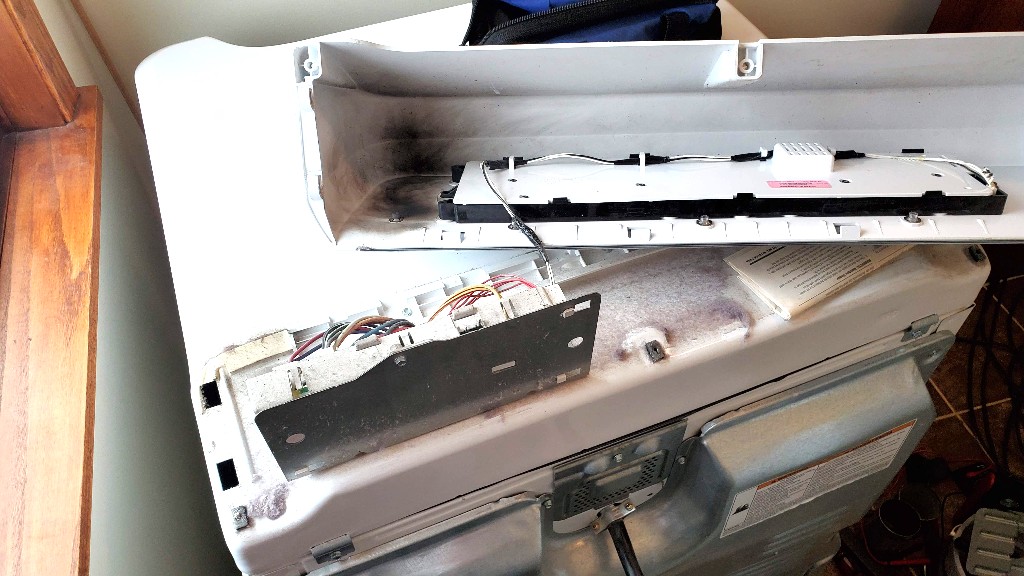
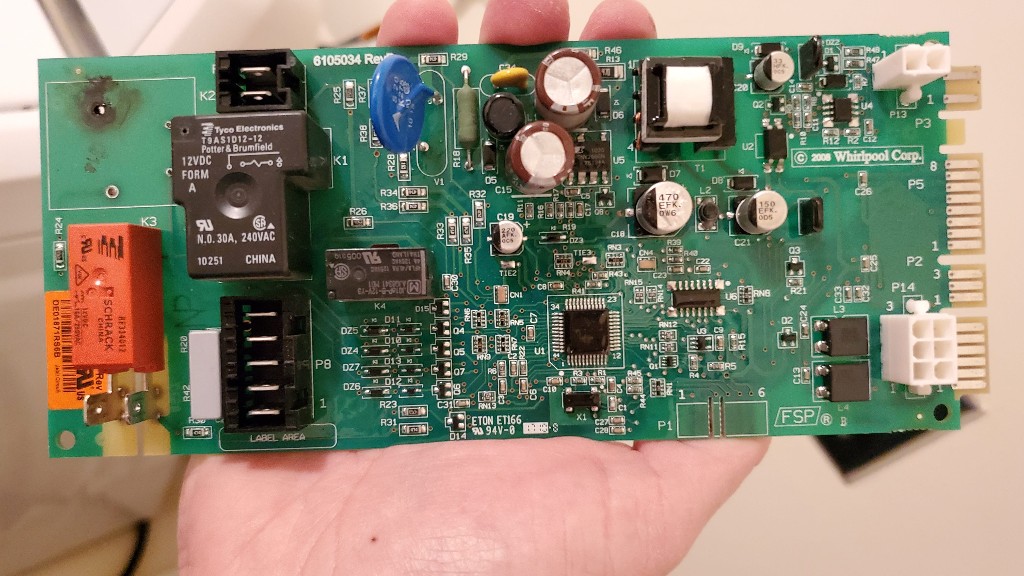
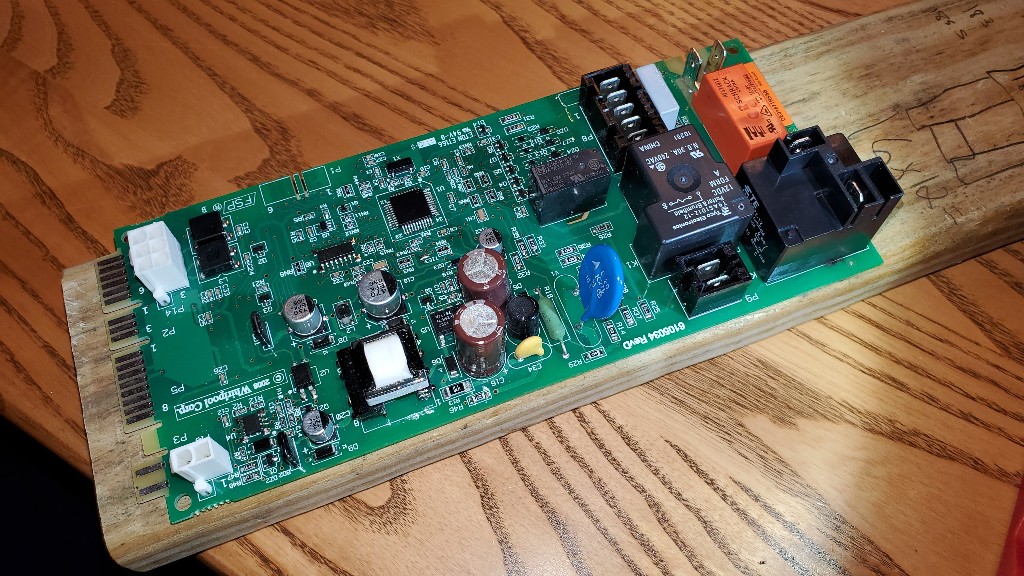
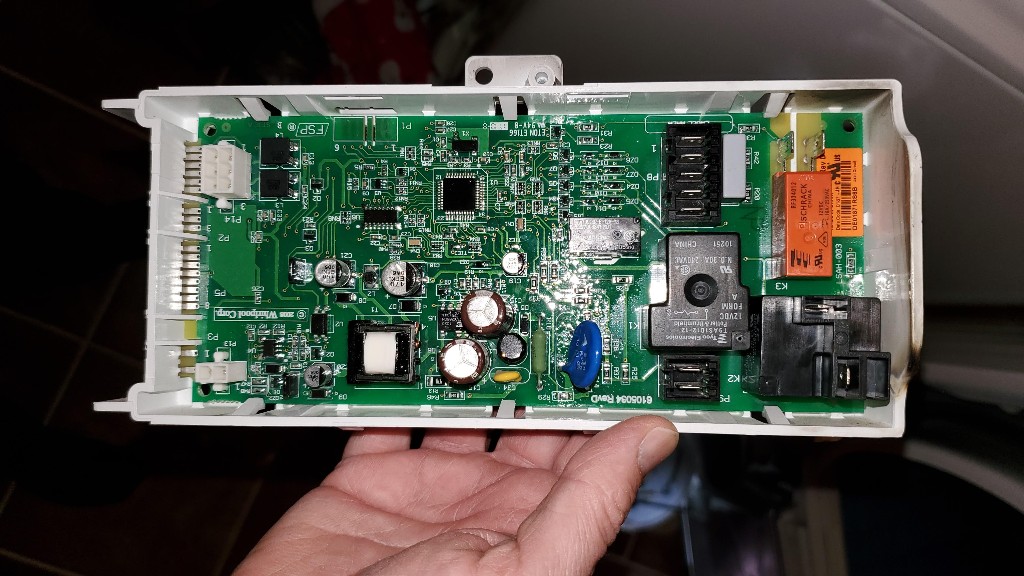
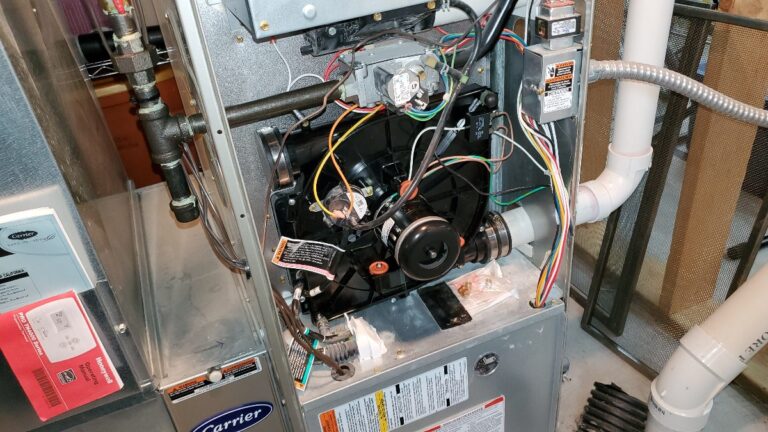
Here is a closer view of the control board.
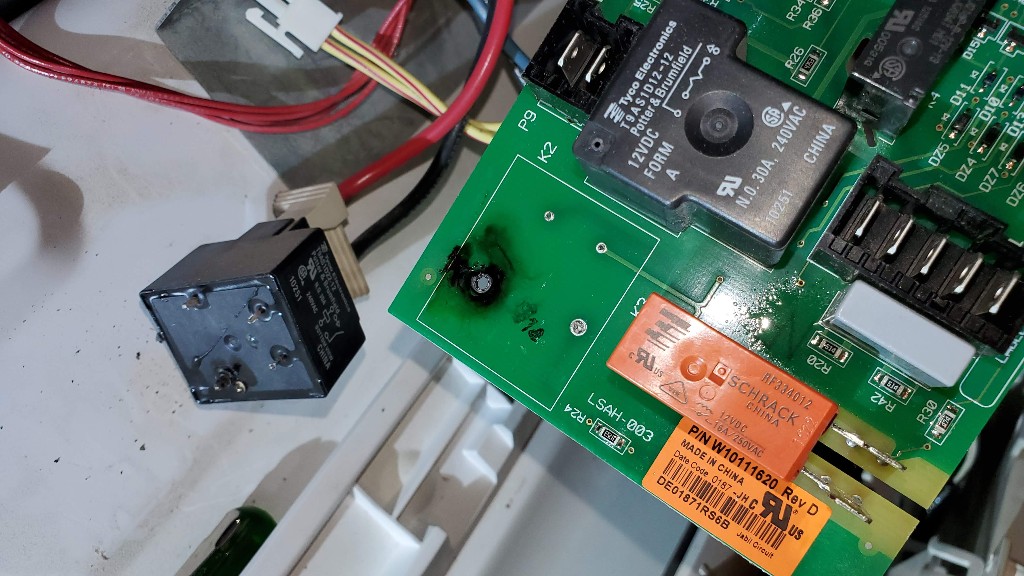
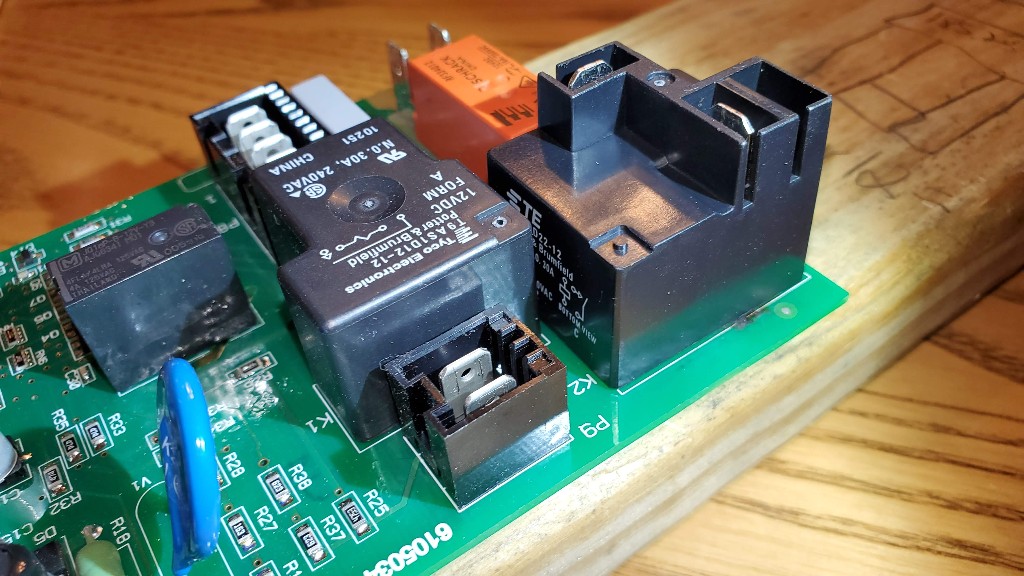
Notice the relay switch in this view, it is in the lower right corner of the board.

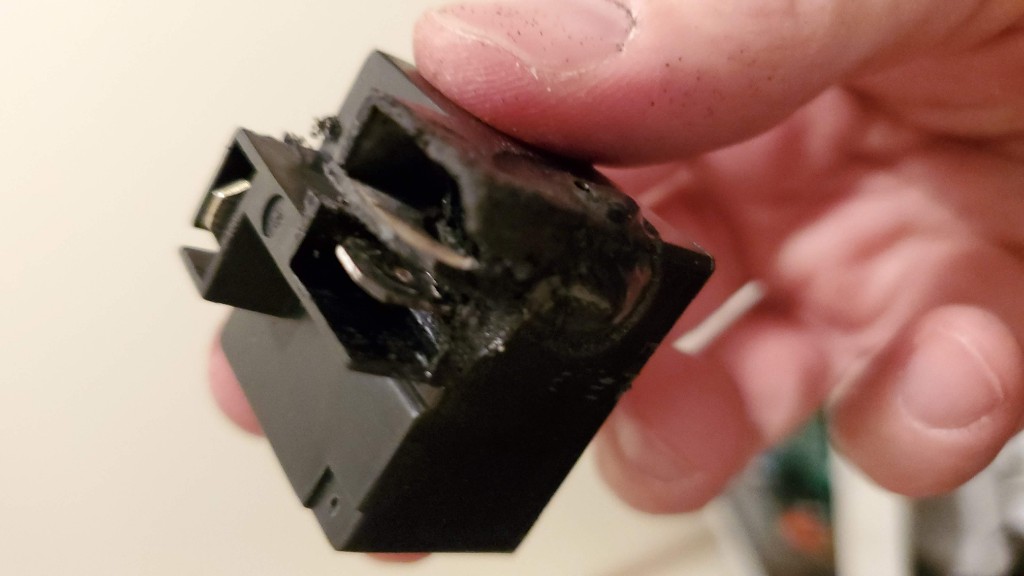
The relay is melted and shows a black mark on the metal panel below, indicating that it has failed.
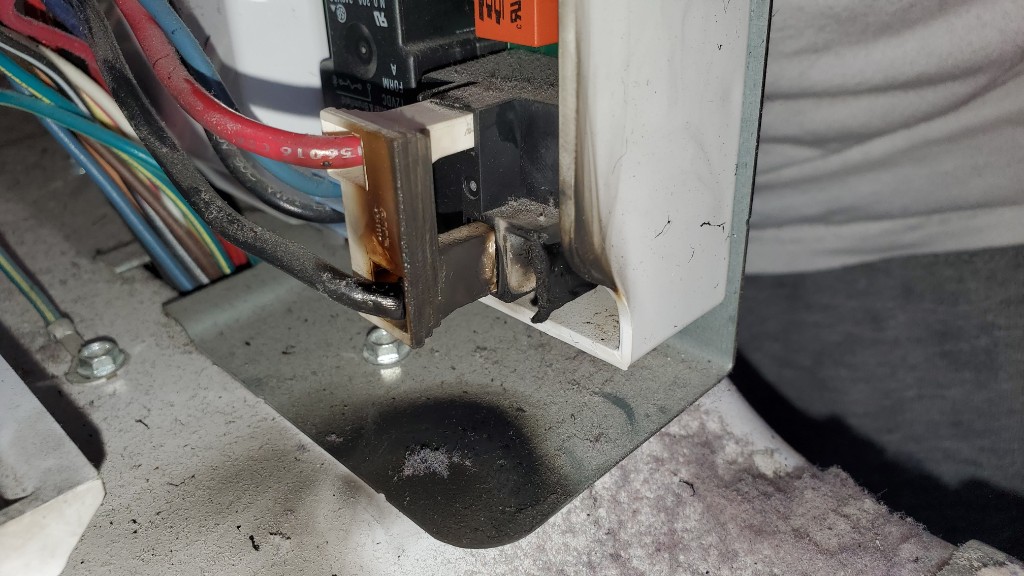
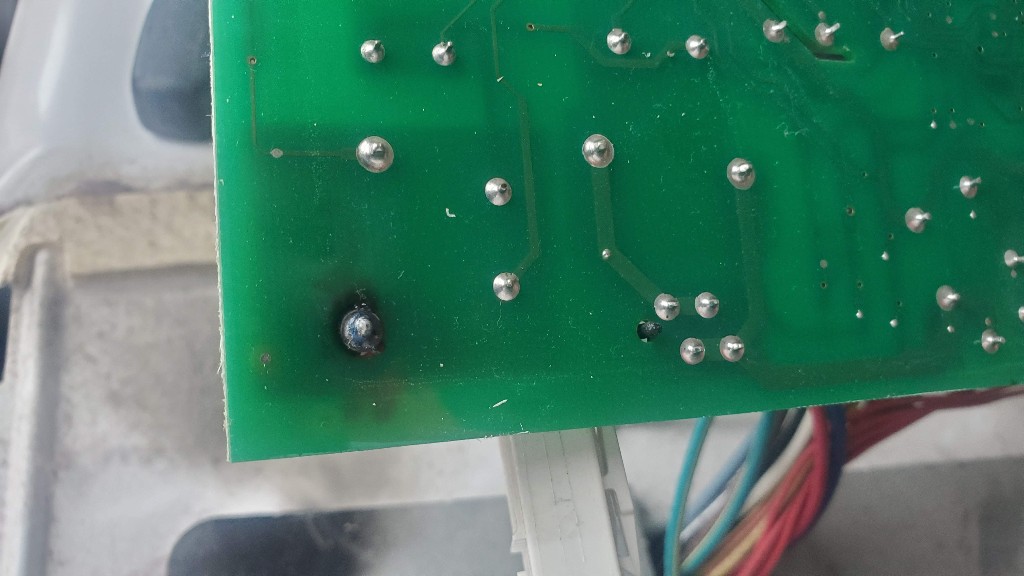
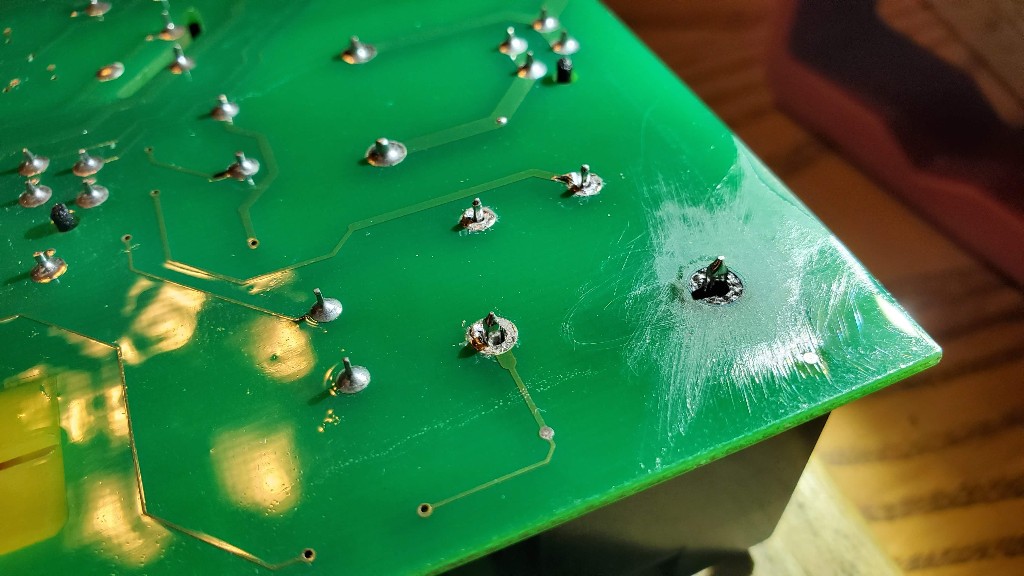
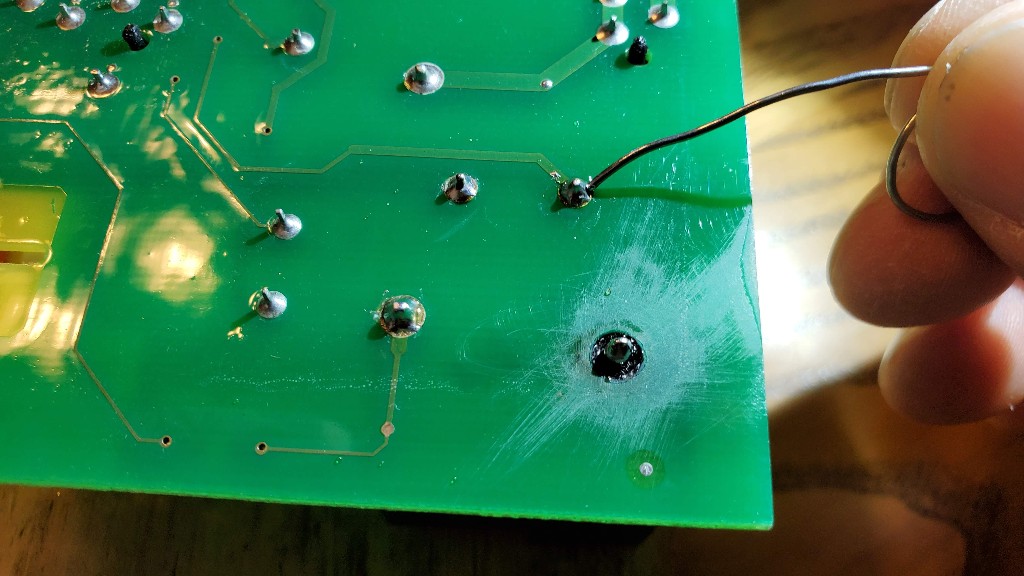
On the back of the board is a burnt pin.
A closer view of the failed relay.

There are a couple of options here. You can replace the whole control board or replace just the failed relay. The part number for the control board is this:
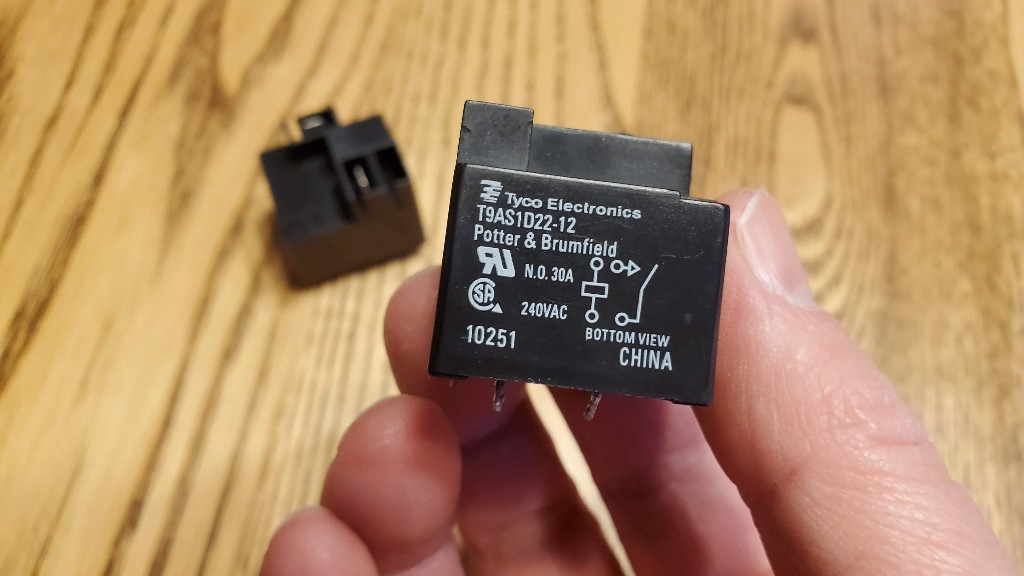
If you are comfortable with a soldering iron, replacing the relay is pretty straightforward. The part number for the relay is:
T9AS1D22-12 30A Relay 240VAC or the 2-pack (for a couple bucks more…)
The control board is about $150 or so from the various places I have seen. The relay is around $15. If you can manage replacing only the relay it will save you some money.
Step by Step Procedure to Replace the Burnt Relay on the Dryer
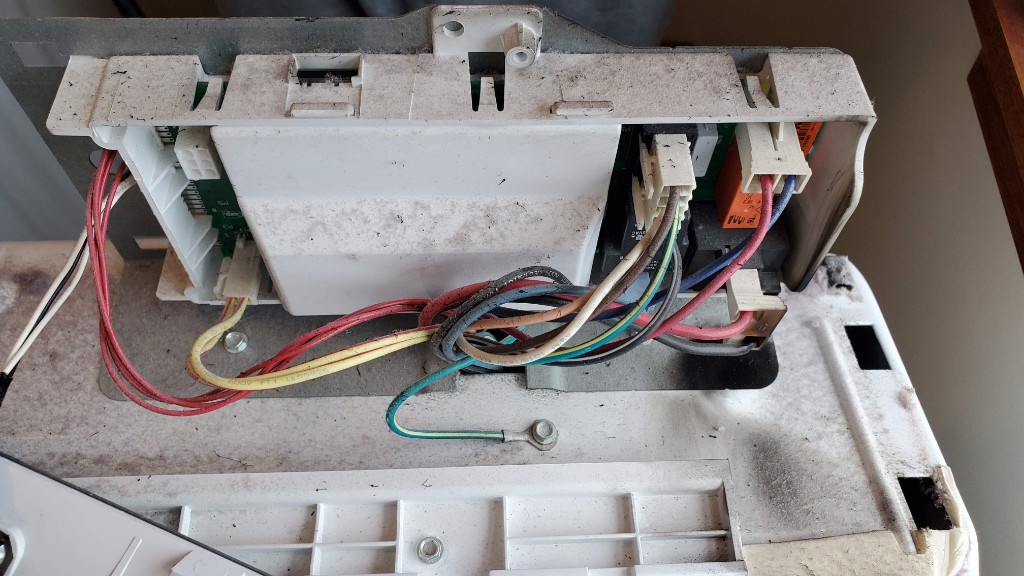
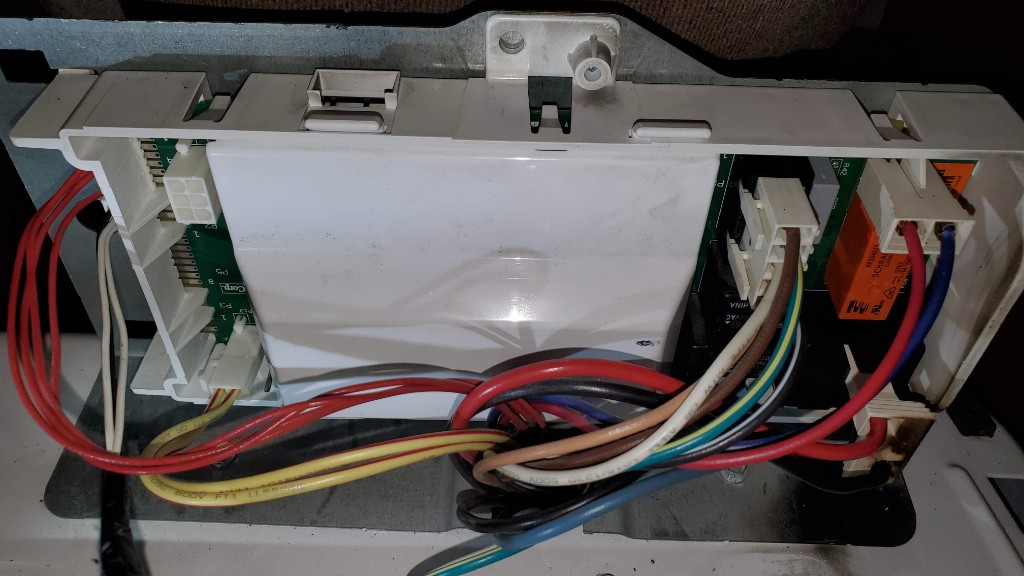
Take the controller board out of the dryer and unplug all the the wires and connectors going to it. It is probably a good idea to snap a photo of it before you disconnect anything. It was helpful for me to have something to look back at, even though most of the connectors can only go in one spot.
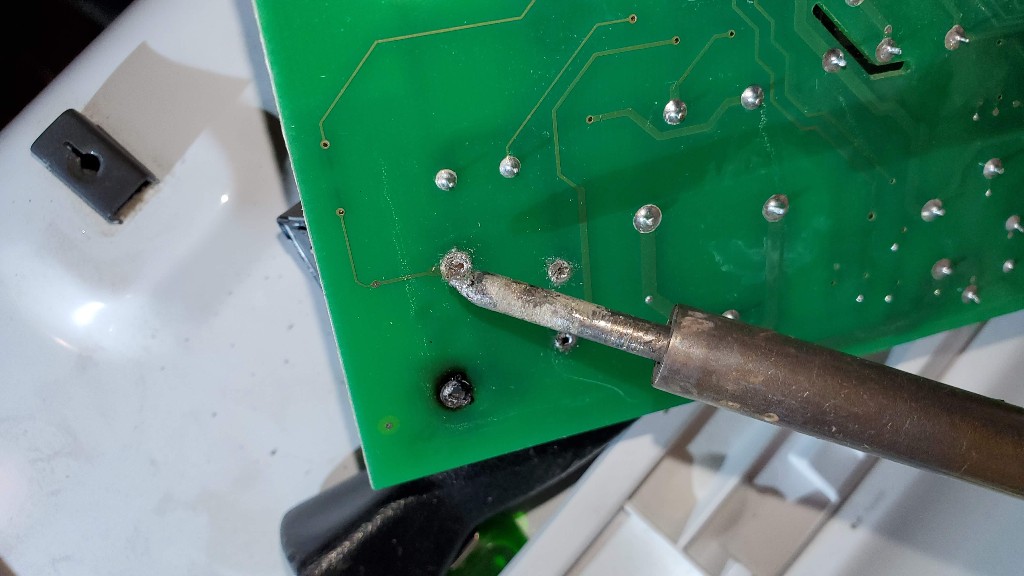
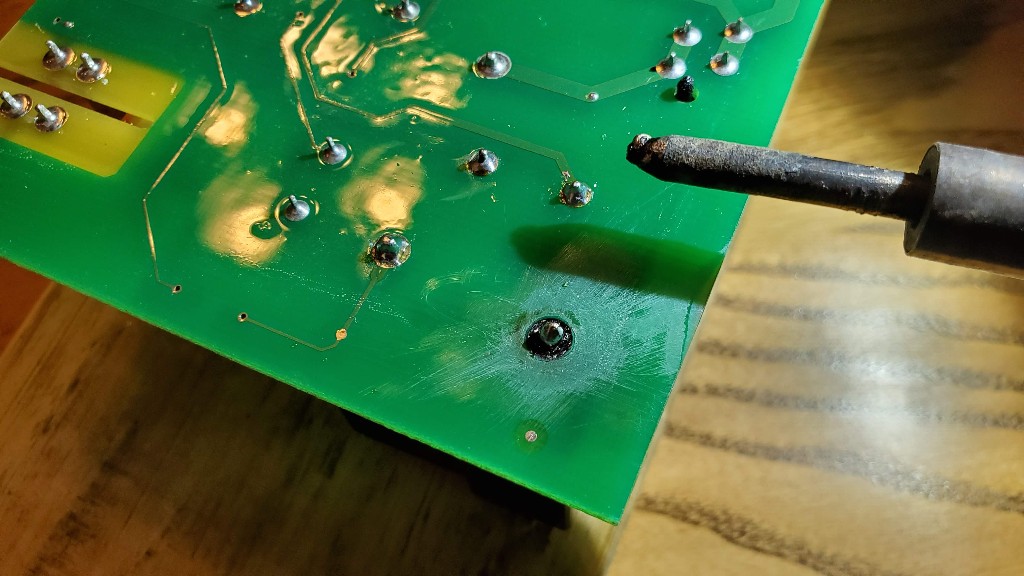
Use a soldering iron to heat up the pins on the back of the bad relay. Melt the solder and simultaneously lightly pry the relay off of the circuit board.
This is a link to a decent soldering iron that includes solder, in case you don’t have access to one. They aren’t expensive and are good to have around.
Notice the burnt mark on the circuit board where the grounding pin got very hot.
Here is the board with the relay removed.
This relay was the culprit.
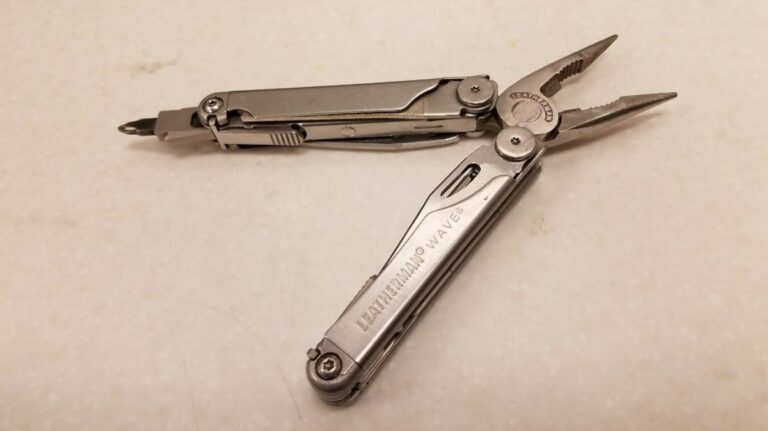
Here are the old and new relays side by side.
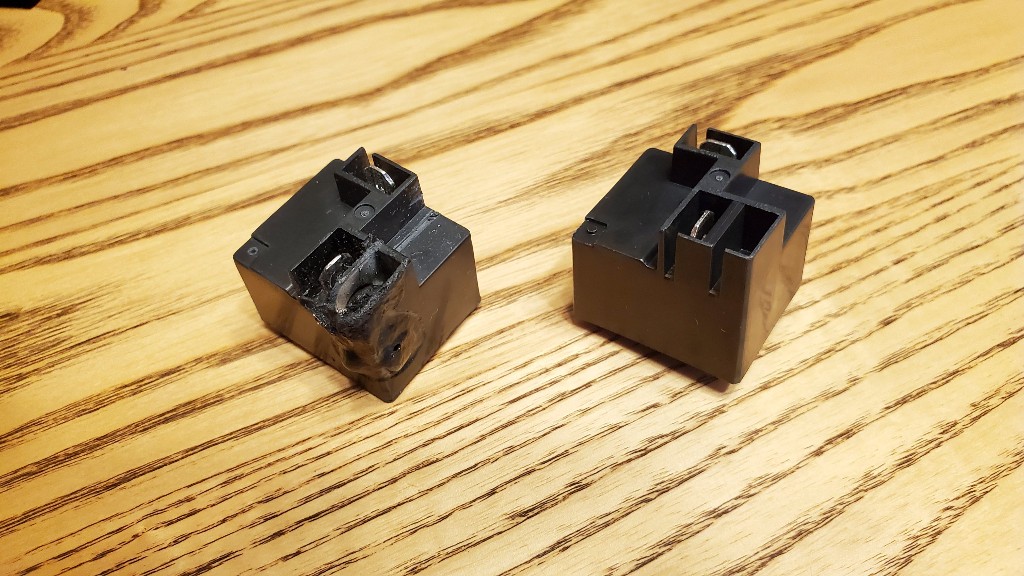
The model number for a new one is T9AS1D22-12 30A Relay 240VAC.
Clean up the holes in the circuit board, then fit the pins from the new relay through. Then carefully heat the pins with the soldering iron and touch the solder onto it.
Here is the board with the new relay soldered on it.
fit the board back into the plastic housing.
Reconnect the protective cover and plug in the wiring.
Plug in the control panel as well.
Slide the control panel back to lock in the catches. Then replace the 3 screws.
Plug in the unit.
Replacing the relay fixed the problem for me. The dryer now runs normally.
Conclusion
A dryer that doesn’t run can be pretty frustrating. Particularly if it turns on but won’t start! Luckily these units are fairly simple in theory. Following the procedures outlined above should help in narrowing down the problem so that you can fix the problem instead of throwing new parts at it, or worse, buying a new dryer!
I hope you found this post helpful, if so, let us know in the comments. Thanks for supporting practicalmechanic.com!
Parts referenced in this article:
- 9AS1D22-12 30A Relay 240VAC or the 2-pack
- W10111620 Dryer Control Board
- 8544771 Dryer Heater Element
- 274 Dryer Thermistor Replacement
- 8557403 Thermal Cut-off Switch (280148) kit
- 3390719 Dryer Thermal Fuse
Fixes for Other Common Dryer Problems
Fixes for Common Washer Problems
Having issues with your Maytag Bravos Washing Machine, too? Check out these related articles.


You gave “Dryer Relay Switch is Shorted Out” as Reason 4. Was the burnt relay you replaced in this article shorted out, or was it stuck open? (I suspect the latter.) Are both shorted out and stuck open relays a problem? Are both scenarios common?
hello. thanks for your very clear article. The relay on my dryer control board fried, but it also melted the connector in the process. Do you know if that connector part is available? I’m not sure where to even start to look. Thanks.
Thank you for such concise and helpful guidance especially regarding the control board. I’m fairly certain it is the culprit in my case but I didn’t know where to begin testing. Kudos!