Repair a Screeching Dryer – Maytag Bravos
The dryer started to screech. That horrible metal-on-metal scraping sound that indicated something was definitely wrong! If you are having this issue, read this picture guide showing the problem and solution for a relatively inexpensive repair!
Note: PracticalMechanic.com is reader-supported. If you buy through links on our site, we may earn an affiliate commission – at no cost to you. Amazon makes less because a small % goes to help keep this site active. Thank you!
Hello everyone, welcome back! The Maytag Bravos clothes dryer started screeching the other day. The smoking gun was when we found a long bit of the felt drum-seal wound tightly around some clothes that had been drying! The felt seal was failing. Here is the felt seal kit and the following article details the process I used to replace it. I hope you find it helpful!
Note: If your dryer is squealing instead of screeching (subtle sound difference, I know!) you may have a different problem that require replacing the dryer roller-wheel bearings supporting the dryer drum.
Okay, on the the seal repair!
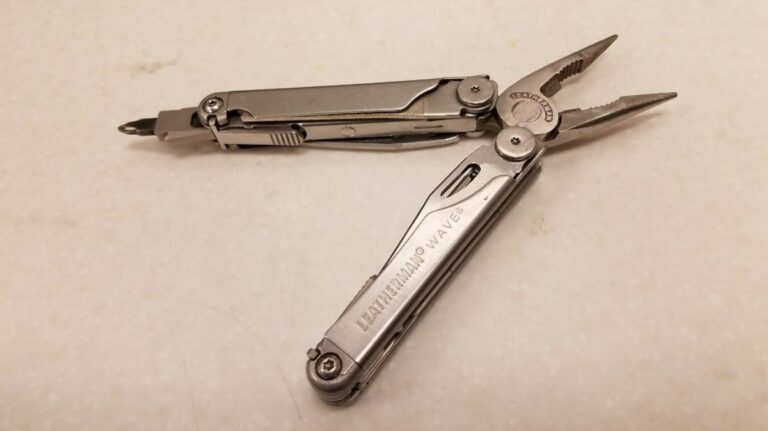
Tools and supplies required for this repair:
- 5/16 in socket (or wrench)
- Flat screwdriver
- Metal paint scraper
- Sandpaper
- spring clamps
- repair kit 280140 (felt seal with adhesive) or repair kit (#W10612022)
How to Take Apart a Maytag Dryer
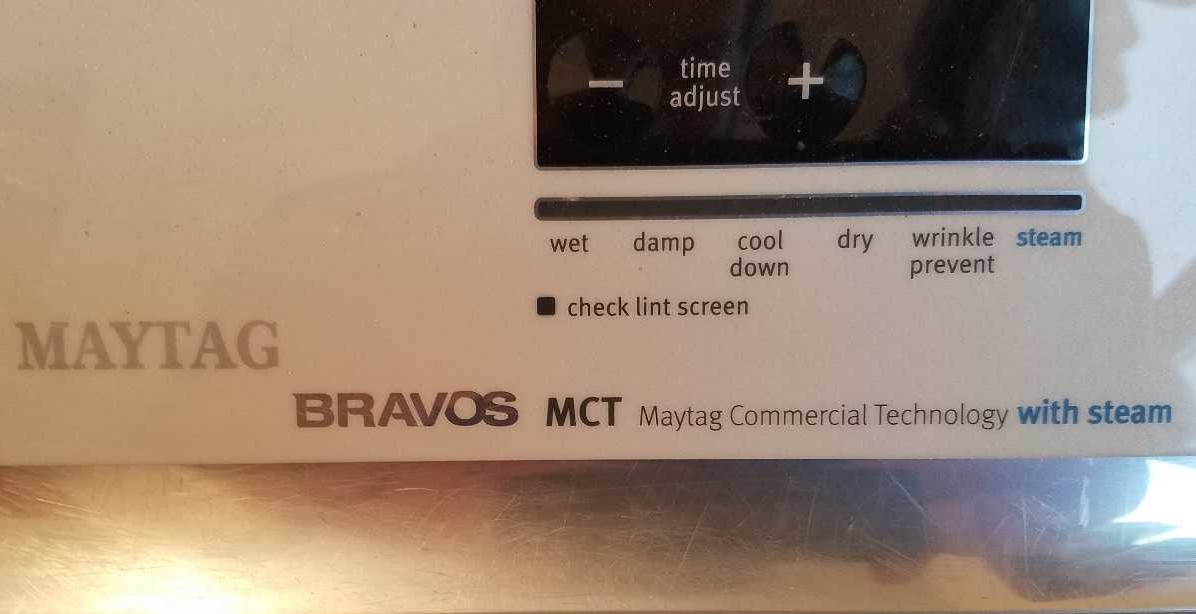
Here is the front panel of the dryer. The model number of my dryer is Maytag Bravos Model# MEDB850WQ0. This dryer has a 27-inch drum (outer diameter). The diameter at the place where you put the felt seal is 25-inches.
This also applies to the following model numbers: MEDB200VQ0, Samsung DV448AEW/XAA, Samsung DV330AG, Maytag Neptune MDG9700A, Samsung DV328, Samsung #DV45k6200GW, Kenmore Elite ST, and others.
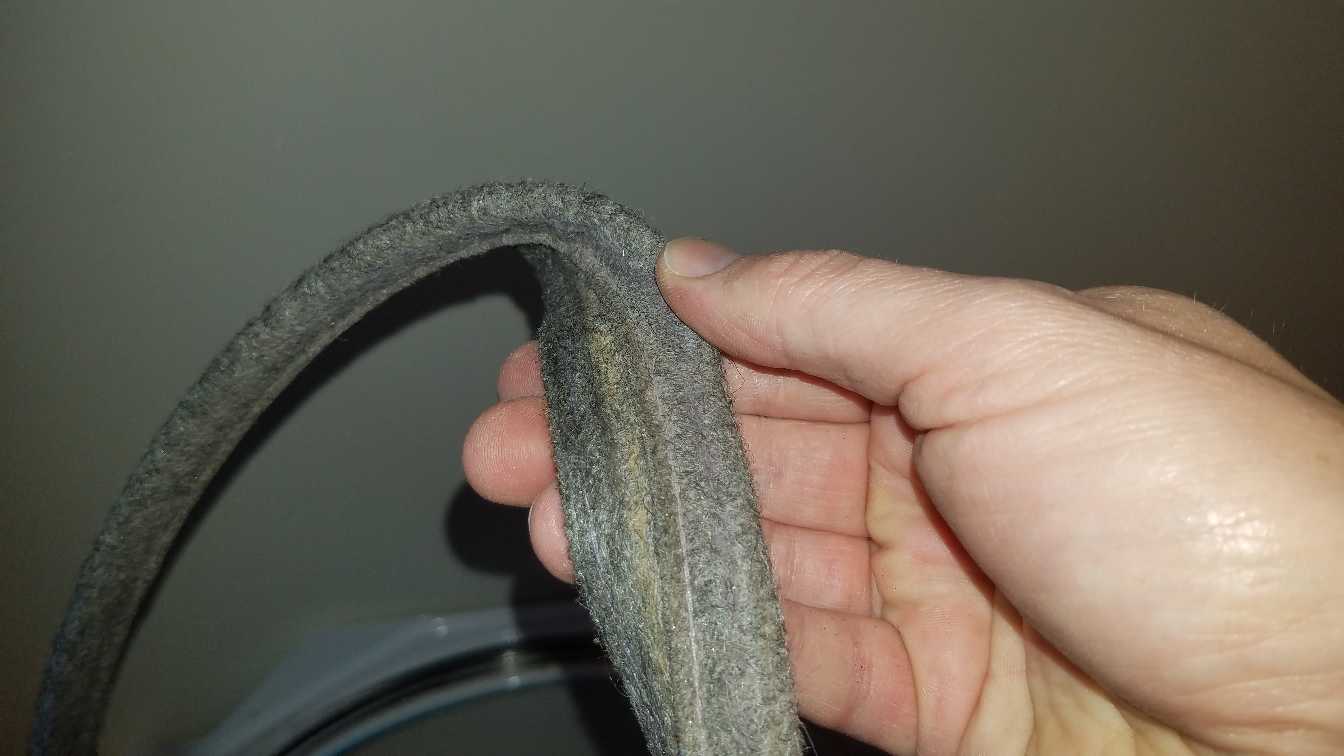
This is the felt drum seal that failed (picture below). These are supposed to be connected… The inner one shown below is the piece that was wound around some clothes!
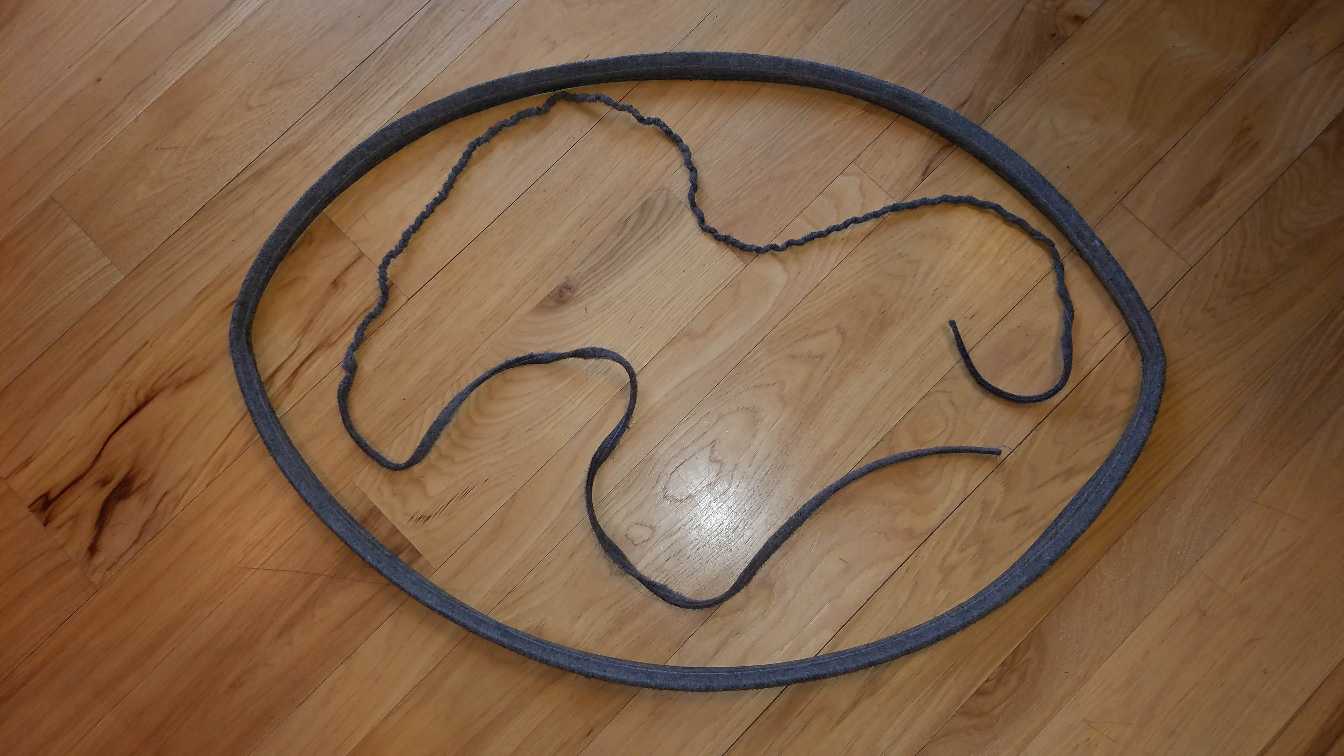
The model number of the felt seal is 280140 or W10612022 you need the felt seal with 2 layers and a diameter of 25 inches.
These kits contain the replacement felt seal and the adhesive glue.
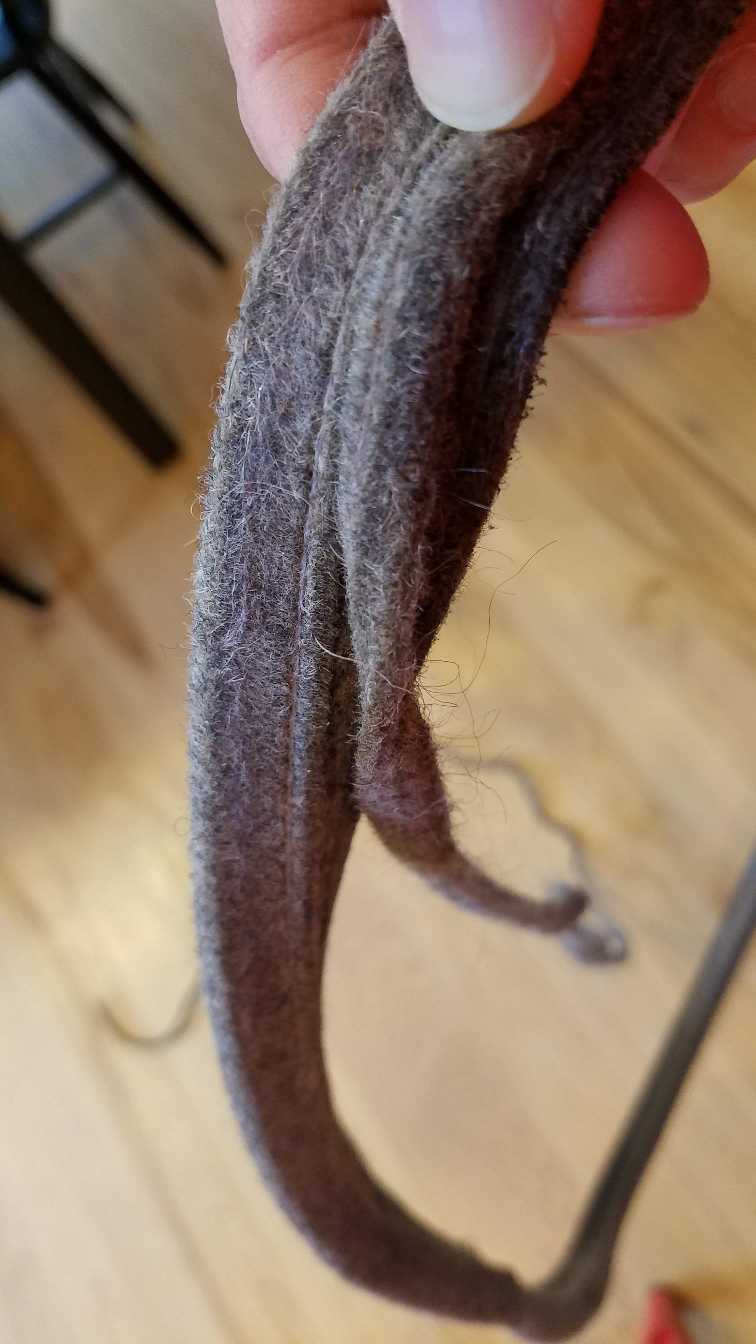
Here is a close up view of the failed felt seal.
If you are ready to tackle this simple repair, read on!
The first step is to UNPLUG THE DRYER!
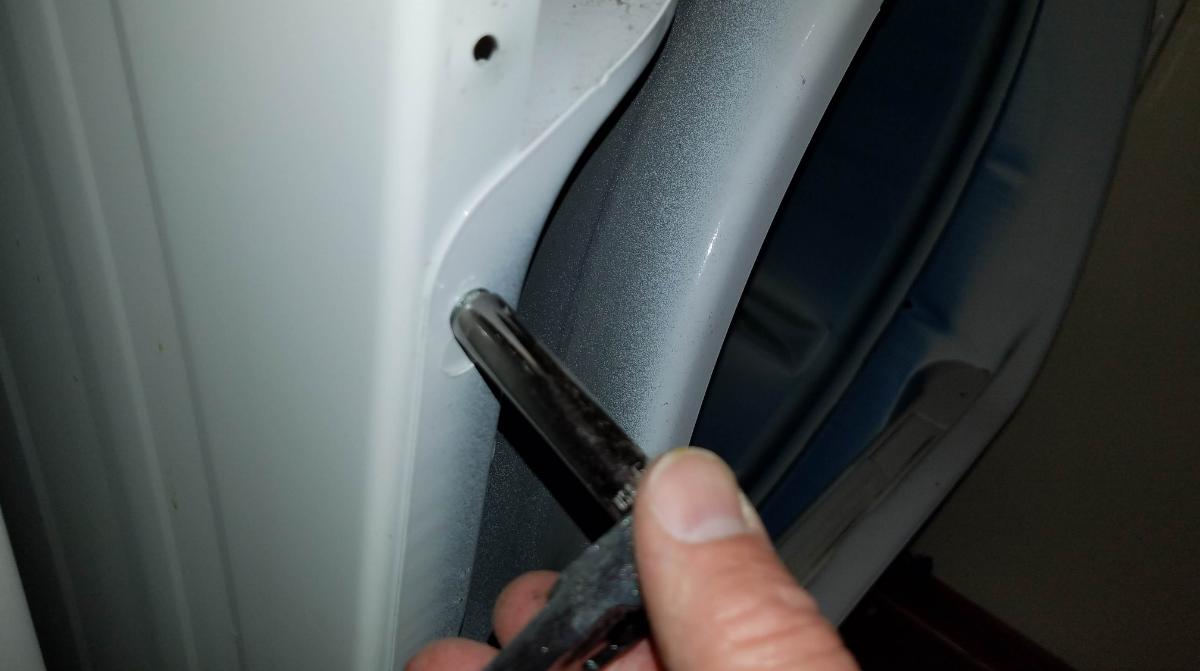
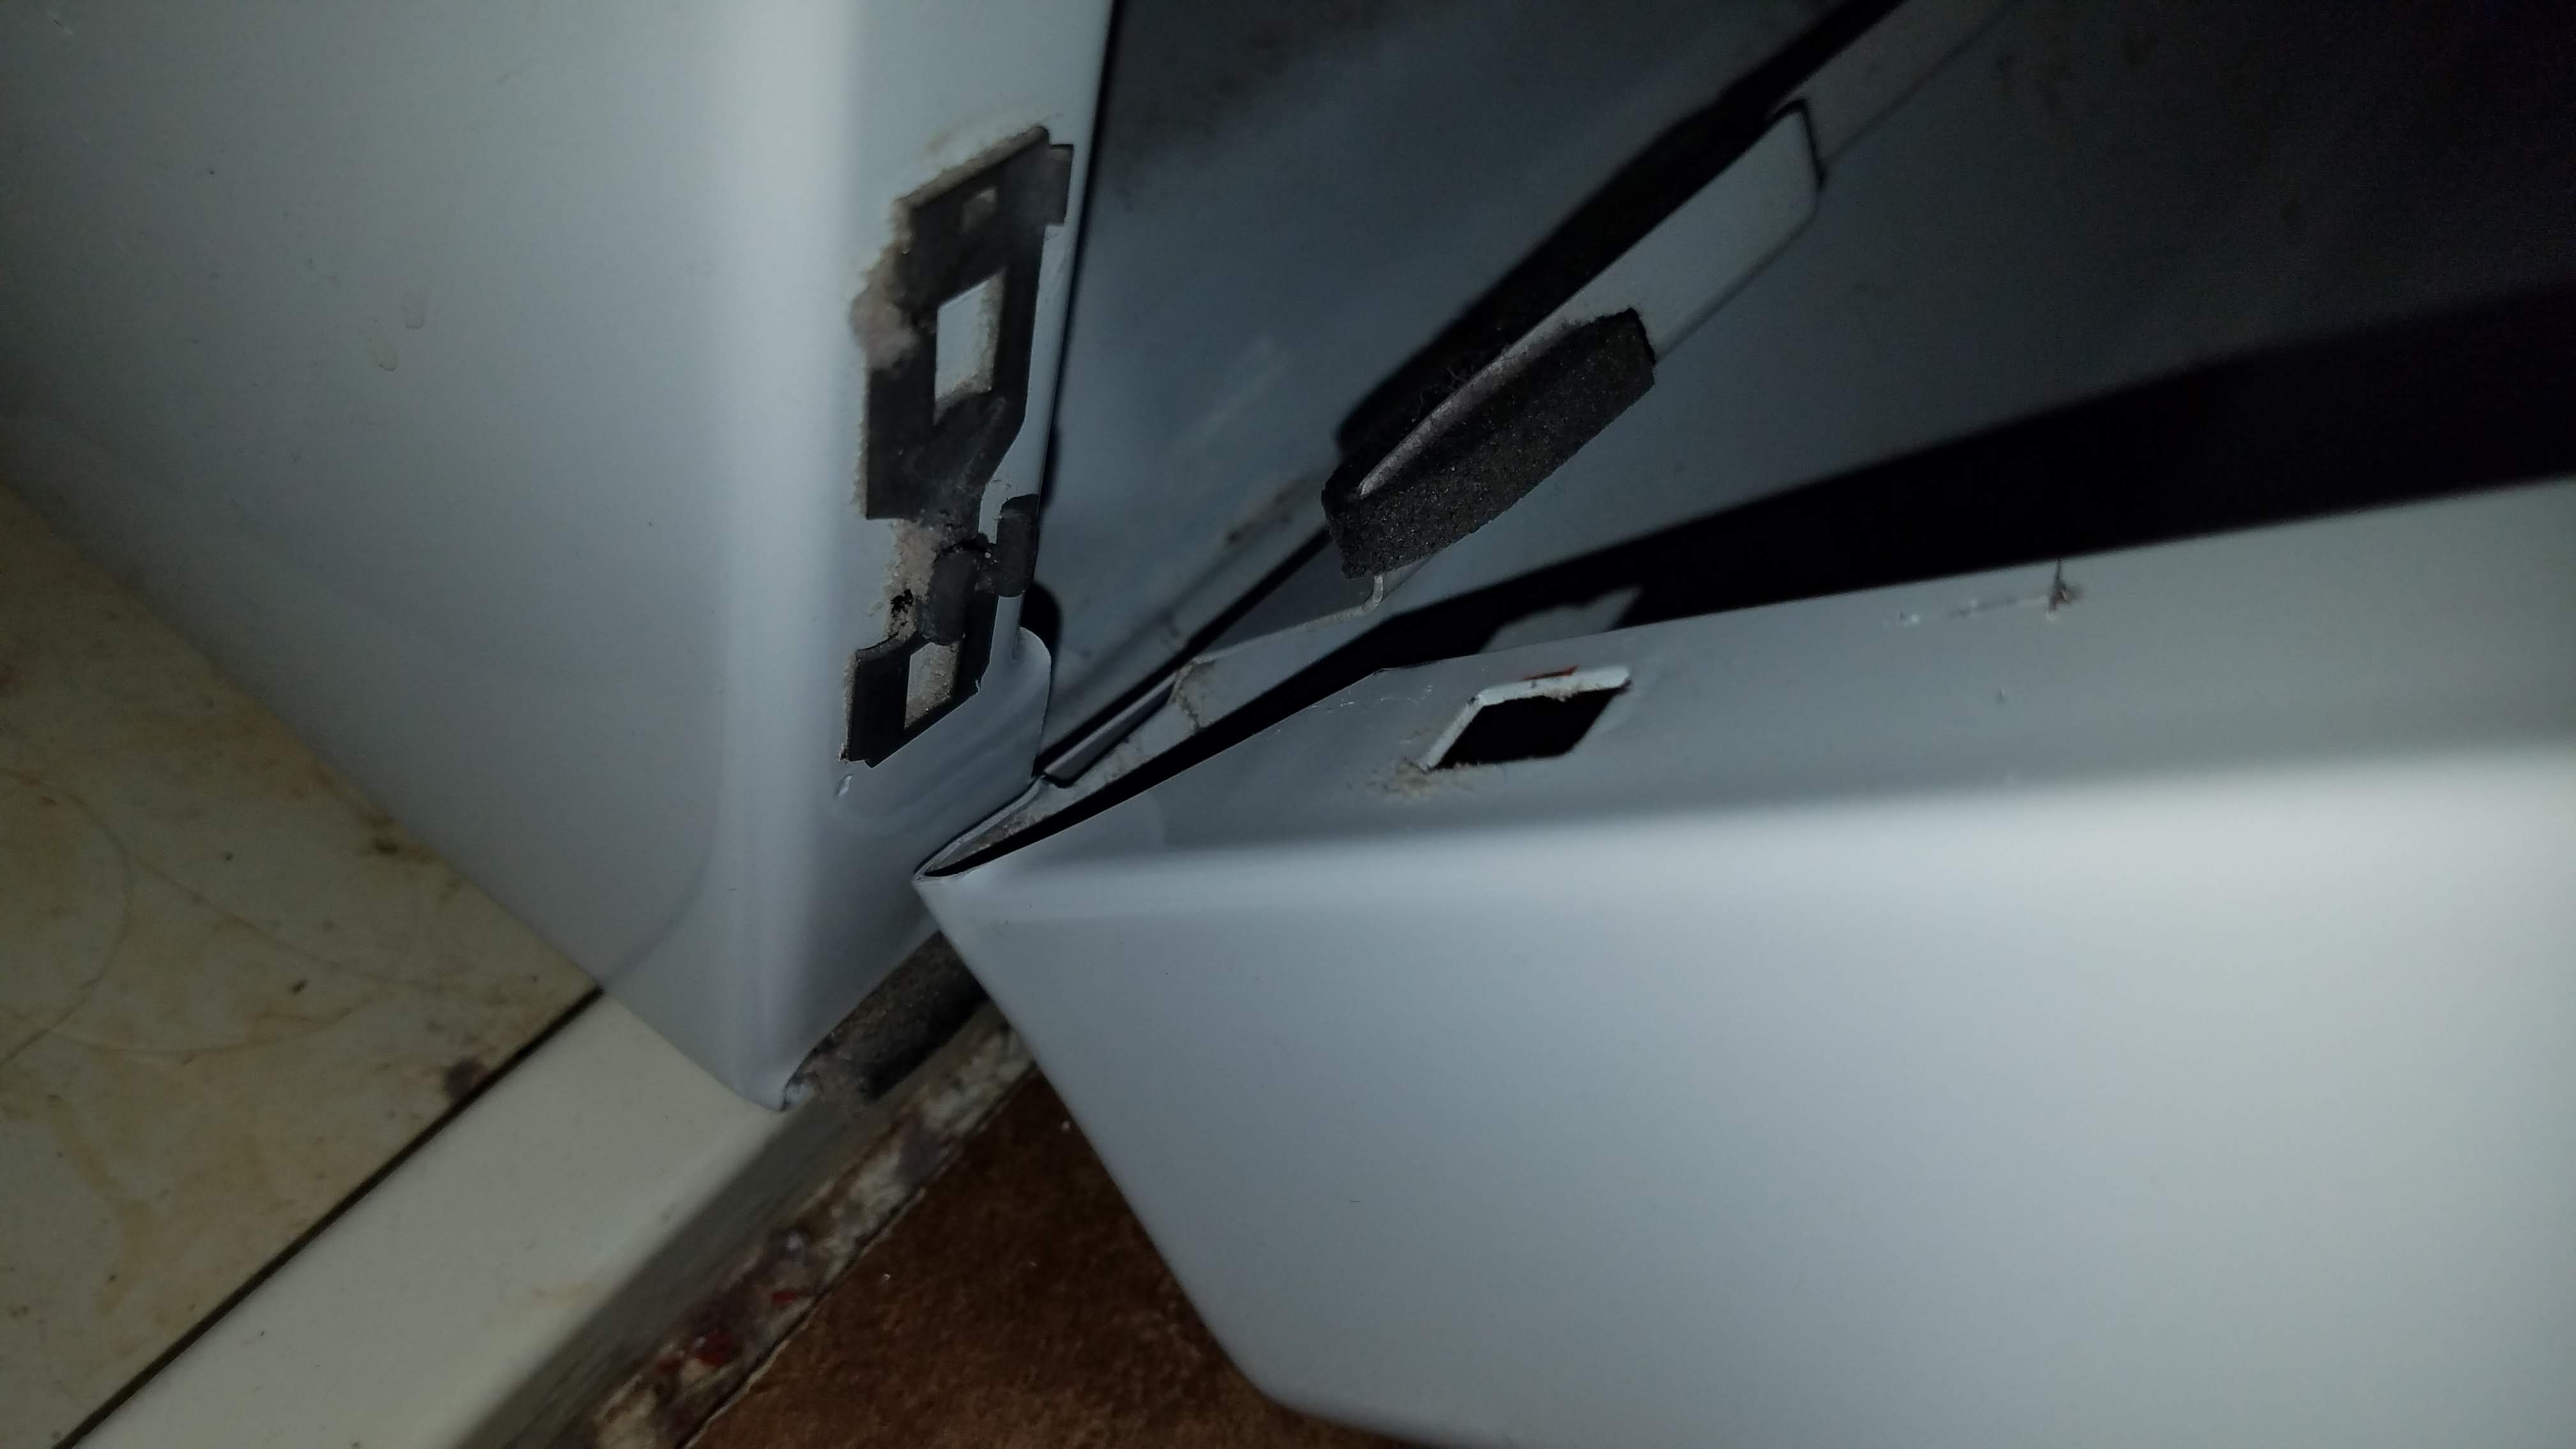
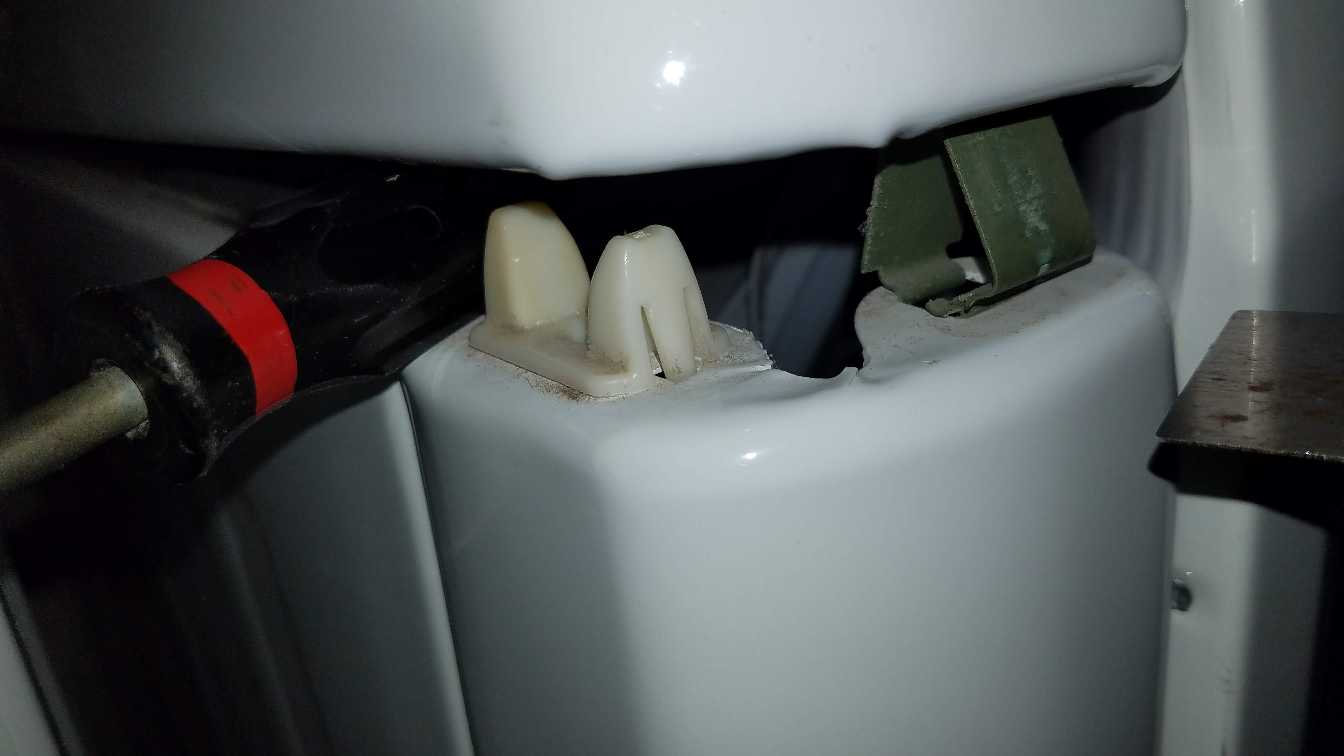
Then, press the metal tabs to release the top of the dryer and tip it upwards. Use something like a metal paint scraper to press the tabs, one on each side of the front-loading door.
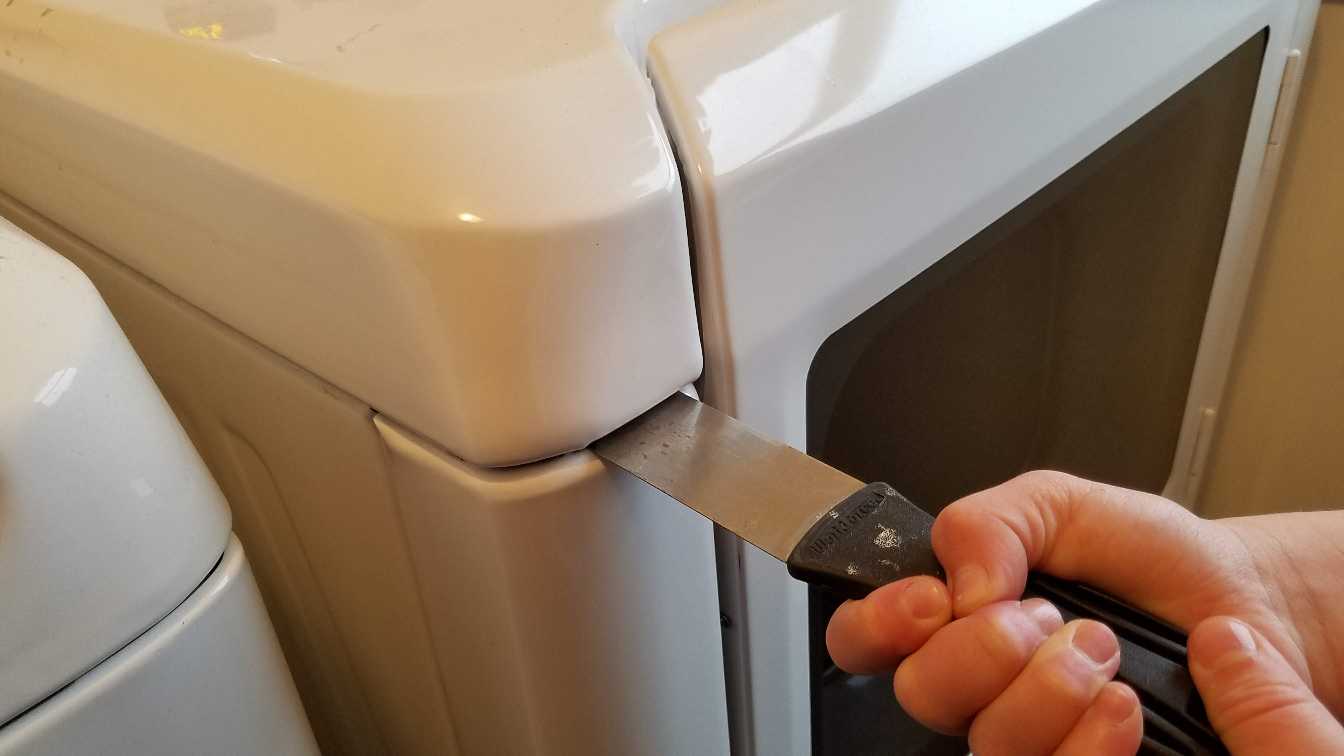
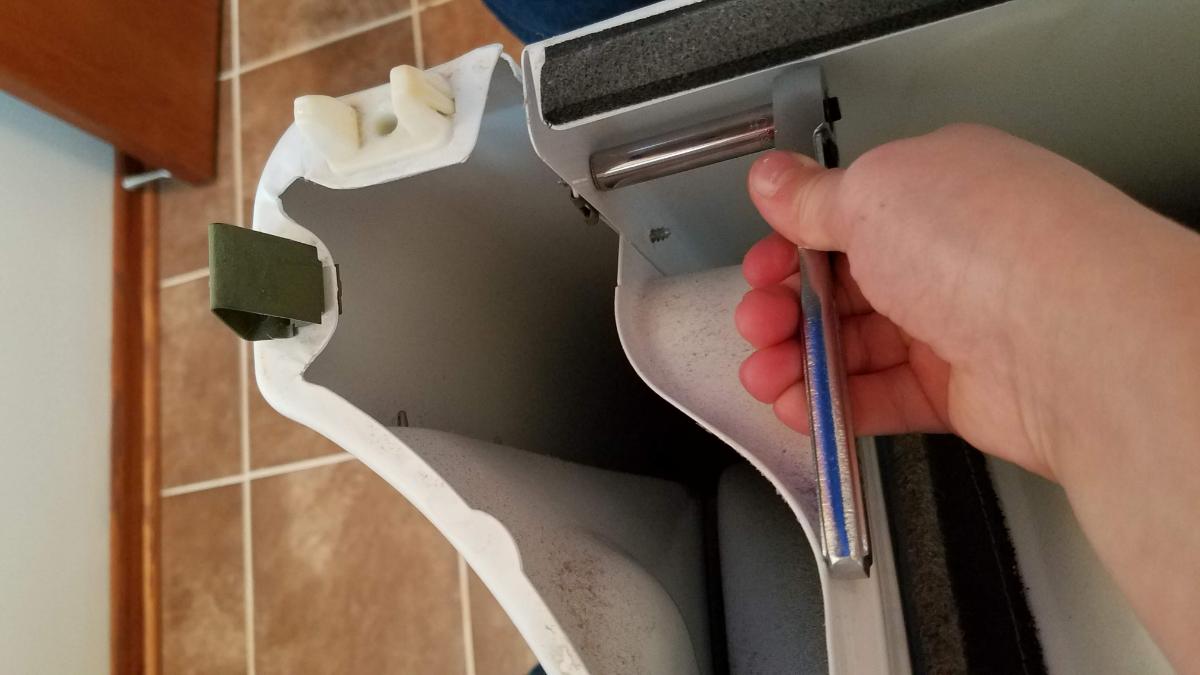
Here is a shot of the tab released. It is the green metal piece. This is what is being pressed inward with the paint scraper to release the top.

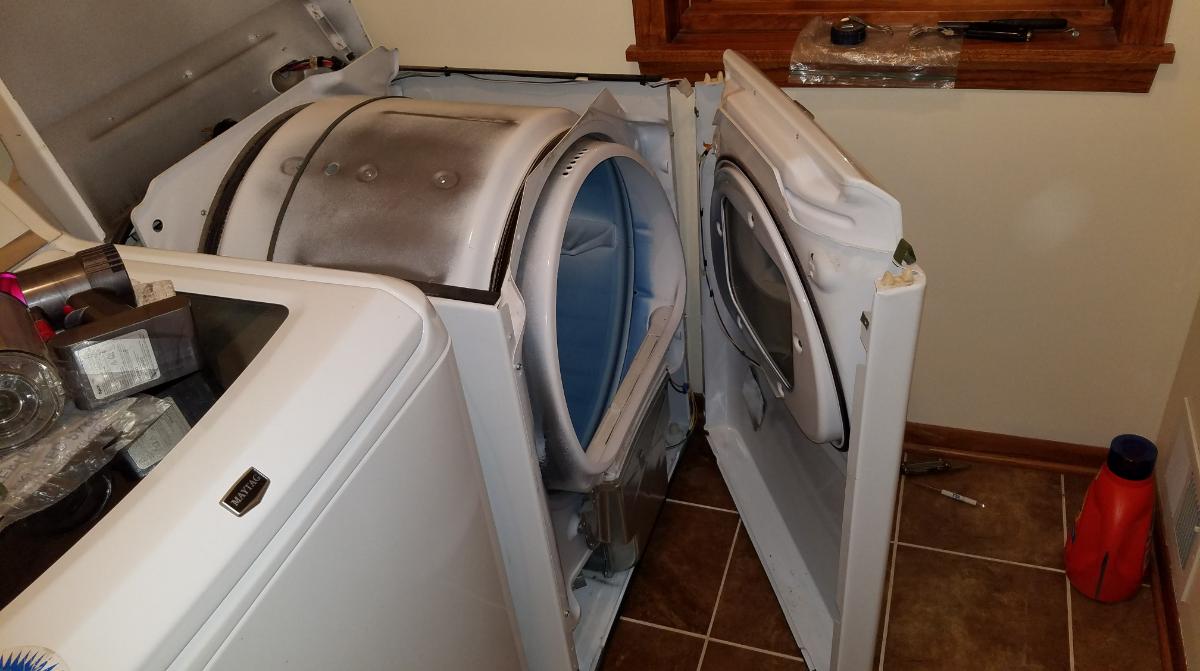
Tip the top back and rest it against the wall, or use a bit of string to hold it from flopping backward.

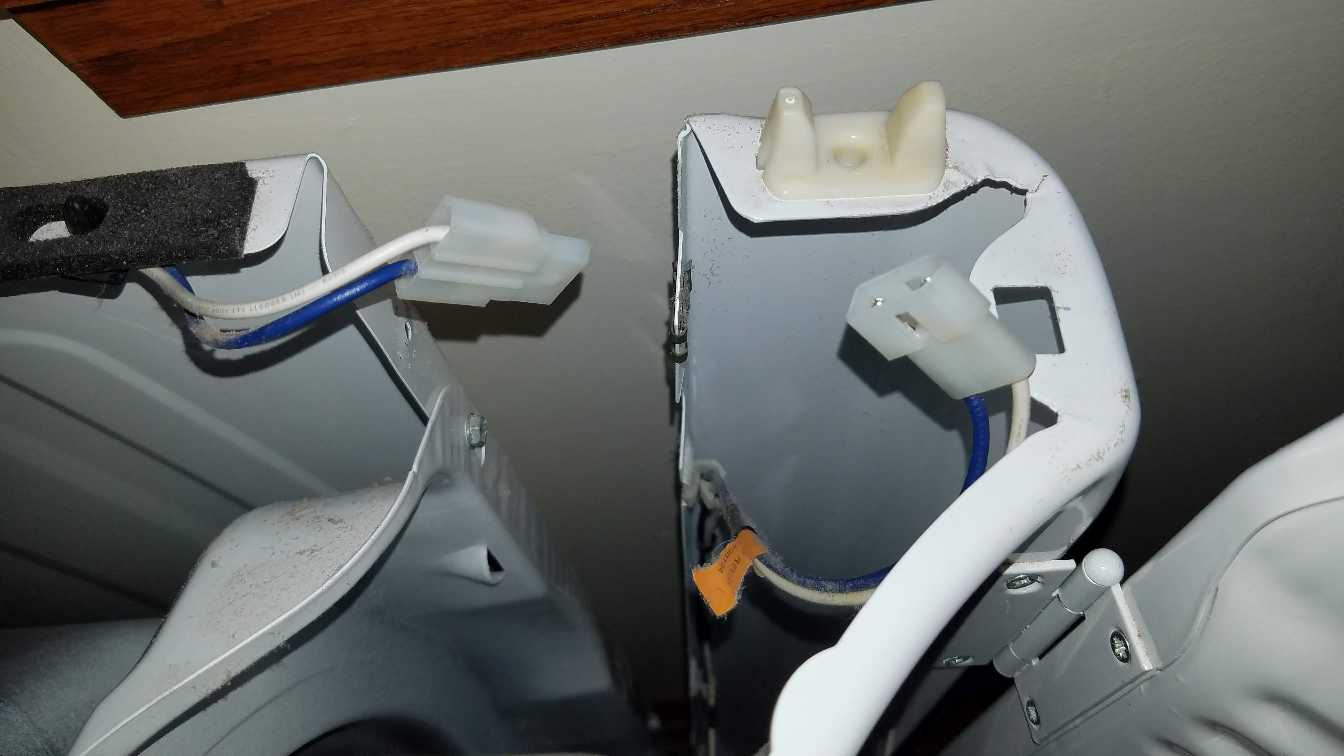
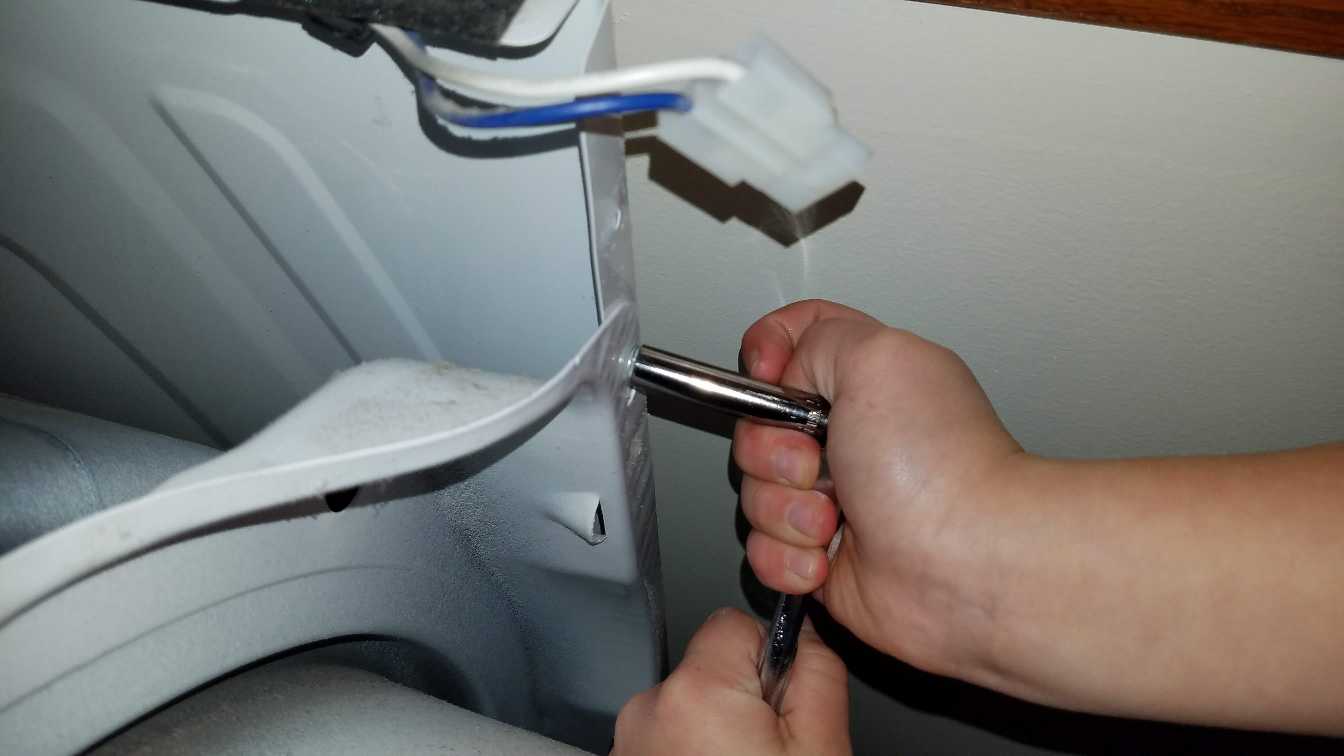
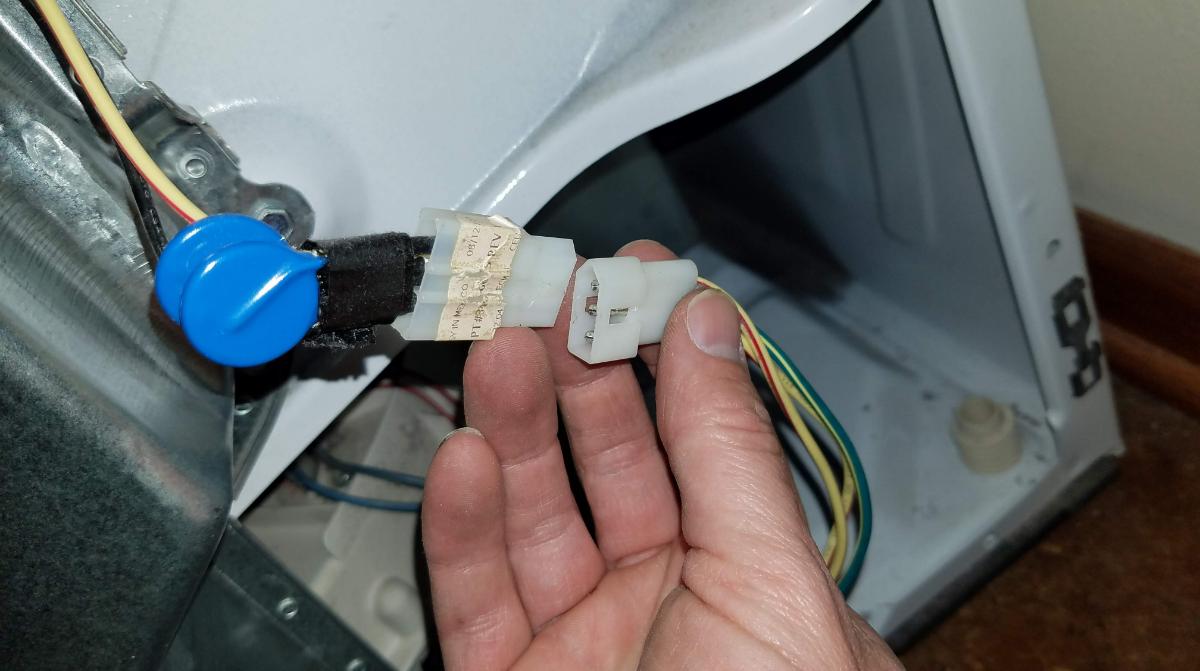
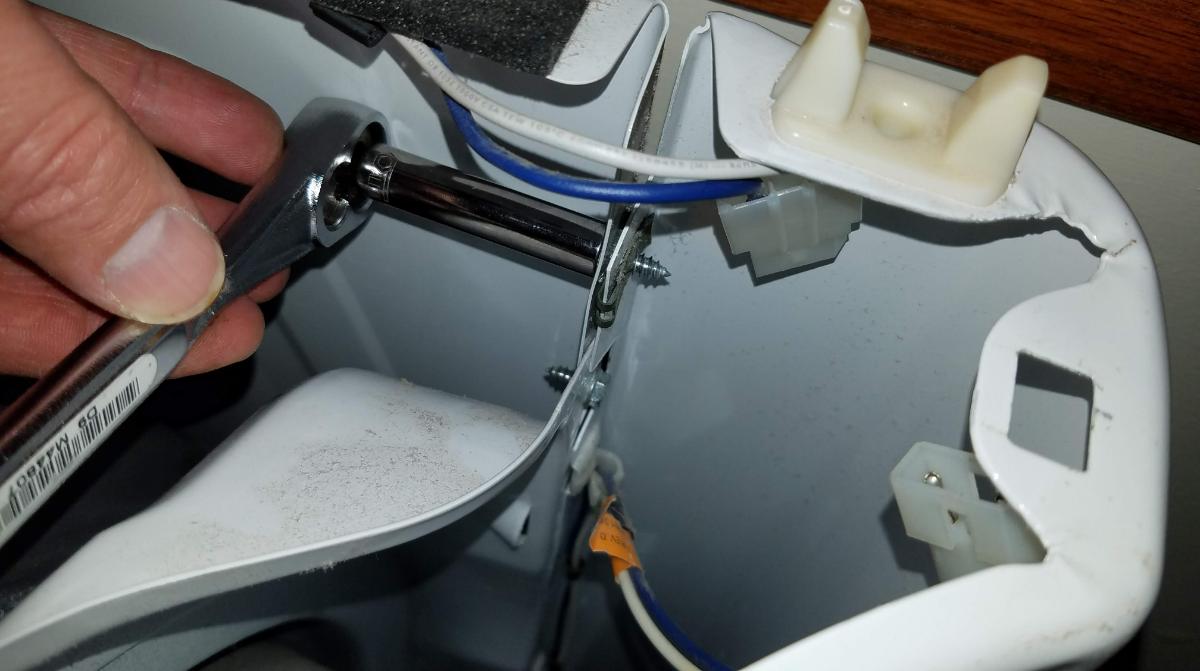
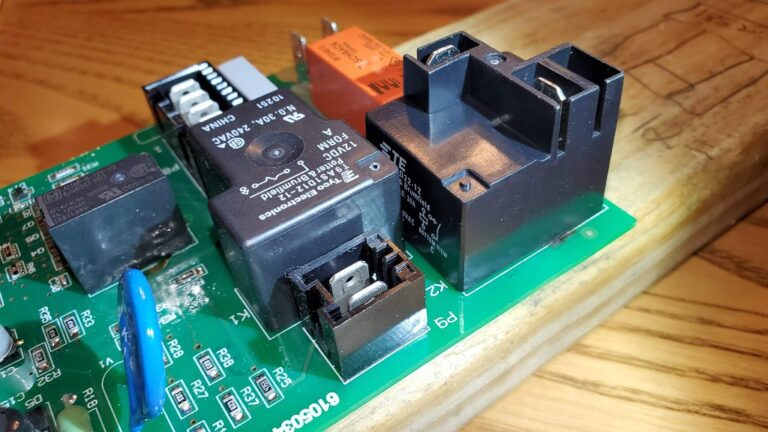
Next, release the connector. It has small tabs top and bottom that need to be forced outward. Use something like a small flat screwdriver to pry them outward while pulling the connector apart.
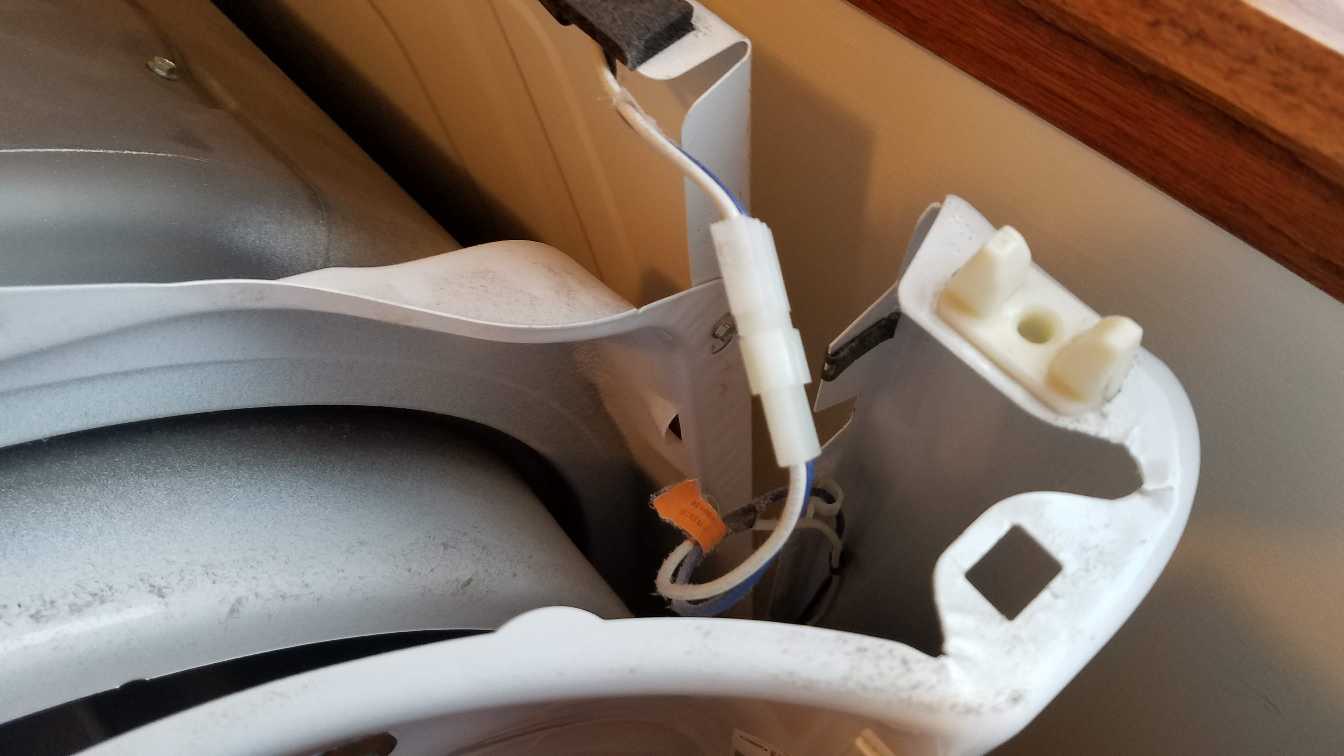
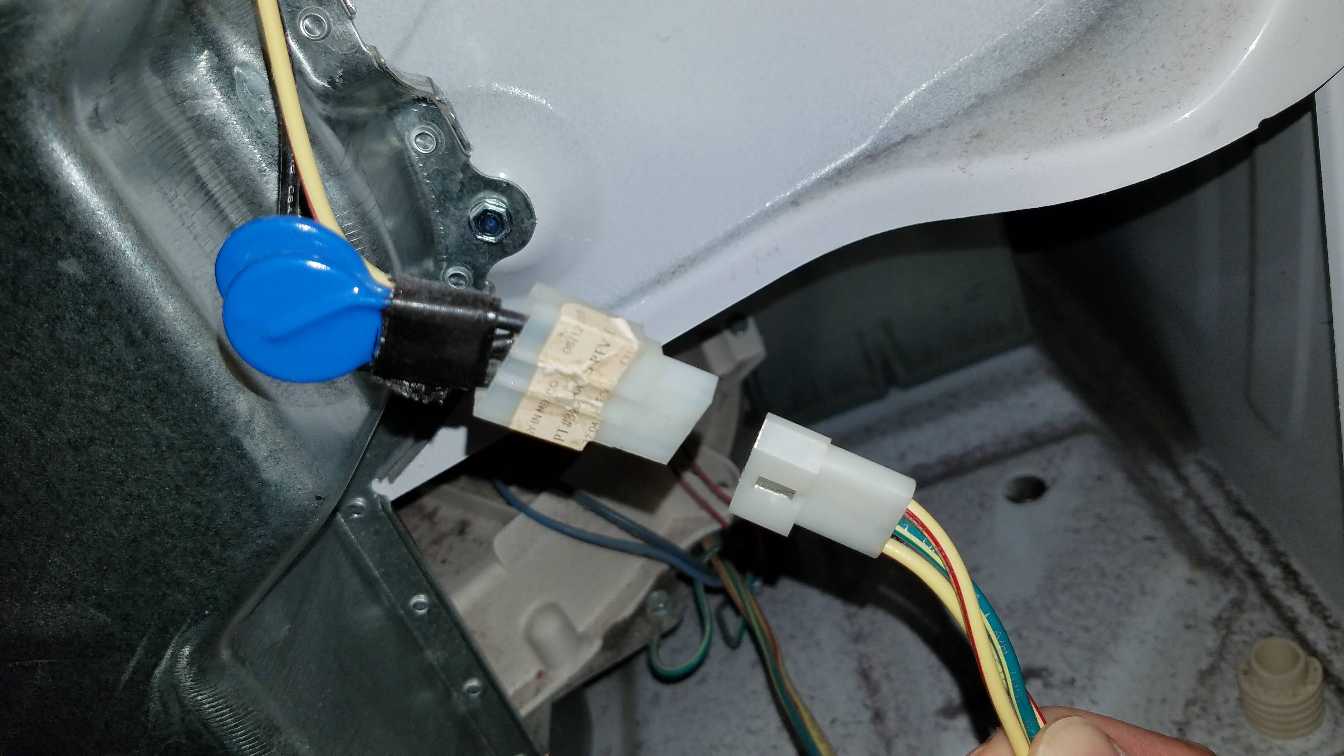
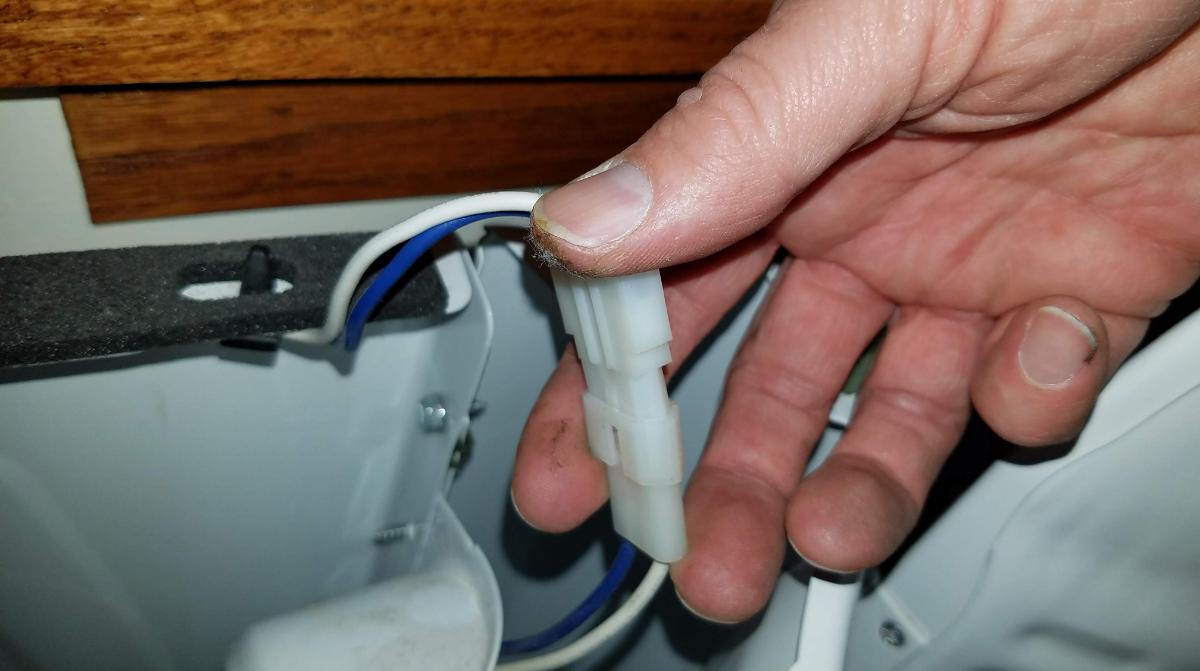
Here is the disconnected electrical connector.
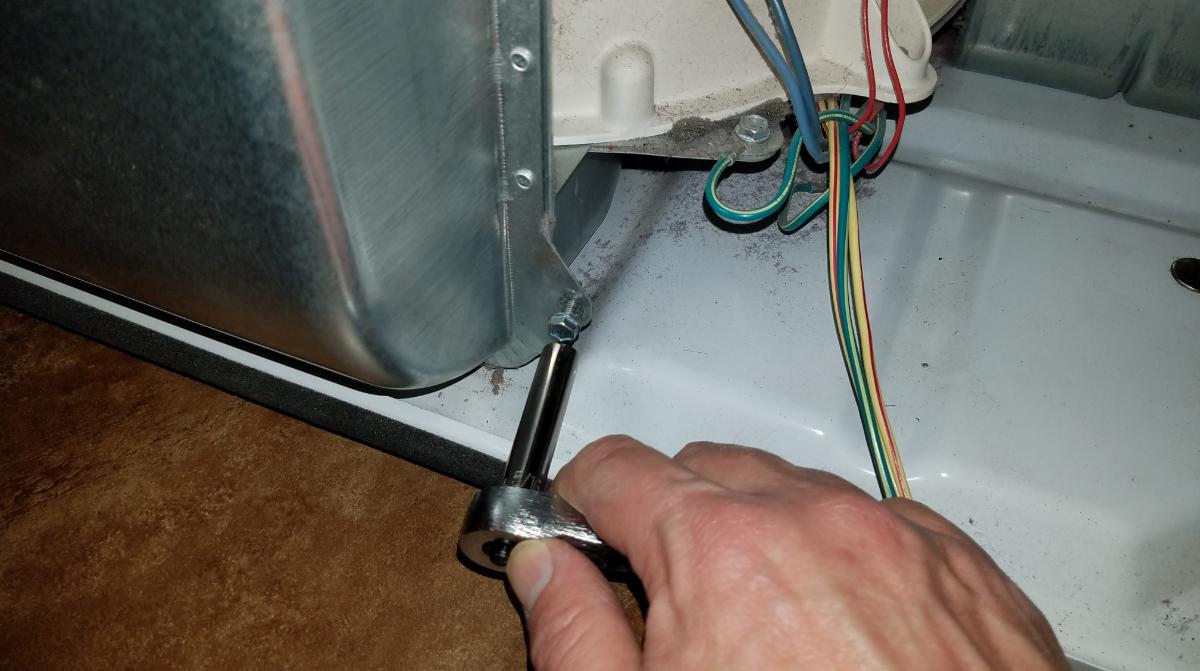
After the electrical connector is free, remove 2 screws from the inside of the front panel of the dryer. These are 5/16″ screws. I used a ratchet. Once those are loose, lift the front panel upward, out of its support tabs at the bottom of the dryer, and set the front panel aside.
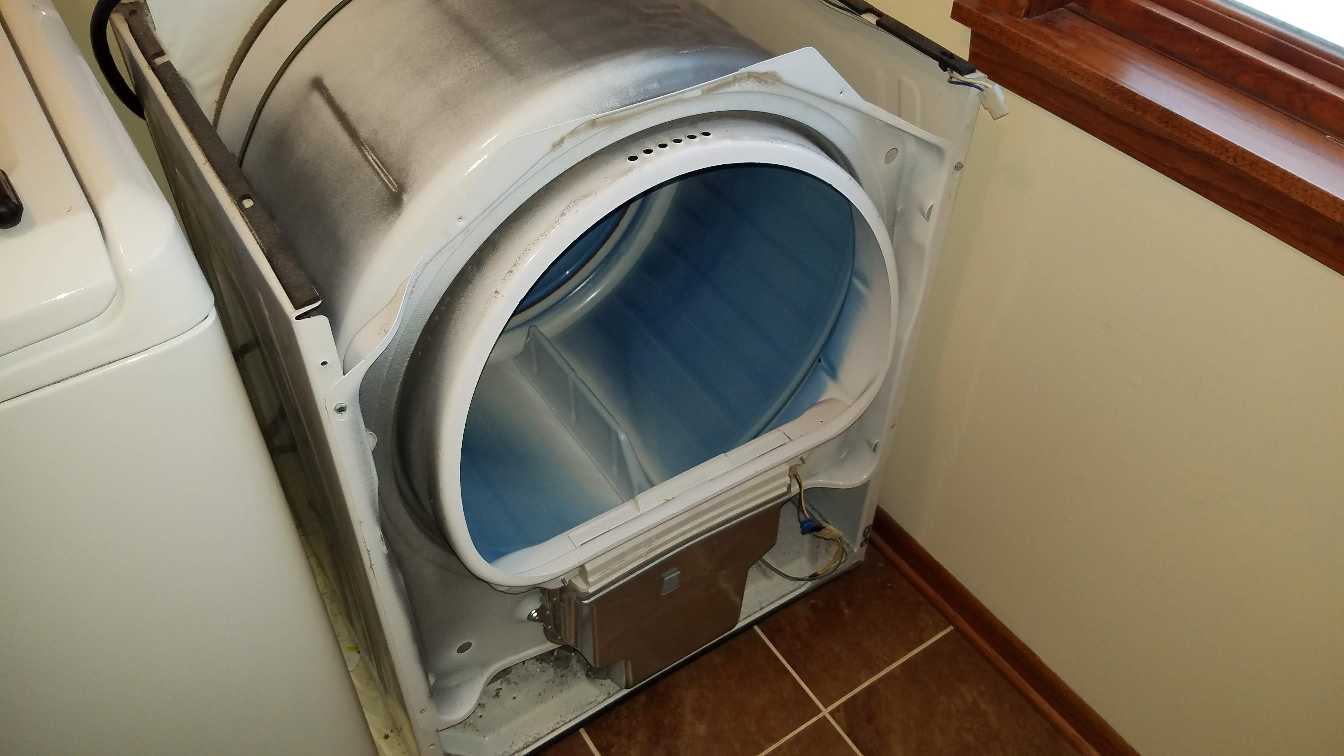
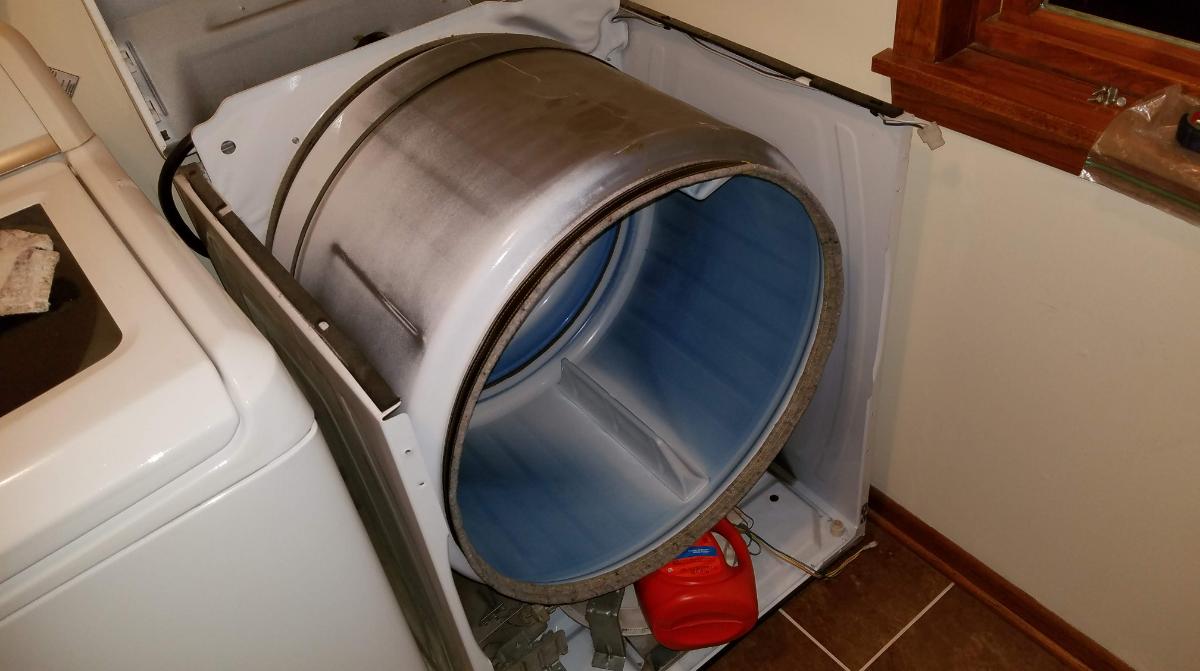
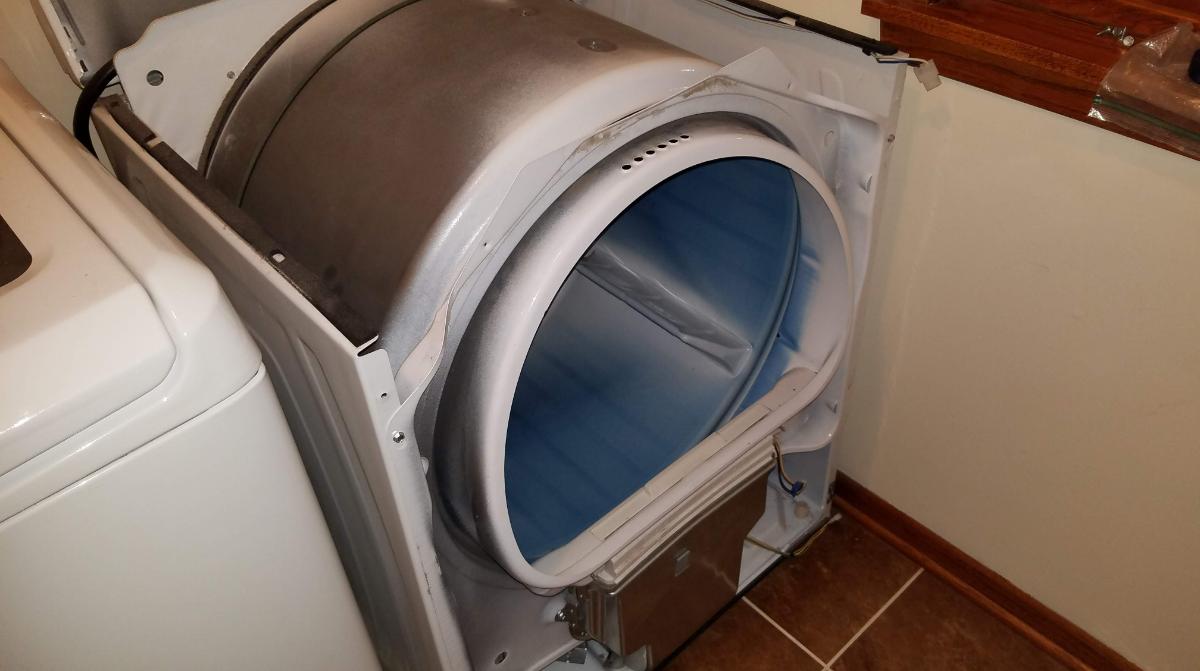
This is what you are left with. Now take out 6 screws (5/16″) to remove the front drum support.
Four of the screws are around the edges.
Two of the screws are in the silver baffling down below.
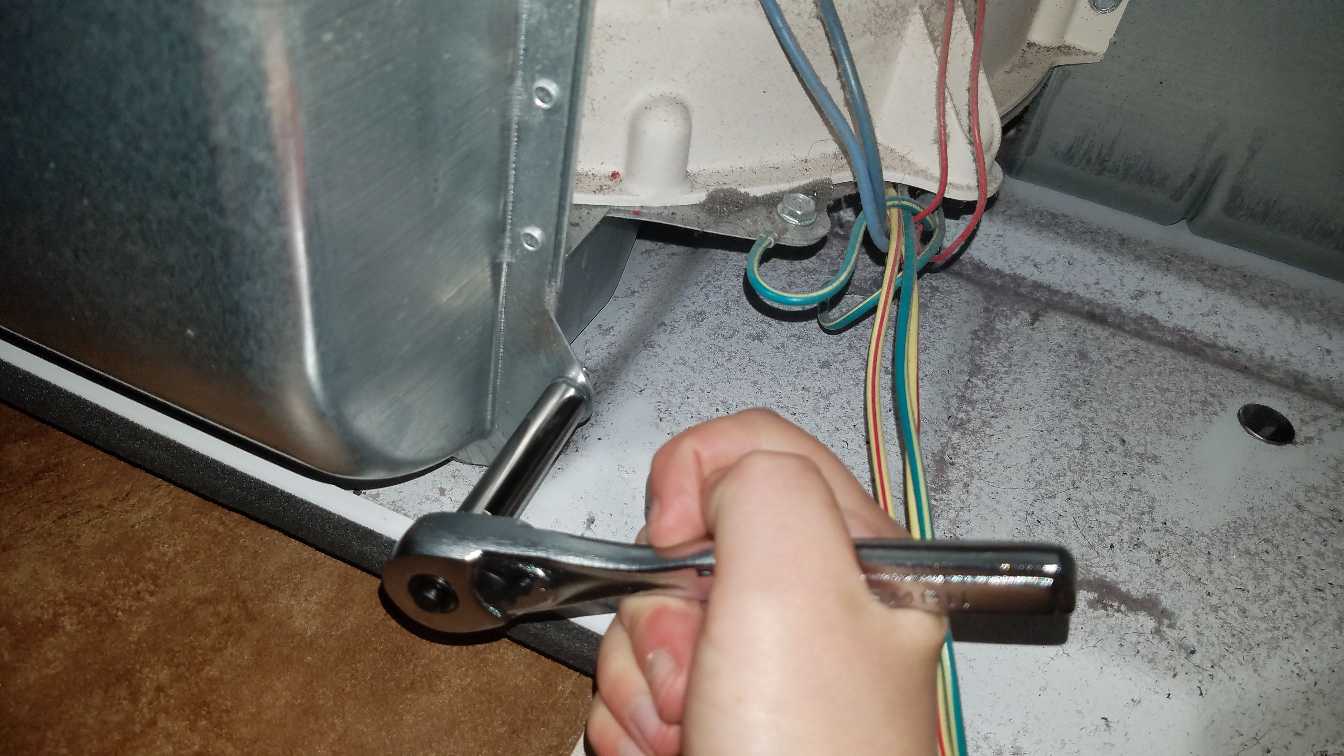
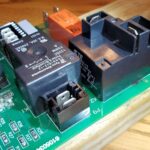
Also disconnect another electrical connection near the bottom.
Now the front retaining section will lift up and away. Note that there are some wheel attached to this that roll along the drum as it spins, so you may need to lift up on the drum a little to get the front panel free.
Also the drum will want to sag down, so put something under it about 6 inches high or so to support it (a bottle of detergent on its side works nicely).
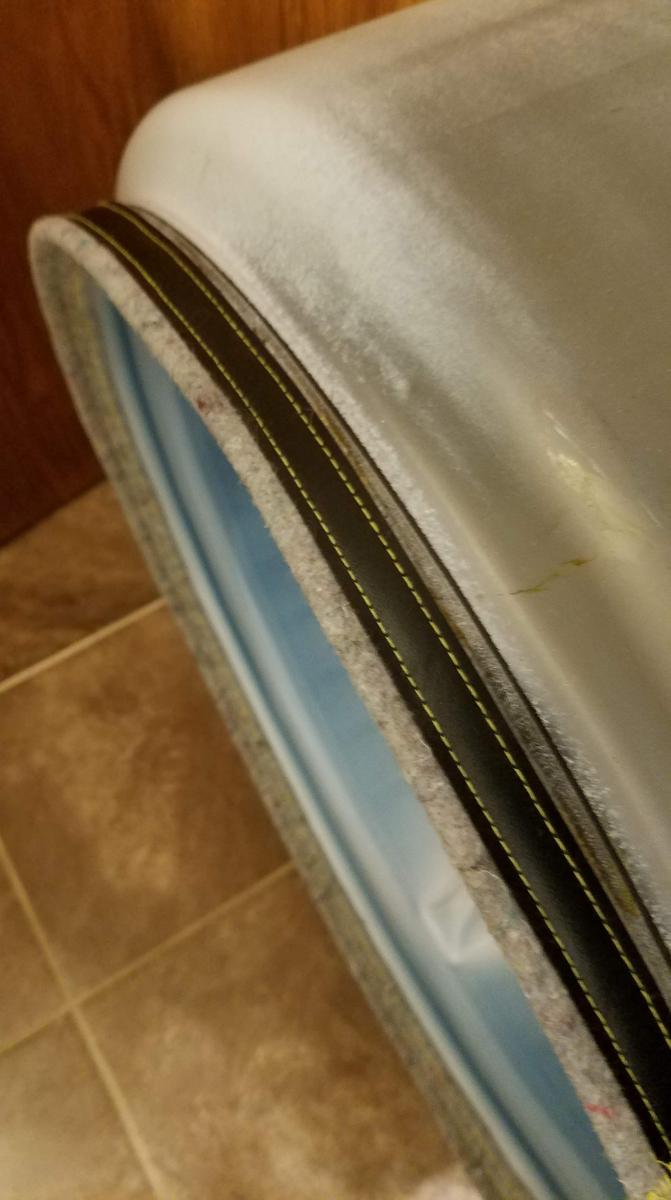
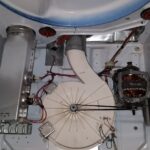
In the image below you can see where the metal-on-metal screeching was occurring. The felt seal had failed. You can see what remains of it below. The top part is fine, but there is supposed to be some felt between the 2 metal pieces as well.
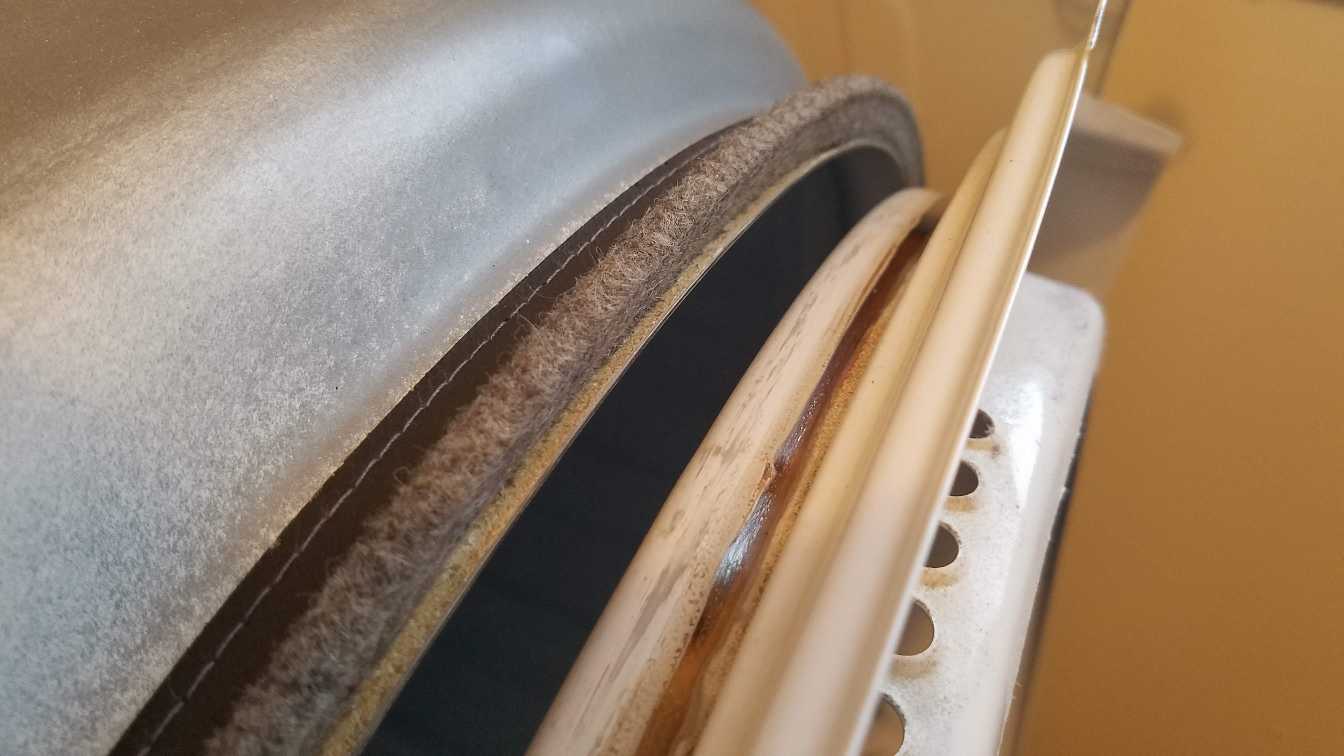
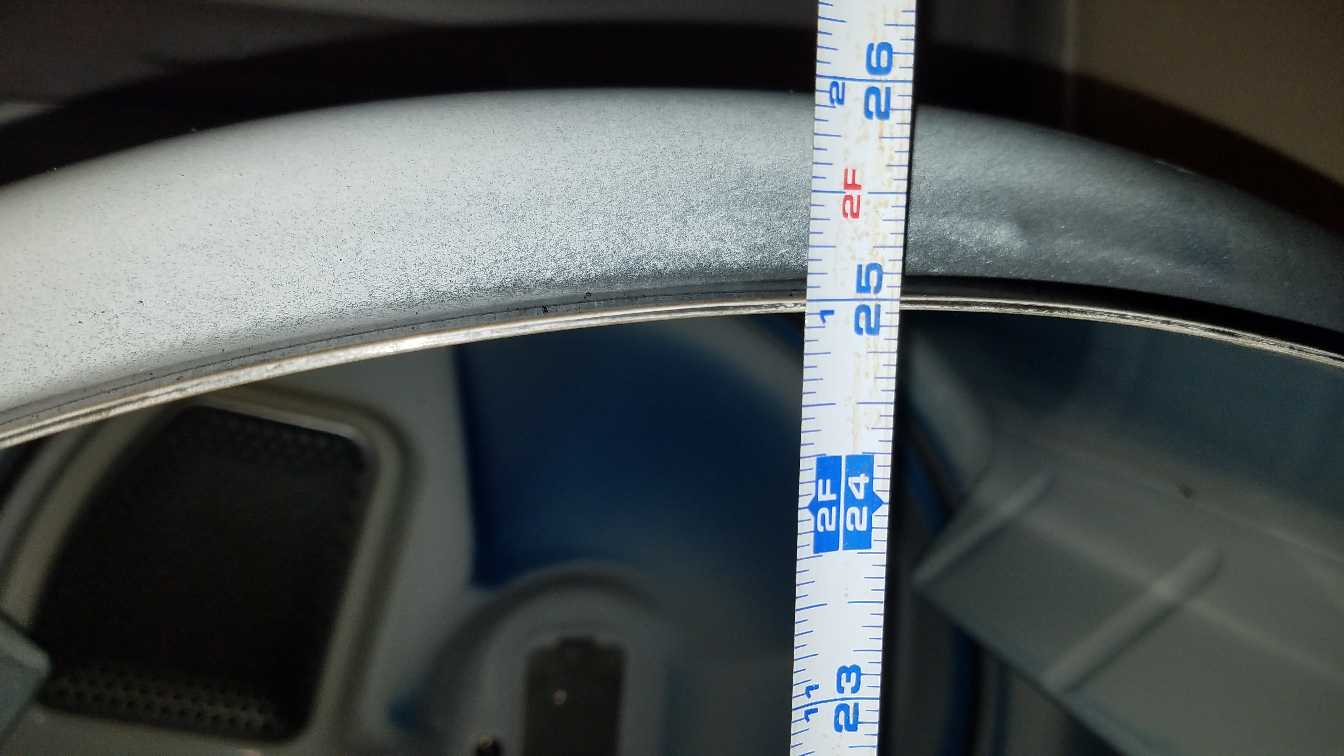
For purposes of clarity, the drum diameter for my dryer was 25 inches at the point where the felt seal fits on, as seen below.
Here is the failed front seal.
Note: The seal at the front and the back of the drum are identical for this type of dryer. It may be wise to replace both at the same time. If one has failed, the other may not be far behind.
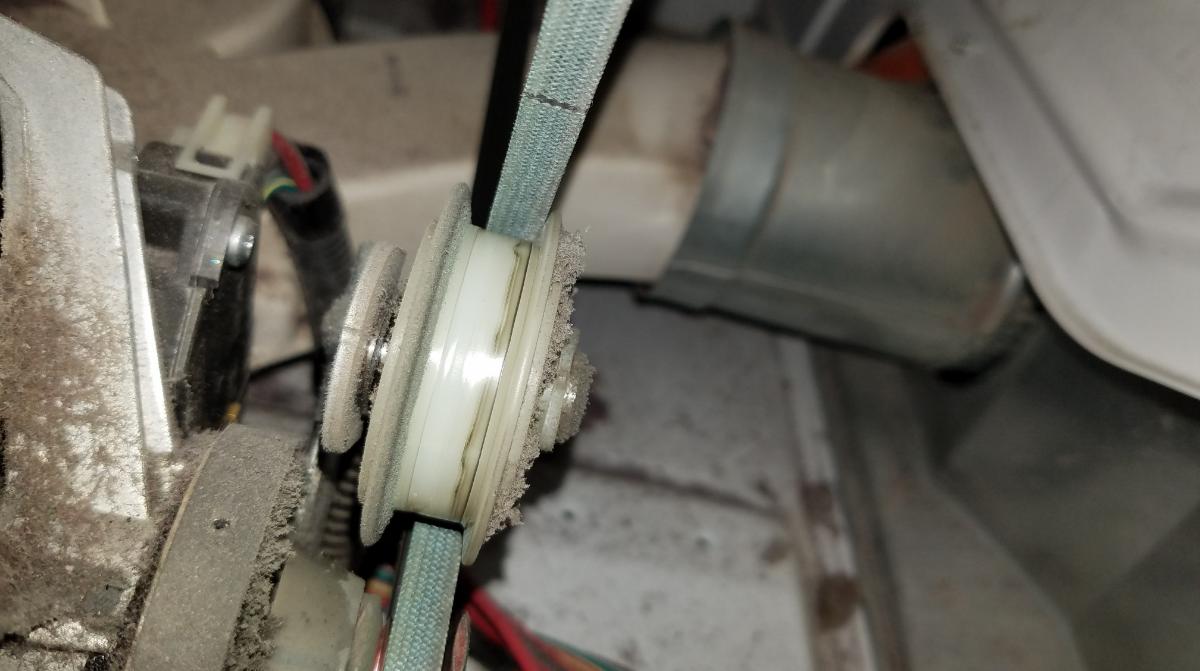
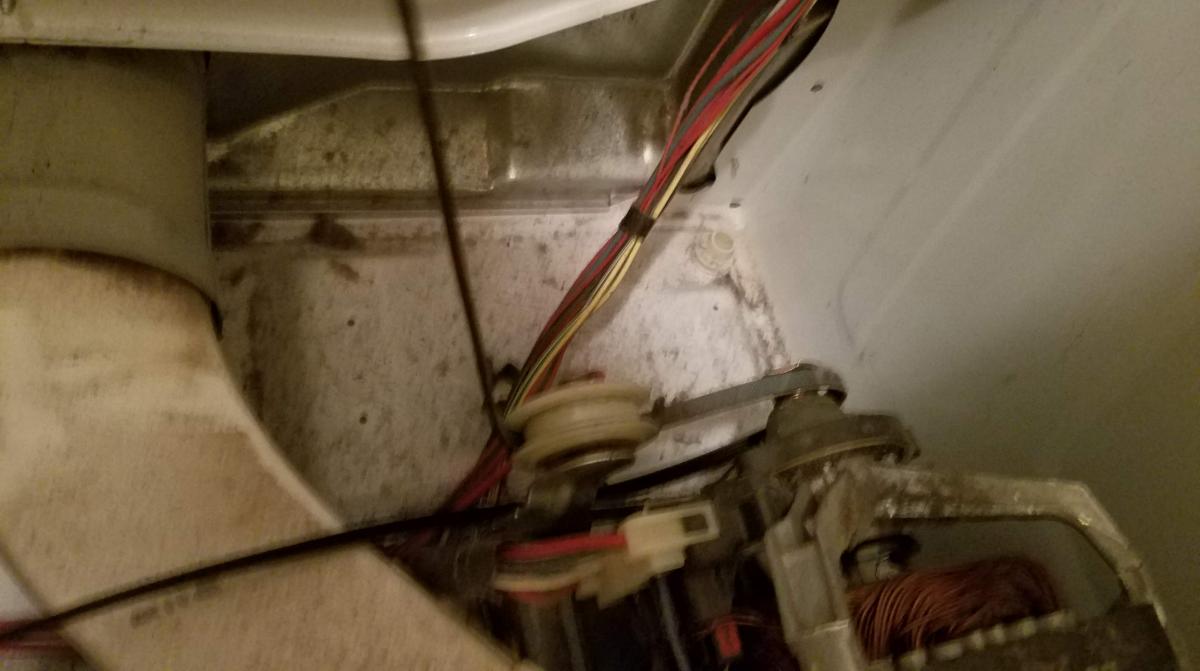
The next step is to remove the drum. Before doing this, we must unhook the drum drive belt. Reach underneath the drum and unhook it from the tensioner wheel. The belt is the one at the rear in this picture.
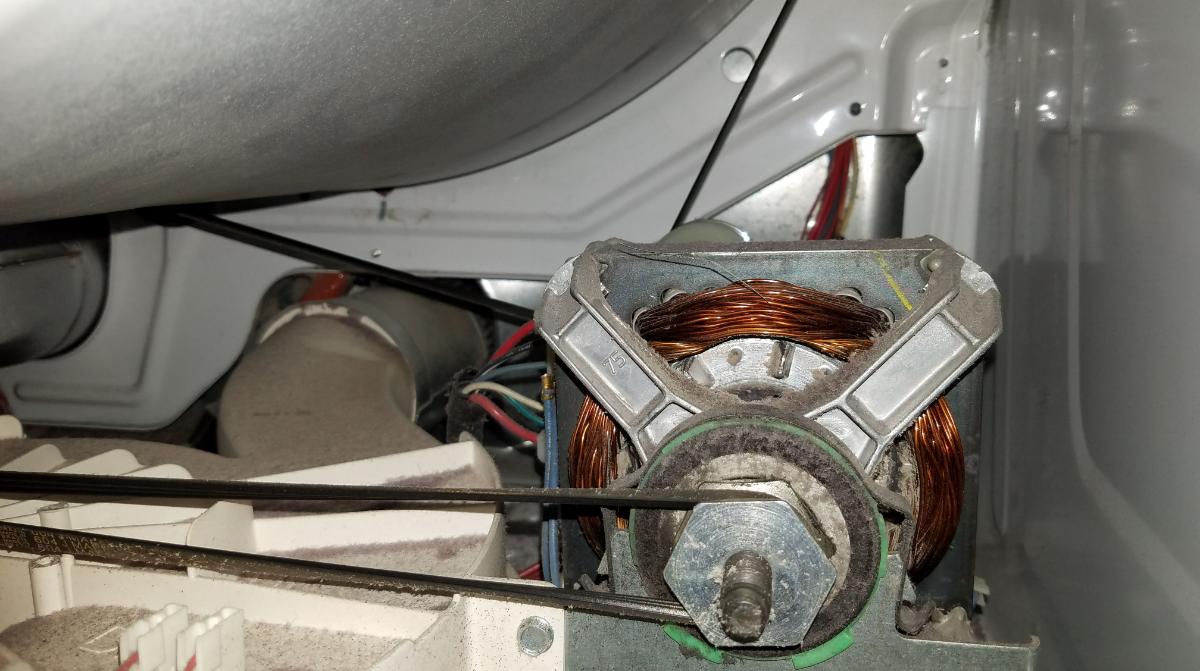
The white wheel in this next view is the tensioner wheel. Take the belt off of this wheel, and also off of the shaft of the motor.
Then take out the drum by lifting it slightly to unhook it from the wheels, then pull it out the front of the unit.
Hint: Use the belt to lift the back of the drum up.
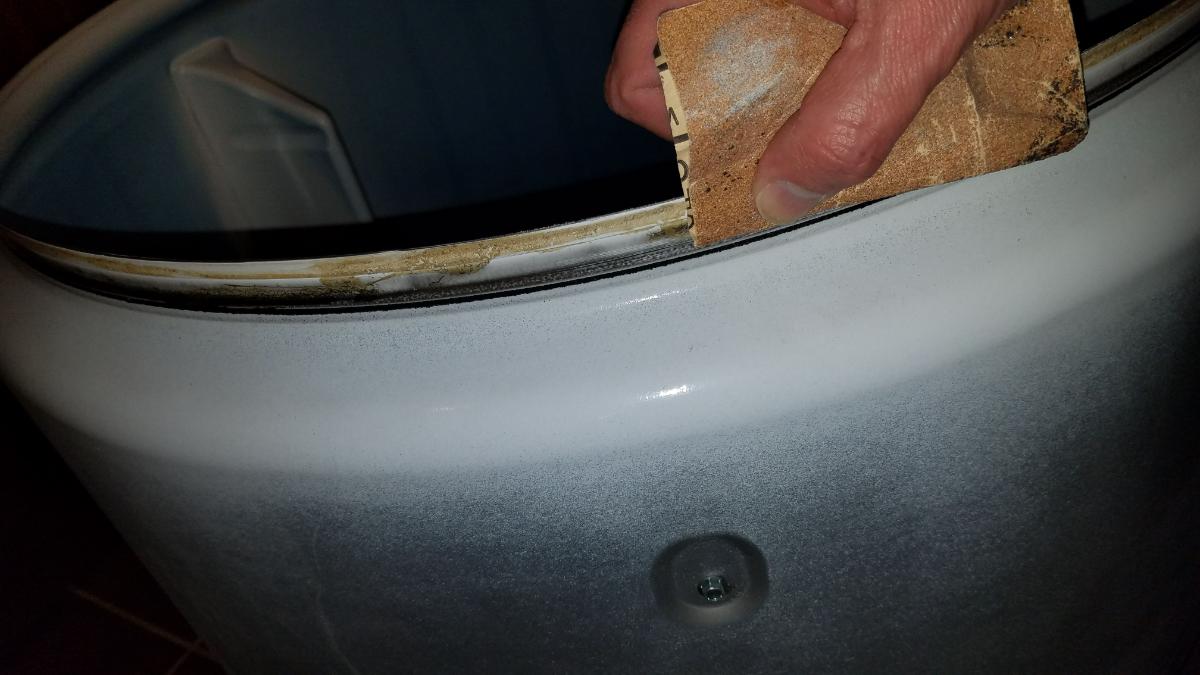
If the old felt seal is still attached, rip it off, and stand off the old adhesive. If it is already off, like in my case, still use some sand-paper to rough up the surface so that the new adhesive has something to cling to.
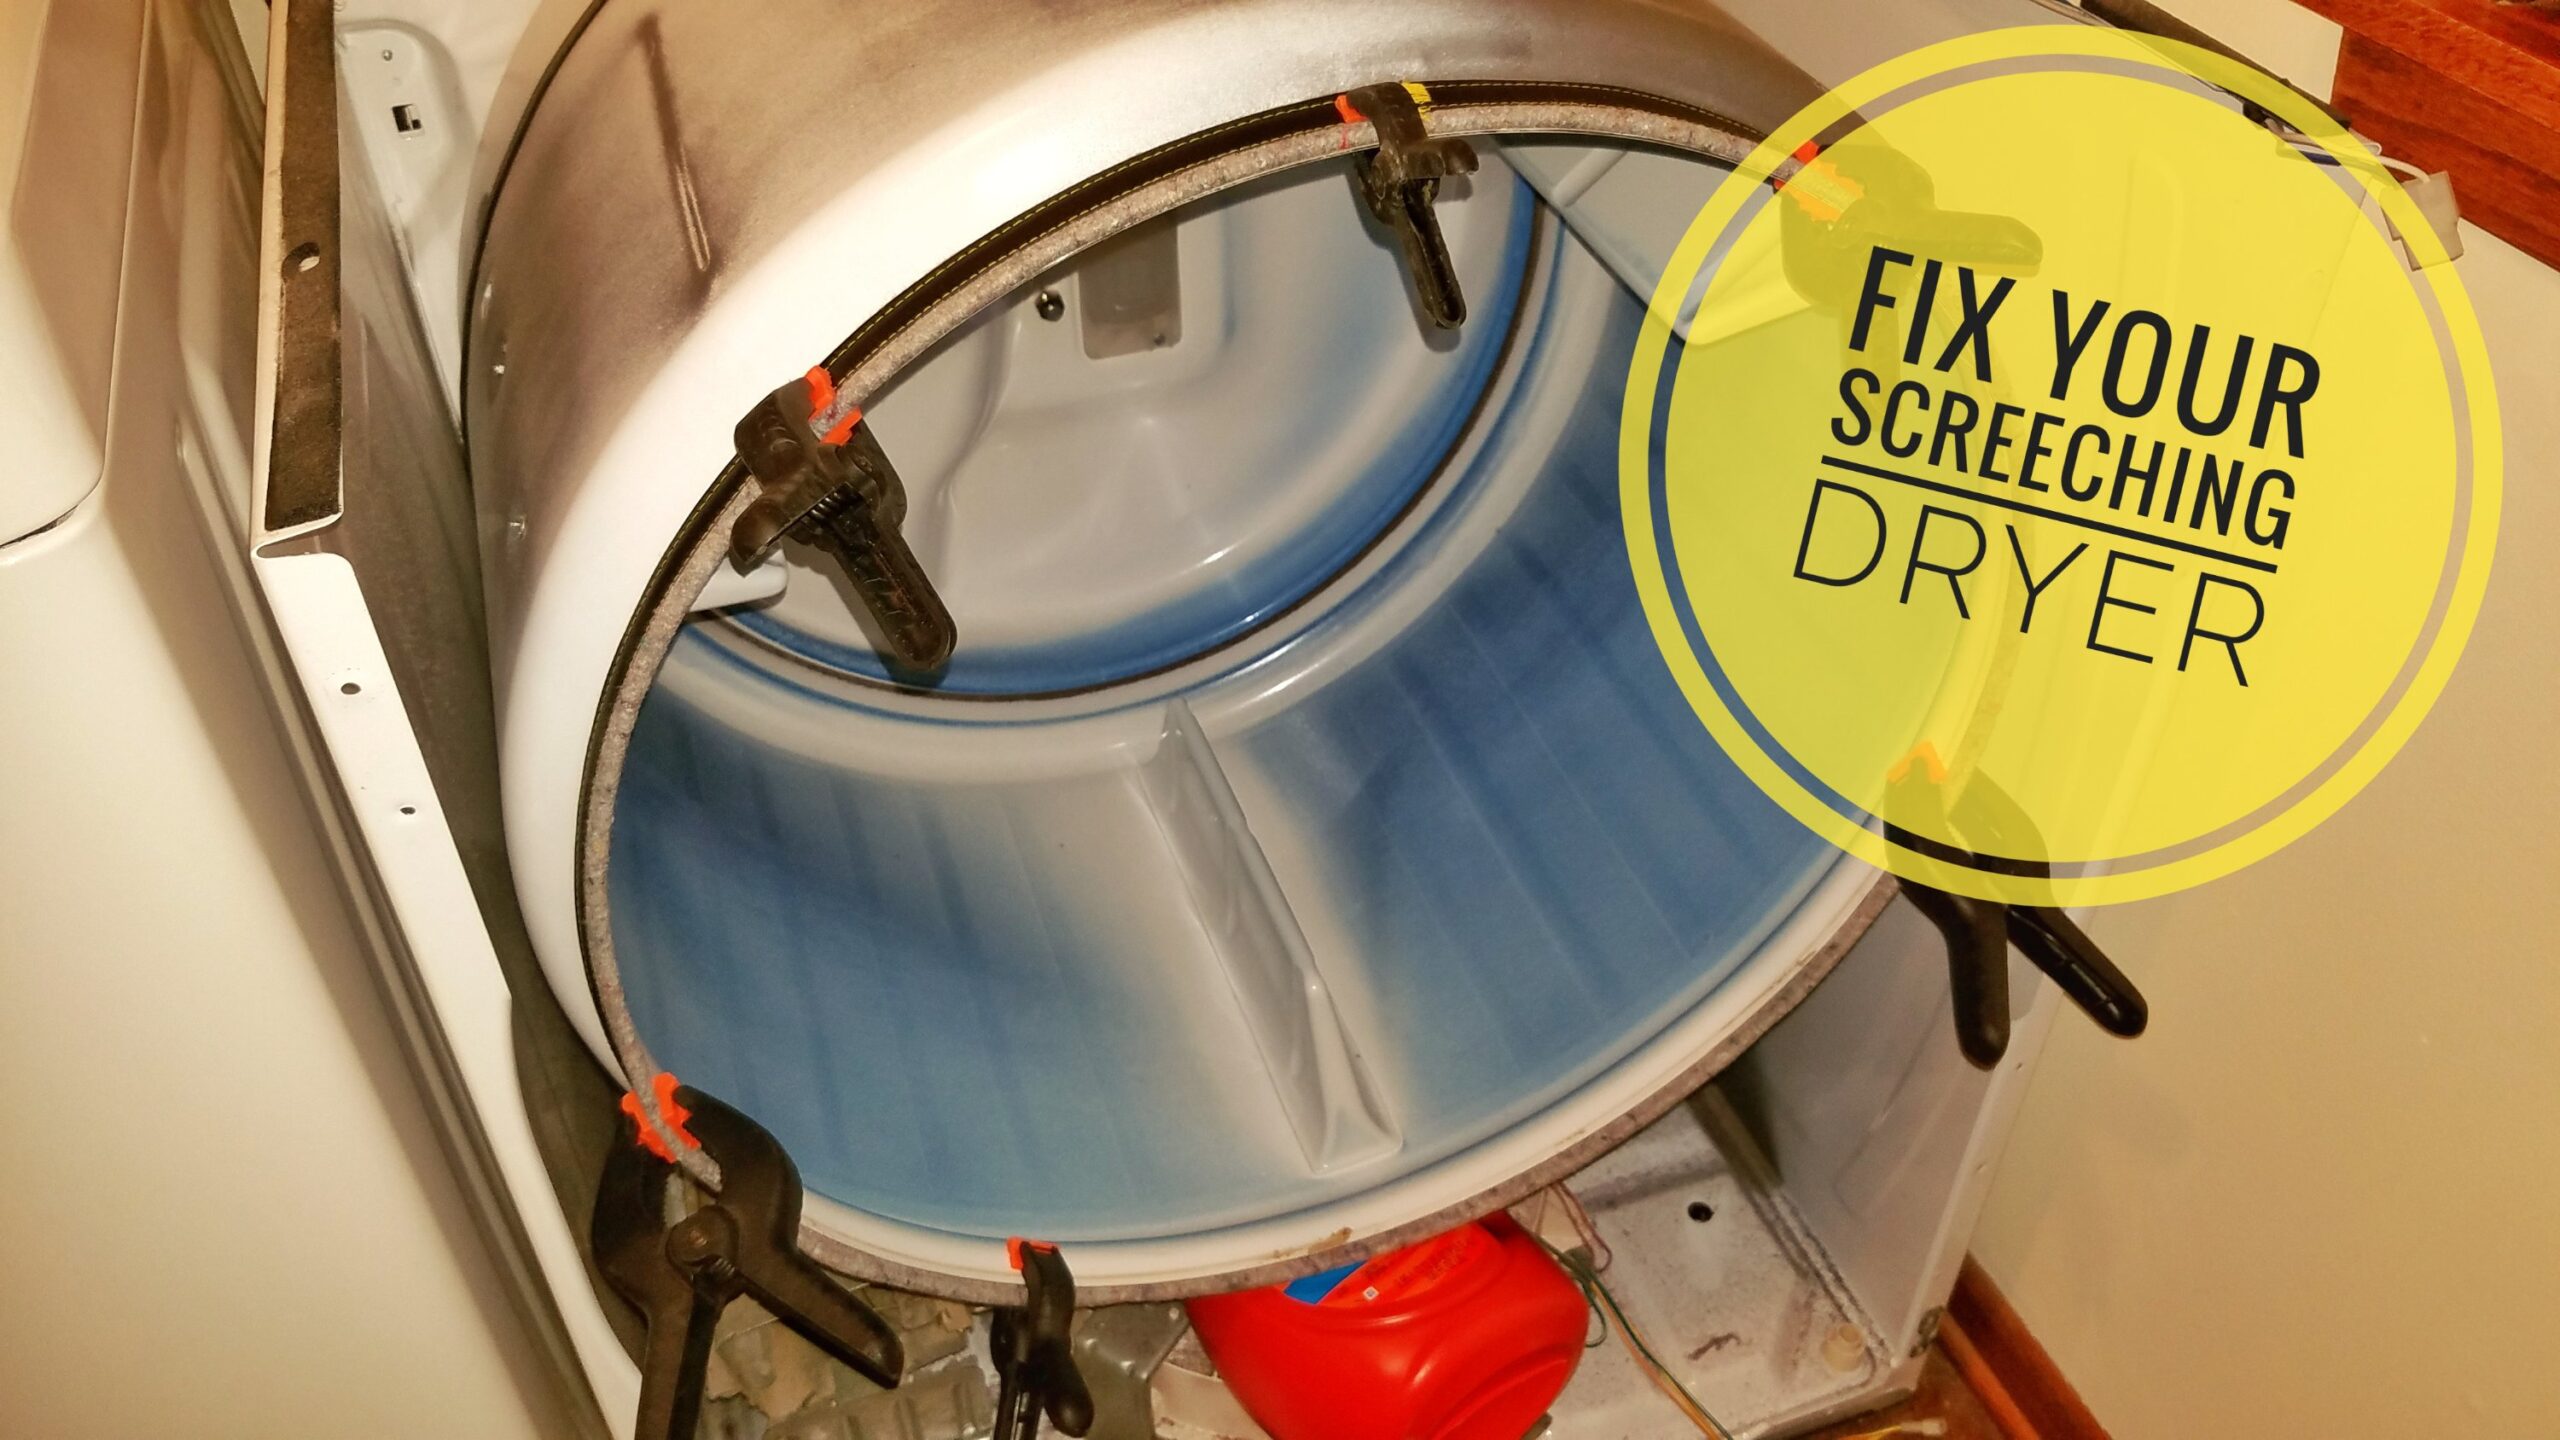
The next step is not strictly required, but will make your life easier. Take the new felt seal and stretch it around the drum and into place. The seal I got was a bit tight, so it was helpful to stretch it out and get it into place before applying any adhesive.
At first, I didn’t worry about fitting the felt over the drum lip (which will eventually be required) just because I needed to get it stretched out. After the seal has stretched appropriately, then you can go back and fit the edge of the drum into the fold in the felt seal.
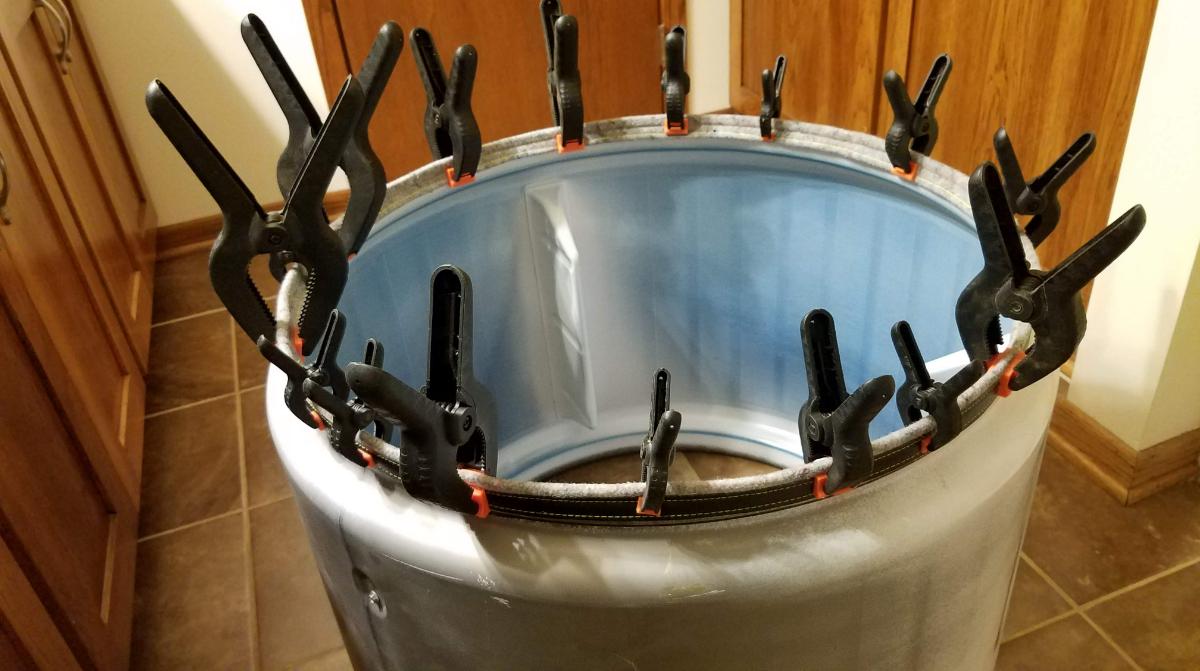
Use spring clamps to hold the felt seal in place (another option is clothes pins, but they don’t hold as tight…).
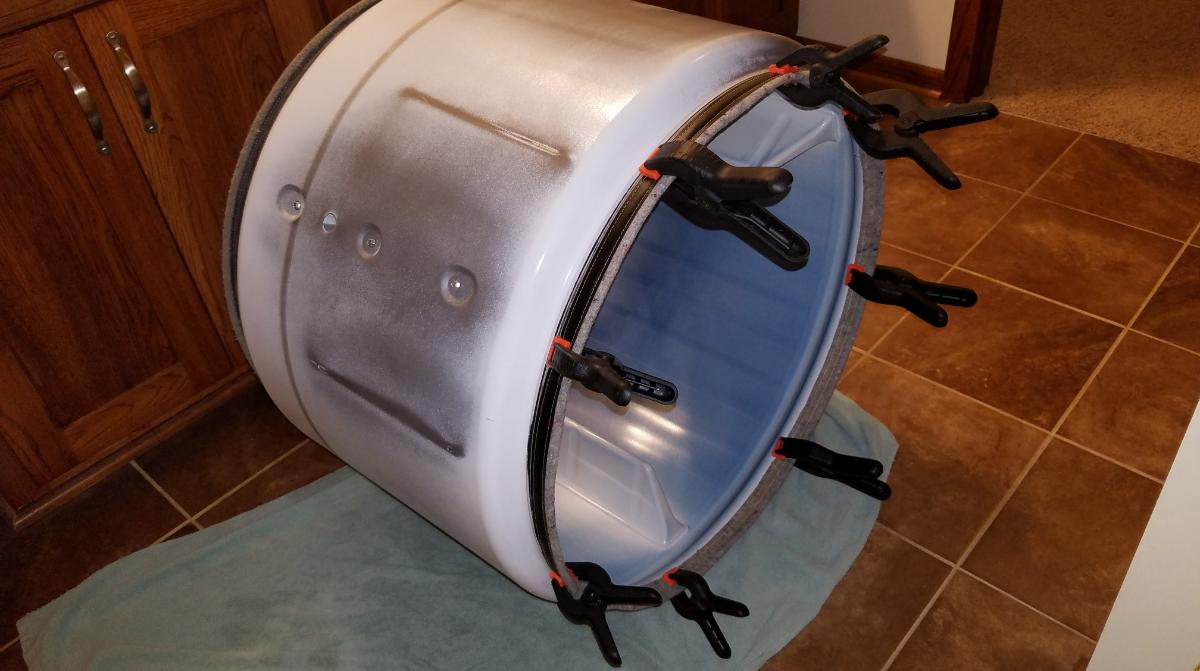
Space the clamps around the drum evenly. The more you have, the better.
Once you have the felt seal in its final position (with the flap in the seal grabbing the edge, or lip, of the drum, you are ready to get the adhesive.
The adhesive is specifically made for high temperature applications. It is very, very sticky. Make sure you are ready, and maybe have a partner help you.

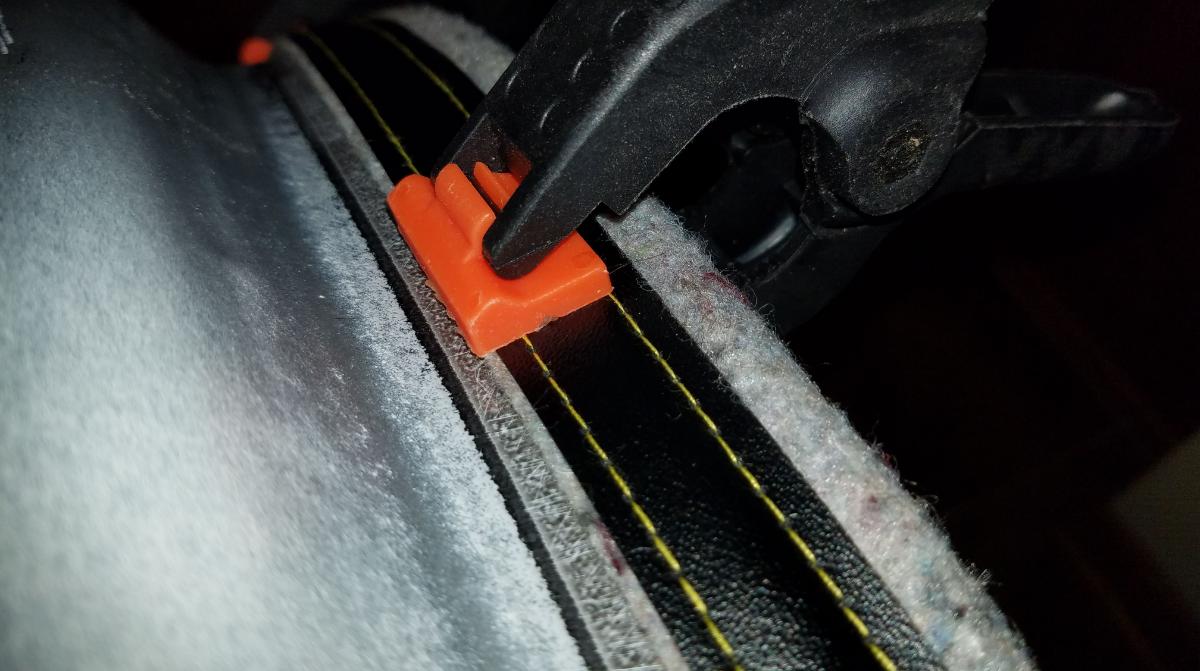
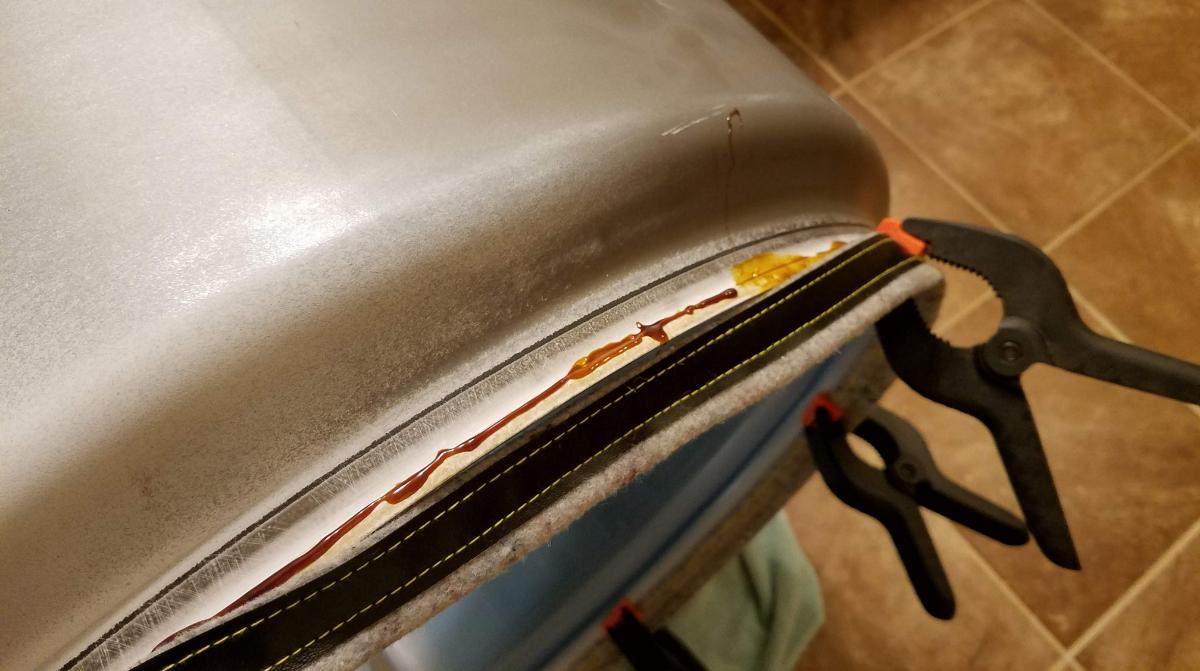
Carefully pull back the lip in the felt seal, and apply adhesive glue to the first 1/4″ of the drum lip. Do not get glue on the inner part of the drum! Lay a small bead, about 6 inches long, or so, then press the felt seal onto it. Then apply a clamp where you have just been, and move on to the next 6 inches.
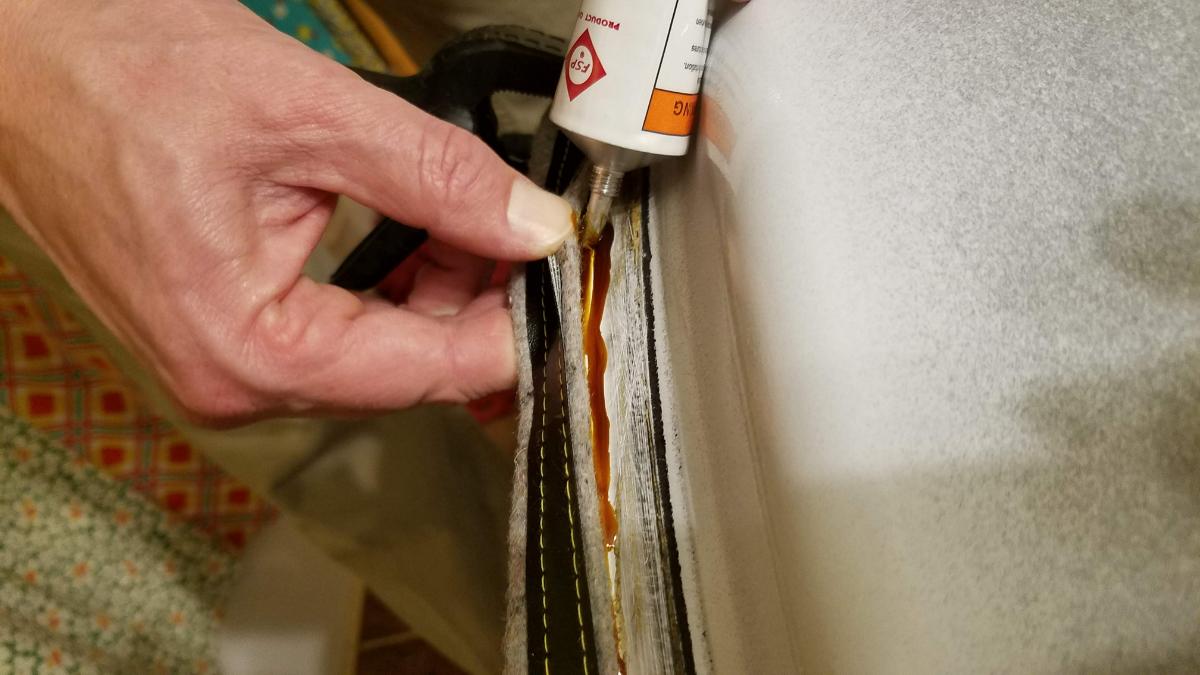
Below is shown about the appropriate amount of adhesive to apply to the dryer drum lip.
After you have worked your way around the entire drum, position the clamps to hold the felt in place. Make sure it is not ‘slipping off’ at any positions.
Leave the clamps in place for about 1 hour or so to let the adhesive set.
After about an hour, check the that adhesive is holding. If it is, go ahead and remove the clamps. (If it is not, give it some more time).
Position the drum back in the dryer where it was. Remember to put the belt back on it first. Put something about 6 inches thick under the front of the drum to hold it up (I put a bottle of tide underneath it.
Look below the drum, and re-string the belt back around the motor and tensioner pulley. This can be tricky because the tensioner wheel has a spring, and you need to pull that back in order to get the belt on.
One tip is to use something like a screwdriver to pry the tensioner wheel up while you feed the belt around it. Another tip if you still can’t get it, is to take out the drum, and wrap a piece of stiff wire around the tensioner arm to hold it up while you put the drum and belt on. (Remember to remove the wire or screwdriver when you are done!).
The next photo shows how the belt should be run around the motor shaft and tensioner wheel.
After the belt is on, lift the front panel into place. Note that the rollerblade-like wheels need to be hooked under the front lip of the drum. So it works well to hook the wheels under the lip first, then give a slight lifting motion to get the front panel into place.
Put in the 6 screws that held it in place.
Two of the screws are at the bottom.
Reconnect the electrical connection at the bottom.
Next, position the front door portion of the dryer.
It has 2 tabs at the bottom that have to fit in a hole, shown below. Lift up slightly, to get the tabs into the hole, then it rests down a bit.
Put in the 2 screws at the top and tighten them up with the 5/16″ socket.
Reconnect the electrical connector.
If everything looks good, go ahead and close the top panel. It will lock into place on the clips.
The repair is now complete.
IMPORTANT! Don’t run the dryer for about 24 hrs or so, to let the adhesive fully cure.
Thanks for reading!
Did this fix your problem? Tell us about it in the comments!
If not, check out this article to replace the wheel bearings in your dryer.
Tools and supplies used for this repair:
- 5/16 in socket (or wrench)
- Flat screwdriver
- Metal paint scraper
- Sandpaper
- spring clamps
- repair kit 280140 (felt seal with adhesive) or repair kit (#W10612022)


Should this work for all Maytag Bravo’s models or is it model specific?
Hi Kristin,
The general idea will be the same for the Maytag Bravos line. That being said, some dryers have a different diameter drum, and I believe there are some dryers with the felt lining only on the front rim and not on the back. I would recommend double-checking the model number of your dryer. Amazon has a “Make sure it fits” feature if you visit this link below on a computer (not mobile device) a field appears at the top where you can enter your model number and it will tell you the correct part for your dryer:
https://amzn.to/2v9x7uz
I hope this helps!
Richard
How do you put the seal on in the back if dryer where it is stabilized
For my dryer, I had to remove the whole drum, then it was the same procedure for the back seal as well. Some dryers may be different front to back, but for this one, the front and back were the same!