Repairing an Exhaust Leak on a Toyota Corolla
Does your Corolla rumble incredibly loudly? Do you feel like it used to be quieter? You may have an exhaust leak… Follow along on this picture guide as I show you the procedure I took to repair an exhaust leak on a 2004 Toyota Corolla!
Diagnosing an Exhaust Leak
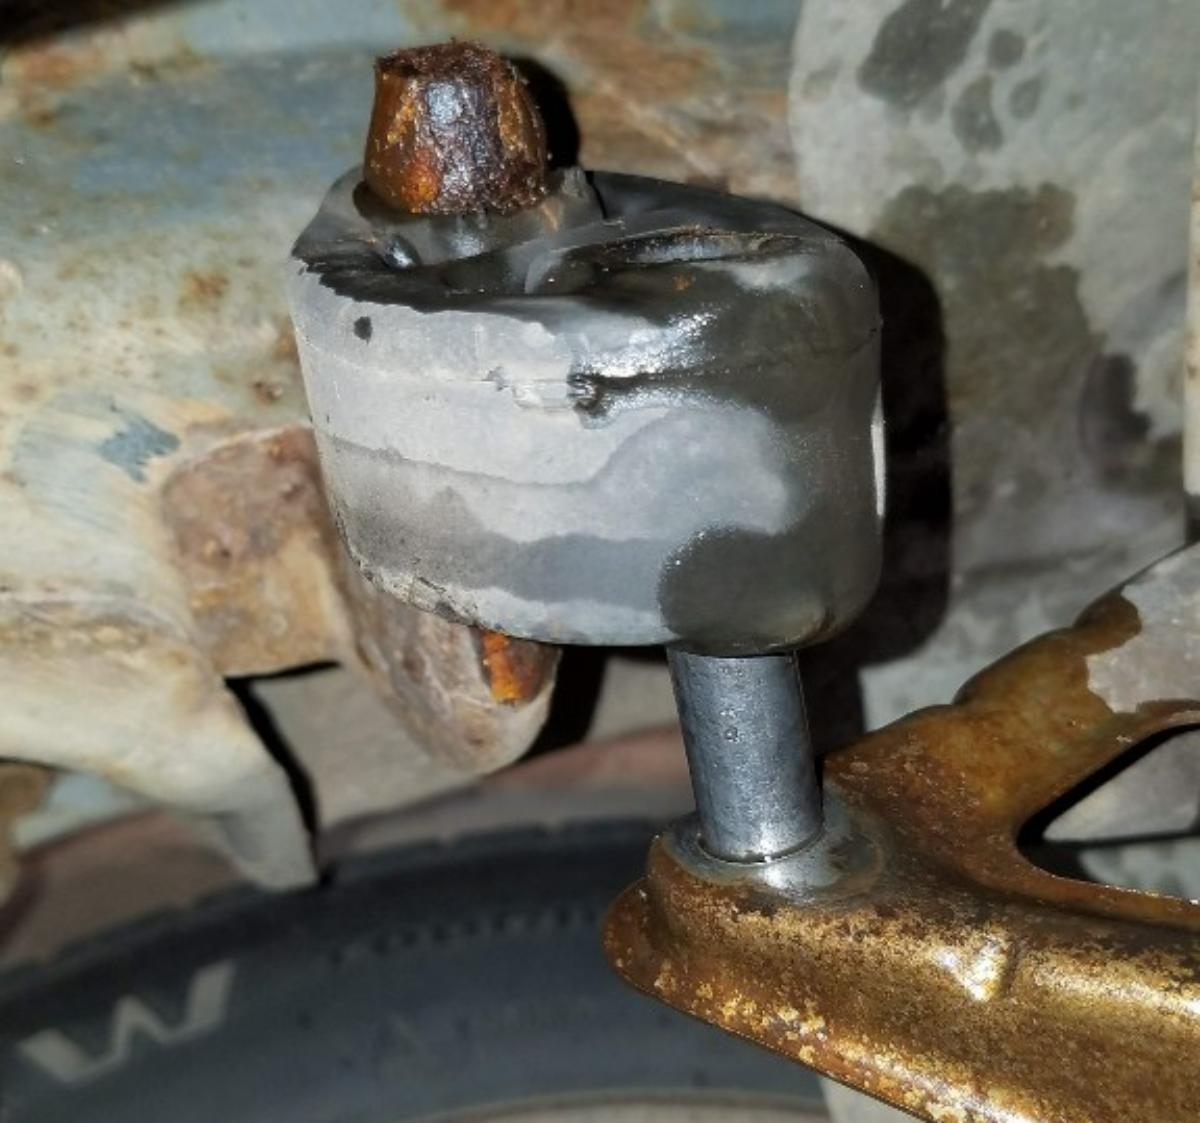
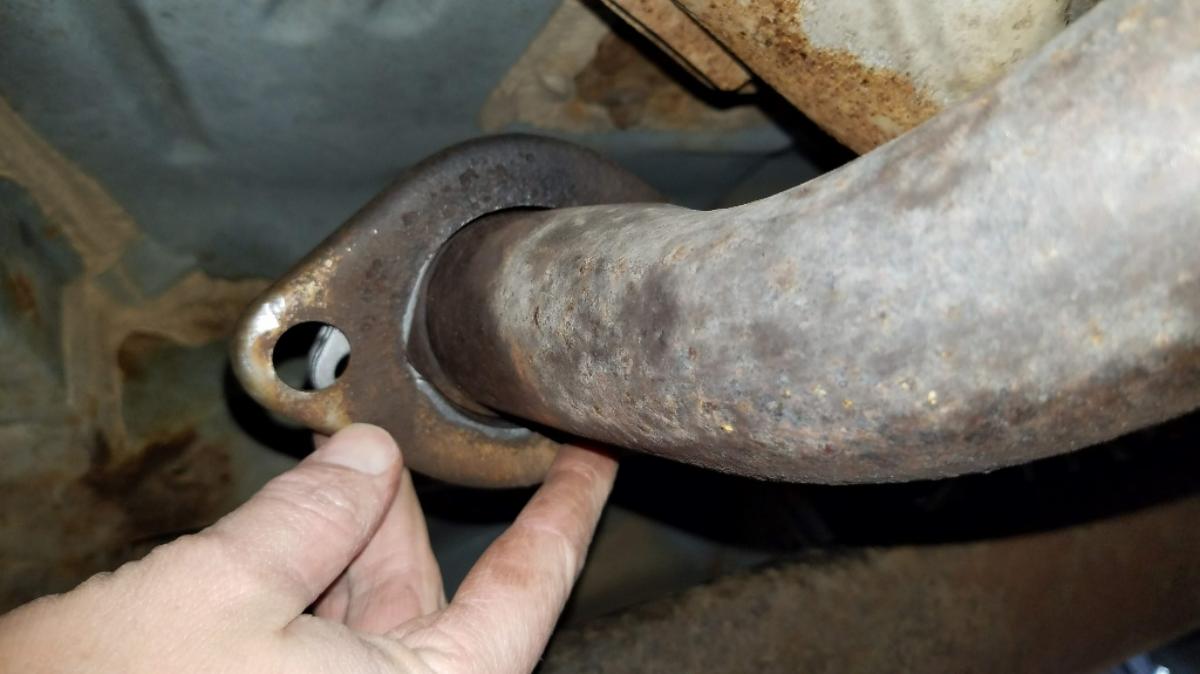
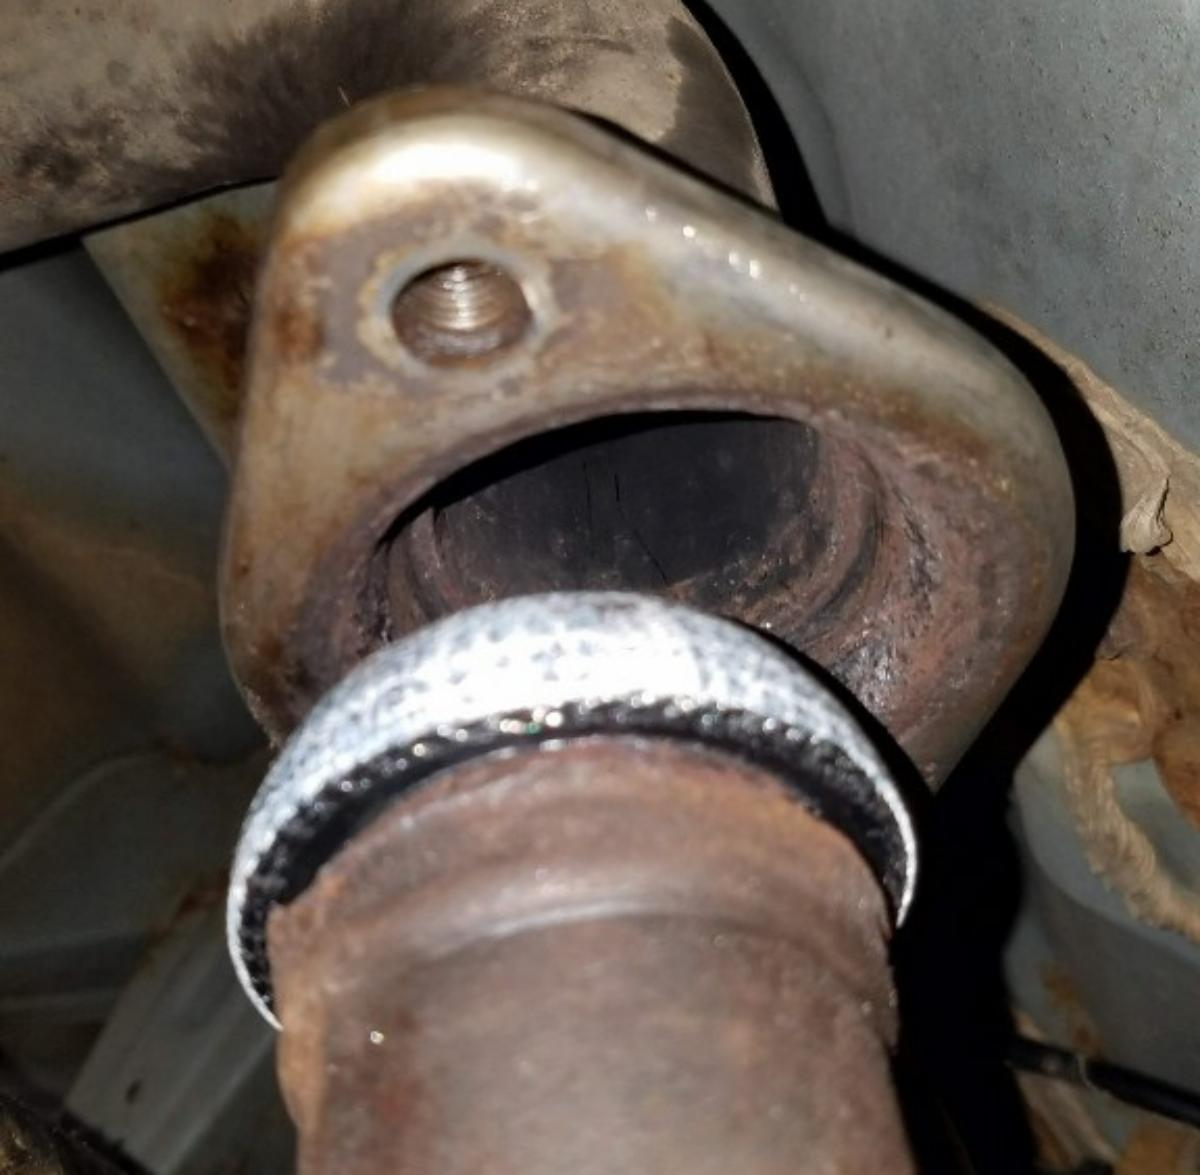
The Corolla got progressively louder over the course of about a week. I finally crawled under the back end to assess the situation. This is what I saw…

Note: When you buy through links on our site, we may earn an affiliate commission – at no cost to you.
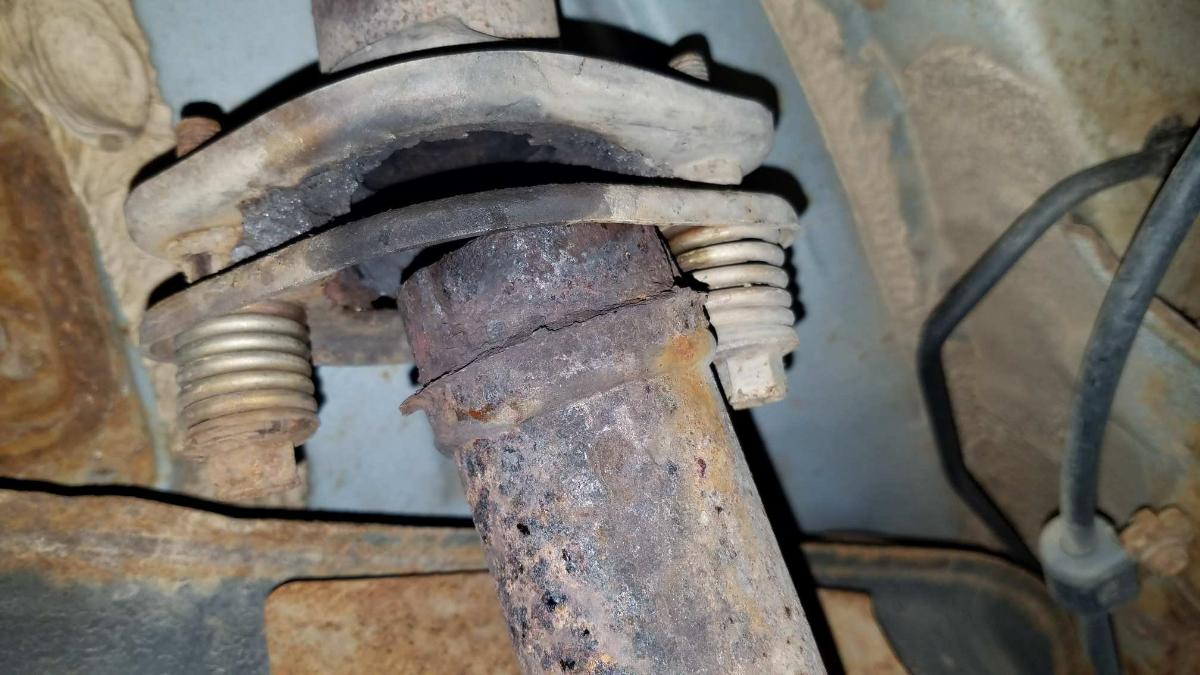
So, there were several compounding problems with this, as follows:
- The flange has broken loose from the exhaust pipe
- The exhaust seal, between the 2 flanges, has completely deteriorated
- The nuts and bolts holding the junction together are rusted and pitted
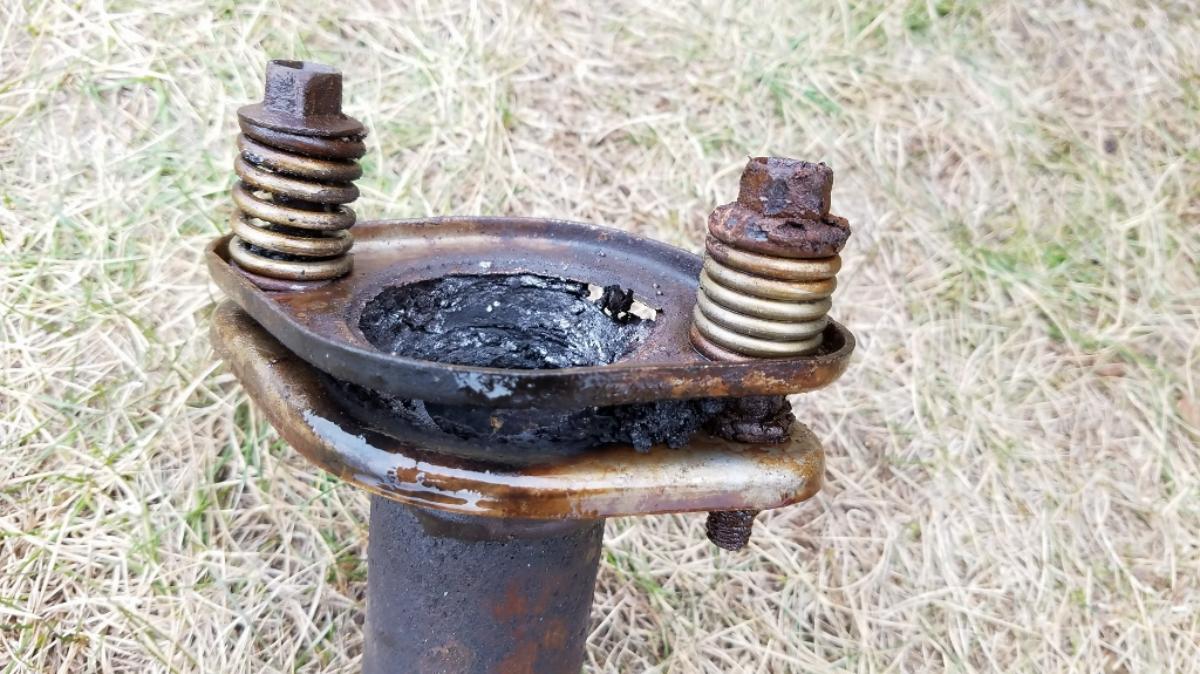
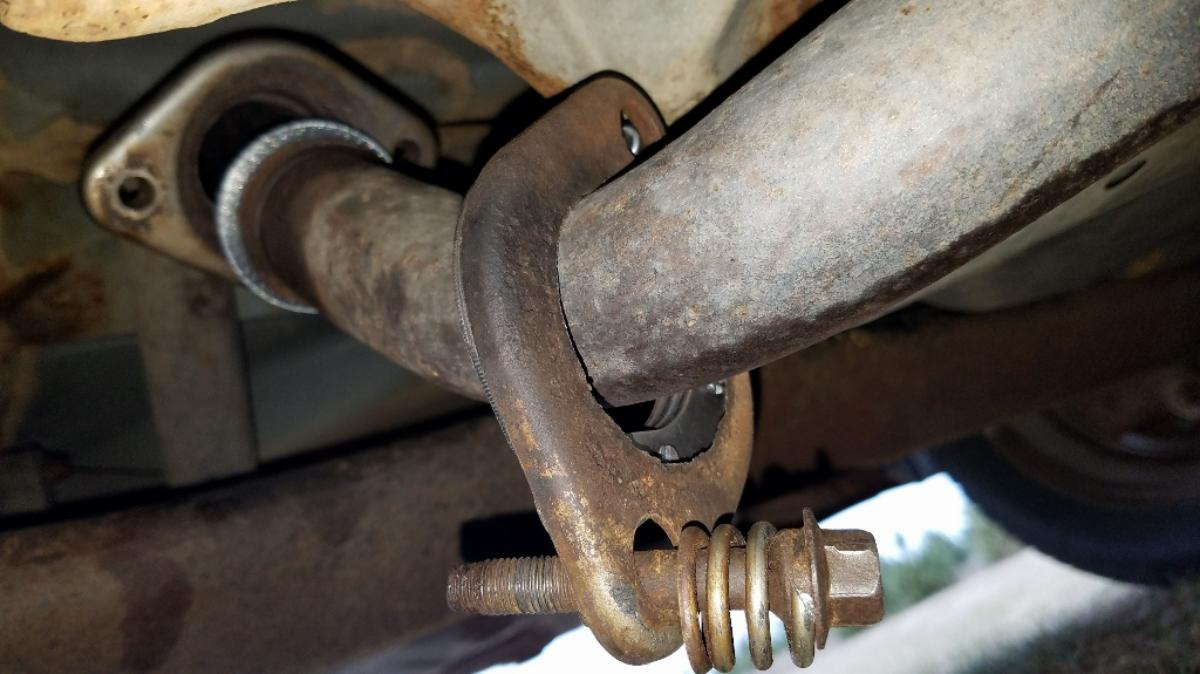
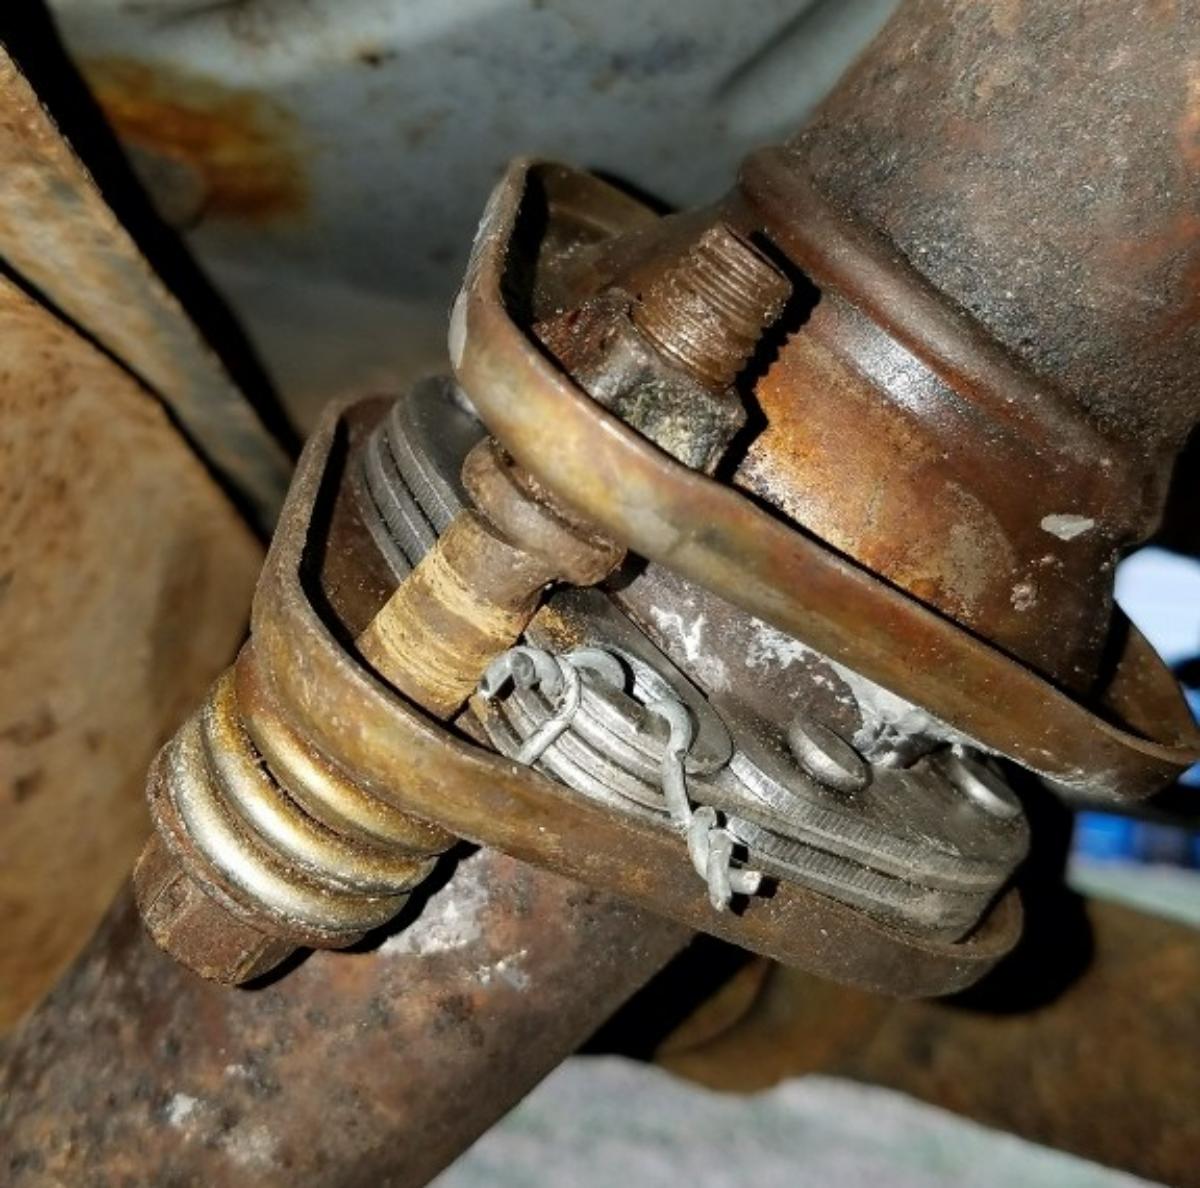
Here is a shot of the other side of the junction showing the rusted nuts and bolts.
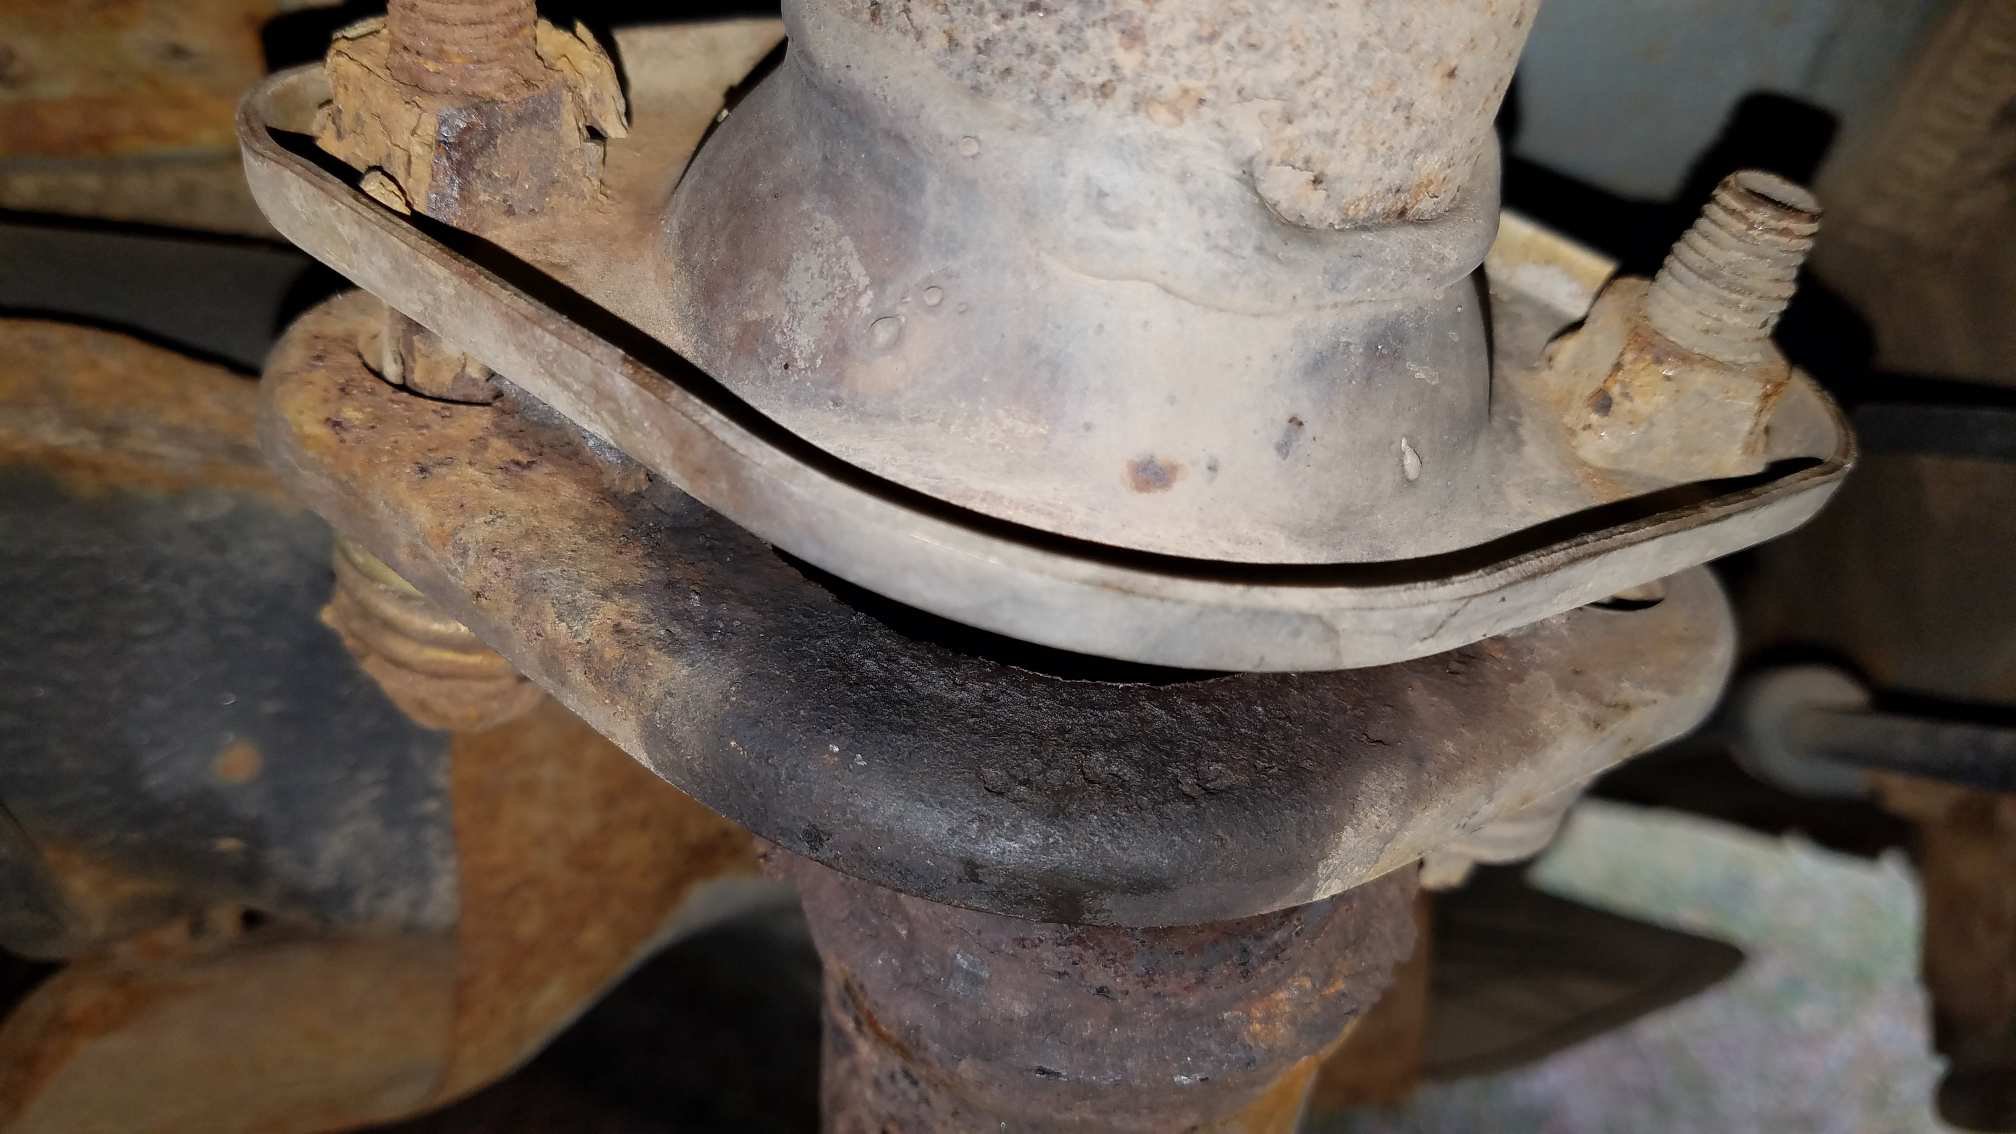
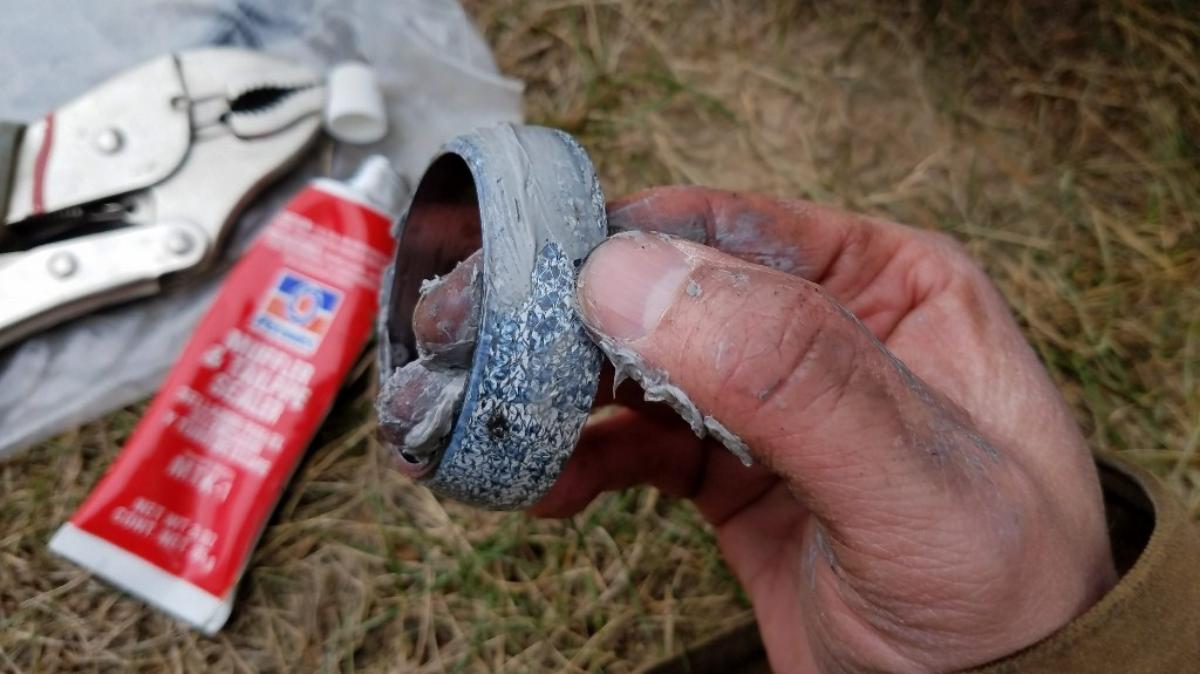
Here is the totally deteriorated exhaust seal.

There are several ways to approach this problem. The best and most complete solution would be to replace the upstream exhaust pipe and catalytic converter and would cost around $115 and according to the reviews, several hours of your time.
Then there is the approach I took, not as much of a complete solution, but less expensive at about $25 and several hours of time.
Steps to Solve an Exhaust Leak:
- Remove the muffler
- Remove what was left of the old exhaust seal
- Install an exhaust flange repair kit
- Install this exhaust flange gasket
- Slather on some tailpipe sealer
- Put it all back together
Alright, if you are ready to come along for the ride, please continue reading…!
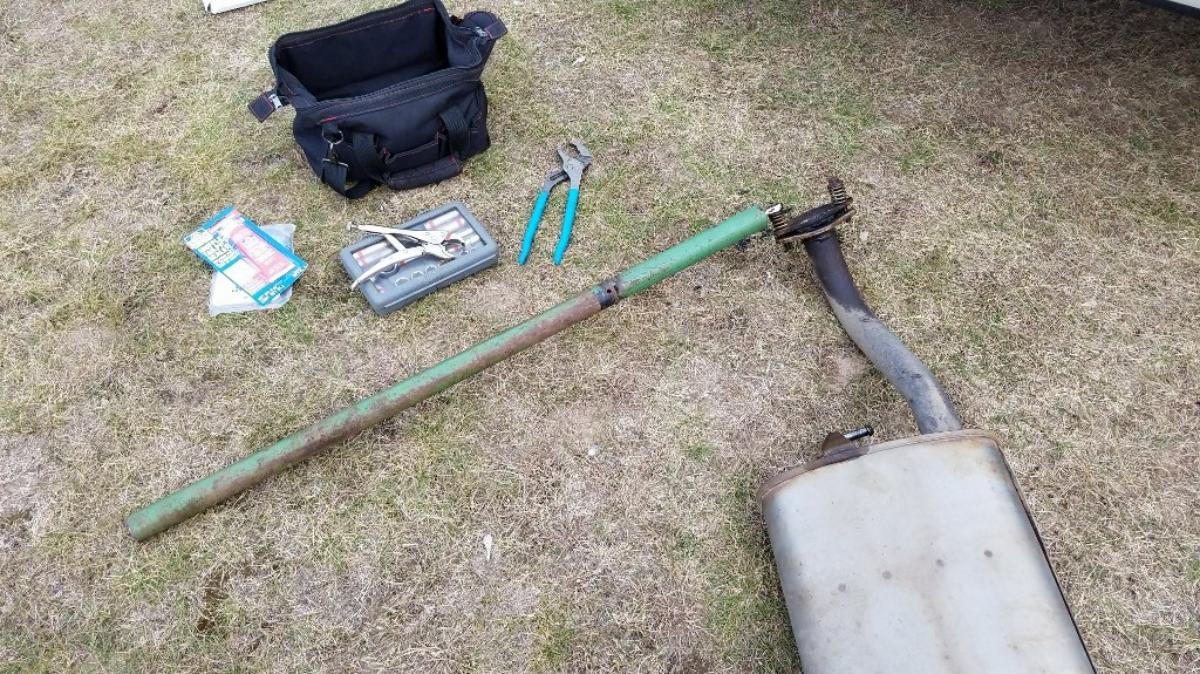
Tools and supplies used for this repair:
- large channel lock pliers
- 14 mm wrench
- cheater pipe (for motivating rusty bolts)
- spray lubricant
- exhaust flange repair kit
- exhaust flange gasket
- tailpipe sealer
- hacksaw
- wire
Exhaust Leak Repair – Step by Step
The working environment underneath a Toyota Corolla is rather small, as anyone who has ever crawled under one can attest. For this reason, I recommend removing the last section of the exhaust system that includes the muffler. While perhaps not strictly necessary, it comes off easily and it will make everything easier to work with.
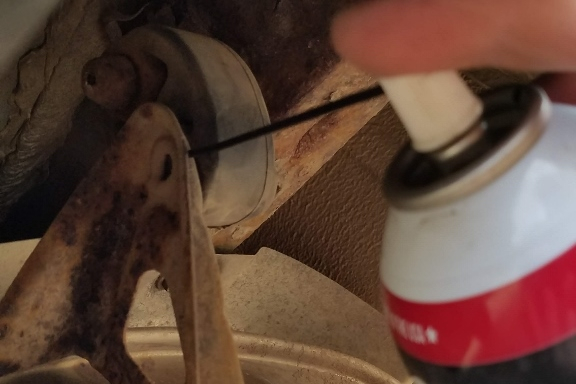
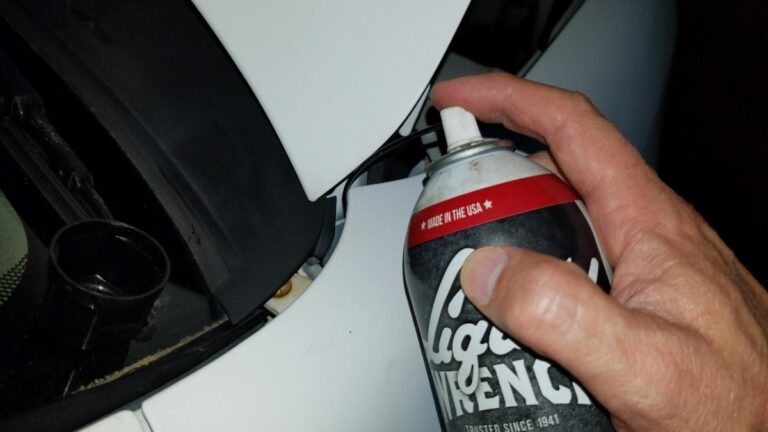
To remove the muffler, spray a little spray lubricant onto the rubber hangers.
Then use a large channel lock pliers to press the end of the stud in through the rubber hanger.
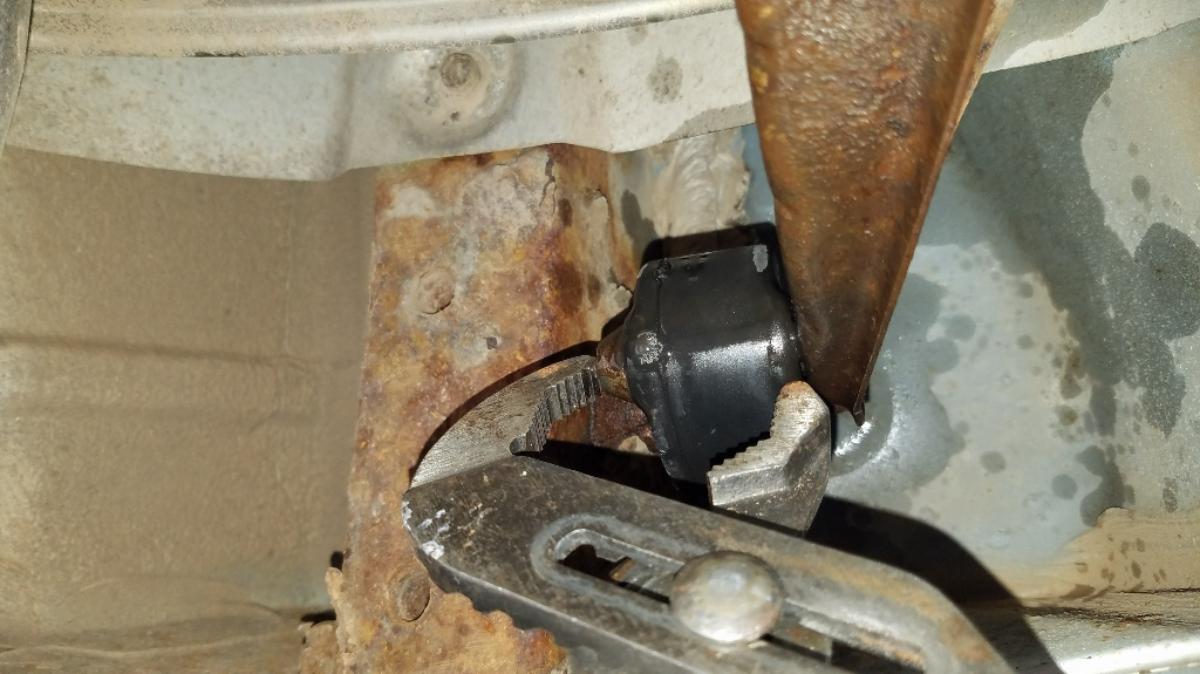
This will force the stud through the rubber hole. Then it is fairly straightforward to pull it the rest of the way off by hand.
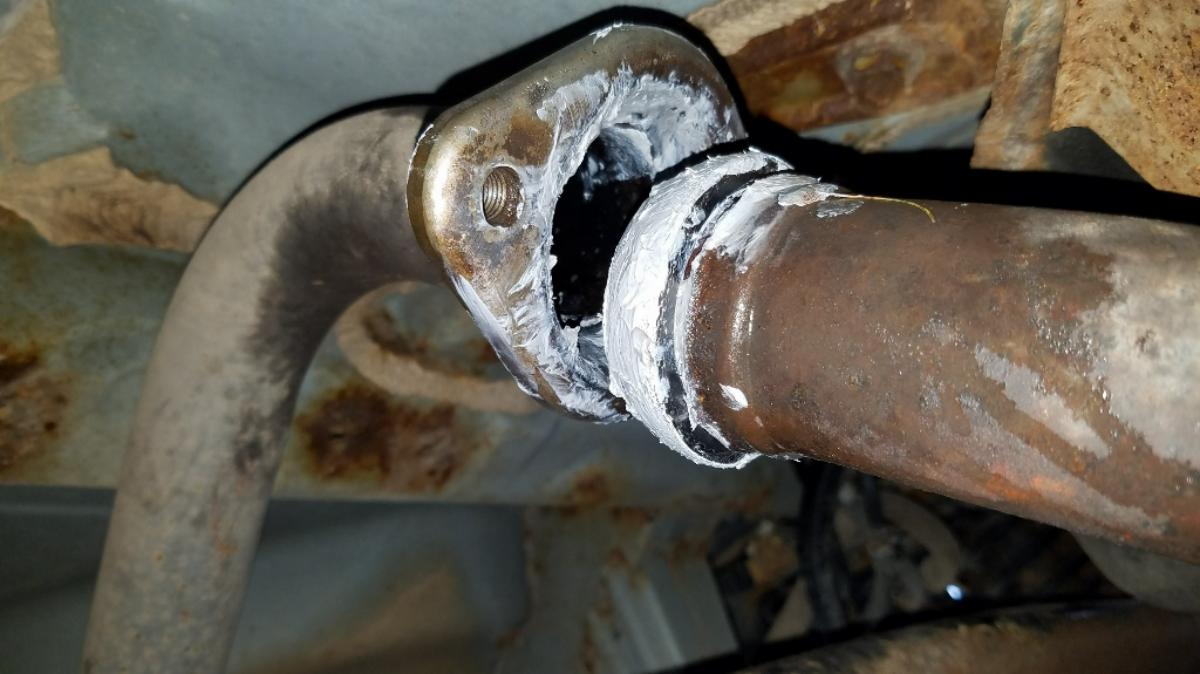
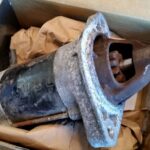
This is a view of the muffler removed.
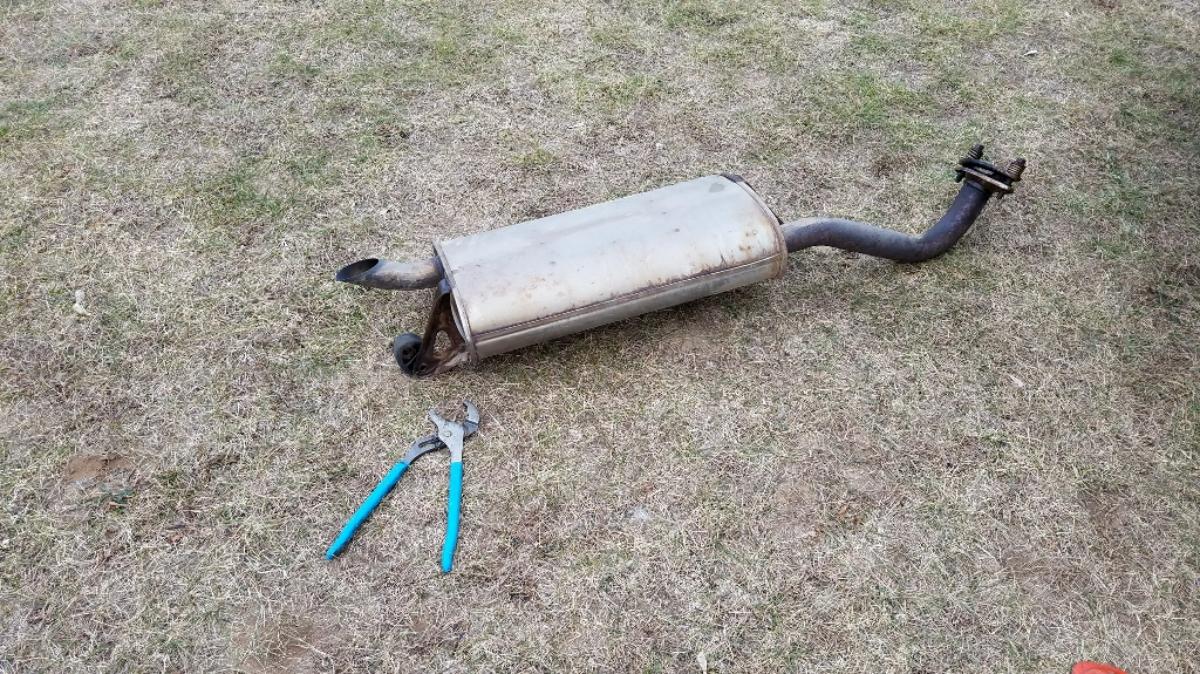
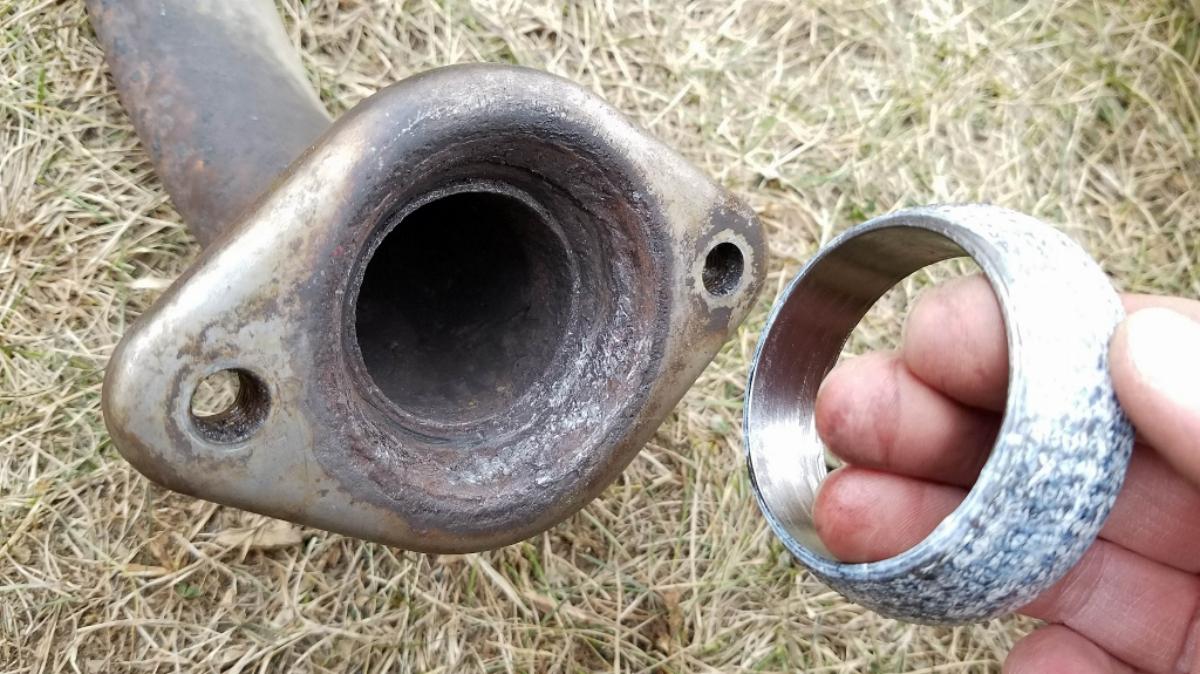
As you can see, the flange from the upstream portion of the exhaust has broken away from that, and the gasket seal between the 2 flanges has totally deteriorated. These things were the source of the leak that was causing the vehicle to be so loud.
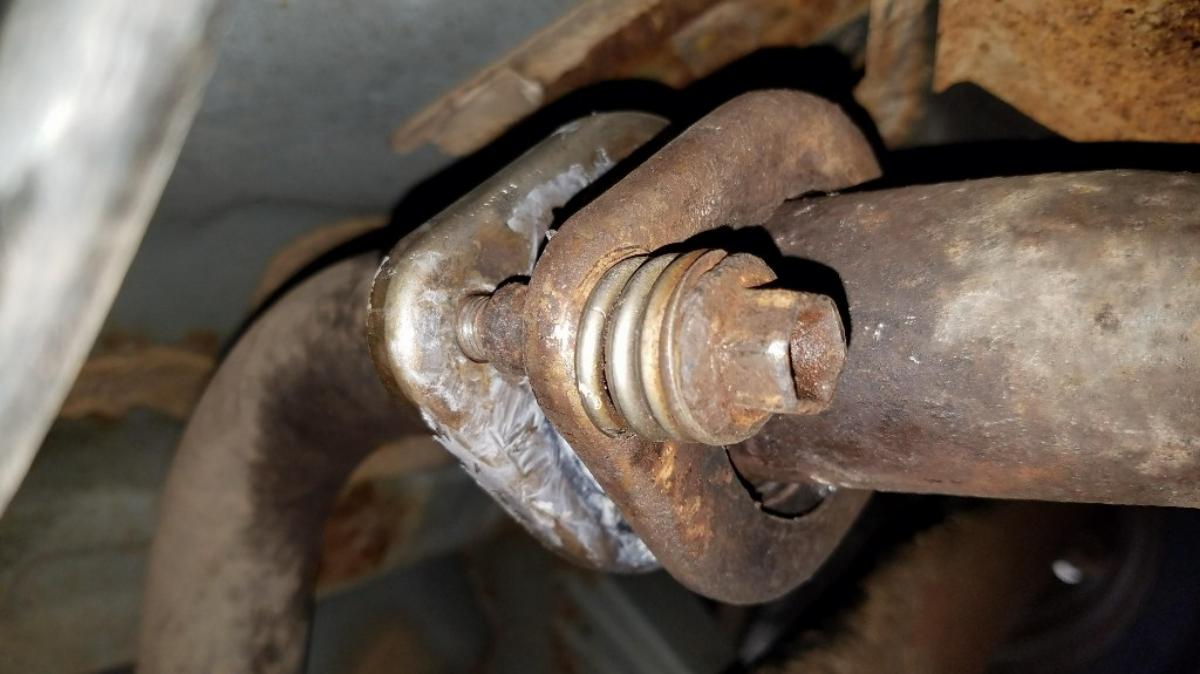
Remove the bolts. In my case they were very, very stiff. The ‘nut’ is welded to the muffler flange. Use a 14 mm wrench for this.
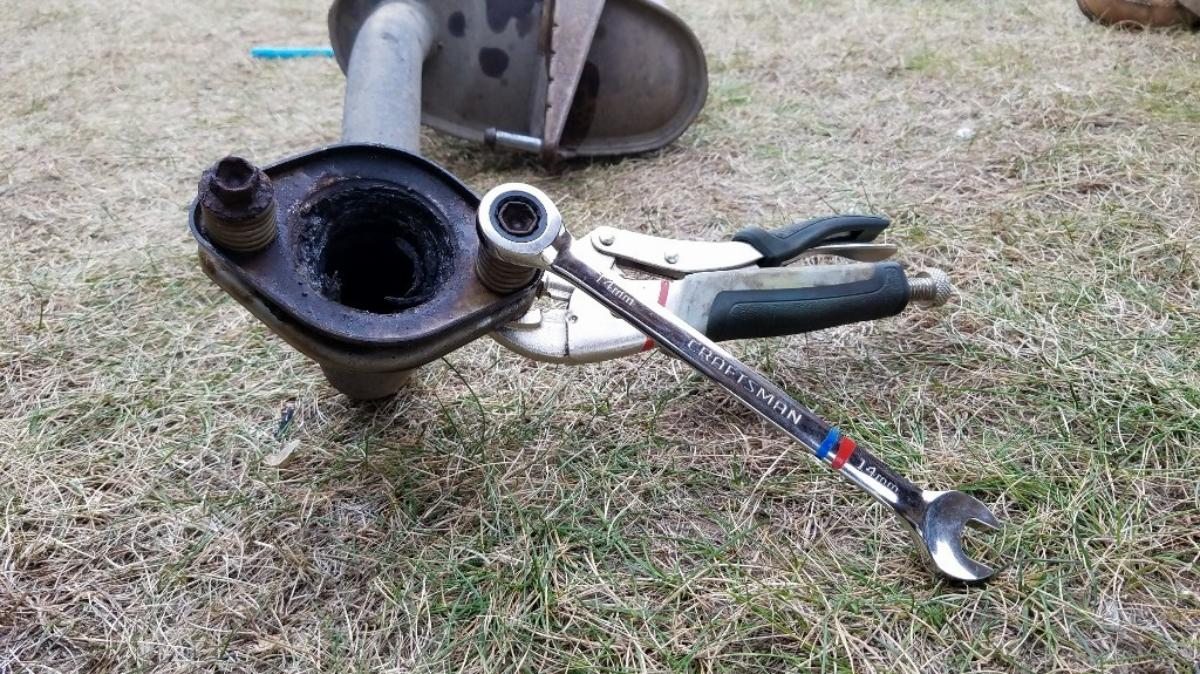
I used a cheater pipe about 4′ long. This made the removal quite a bit easier.
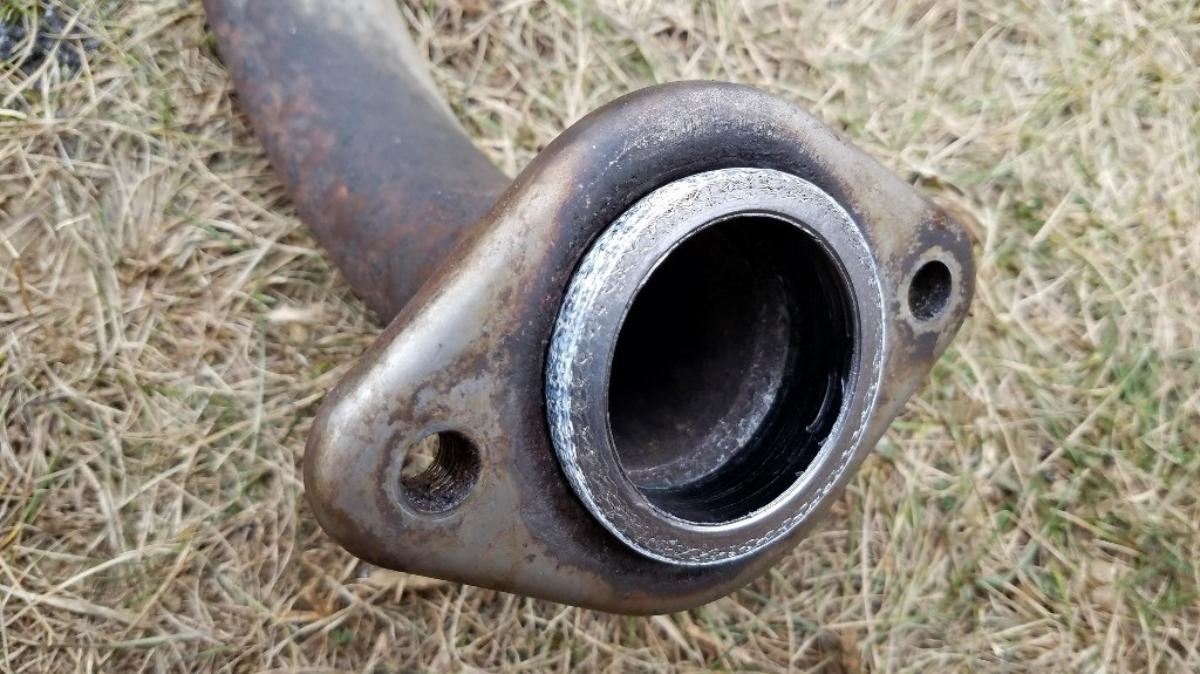
This is the new flange gasket seal.
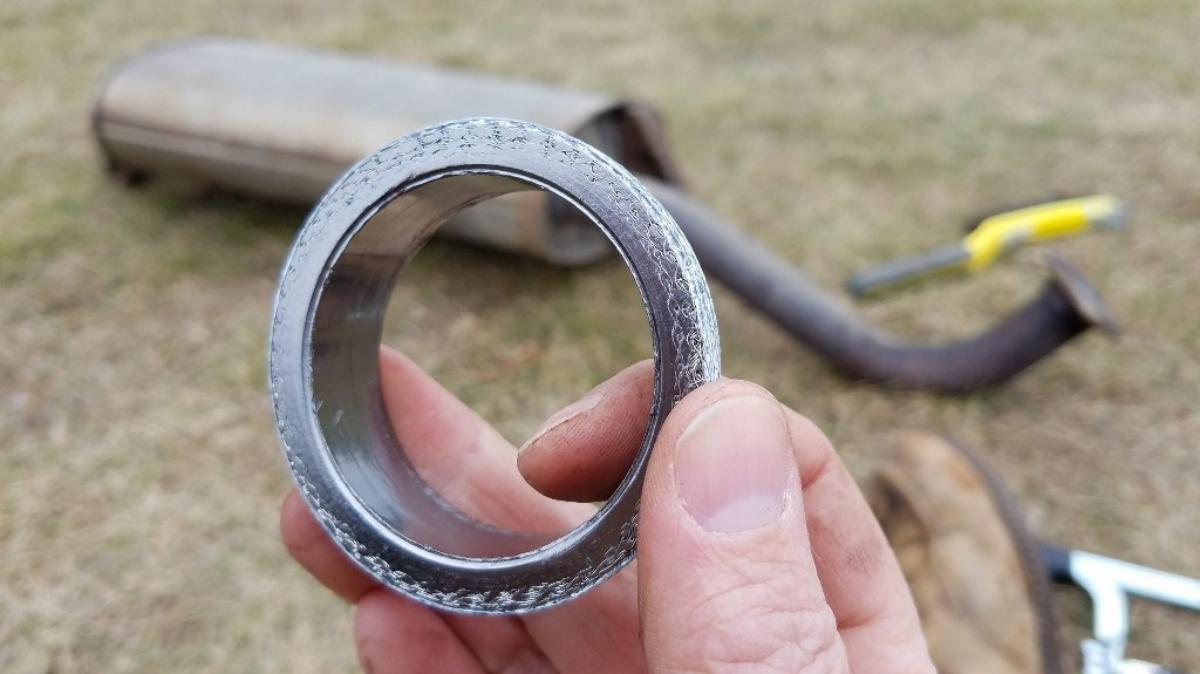
This is the seal installed.
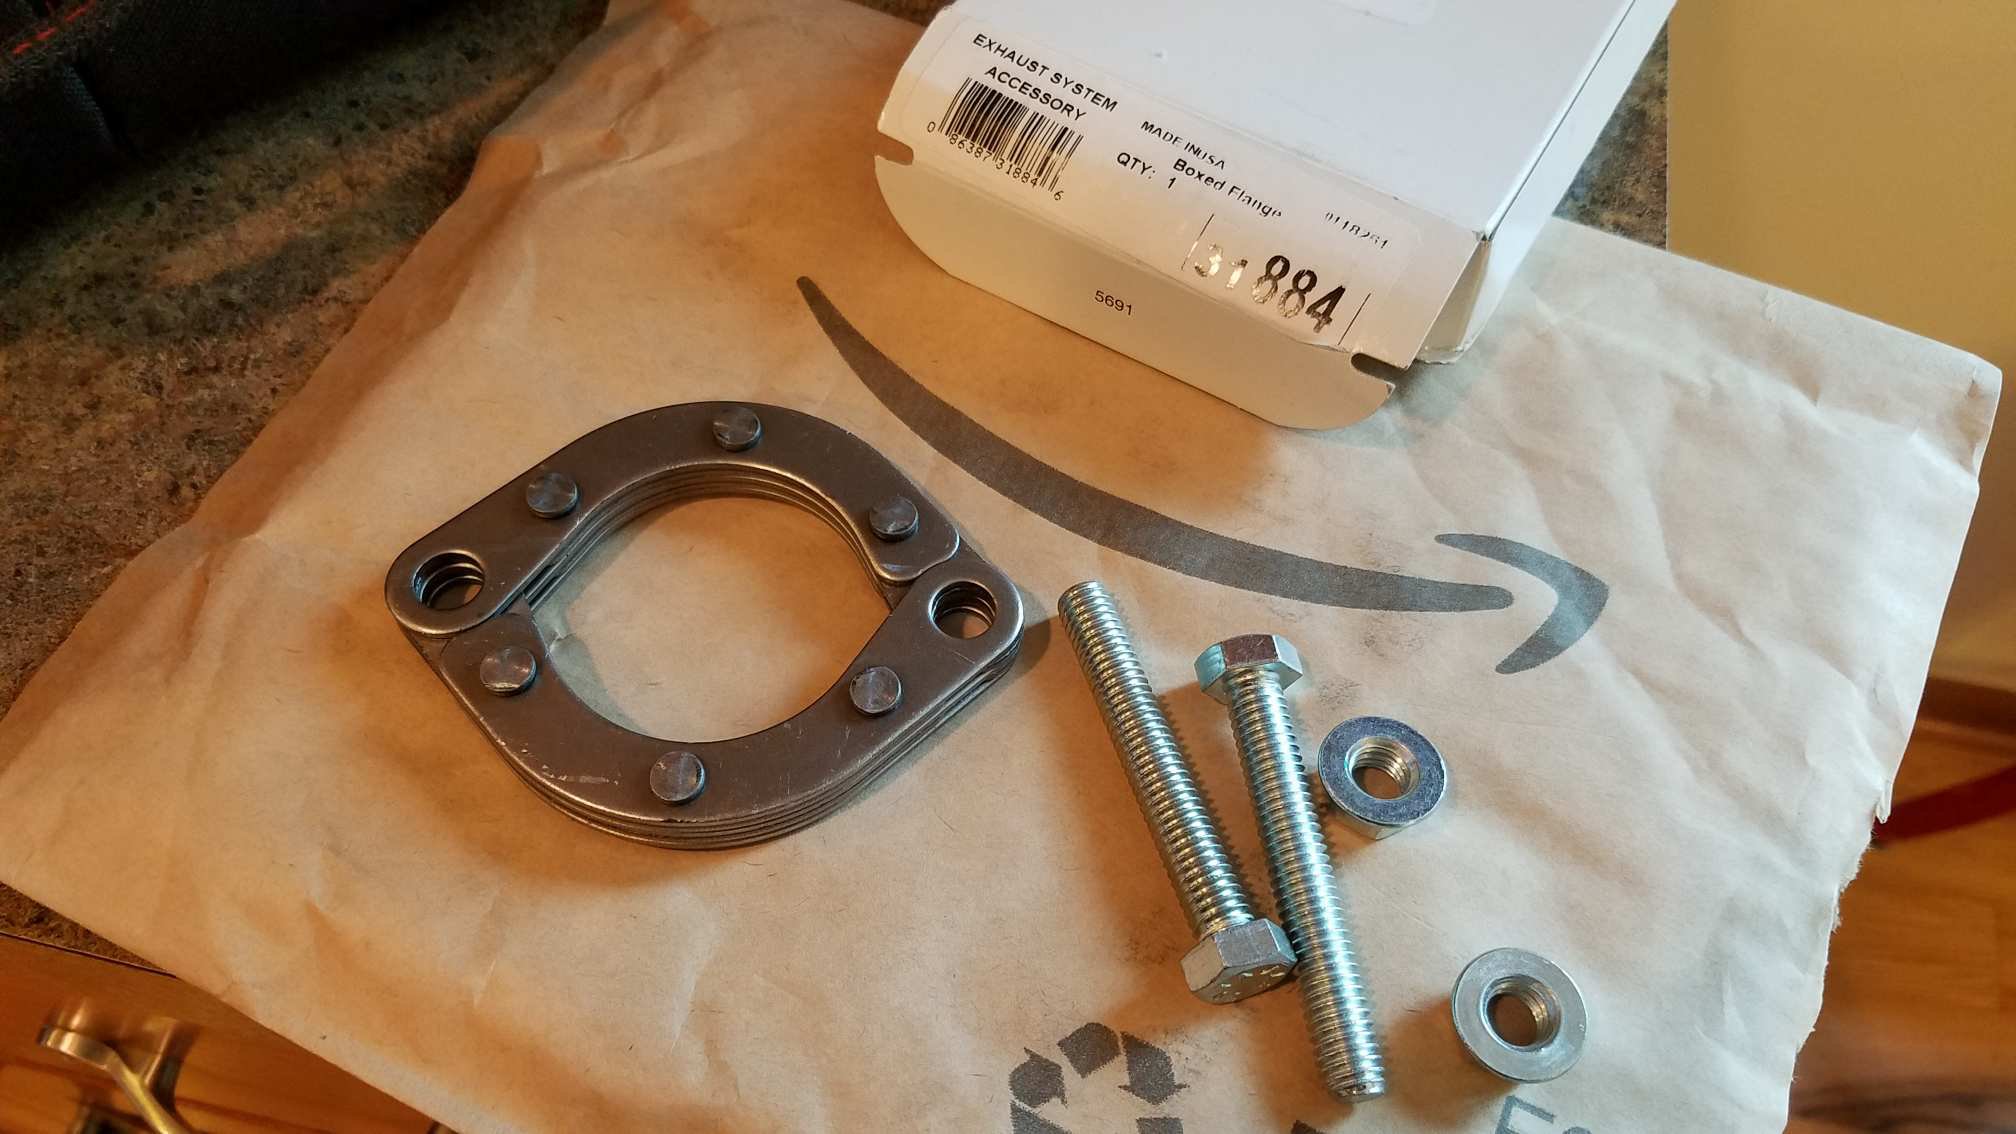
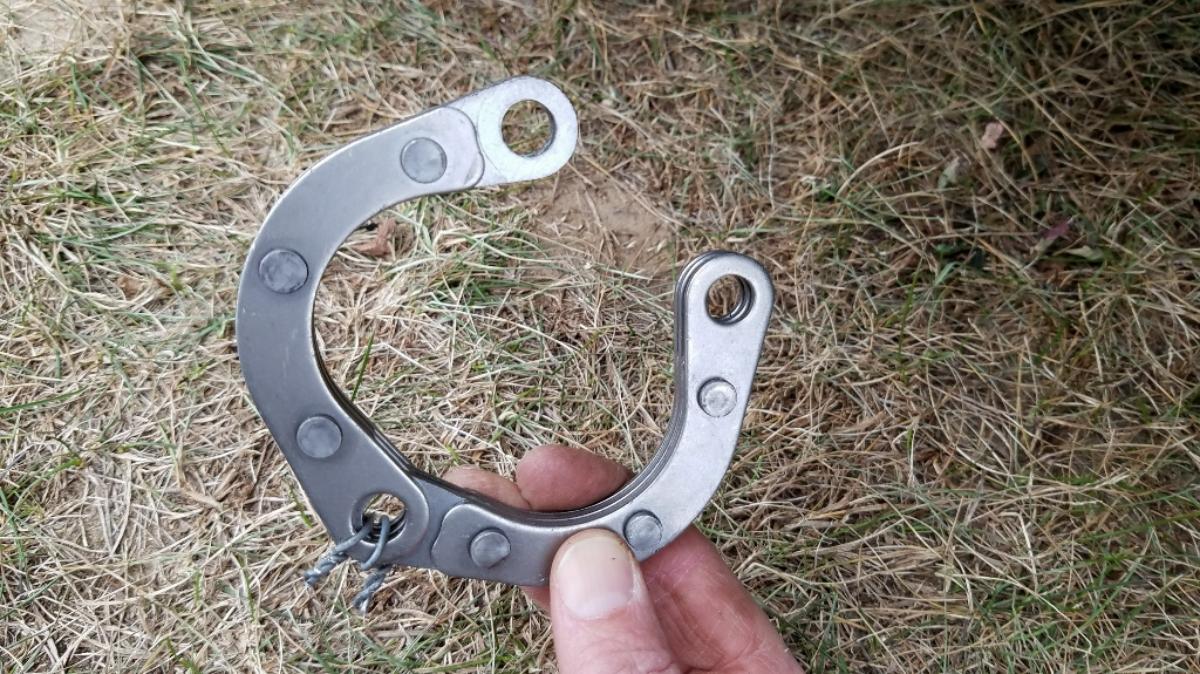
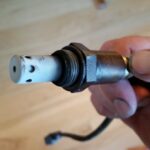
Next, here is the exhaust flange repair kit.
This device locks small enough so that it cannot slide over the shoulder in the pipe, as shown.

I then put the flange piece that was broken, behind the flange repair kit.
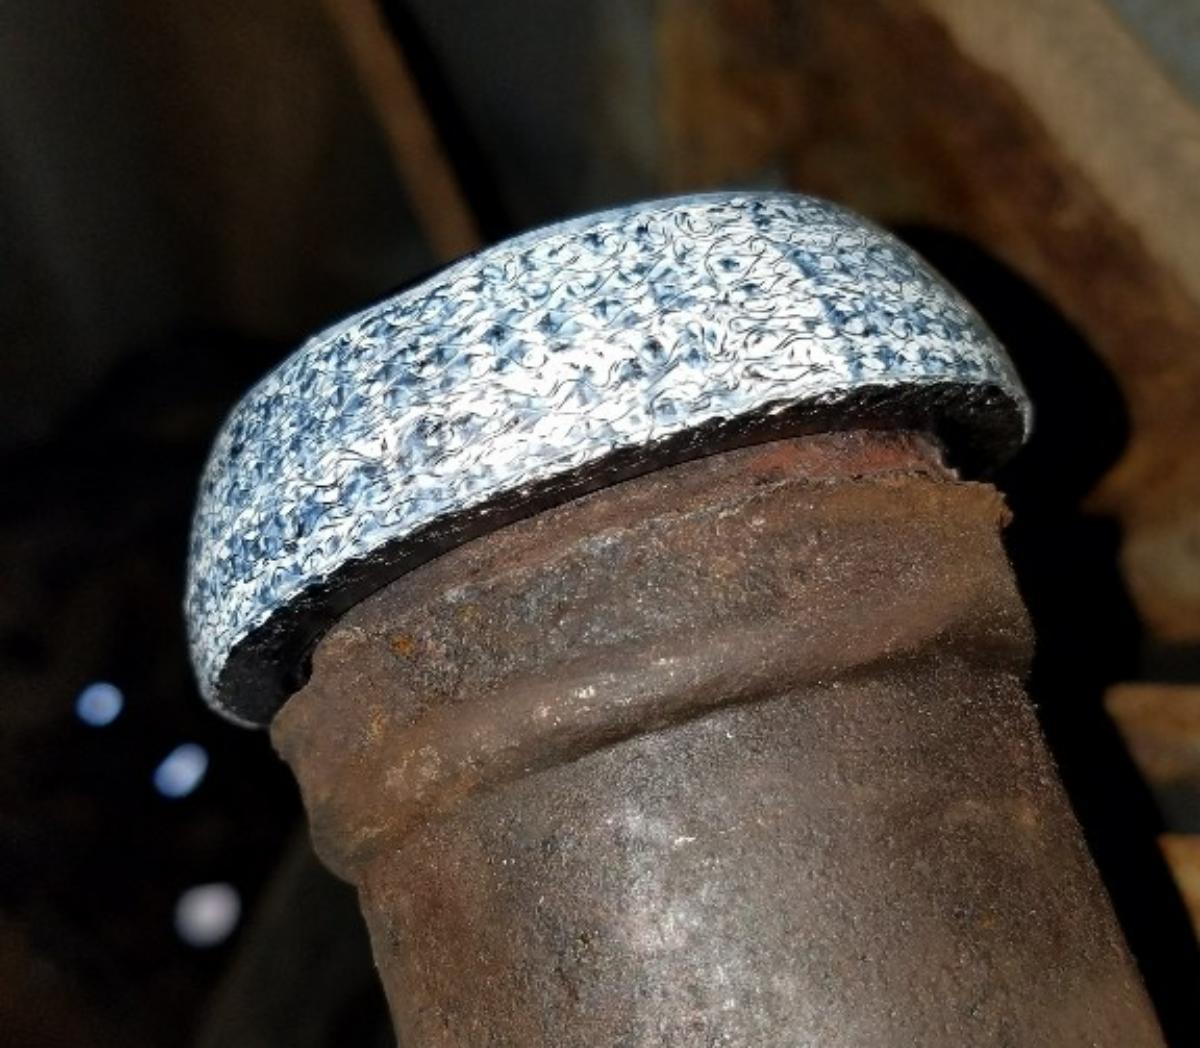
This shows the gasket seal, and where it fits into the muffler portion of the exhaust pipe.
And this is the seal inserted into the muffler portion with the flange.
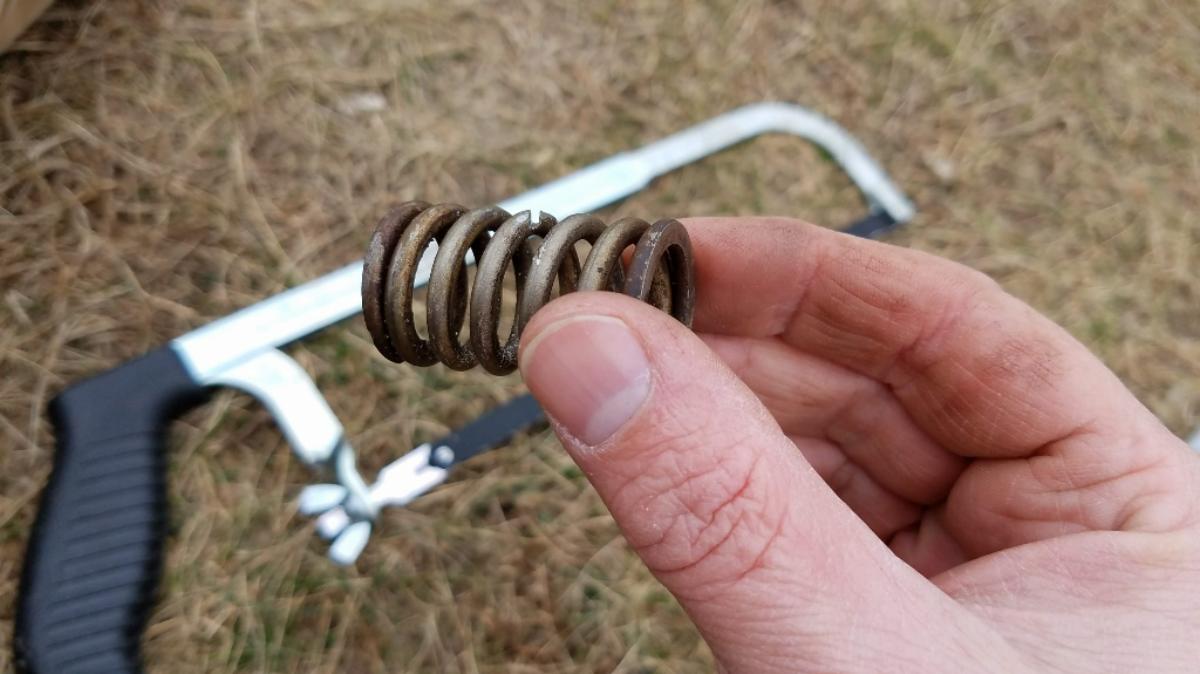
For this repair, the flanges will be further apart than they were originally (about 1/2 inch). For this reason, I chose to shorten the springs, but cutting one of them in half with a hacksaw, then using the 2 pieces, one for each bolt. Here is the spring almost complete cut through.
The flange repair kit has this piece. That can open up and be fitted over the exhaust pipe. Unfortunately the hole spacing does not match that of the original flanges, so it will be used to grab the pipe at its shoulder, with the flange placed over it, but without the holes aligned. I also used a bit of wire to make sure that this piece would not open up after installation.
This is a view of the gasket seal installed and how it will fit into the other exhaust pipe.
This is the order of pieces installed, before applying the sealant and tightening the bolts.
Now go ahead and apply the tailpipe sealer. In order to do so, it is recommended to wet the surfaces to be sealed. Then apply the sealant to all portions that you want to seal from exhaust escaping.
The joint with the seal and sealant applied.
Here the bolts are tighten up. If you cannot get the 2 flanges together, use a C-clamp to hold them together while you get the bolts in place.
The repair from a different angle.
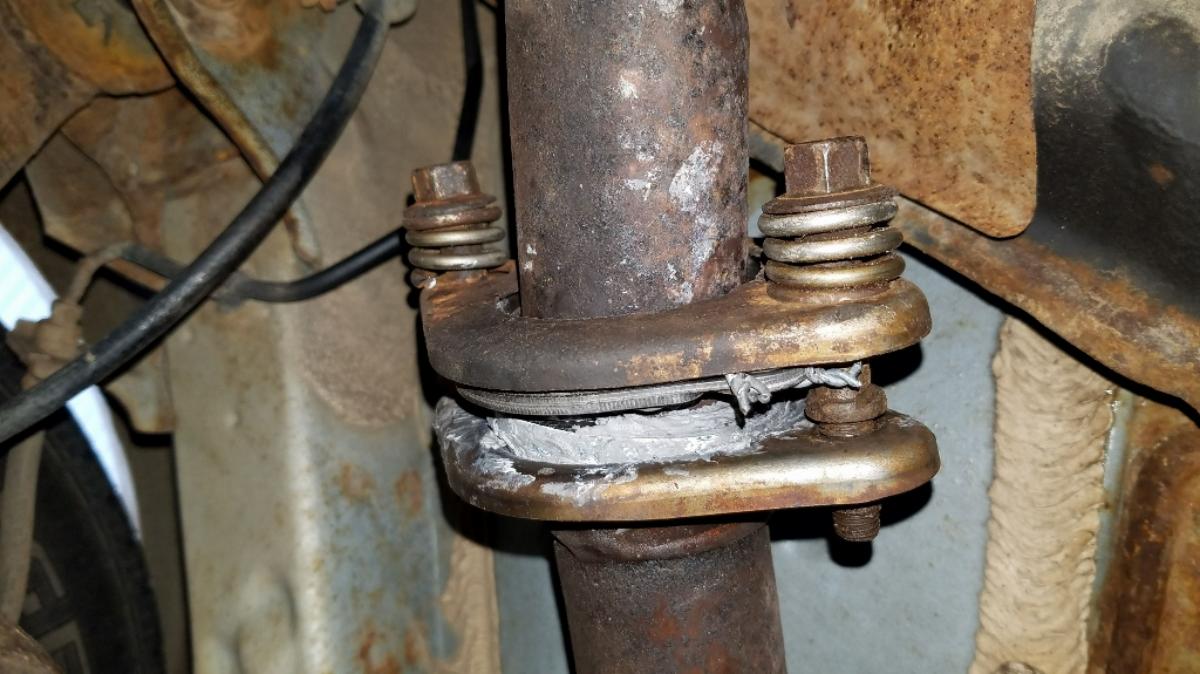
This is the final repair as seen from the front of the vehicle looking back.
And that’s about it! I hope this was helpful for you!
Click here to check out additional posts about Toyota Corolla maintenance!
Tools and supplies used for this repair:
- large channel lock pliers
- 14 mm wrench
- cheater pipe (for motivating rusty bolts)
- spray lubricant
- exhaust flange repair kit
- exhaust flange gasket
- tailpipe sealer
- hacksaw
- wire

Exactly I wanna work on my 94 corolla dx leaks exchaust. Took car to get an estimate at local shops, cost more than the price of a whole car. Nice step by step & pic’s
many THANKS
Yeah, I hear you!
A detailed, thorough and logical approach- very good.
EXCELLENT EXPLANATION AND PICS OF THE REPAIR….THANK YOU
Thanks, I’m glad it was helpful.
What’s a reasonable price a mechanic should charge for this?
Word of warning for anyone doing something like this, I do not believe that was permatex ( RTV) that was used as a sealant on the exhaust. It should be noted that standard Permatex ( RTV) lets off a gas that while curing will destroy 02 sensors in your exhaust system. Permatex does make O2 sensor friendly RTV like materials.