How to Replace the Drain Pump on a Maytag Bravos Washing Machine
Are you getting the “LD” error on your Maytag washer? This error code means “Long Drain” and suggests you either have a clog in the drain hose, or the drain pump has failed!
Follow this simple picture guide to replace a faulty drain pump. They don’t make washers like they used to, and these drain pumps seem to fail after about 5-7 yrs.
Note: PracticalMechanic.com is reader-supported. If you buy through links on our site, we may earn an affiliate commission – at no cost to you. Thank you for your support!
What you’ll need:
- vise grips or pliers
- flat-head screwdriver
- 5/16″ socket
- replacement drain pump (part# W10536347)
This repair will take about 30-60 minutes.
Maytag Self-Diagnosis Test
The washer has a self-check test that can be run to help determine the problem. The test is really easy to run and can help diagnose the issue you are having. Basically the washer quickly runs through all of its functions and then tells you which ones (if any) it was unable to complete.
Steps to Initiate the Self-Diagnosis Test on a Washing Machine (Maytag)
- Turn off the washer and unplug it for at least 30 seconds.
- Plug the washer in.
- Select any button (other than ‘Power’ or ‘Start’) and press it for 3 seconds.
- Release it for 3 seconds
- Press it for 3 seconds
- Release it for 3 seconds
- Press it for 3 seconds
- The display will show 8:88 then the diagnostic test will start.
The different steps are labeled C0 through C9 or so.
- C0 – Slow spin mode
- C1 – Hot and cold water valves open
- C2 – Cold water and bleach valves open (10 sec)
- C3 – Hot water and fabric softener valves open (10 sec)
- C4 – Hot and cold water and detergent valves open (10 sec)
- C5 – Agitate (15 sec)
- C6 – Circulation pump (10 sec)
- C7 – Drain pump Actuated
- C8 – Drain pump and slow spin
- C9 – Spinning Stops
- End of Test
If the test does not finish, and hangs up on one of the steps, that indicates which function is the problem. In my case, it stayed on C8 because the washer never drained. If you get the error code F32, this indicates a bad drain pump as well.
If you believe the pump is okay, but you just have a clog, check out this post on how to fix a clogged drain pump.
Procedure to Fix a Bad Maytag Drain Pump
Replacing the pump is pretty easy, 3 screws and 2 hose clamps. Follow these steps to replace the drain pump.
First, unplug the washer.
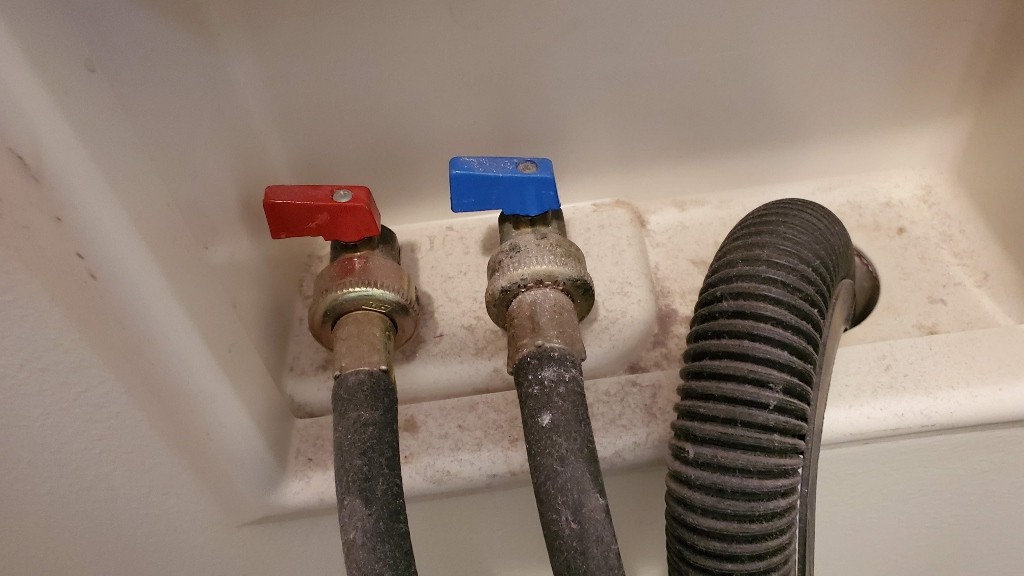
Turn off both the hot and cold water supply.
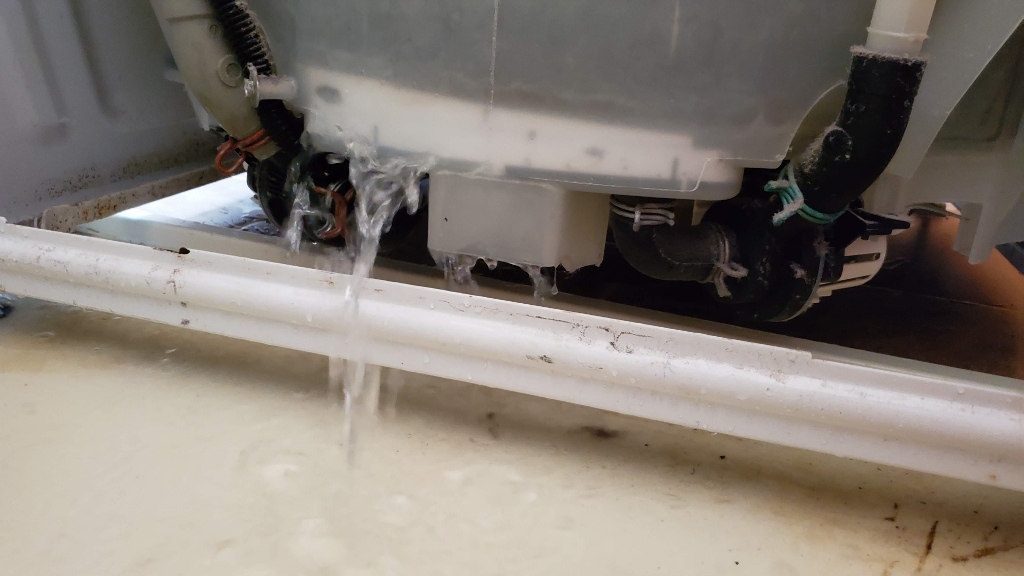
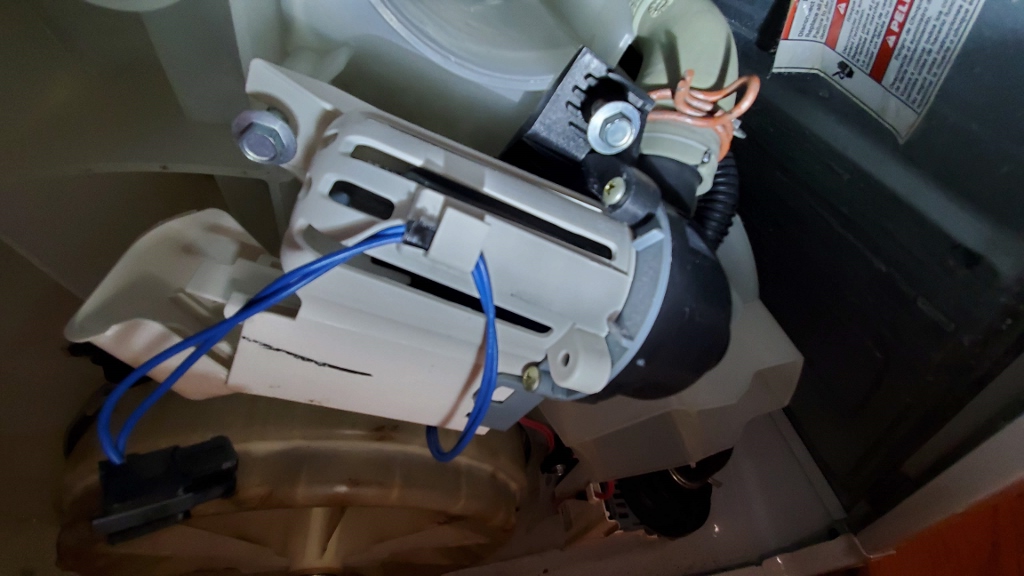
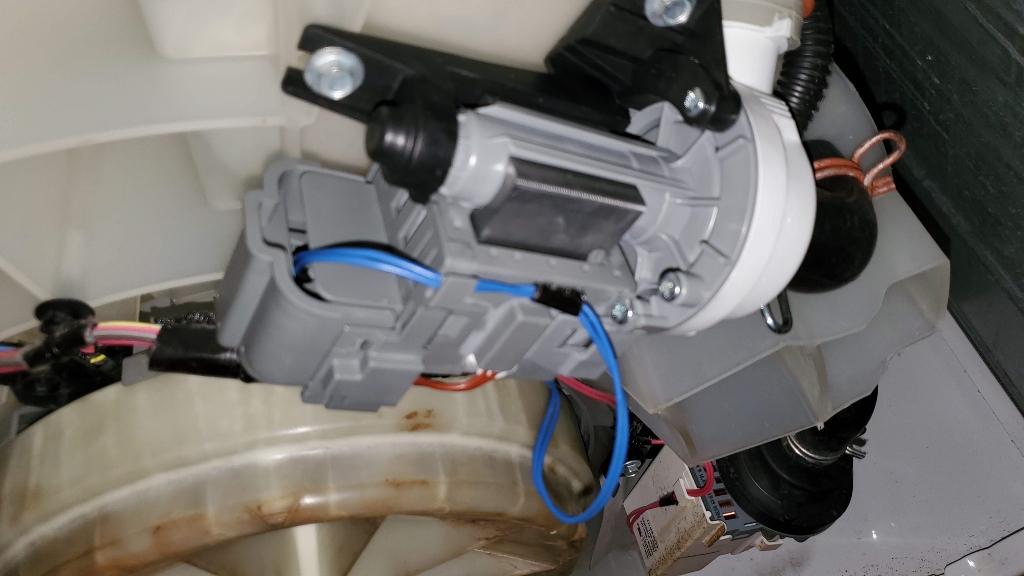
Move the washer to a location where you can get at the back of it. Here I have tipped the unit up in order to see the pumps underneath. The pump on the left is the drain pump that we will be repacing (note, in this picture, the drain hose has already been removed, we will do that in a subsequent step).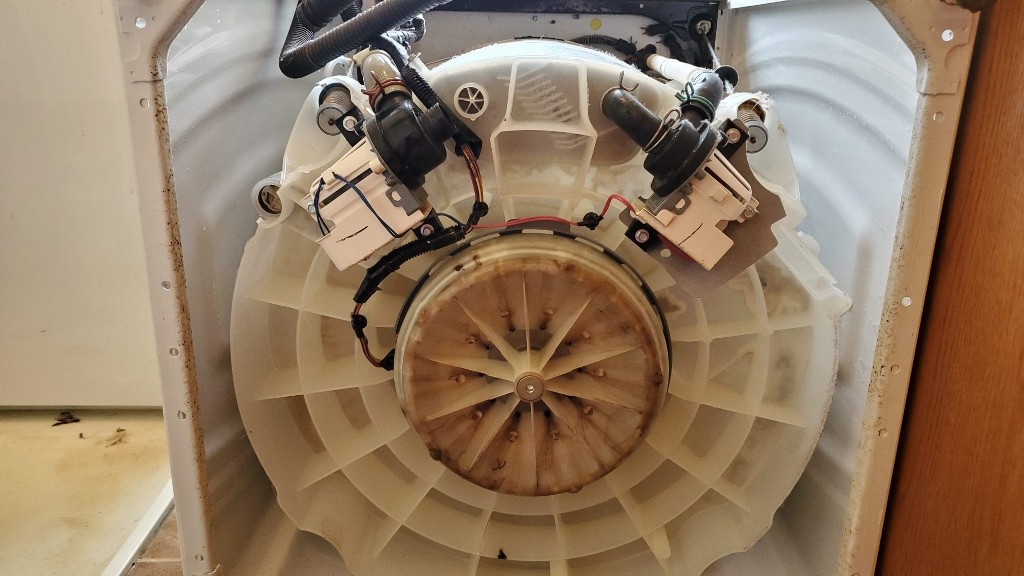
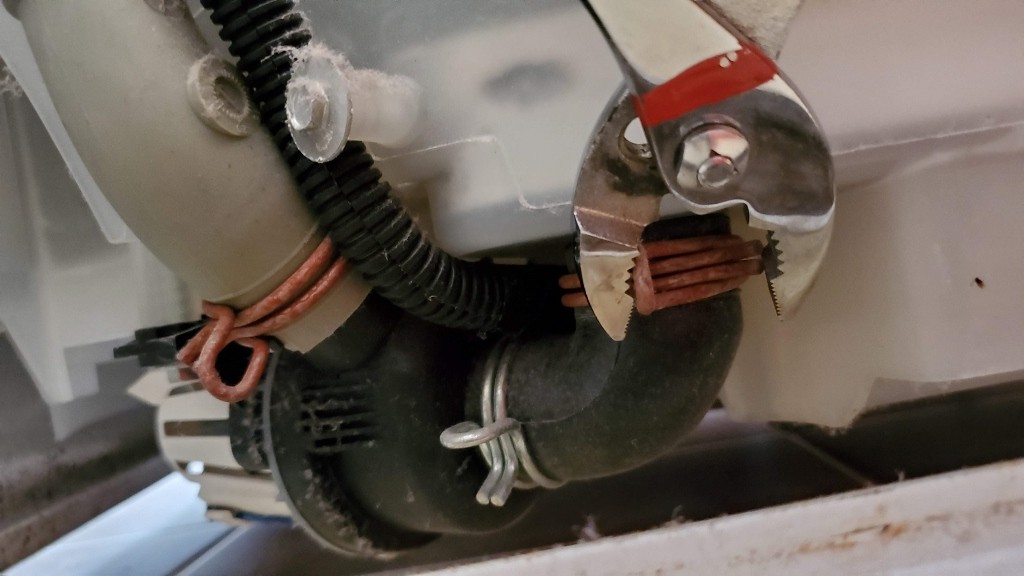
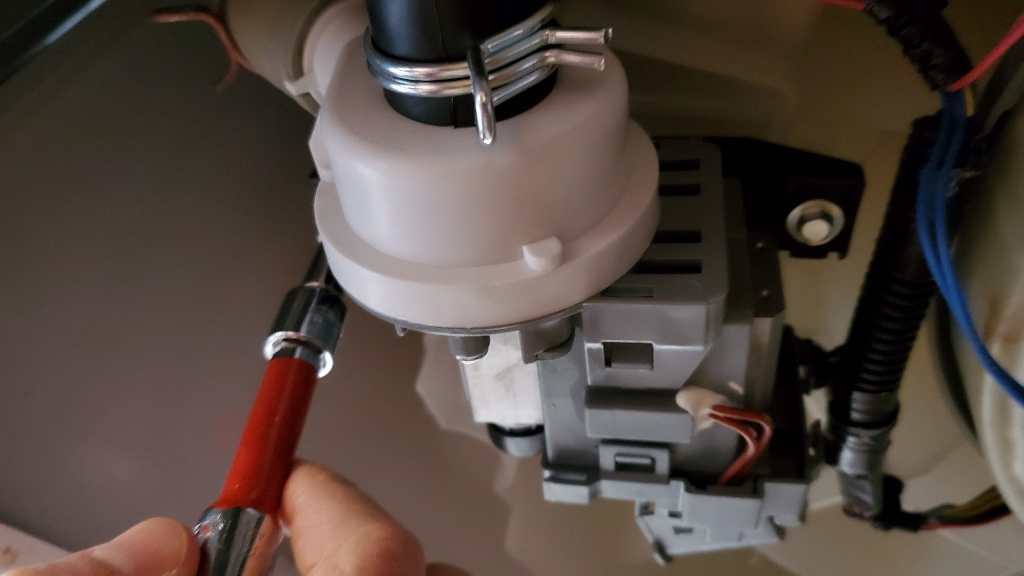
If your washer is still full of water (because the drain pump doesn’t work!), then you will need to drain the water out. Tip the unit forward slightly so you can get under it (maybe a friend can hold it, or prop it up with some detergent bottles). Then use a pliers or vise grips to remove the pipe clamp connected to the bottom of the tub and going to the pump, as shown below.
Slide the clamp down.
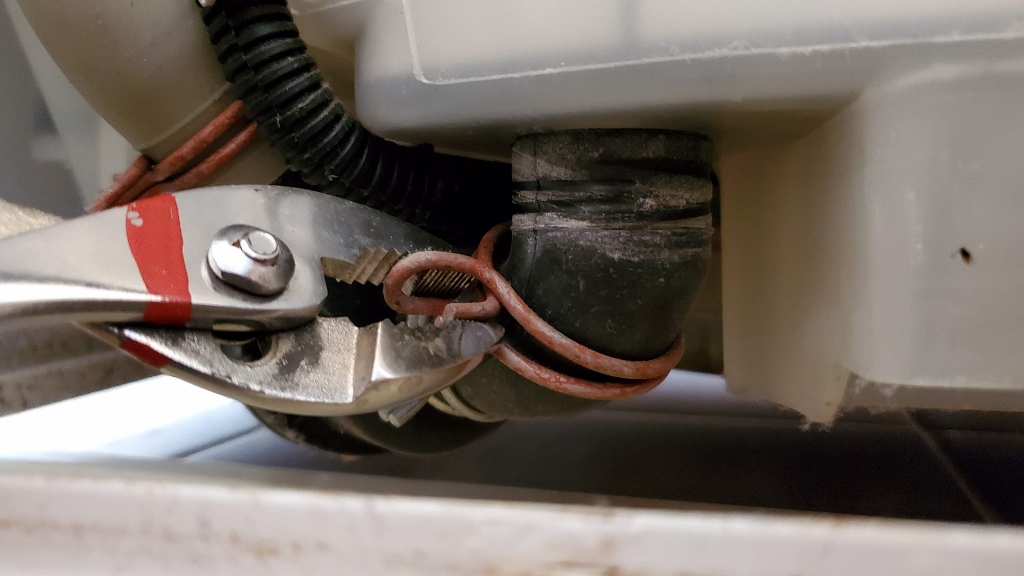
Pull the rubber hose off of the tub.
ATTENTION! water will start flooding out of the tub (if it was full of water). Use a drain pan, or be positioned over a floor drain for this step!
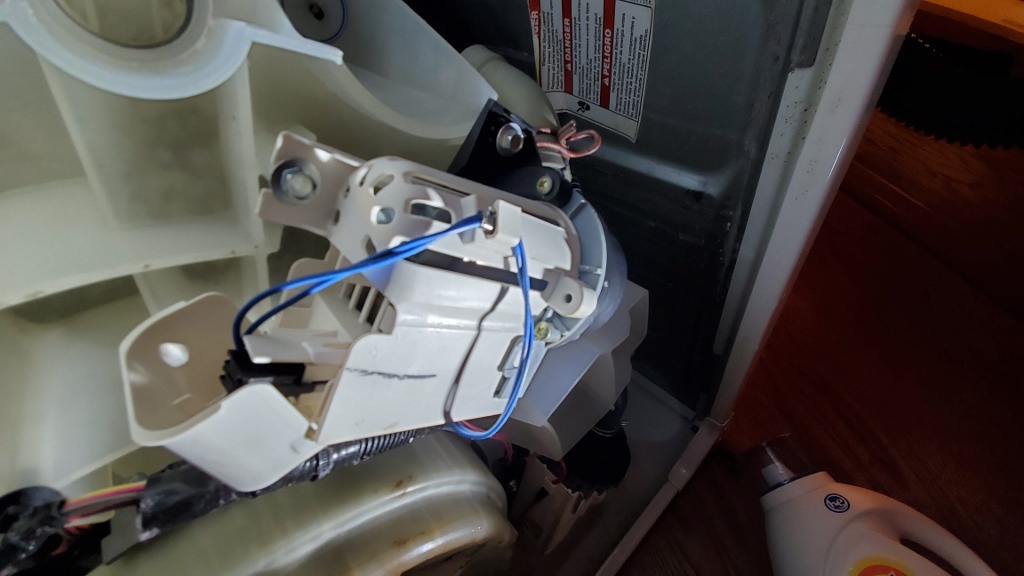
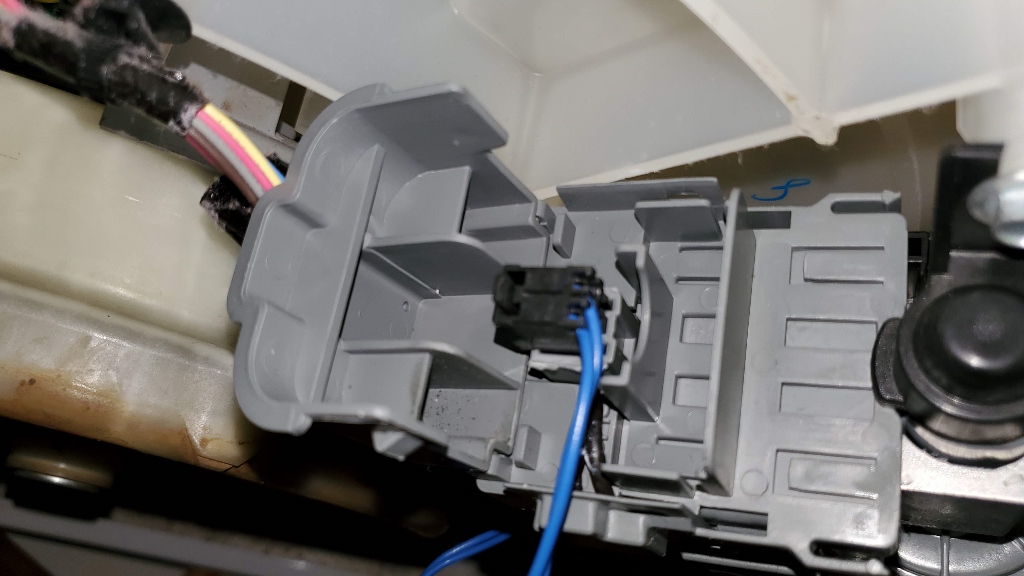
Use a flat-head screwdriver to pry open the plastic cover that houses the electrical connection. There are 2 plastic tabs, one on each side. It doesn’t matter if you break these off, since you will be replacing it anyway.
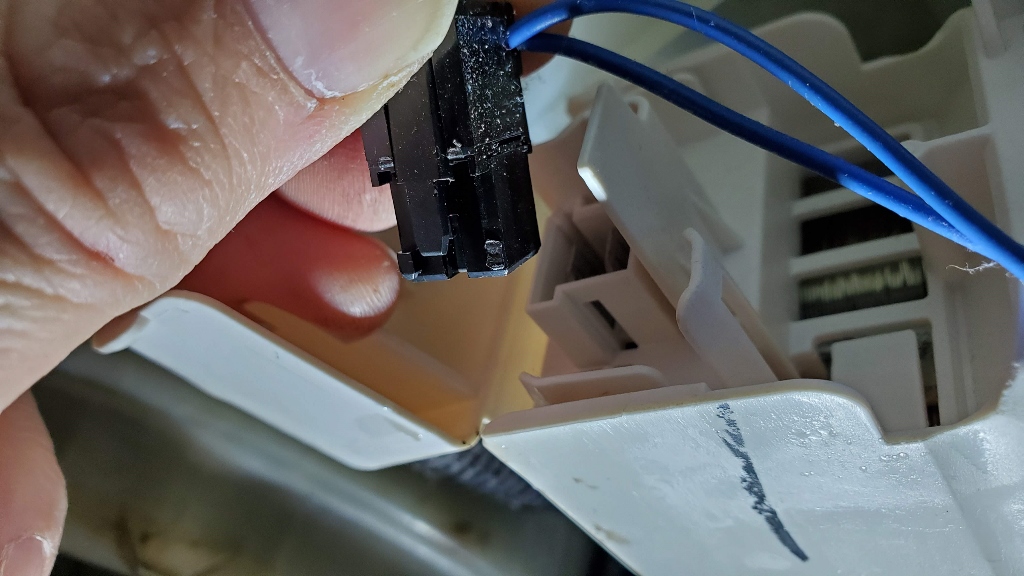
Press the tab on the electrical connector while pulling it out to disconnect it.
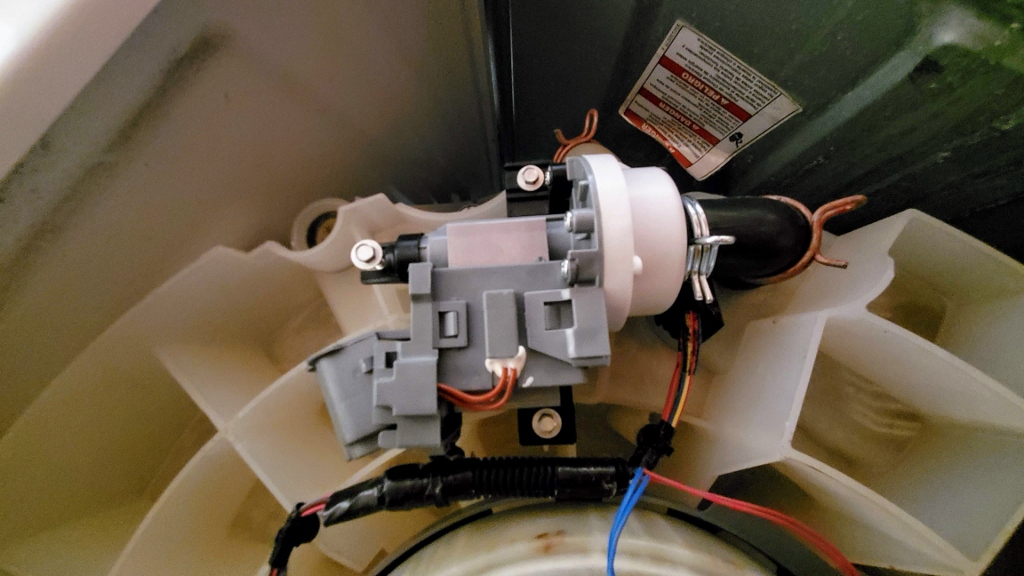
Next, remove the three 5/16″ socket-head screws that hold the pump in place. (2 of the screws are visible in this view, the other one is behind.)
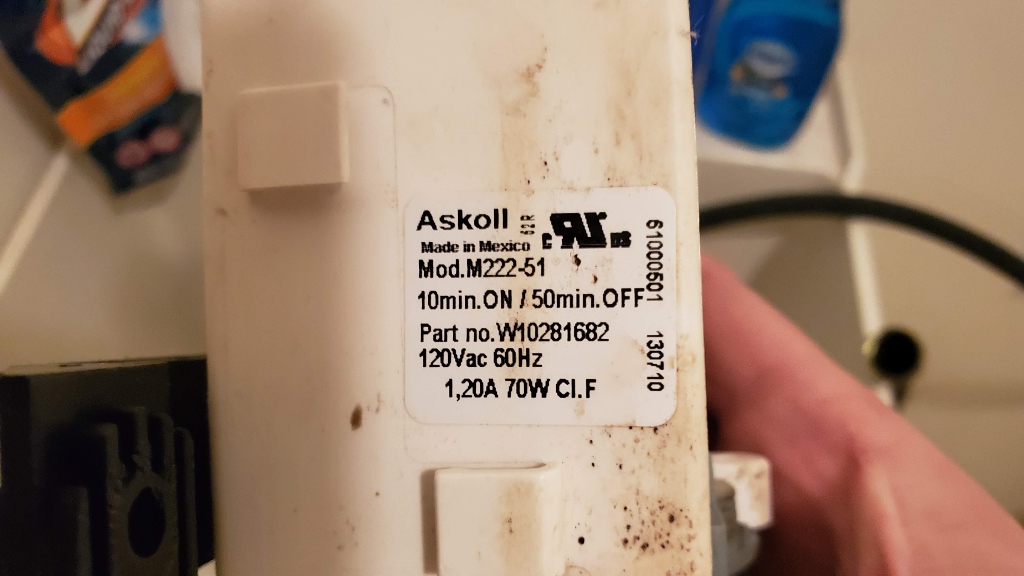
This is the information placard on the old drain pump I removed. Note that the old part number was W10281682. I replaced it with this pump: W10536347, which is the newer version and is backward compatible. This replacement pump has been working great for me since I replaced it, and I recommend it.
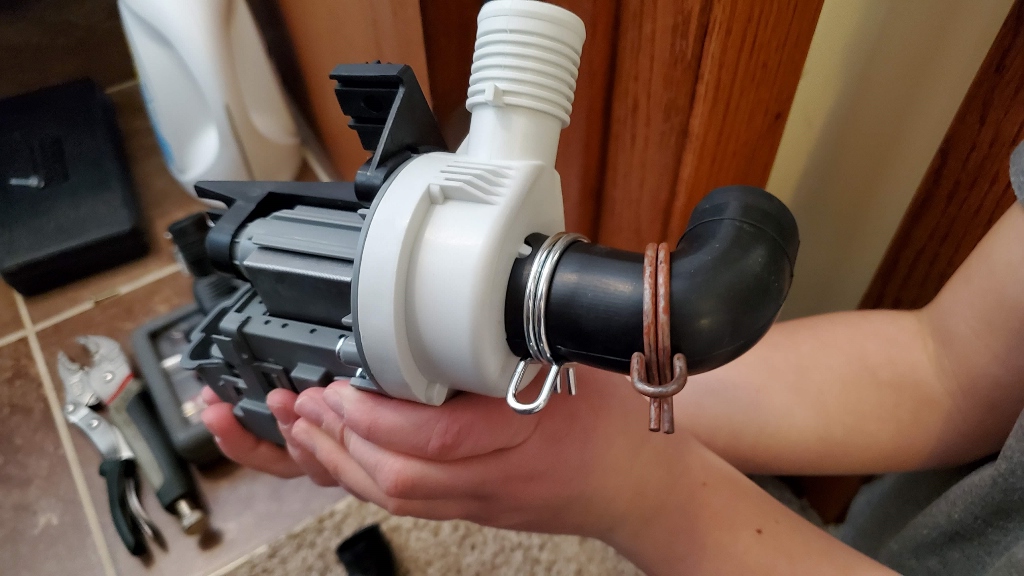
Here is a view of the old pump and new drain pump side by side for comparison.

One thing I was concerned about was the electrical connector. I wanted to make sure they were compatible, and that the connector would fit into the new pump. I couldn’t find this view on any of the product pages for this pump, so I hope this helps you. The connector socket WAS compatible with the existing electrical connector. In this view, the old pump is on the right and the new pump is on the left. The connector is rotated 90 deg but the size and shape are the same, so it works.

The new pump comes with the short rubber hose. Take the old hose clamp off of the old one, and slip it onto the new one.

Fit the hose onto the drain hole on the bottom of the tub and use a pliers or vise grips to slide the hose clamp up and into place.
Do the same for the upper drain hose.
Then use the existing 3 screws to mount the new pump in place.
This is a view of the new pump installed. Next we need to connect the electrical connector. Flip the back plastic cover open.
Line up the tabs, and push the electrical connector into place.
Make sure it is tight, then snap the plastic cover closed, making sure the wire is not being pinched. Feed the wire into the small plastic clip as shown, so that it is not dangling loose.
Now that the pump is replaced, reconnect any hoses you may have disconnected. Tip the unit upright, and turn on the hot and cold water supply.
You’re all set!
Used in this Repair:
- vise grips or pliers
- flat-head screwdriver
- 5/16″ socket
- replacement drain pump (part# W10536347)
Is your washer loud, like a jet engine?!?! Read this for instructions on replacing the washer bearing!
Thanks for visiting practicalmechanic.com!

0 Comments