Easy Fix for a Slow Filling Noisy Toilet – Includes Pictures
Does your toilet take forever to drain? Or do you I had this issue and solved it in 15 minutes with a new fill valve! I wish I had done this years ago; now the toilet fills twice as fast after a flush – less than 30 seconds!
Note: PracticalMechanic.com is reader-supported. If you buy through links on our site, we may earn an affiliate commission – at no cost to you. Thank you for your support!
The main reason that toilets begin to fill slowly is that over time the fill valve starts to get clogged with scum. You can try cleaning out the old fill valve as one way to solve this issue, but there are so many little nooks, crannies, and small passageways where the water comes through that it is really tough to get it all, and you end up needing to clean it again in short order (at least I did).
It saves time and frustration to just replace the old fill valve since they are so inexpensive anyway.
Tools and Supplies Needed:
There really aren’t too many tools required. Mainly just the new fill valve.
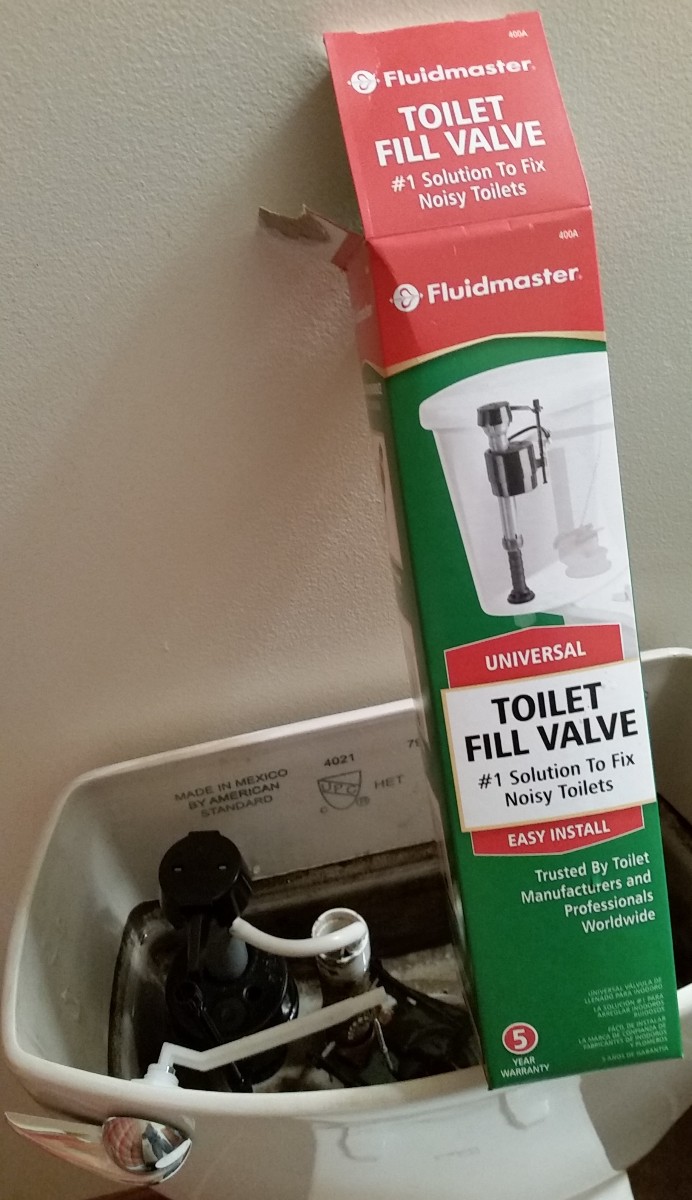
- toilet fill valve – ‘Fluidmaster 400AH‘
- catch pan or bucket (maybe some old rags)
- pliers
Replacing a Fill Valve on a Toilet Step by Step Procedure
The first step is to turn off the water supply to the toilet. This is usually a small valve near the wall where the supply water comes in. Turn it 90 degrees to the ‘off’ position.
Next, place a catch pan or bucket underneath the joint where the water supply line attaches to the toilet.

Use your hand or a pliers to unscrew the supply line. Also unscrew and remove the plastic retaining nut on the bottom of the old fill valve.
Note: Water from the tank will begin dripping out. Make sure the drain pan is handy to collect all the water from the tank.

Now, inside the toilet tank, unclip the black plastic lever from the handle, and remove the tubing by pulling off of the old fill valve.

LIft the old fill valve out and set it aside.

Take the new toilet fill valve, and install it in the opposite way that you removed the old one. I used the Fluidmaster 400A this time, but in the future, I would recommend the ‘Fluidmaster 400AH‘ which is also compatible with newer high-efficiency toilets AND has a restrictor valve that can be used if your fill valve is whistling.
Before you put the cover back on the tank, make sure to double check a couple of things:
- Make sure the lever arm and float are not caught or binding on anything (such as the little metal chain).
- Don’t over-tighten the plastic nut on the bottom of the toilet. Hand-tight is enough, you don’t want to crack the plastic. One suggestion is to use rubber gloves to tighten it, that way you can get a good grip, get it nice and snug, and not over-tighten it.
Make sure everything is connected, including the tubing and the plastic lever. As well as the supply line of water. Then try it out by giving it a flush and prepare to be amazed at how quickly it fills!
Thanks for visiting PracticalMechanic.com!
Tools and Supplies Used:
There really aren’t too many tools required. Mainly just the new fill valve.
- toilet fill valve – ‘Fluidmaster 400‘
- catch pan or bucket (maybe some old rags)
- pliers