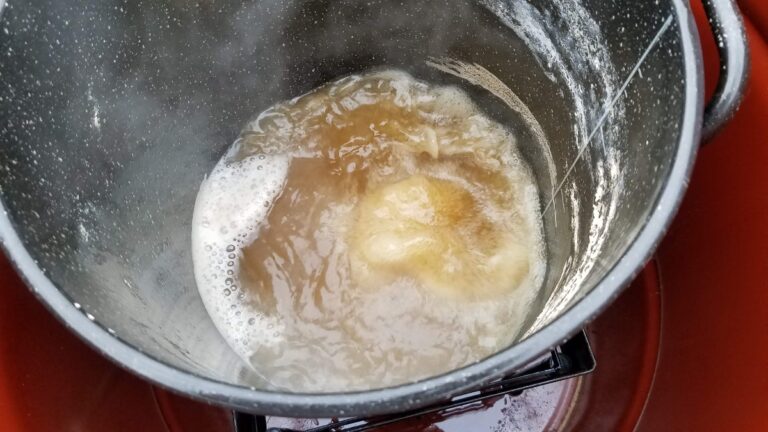
How to Perfect the Finishing Boil for Maple Syrup
We’ve Moved to HowToMakeMapleSyrup.ORG!
Click here for my recommendations on Maple Syrup Making Equipment.
Please click the link below if you are not automatically redirected:
How to Perfect the Finishing Boil for Maple Syrup
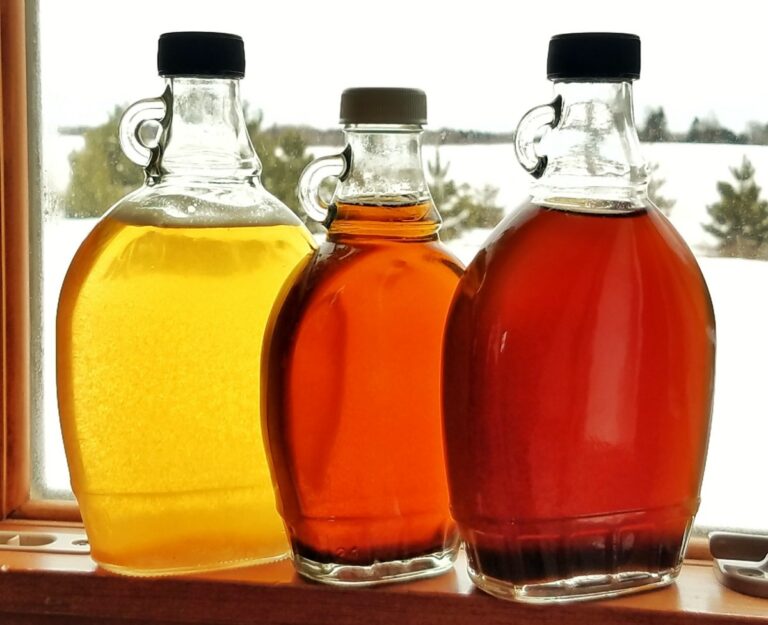

I have been making syrup for the past 5 years. It is great to get the kids involved and a fun family project. Plus the juice is worth the squeeze! I used to mix the sap at different boiling points thinking i was speeding up the process but it only made the syrup darker in color. I think keeping the batches separate makes it better. Great posts on here!
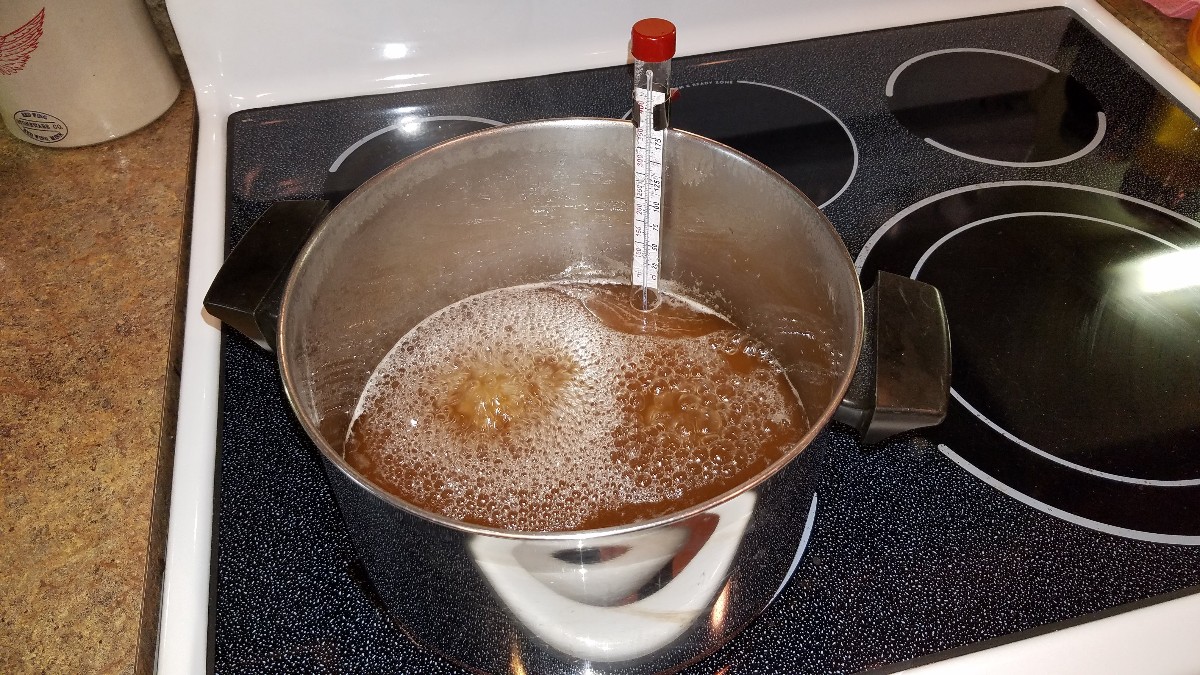
No need to filter at 215. Keep boiling. Everything will filter out when it’s syrup. Also, no need to let it cool to 180. That only allows syrup to thicken up and take more time to run through the filter. Filter as soon as you have syrup, right around 219. With that being said, the boiling point of water can change through the day so use a hydrometer. Faster than a refractometer. Keep it simple. 40 years of sugaring here.
Thanks for a great article! I’ve been looking for tips to get our finished syrup to not be cloudy with sugar sand this year, and just generally improve our finishing process. I’ll definitely be looking into getting a refractometer.
I have a question on step 5 of the process where you’re doing your final filtering from one pot into another pot. How do you maintain the temperature so it doesn’t get too cool to can it afterward? Are you giving the “final” pot some heat to keep it warm, or do you not usually run into trouble canning it from the final pot?
Thanks!
Thank you!
I usually just can right after the final filtering without re-heating. The jars/lids still seal up just fine at that temperature.
All the best!
Both the refractometer and filtering after letting it cool to 190 were awesome modifications to our process! The refractometer helped us cook to a more syrupy texture than our thermometers told us to use, and the filtering after cooling produced very clear syrup. Thank you!
I’m so glad to hear it! Thank you for the feedback, it will definitely be helpful to others. All the best to you!
* made syrup with my dad and he used milk in the process to clean the syrup can you explain where in theprocess that is done
Hi Sherry!
What a wonderful memory to have of making syrup with your father! Yes, adding whole milk (some use egg whites) to the final boil is said to help clarify the syrup. The idea is that as the milk curdles, it attracts particulates and sediments, causing them to stick together. The curdled milk, and anything else it has attracted, floats to the top of the boiling syrup. Use a skimming spoon or strainer to remove it.
If you are going to use this method, add the milk shortly before the syrup is done, continue boiling until the milk curdles, then skim it off. At that point, your syrup is done!
Good luck and thanks for the cool story!
Richard
We are making syrup with our grandson, tapping trees in our neighbourhood. We have finished almost 4 gallons already, but tonight I boiled the syrup more. I bought a hydrometer but it did not come with a cup. I decided to get to 219 and boil for a few minutes. I’ll calibrate my thermometer tomorrow!
Thank you so much for the kind words, DW!
I’m glad to help and glad to hear you’ve got your first batch already! Good luck on the rest of your season!
I boiled my sap in batches over the last week or so. I took to 219° by my thermometer but it didn’t foam up at all. Can I take the 4 quarts I have and pour them into a pot and finish them? Awesome article, thanks for putting it up!
Hi, as long as the batches haven’t spoiled (been refrigerated or sealed), yes, you can certainly put them in a pot and continue boiling. That should be just fine. Final product may just end up a bit darker.
Concerning the 219 temperature, it may be that the boiling temperature is higher at your location (eg. due to altitude). To test this, you could boil a pot of water and measure the temperature while boiling, then add 7 deg to that value to determine the temperature at which your syrup is done. This has the added benefit of calibrating out any error in your thermometer.
I has a candy thermometer that drifted over the years, and was about 10 degrees off! Had to boil sap to 229F on that thermometer!)