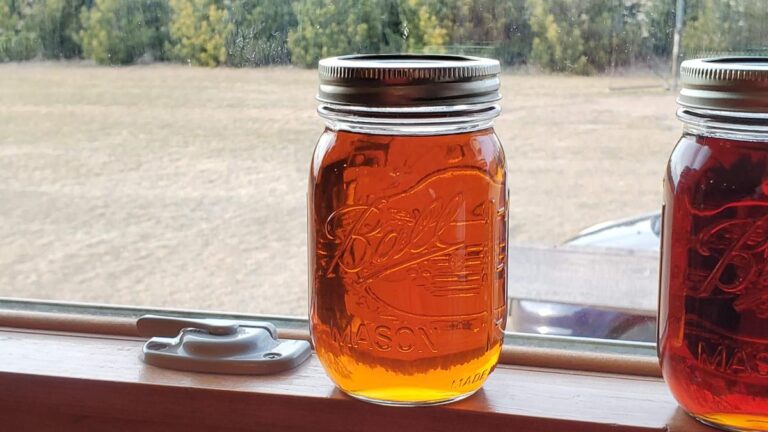
The key to making perfect Maple Syrup lies in achieving the correct sugar content. It is imperative that you stop boiling at just the right time in order to avoid syrup that is either too watery, or syrup that begins to crystalize.
Using a refractometer allows you to achieve perfectly finished Maple Syrup, by providing simple, accurate measurements of the sugar content.
Table of Contents
- Making Your Own Maple Syrup
- Measuring Sugar Content of Maple Syrup
- What You’ll Need
- Refractometers, Sugar Content, and Maple Syrup
- What is a Refractometer?
- How is the Refractive Index related to Brix?
- At What Temperature Does Maple Syrup Boil?
- What Does Boiling Maple Syrup Look Like?
- What Happens if the Sugar Content of Maple Syrup is Too High?
- How Do You Know When Maple Syrup is Done Boiling?
- What is the Sugar Content of Real Maple Syrup?
- How to Use a Refractometer to Measure the Sugar Content of Maple Syrup
- How to Use a Refractometer
- Drip Some Syrup on the Viewing Slide
- Read Off the Sugar Content from the View Port
- Cleaning the Refractometer
- Conclusion
- Supplies mentioned in this Article
- 3-Part Series on Making Maple Syrup
- Check out the “How to Make Maple Syrup Podcast!”
If you buy through links on our site, we may earn an affiliate commission at no extra cost to you.
Making Your Own Maple Syrup
Check out these links to the other articles in this series:
- How to Tap Trees for Maple Syrup
- Easiest Way to Boil Sap for Maple Syrup
- How to Perfect the Finishing Boil for Maple Syrup
Measuring Sugar Content of Maple Syrup
In this article, we are assuming that you have already performed the majority of the sap boiling on an outdoor fire, and you are now nearing the final stage of the boiling process.
The final stage of boiling down sap, often called the ‘finishing boil,’ is best done in a controlled way (i.e., on a stove) so that you can maximize the likelihood of producing perfect maple syrup that hasn’t been overdone (creating crystals or ‘rock-candy’) or underdone (watery syrup). It can also be more conducive to bottling the syrup in a food-safe way.
While performing the finishing boil, it can be helpful to know the sugar content of the syrup periodically so that you know when to stop boiling. When the syrup reaches a sugar content (brix) of 66%, you have achieved Maple Syrup, stop boiling!
What You’ll Need:
- Large Boiling Pot (5 quart) for boiling the syrup in
- Candy Thermometer for having a rough idea of when the syrup is nearing completion
- Refractometer to measure the exact sugar content of your syrup
Refractometers, Sugar Content, and Maple Syrup
What is a Refractometer?
A refractometer is a device that measures the refractive index of a liquid. It does this by measuring the angle at which light is bent by passing through a liquid media. A higher angle indicates a higher refractive index, and a lower angle indicates a lower refractive index.
How is the Refractive Index related to Brix?
Maple Syrup is a mixture of water, sugar, and other constituent parts. As water boils away from the syrup, the sugar remains, and the resulting mixture has an increased proportion of sugar in it. The sugar concentration in Maple Syrup is directly related to the refractive index. Therefore, we can use the refractive index to provide a measurement of the Brix value (sugar content) of the Maple Syrup.
At What Temperature Does Maple Syrup Boil?
Maple syrup boils at a higher temperature than water due to its sugar content. Water boils at 212°F, while maple syrup boils at 219°F. For this reason, you want to continue boiling your sap until it reaches a temperature of 219°F.
Note: In general, you want to boil the sap until it reaches a temperature that is 7°F above the boiling temperature of water. So, if your area differs significantly from 212°F, add 7°F to the boiling point of water at your location.
What Does Boiling Maple Syrup Look Like?
A couple of clues will occur as you approach the time when the maple syrup is done. You will notice that the consistency of the syrup seems to change as you approach the 219°F temperature. Watch for these tell-tale signs:
- The syrup will suddenly want to bubble over! The heat setting that you have been using on your stove all along, will suddenly be too hot. Often this will happen the instant you put a spoon or stirring stick into the syrup. Turn the heat down little by little to keep the boiling going but to stop the syrup from boiling over.
- The bubbles will change consistency and turn into larger, more viscous, more spherical, and stickier bubbles than before (not foam), like below.
What Happens if the Sugar Content of Maple Syrup is Too High?
There may be a temptation to go to higher temperatures in order to achieve thicker syrup. While this is the case, and the syrup will become thicker, it will also become more prone to crystallization. Maple Syrup will begin to crystallize when the sugar content is above 68.9 °Brix.
Below is some maple syrup that was heated to 230°F. After several weeks on the shelf, significant ‘rock-candy’ crystallization had occurred.
How Do You Know When Maple Syrup is Done Boiling?
Once the sap has reached 219°F, let it boil at this level for another minute or so, then it is done. I find that knowing exactly when to stop boiling can seem a bit arbitrary!
It depends on how accurate your thermometer is, how quickly you get the syrup off the heat, and it’s easy to end up just ‘guessing’ when it is done. That is why I use a refractometer.
What is the Sugar Content of Real Maple Syrup?
According to the International Maple Syrup Institute, real maple syrup has between 66% and 68.9% sugar content.
You want the syrup to be between 66-68.9% on the brix scale (66-68.9% sugar content) because lower than 66% and your syrup will be too watery.
And above 68.9%, your syrup will start to crystalize in the jars. So ideally, you measure the sugar content directly instead of only going by temperature.
How to Use a Refractometer to Measure the Sugar Content of Maple Syrup
Here is a picture of my refractometer. I was actually surprised at how inexpensive they are, you can get one very reasonably priced at Amazon.

They cost less than a hydrometer, the traditional way of measuring Maple Syrup, which relies on density.
How to Use a Refractometer
The maple syrup will boil for a long time at 212ºF, then it will start to climb. I watch the candy thermometer as a reference, and when it is indicating about 215ºF I start sampling with the refractometer.
Drip Some Syrup on the Viewing Slide
Take a few drops from the pot and drip the syrup onto the viewing slide, then close the lid.
After that, wait a few seconds for the syrup to cool to room temperature. It doesn’t take long because it is only about 5 drops, which cool very quickly.
Read Off the Sugar Content from the View Port
Look into the viewport (like a telescope) to read off the % sugar concentration (brix value). The line between blue and orange indicates the % sugar in your syrup.
In the image below, I was at about 66.4% which is about perfect. (If the scale is all blue – keep boiling, you are below the minimum reading.)
In the picture below, I show 2 different batches. The one on the left is at the maximum (68.9%) and the one on the right is at the minimum (66%) brix values to technically be considered maple syrup.
This is not a ‘digital’ refractometer, it is analog (doesn’t require batteries). I read somewhere that a person thought it required sunlight – it doesn’t. All I use is the normal overhead room light, and then look in the viewport (like a telescope), and it looks like the images I’ve pasted here.
I wrote a whole article on How to Perfect the Finishing Boil for Maple Syrup, check it out!
Cleaning the Refractometer
To clean the refractometer, use a wet dishtowel and wipe off the slide and slide cover with warm soapy water. Then try it off with a dry towel.
For more information, check out my List of Most Frequently Asked Questions About Making Maple Syrup.
Conclusion
And that’s it! This is a super easy way to directly measure the sugar content of you Maple Syrup. I usually sample multiple times as I am boiling, so that I have an idea of when the syrup will be done.
The final product is incredibly beautiful; it looks like a jewel.
Congratulations! Enjoy your self-made maple syrup!
I hope you found this helpful! I know that harvesting maple sap and boiling it into fresh maple syrup is a highlight of the spring for my family! I hope it is for you and yours as well!
I love getting comments and especially hearing stories about how other people boil and make maple syrup! Please leave a comment on any tips and tricks that have worked well for you!
Supplies mentioned in this Article:
- Large Boiling Pot (5 quart)
- Candy Thermometer
- Canning Jars and extra lids
- Maple Syrup Bottles with little handles
- Syrup Mesh Filters
- Synthetic Filter for final-filtering (or 3-qt synthetic filter)
- Filter stand
- Food-grade Funnel
- Refractometer
- Hydrometer
- Dripless Syrup Dispenser
Check out these Details on my YouTube Video on Refractometers
Other Articles in the Series on Making Maple Syrup
- How to Tap Trees for Maple Syrup
- Easiest Way to Boil Sap for Maple Syrup
- How to Perfect the Finishing Boil for Maple Syrup
- Frequently Asked Questions on Making Maple Syrup
- How to Use a Refractometer for Maple Syrup
- What is the Jones Rule of 86 for Maple Syrup?
Check out the “How to Make Maple Syrup Podcast!”
Listen to the “How to Make Maple Syrup Podcast!“

Top 5 Lesser-Known Mistakes When Making Maple Syrup (Rebroadcast) – How to Make Maple Syrup!


Maple Syrup Articles from the Blog
What is the Maillard Reaction in Maple Syrup?
The Maillard reaction is a chemical process and one of the key factors in giving maple syrup its unique flavor, when…
Read More…Maple Syrup Labels (Free Printable PDF Downloads)
I made some printable labels for my Maple Syrup jars and thought they might be helpful for others as well! Feel free to download these pdf’s and share with friends and family! To make stickers, print them on printable 2″ labels…
Read More…What is the Jones Rule of 86 for Maple Syrup?
The Jones Rule of 86 is a handy rule of thumb developed by Charles Howland Jones back in the 1930’s. This article describes the details of the rule as well as how to utilize it most effectively to make Maple Syrup. There is a fair amount of confusion relating to…
Read More…Maple Syrup DIY – Frequently Asked Questions
Answers to a list of the most common questions related to tapping maple trees and boiling sap into delicious maple syrup!
Read More…5 Reasons to Use a Turkey Fryer to Make Maple Syrup
I switched from boiling maple sap over a wood fire to using a propane turkey fryer and never looked back! These are the reasons I switched!
Read More…How to Perfect the Finishing Boil for Maple Syrup
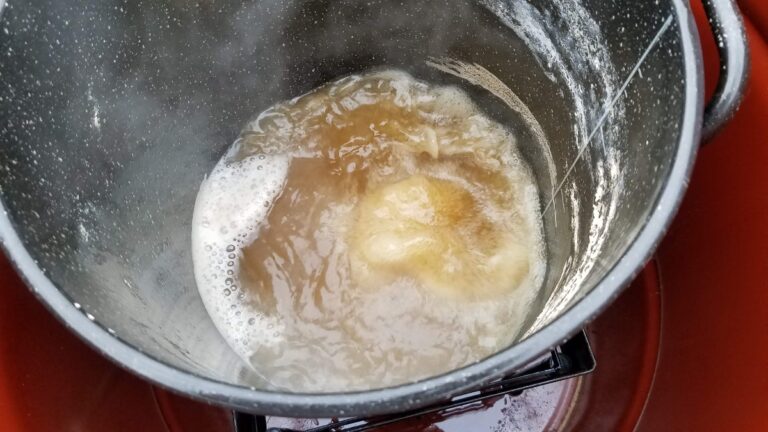
This picture guide walks step-by-step through the final process to do the finishing boil for maple syrup. You’ve spent hours collecting and boiling down your sap; don’t screw up the CRITICAL last 15 minutes of the boiling process, especially watch out for…
Read More…How to Boil Sap for Maple Syrup (Fun and Easy!)
Easy picture guide on how to boil maple sap to make fresh, delicious maple syrup! Includes tips and tricks for getting the most out of your Maple Sap!
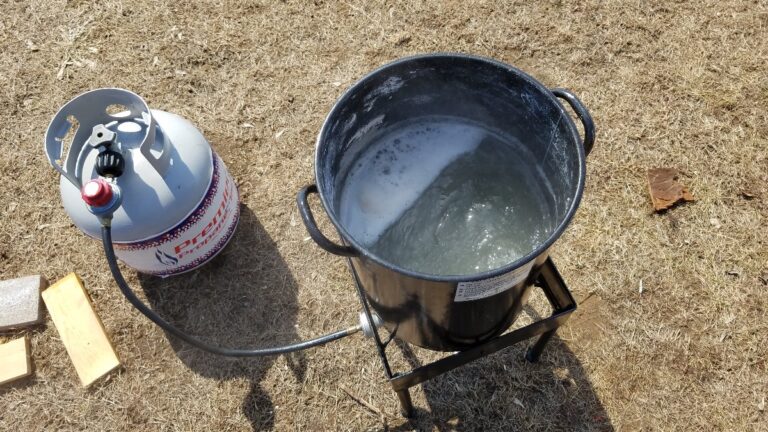
 The most important step is making sure…
Read More…How to Tap Maple Trees and Make Maple Syrup the Easy Way
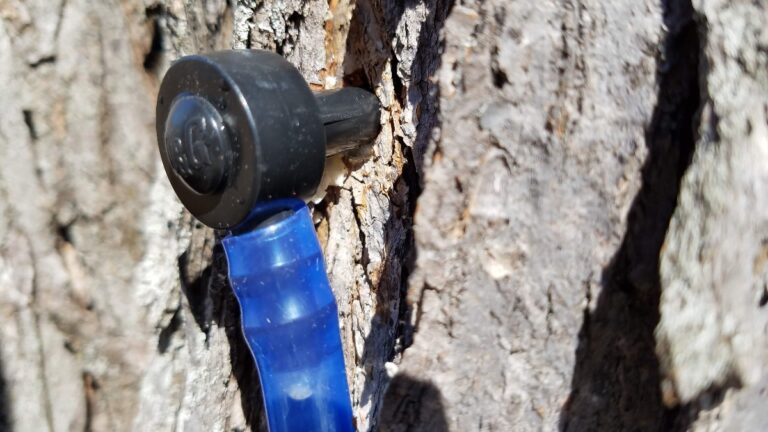
Who doesn’t love Maple Syrup? Check out this picture guide to get up and running quickly tapping your Maple trees! The easiest way to tap your Maple trees is to start from…
Read More…
I am looking forward to trying a refractometer since hearing your podcast! It makes sense for a home producer.
I think you’ll like it, I wish I had started using one a lot sooner!
Also, thanks for listening to the podcast! I send those out into the ether and wonder if they are helpful to anyone, so nice to hear feedback!
Good luck This maple season!