I Put a Touchscreen Radio in My 2004 Honda Accord – Easy Upgrade!
The radio in my 2004 Honda Accord went out, and rather than buy a new one with the same set of very basic features, I replaced it with an aftermarket 10″ touchscreen Android-powered radio!
If you make purchases through links in this guide, I may earn a commission which doesn’t cost you anything extra but helps me with website hosting fees. Thank you.
This plug and play replacement costs about $150-250, and vastly increases the capability of your radio! This upgrade makes the interior of your 15-yr-old car look fully modern!
Table of Contents
- Tools and Supplies Needed
- Removing the Old Radio
- Installing the 10″ Touchscreen Radio
- Setup of the Touchscreen Radio
- AC Problems – Air Conditioning or Rear Defrost Not Working
- How to Set the CANbus Settings
- Video Guide for Radio Replacement in a 2003-2007 Honda Accord
In this picture guide, I walk through the steps I took to perform the radio replacement. It took me about 1-2 hrs, and these are the required tools:
Tools and Supplies Needed
- Plastic pry tool or flat-head screwdriver
- Phillips screwdriver
- Android Radio 10″ Touchscreen (I now recommend this one)
Removing the Old Radio
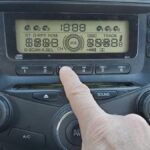
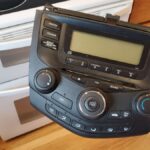
The first step is to remove the old radio. Here is the original radio that was in my 2004 Honda Accord.
Note: I have a single-climate control vehicle, meaning that you cannot set the temperature separately for the driver and passenger. If you have "dual climate control" it means that you have a separate control for the temperature on each side.

The first step is to remove the negative battery terminal. The reason for this is so that the radio does not accidentally get shorted out while unplugging it and installing the new one.

Next, use a pry tool to wedge between the panels. You could also use a flat screwdriver, but it could mar the finish. I used pry tools like this. Pry the top panel up…

Then pry it forward slightly (about 3/4 of an inch)

Then the top cover will lift up. Don’t remove it completely, as there are some wires still attached, just swing it aside for now.

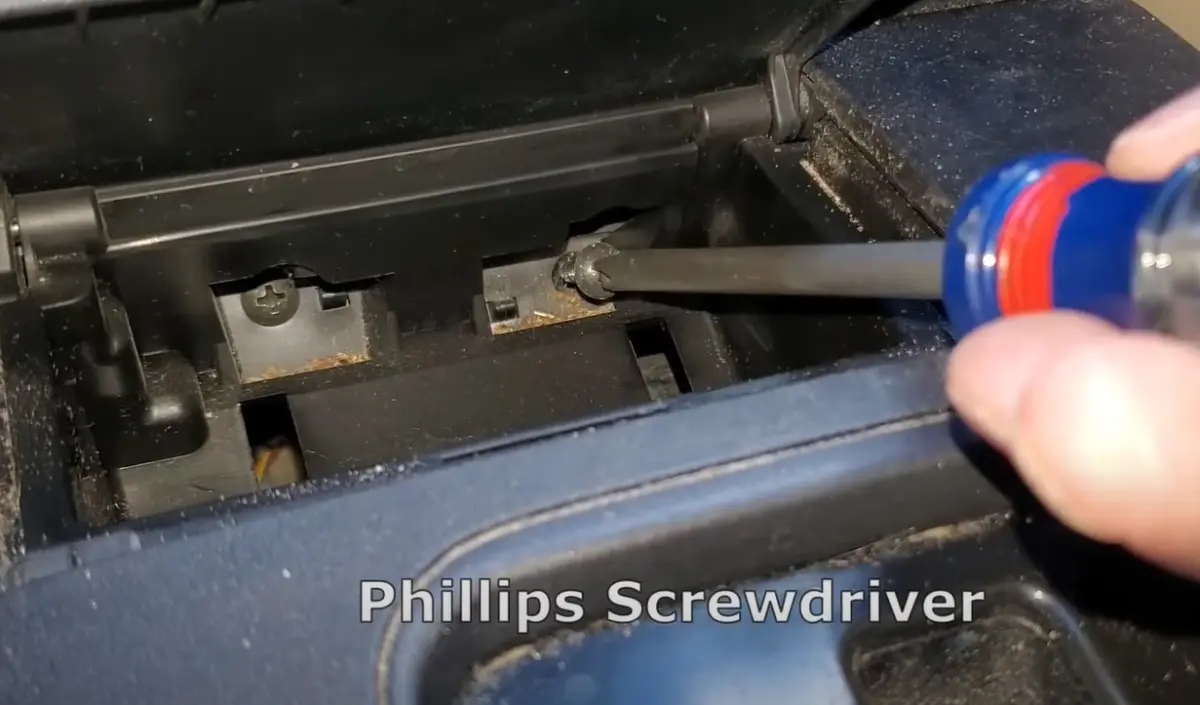
Underneath the radio are 2 screws that need to be removed in order to take out the old radio. To get at them, we have to remove the cubby below the radio. To do that, first remove the “not an ashtray” with a pry tool.

Then use a Phillips screwdriver to remove the 2 screws.
Pry up and remove the trim around the gear shifter knob.
Hint: Put the key in the ignition and turn it to "II" then you can put the shift lever all the way down and it makes it easier to remove the trim.

Remove the ashtray, don’t yank it out! You need to carefully unplug the cigarette lighter cable.

Remove 2 more Phillips screws.

Now the cubby should be loose. Carefully pull the cubby out. You may need to rock it back and forth, up and down a bit to get it loose.
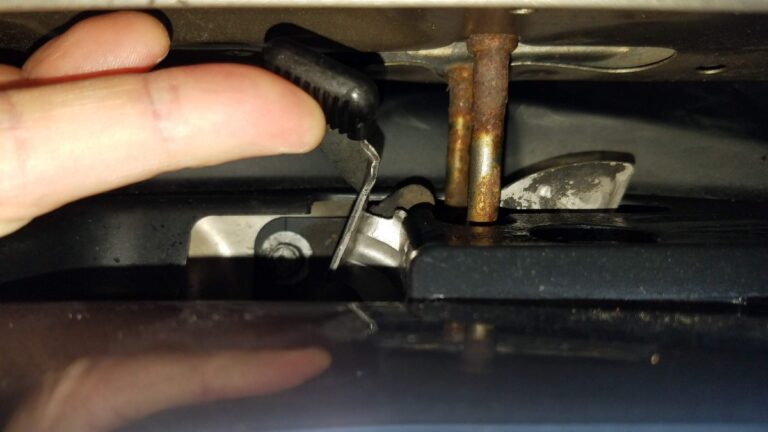
Now, go to the top of the radio, and there are 3 screws at the top. Remove these three.

Now, underneath the radio (kind of hard to see) are 2 screws that need to be removed before the radio will be loose. Remove these two screws. this view is looking up

The radio should now be free. Wiggle and pull the radio out. Careful not to pull to hard, as there are a bunch of wires attached to it in the back…

Now, unplug all of the connectors on the back of the radio.

Installing the 10″ Touchscreen Radio
The next step is to prepare and install the new Android 10″ touchscreen radio.

Follow the instruction sheet to plug all of the connectors into the back of the new radio.
Note: There is a "Y-cable" included in the kit. If you have dual-climate control (can set different temp for driver and passenger) then you should NOT use the Y-cable! If you have single climate control like my car, then you SHOULD use the y-cable. The instruction sheet included with the new radio describes this pretty clearly.
Note: Another thing to watch for. I've seen some comments in the reviews for this radio saying things like the rear defrost or AC doesn't work. One of the problems is if the connectors are not plugged in all the way, are loose, or have bent pins. Make sure to be very careful when plugging everything in that it is plugging in straight, not backwards, and is fully seated!

Bring the new radio to the car and attach the connections. They can really only fit one-way.

On the bottom of the new radio are 2 tabs that help secure the radio to the car. The problem is that these tabs don’t necessarily line up with the tab holes in your car (mine didn’t); it depends on what type of car you have.
There are 2 ways to deal with this. Either you can make new slots (this is what I did) by drilling holes into the plastic as shown below:
The other option is to just remove the tabs from the radio, they are just each held on with 2 screws. Remove the screws and the tabs. The radio will be plenty secure without those.

After plugging in all the connectors, slide the new radio into place and re-install the 3 screws on the top.

Then, re-install the top trim piece. It works best to set it down, then slide it back, so that the tabs seat properly.

Now, re-install the cubby.

Put the ash tray back in, plug in the cigarette lighter, and re-install the screws.

Snap the trim back on.
Re-connect the negative battery terminal, then start up the car!

Setup of the Touchscreen Radio
Now, connect your android 10″ touchscreen radio to wifi. Start downloading apps from the Google Play Store.
The radio comes with several apps included a radio tuner and music player. I downloaded YouTube, Amazon Music, and Google Maps, among others.

The radio has dual-screen capabilities which is nice for having the music and maps side-by-side.

To listen to music from an external USB plug, attach a thumb drive to the USB connector, then nagivate to the appropriate folder.

The unit runs on Android 10. It can also connect through Bluetooth to an iPhone using CarPlay.

If you connect the radio to your phone’s wifi hotspot, you can get live traffic on the screen.


This unit works with either Android or iPhone. The sound is great, the sound is just as good as with the stock radio.
Let me know your experience installing an aftermarket touchscreen radio in your car!
AC Problems – Air Conditioning or Rear Defrost Not Working
The radio works well for most people, but one complaint you hear is that the AC is not working. This is due to one of several reasons:
- The connections on the back of the radio are not correct (not pushed in all the way, bent pin, upside down, incorrect use of the “y-cable,” etc…)
- There is a “Y-cable” that is included with the kit. DO NOT USE THIS Y-Cable IF you have a DUAL climate control system in your car. This means, if you can set the AC differently between driver and passenger in your original car, then DO NOT USE THIS Y-Cable. If you have Single climate control systems (like I do) then you must use this Y-cable, and it just duplicates both temperature knobs to do the same thing (this radio does NOT convert a single climate control car to a dual climate controlled car!)
- There is a small white connector on the back of the radio. I believe this is related to the rear defrost. Make sure you have that small cable attached properly.
- The most common reason is that the CANbus settings are not set correctly. CANbus refers to the communication between the radio and the car. You need to tell the radio what ‘language’ to use, or else it won’t work, or it will partially work. The most common issue is that it is set to a Honda Accord, but not set to the correct model of Honda Accord.
How to Set the CANbus Settings
To set the CANbus settings, you need to follow these steps:
- Go to the CarSetting app on the radio.
- Then go to “System Settings”
- Touch “Factory Setting”
- Enter the following Password: 16176699 or 8888 or 8878
- Press “Confirm”
- Scroll down to CAN Type Setting
- Press CAN Type Set
- Wait a few seconds for it to load
- Then, select cytong: Honda: Accord: 2002-2007(7Gen): touch 02-07(Low): select cytong.
A couple of notes:
- (Note: Don’t select cytong (Accord)! You will not see the AC controls on-screen if you do!)
- Select (Low) for Single-Climate control cars (like mine).
- Select (High) if you have Dual-Climate control.
- If you are using a different Android aftermarket radio than the one shown here, you may need a different password. I do not have experience with those radios, but several other passwords that may work include: 8888, 8878, 8317,123, and 126. If you find a different password that works for your radio, please put a note in the comments section below giving the Name/Model of your radio, as well as the password that worked for you. This will be helpful for others who may find this post… thank you!
- Here is a link to my YouTube video on how to get into the CANbus settings.
Video Guide for Radio Replacement in a 2003-2007 Honda Accord
Check out this video for more details on how I installed this aftermarket radio.


I know this post is nearly 4 years old.. but I see there are newer models of this radio “upgrade” available on Amazon and other websites. Does anyone have experience with these??.. are they all about the same or do I have to very careful with the device I select so things like steering wheel controls, climate control, etc will continue to work?
Great write up by the way, and I believe you made a youtube video as well. I watched it last night.
My radio works fine but the backlight is burned out, so you cant see the LCD radio screen and the orange backlit buttons no longer work.. it’s quite spooky at night lol.
I wanted a backup camera and it was going to cost me more than one of these head units (Android 12). In addition to now having a camera, I can run Torque Pro to track mileage, diagnostics and have more gauges that the Accord never came with. I’ve got all sorts of music options and I’m using TomTom for navigation. The downside is most everything come with no manuals worth a darn so it can be a chore to find advice online to fit the exact model radio and software version. My unit has an AC fetish. I wants to turn the AC on all of the time when I change some settings and the car isn’t adjusting idle properly when the AC is on so there can be some engine lugging, but that might be unrelated to the head unit.
Ken
Hello,After installation on my friend’s accord similar unit, single climate control, all seems working but hot and cold settings swapped, any idea why? I search for harness pinout, maybe mess with Y-cable, but no luck. However, I haven’t check closely myself, maybe there is something else.
Can you use the steering wheel radio controls with this radio?
Yes. One of the apps is to program what you want each button to do.
Any issues with intermittent sound? And did you happen to splice the blue ant power wire into the red power acc on the headunit harness, this seem to fix most peoples sound from what I researched but mine is still intermittent.
Hi Reggie,
No issues with intermittent sound for me. I didn’t do any splicing. I just hooked up the connectors according to the instructions. I also made sure all the connectors were tight and well seated.
Hope you’re able to track down the issue.
I’m curious as to whether I will need a radio reset code for the after market radio never did this on an accord but I’ve heard people complain about this is this a issue or no?
Hello, No reset code is necessary for this aftermarket radio.
All the best!
I had a Honda Accord that I purchased about 5 years ago. Since then, the radio has been acting up and would not turn on or off. The screen was dark, with no picture at all. I searched online for solutions to my problem and found this product to be very helpful in fixing my car’s radio problems. This is a guide that helped me fix the issues with my car’s audio system by simply replacing the old stereo unit with one of these new units from Amazon which are known as easy plug and play radios .
I used your guide to replace my glitchy radio, and it works great! I really appreciate when people pass on helpful guides like this. I wish you the best,
Tony