
How to Replace the Chain on a Stihl MS291 or MS271 Chainsaw
Follow these easy steps to change the blade on a MS291 or MS271 Stihl chainsaw.
Note: PracticalMechanic.com is reader-supported. If you buy through links on our site, we may earn an affiliate commission – at no cost to you. I do not put any other type of ads on this site because I think they are annoying. Thank you for your support!
Tools and parts used:
- 3/4″ socket
- flat-blade screwdriver
- replacement Stihl 18″ chain (26RM3-74)
- cover nuts for Stihl chainsaw
By the way, check out this post where I cover what to do about issues getting your Stihl MS291 to start.
Steps for Changing the Chain on a Stihl MS291 Chainsaw
- Remove the bar cover by removing the 2 nuts using a 3/4″ wrench
- Remove the bar and old chain
- Clean the oil and woodchip residue from the sprocket
- Turn the tensioner screw counter-clockwise to relax the tension pin
- Flip the bar over (change its orientation every time you change chains for even wear)
- Feed the new chain onto the bar – cutting surfaces should face out on top of the bar
- Place the bar and chain onto the saw, feeding the chain around the crank
- Make sure the tensioner pin is in appropriate hole in the bar
- While holding the bar and chain, tighten the tensioner screw until the chain is taught
- Put the bar cover back on and put the 2 nuts back on, tightening them finger tight
- Perform the final tension adjustment of the tensioner screw
- Fully tighten the cover nuts with the 3/4″ wrench
- Verify the proper tension (should be able to pull the chain ~ 1/4 to 1/2 inch from the bar
How to Select the Correct Chain for Stihl Chainsaws
Before we begin with the detailed steps on how to change the chain, a few words on how to select the correct chain for your saw. There are a plethora of chains available, and it is important that you get the right chain. The wrong chain can damage your saw… or damage you.

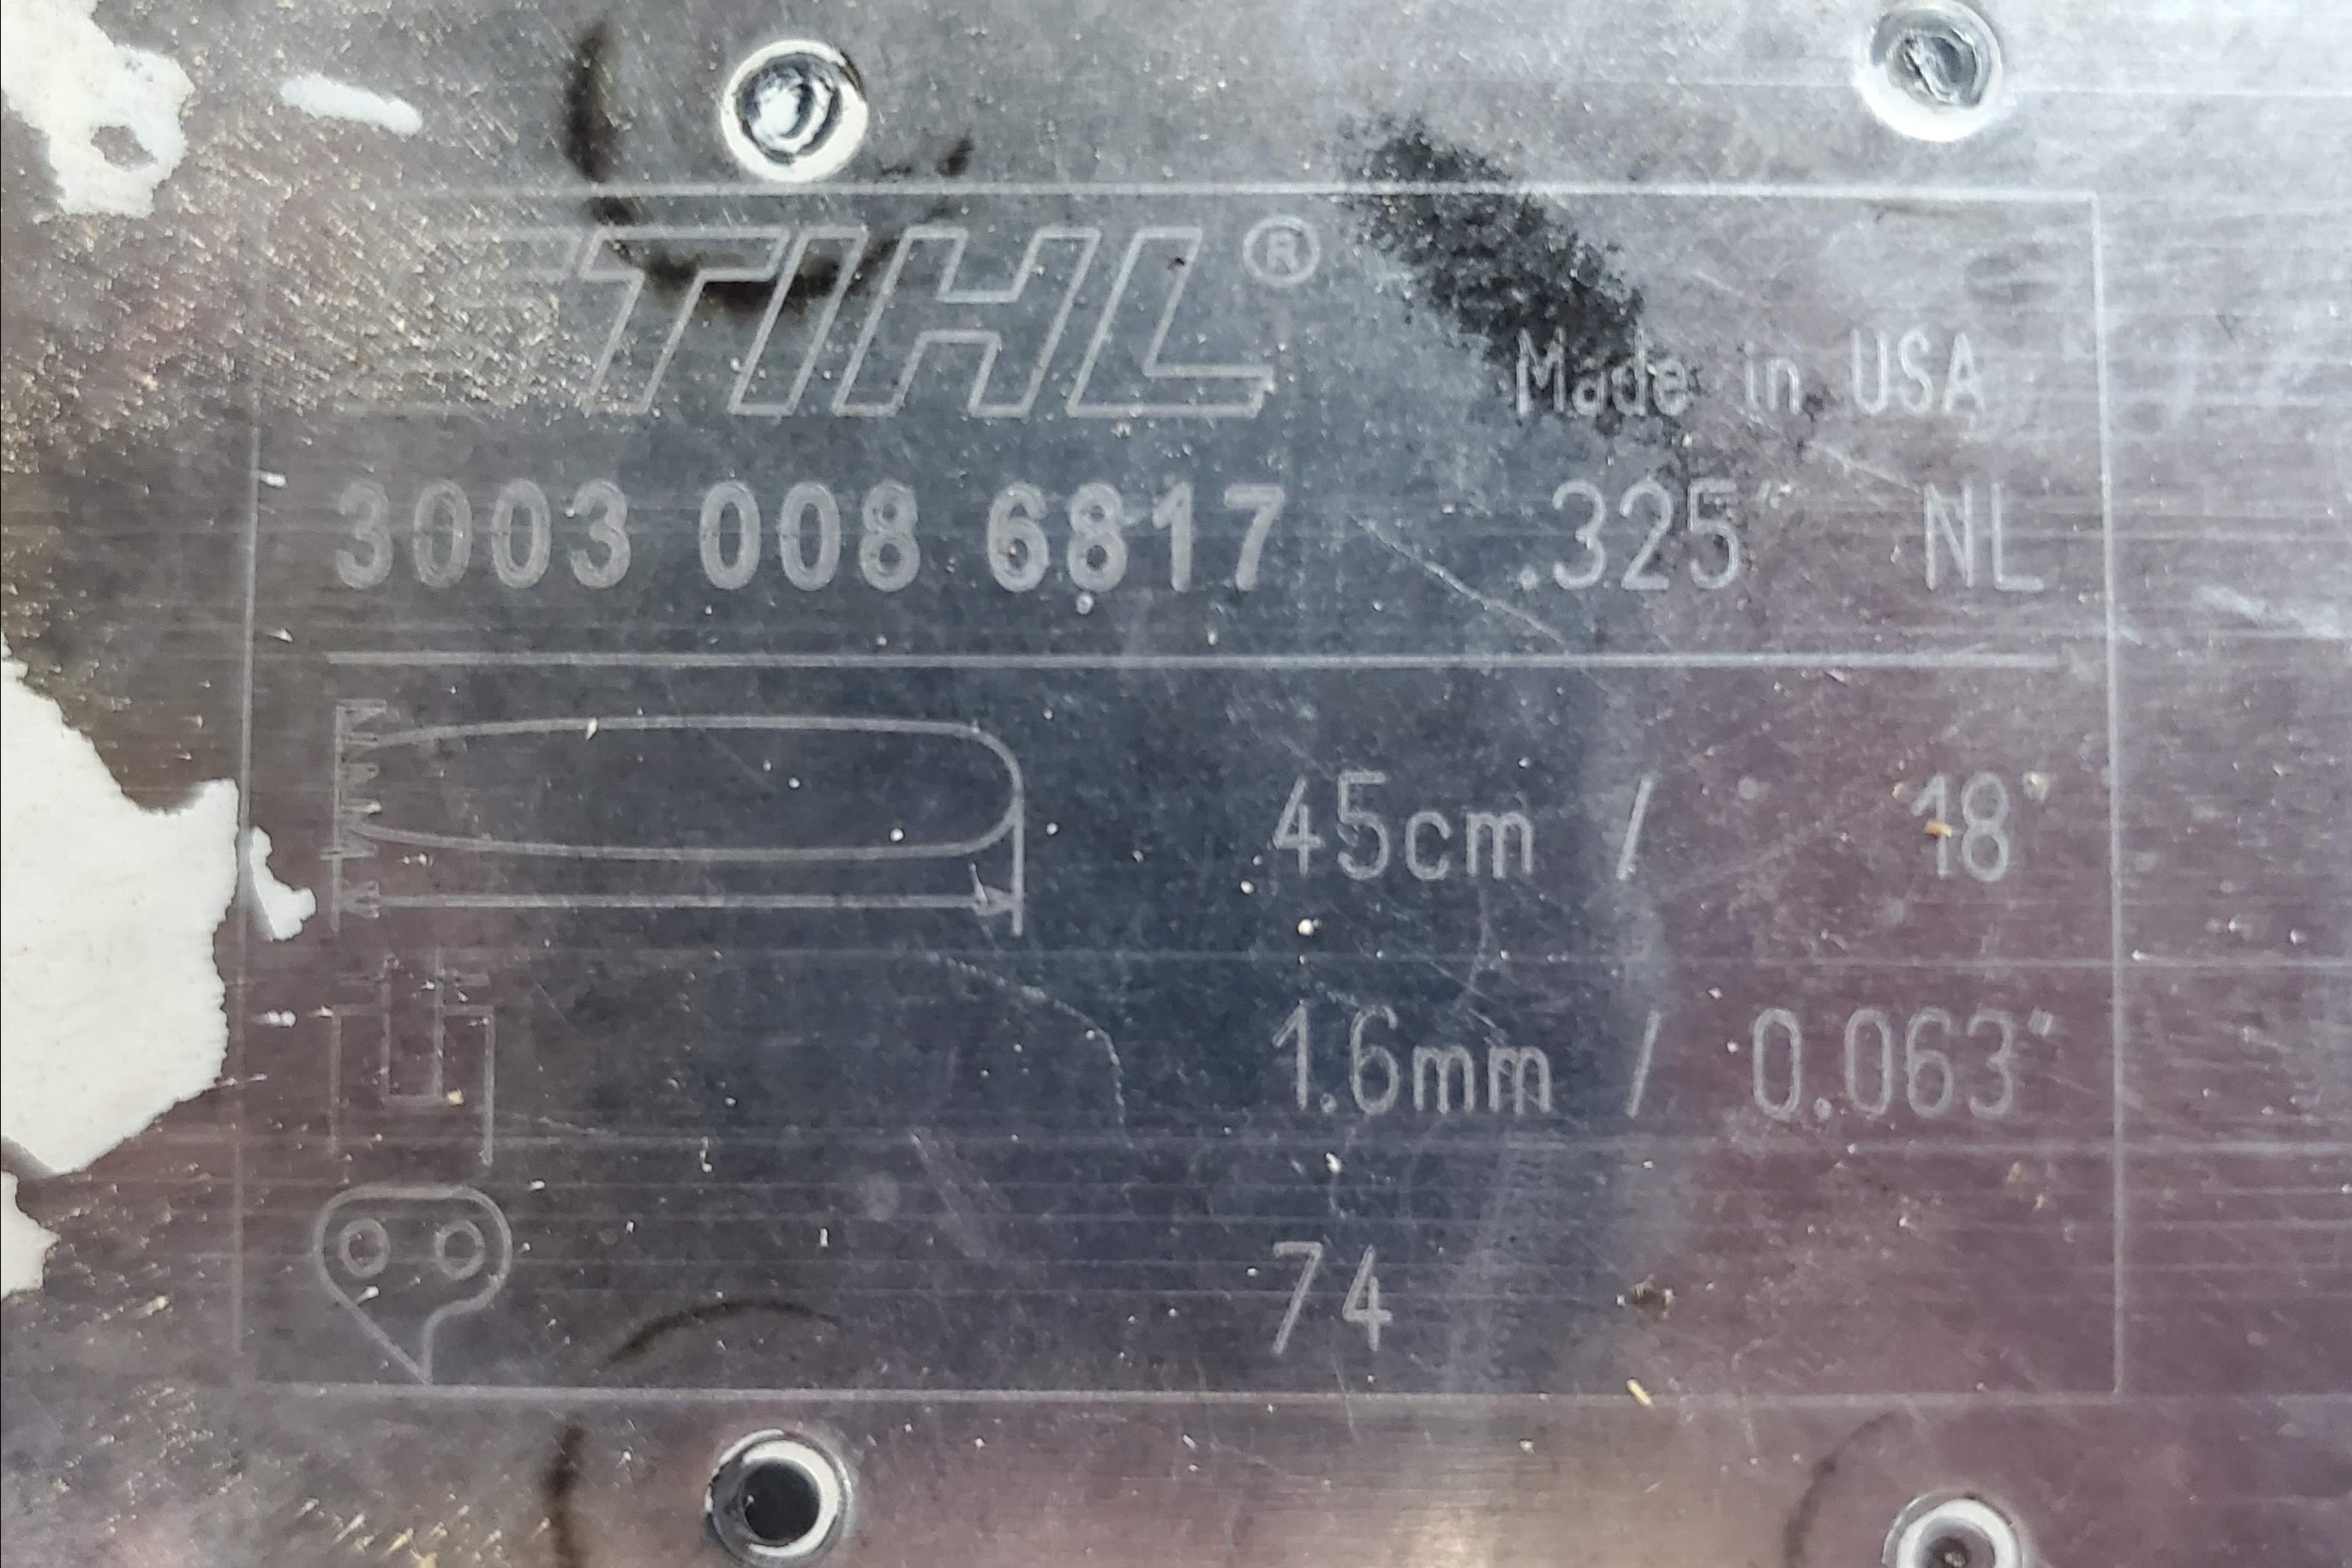
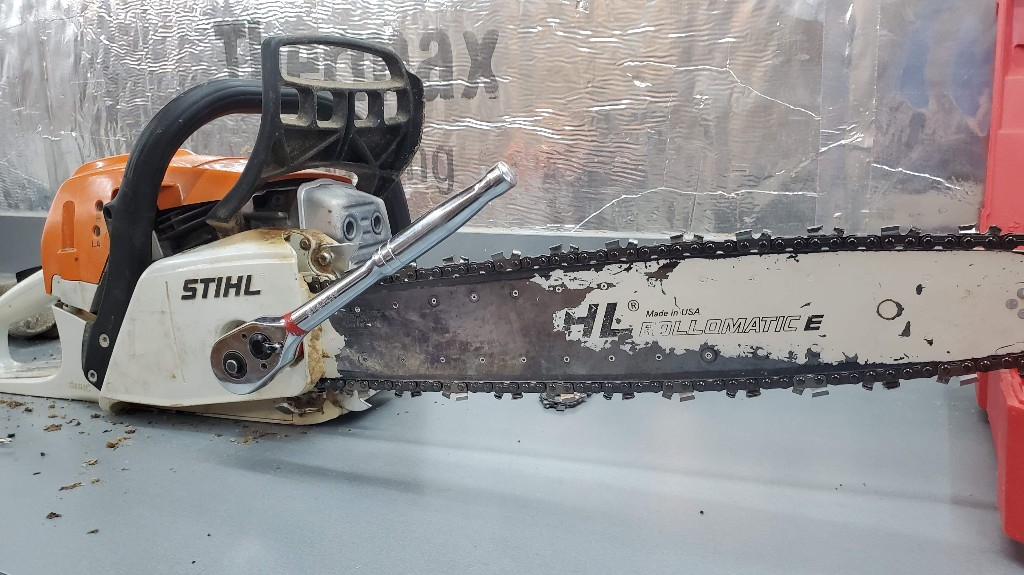
The first and easiest step is to simply look at the bar of your saw. It has imprinted on it the specifications for the chain that you need.
For determining which chain to use, I would recommend that you download the Stihl Chain Selection and Identification Chart. This pdf is really great for understanding which chains work with which saws. It also gives a breakdown of what each number or letter means in the chain model number.
For example, I recommend the Stihl 26RM3-74 Chain for my MS291 saw with 18″ bar.
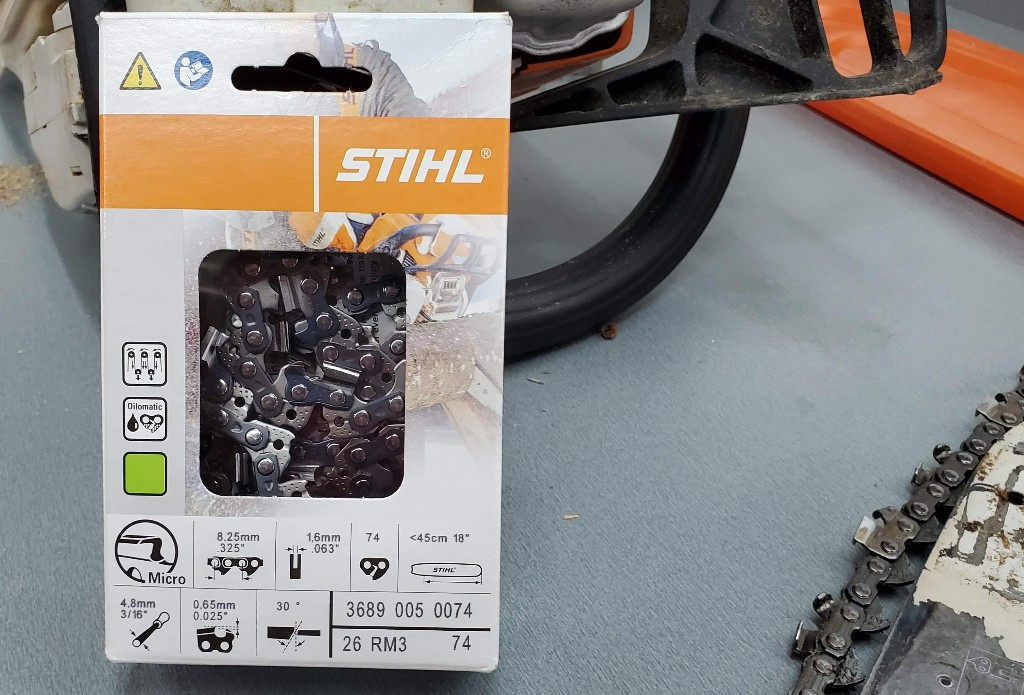
This is the chain recommended by Stihl for this saw.
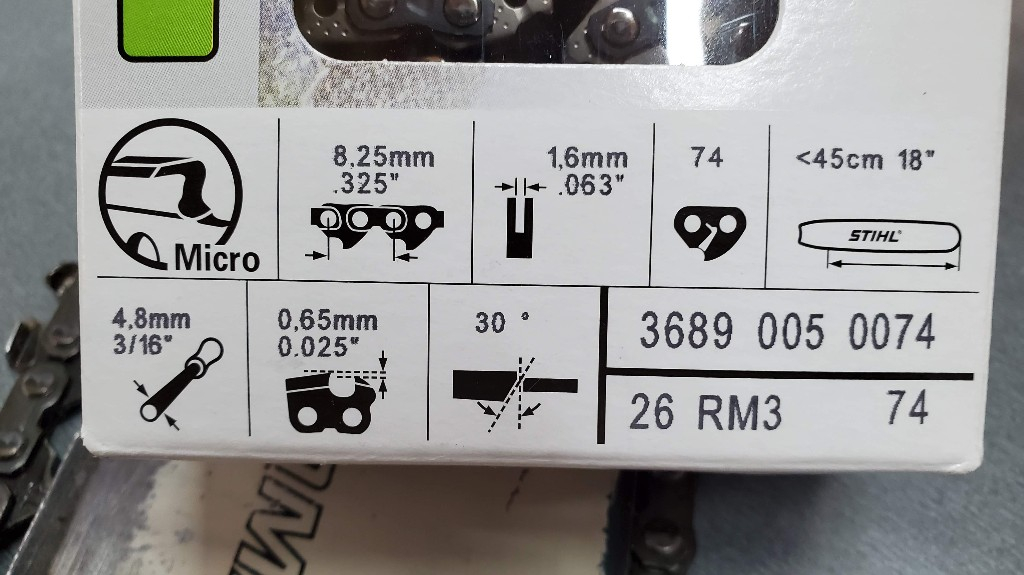
Let’s break-down the meaning of these numbers:
- 2 – Pitch – Indicates that the distance between links is 0.325″
- 6 – Gauge – Indicates that the gauge is 0.063″
- R – Cutter Type – Stihl Rapid
- M – Chisel Shape – Micro (Semi-Chisel)
- 3 – Special – Single-humped drive link
- 74 – The number of drive links
There is another common alternative, the 26RS3-74. This chain has the “full chisel” instead of the “semi-chisel” shape. Basically it means that it is sharper, but along with that it tends to get dull faster. The semi-chisel is not as sharp, but lasts longer between needing to be sharpened.
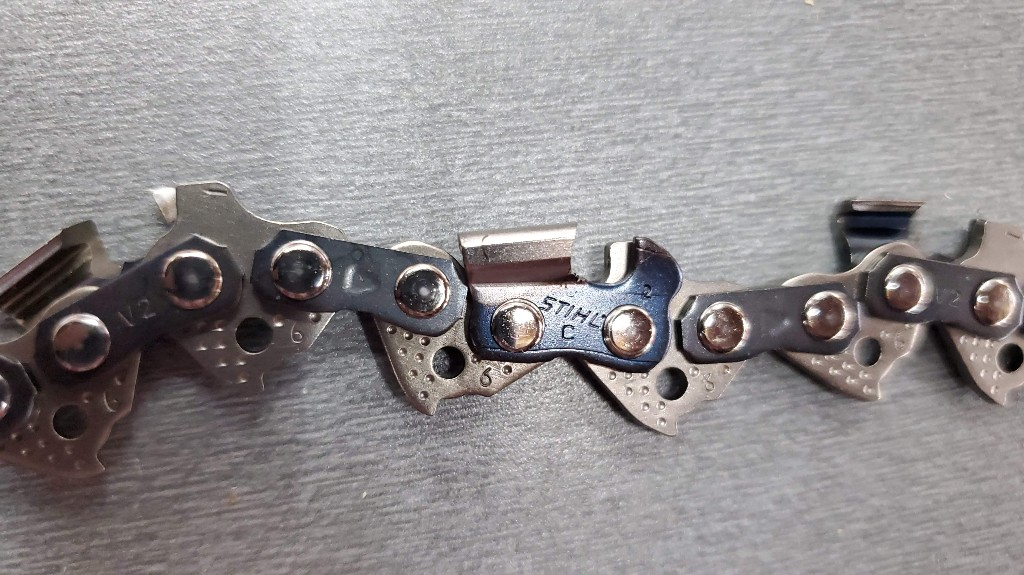
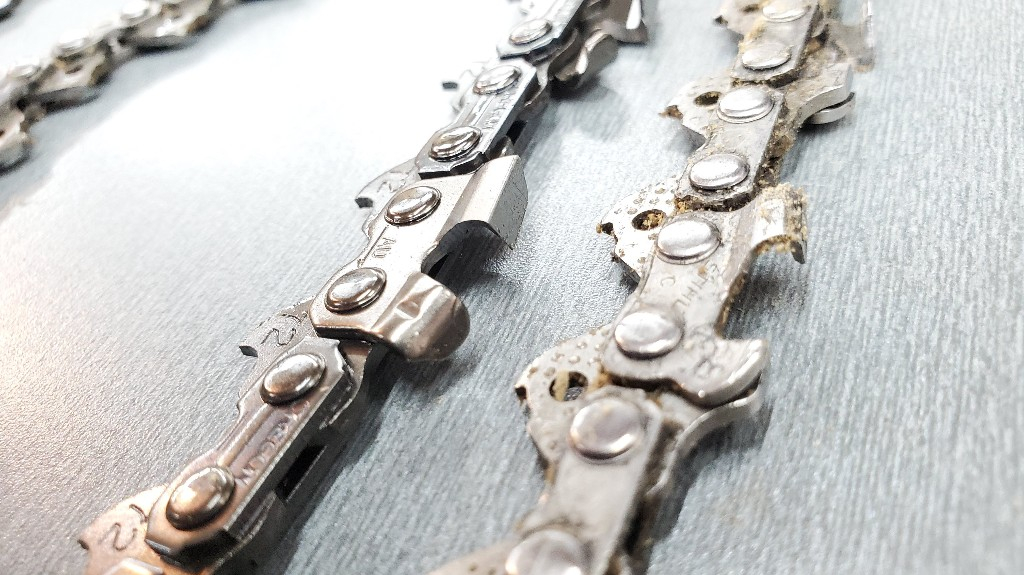
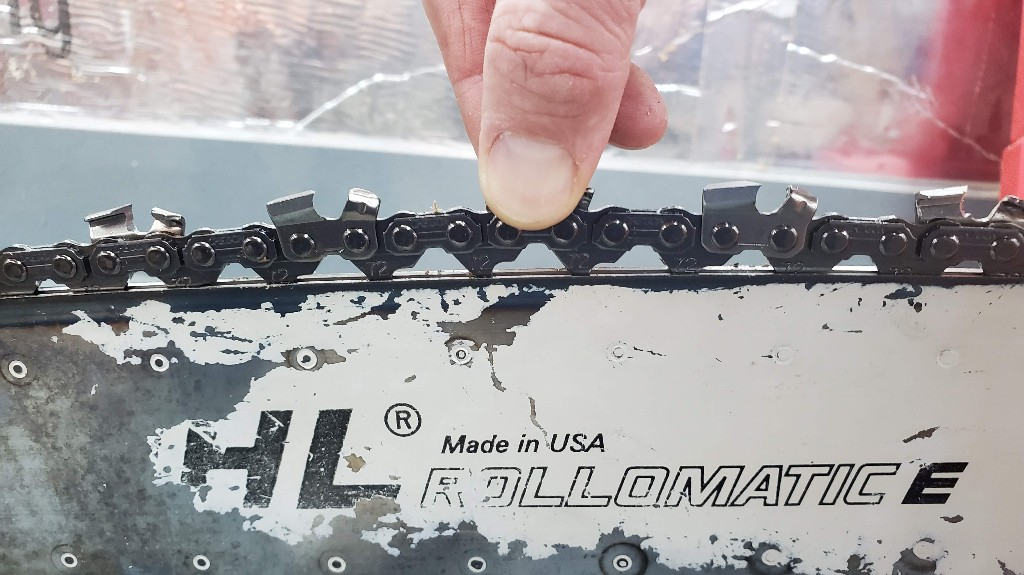
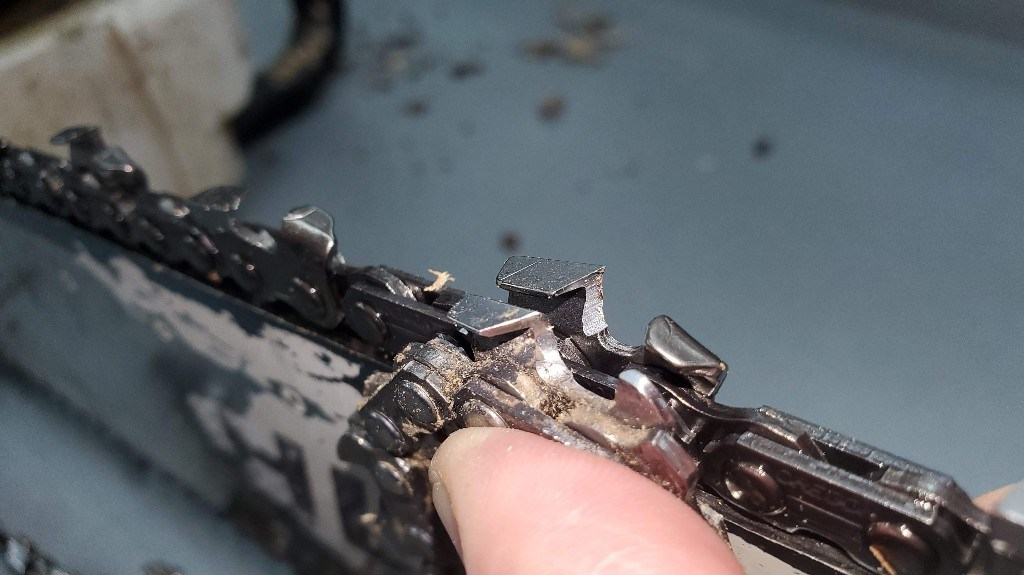
Here is a close up of the semi-chisel on the 26RM3-74

Note the way the cutting blade is rounded (i’ve heard it described like the curve in a “?” question mark). The RS blade comes to a point (like a “7”).
Here is another view of the RM, semi-chisel.

Also, the 26RM3 has the anti-bucking feature (green link – and green square on the box), whereas the 26RS3 does not (yellow link – yellow square on the box – for ‘caution’), making it a bit more dangerous for the inexperienced user.
I use the 26RM3 so that I don’t have to spend as much time sharpening. The extra safety feature of the anti-bucking is a bonus.
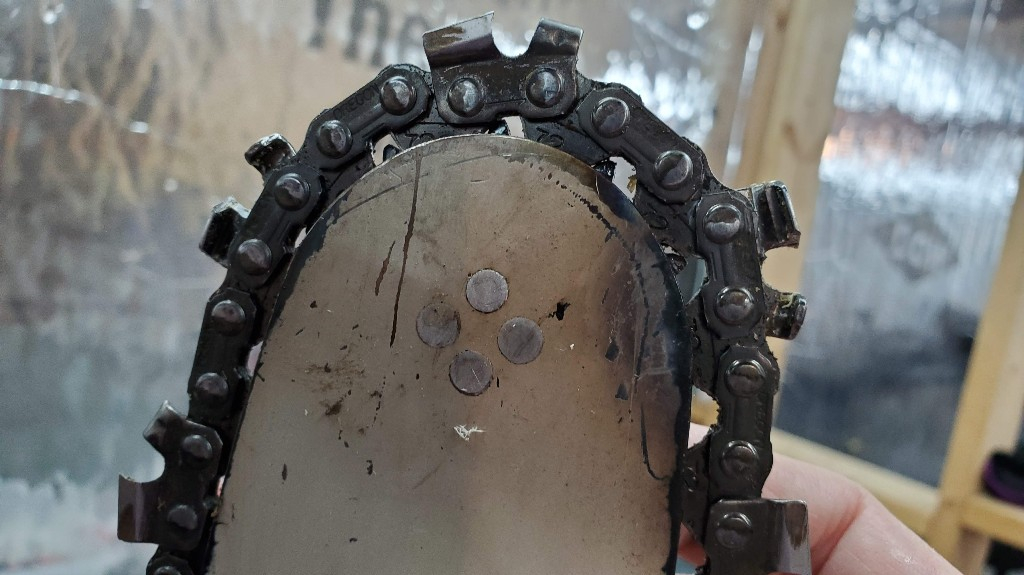
The number of links is also important. If you have the wrong number of links, the chain won’t fit quite right, and it will come off often and cause you all kinds of grief.
Here is an improperly fitted 72-link chain put on a bar requiring 74 links. Note the gaps you can see between the bar and the chain. This is an INCORRECT fit!
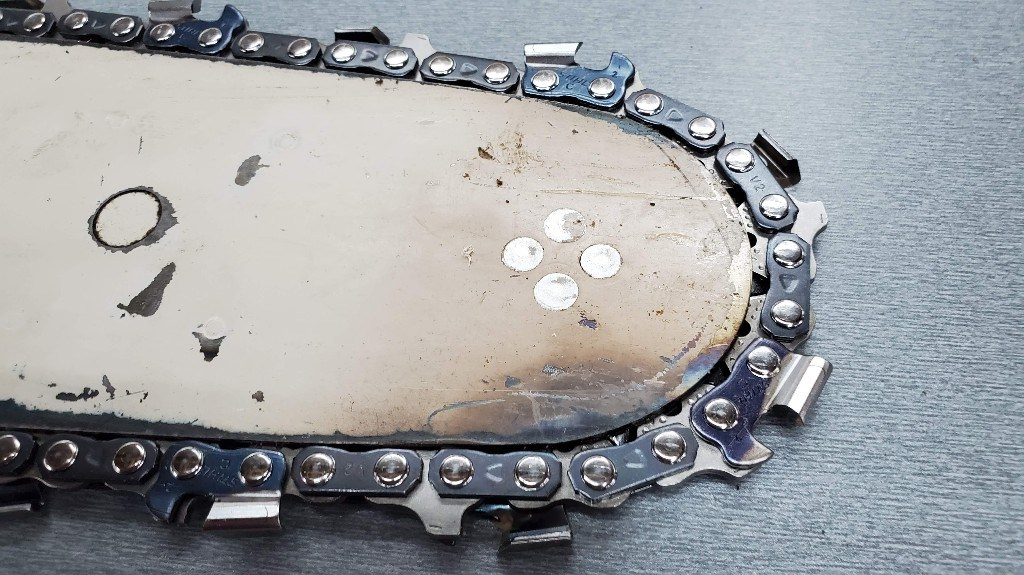
Below is the correct fit.
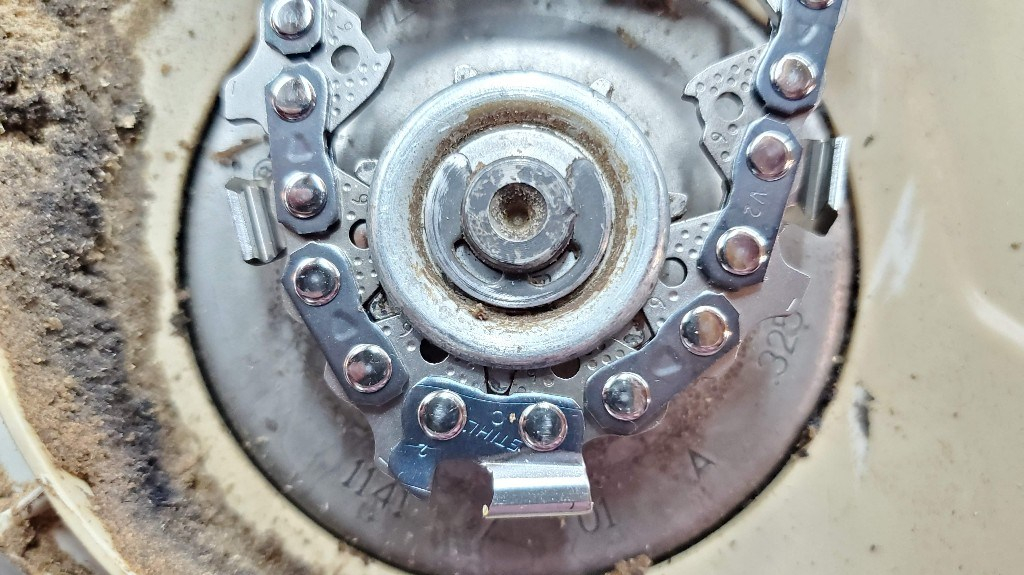
Here is the correct fit around the sprocket, it fits perfectly.
Changing a Chainsaw Chain – Step by Step Procedure
Alright, let’s go through each of the steps for changing the chain in a little more detail with pictures!
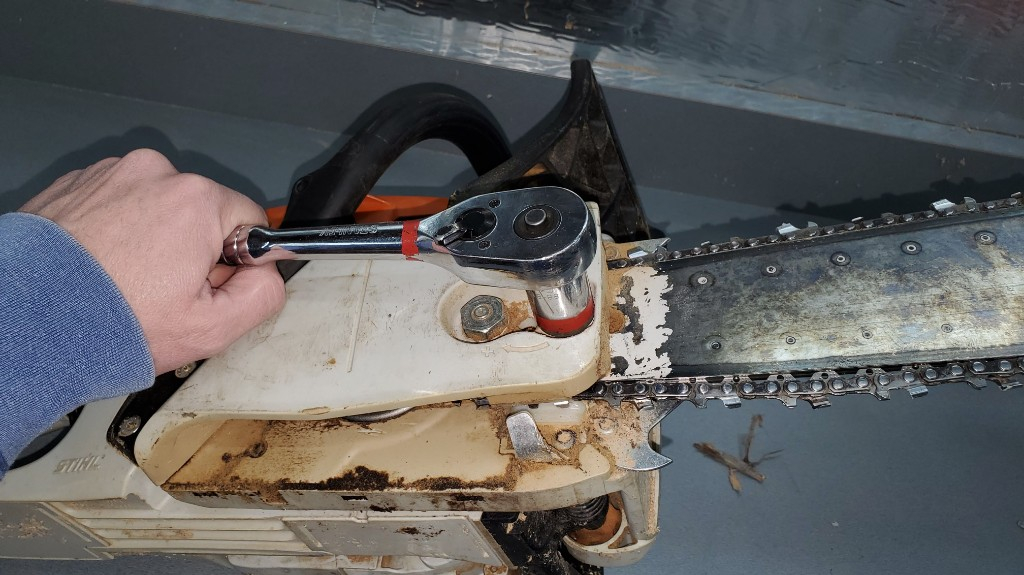
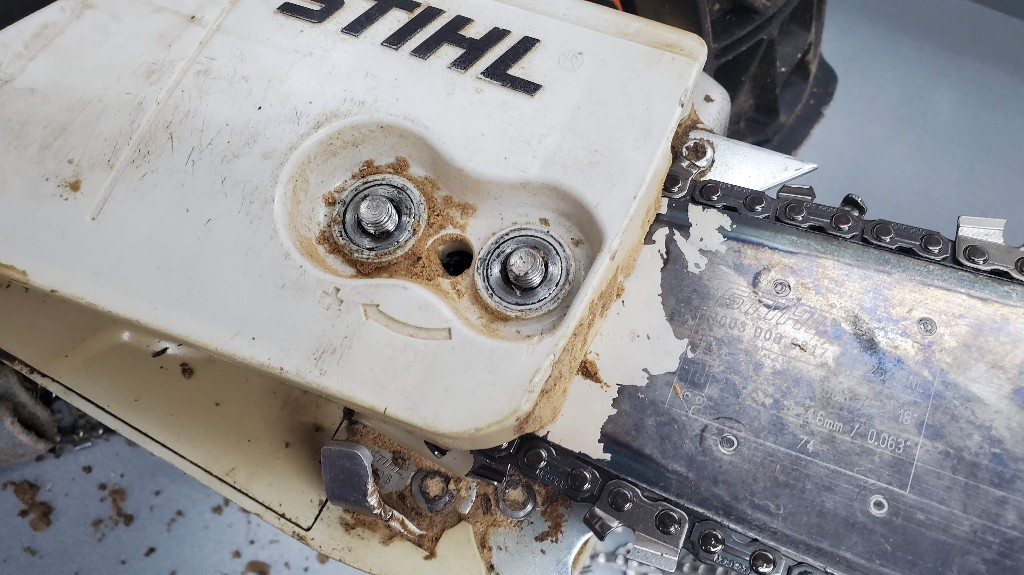
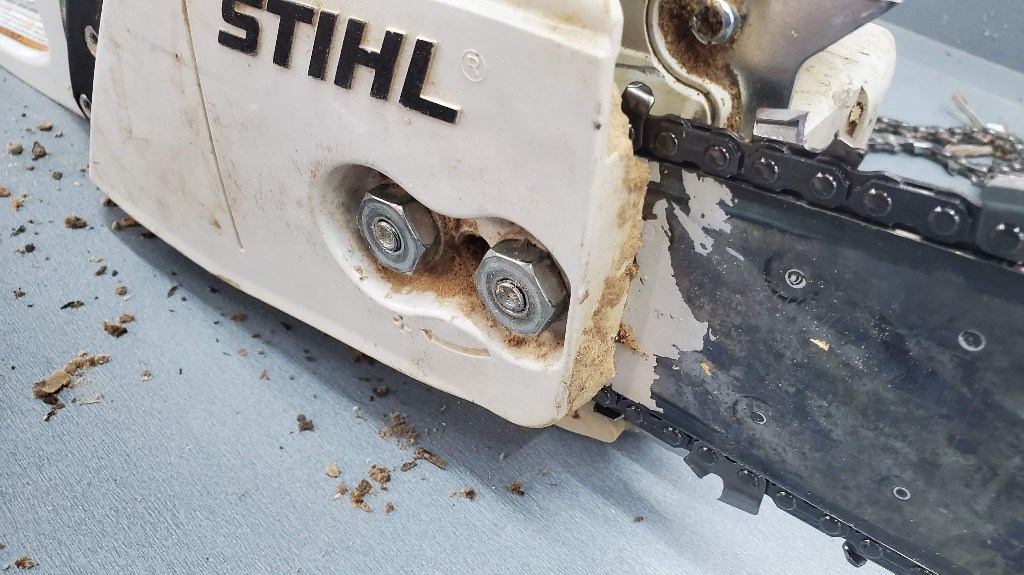
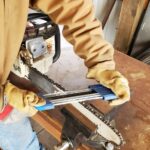
Step 1: Remove the Bar Cover
Use a 3/4″ socket wrench or the wrench tool that came with the saw.
Loosen the two nuts holding the cover on.
Remove both nuts.
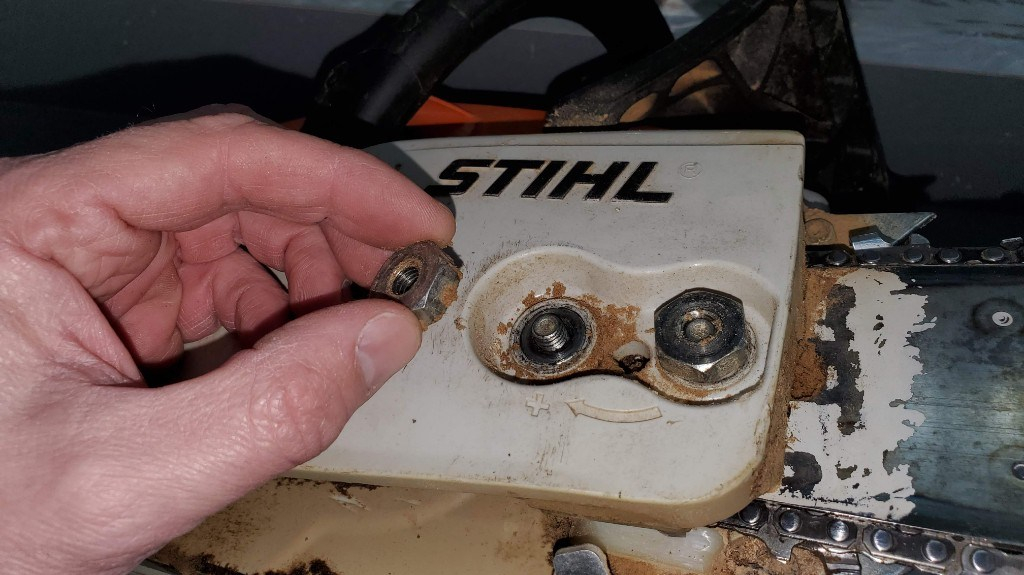
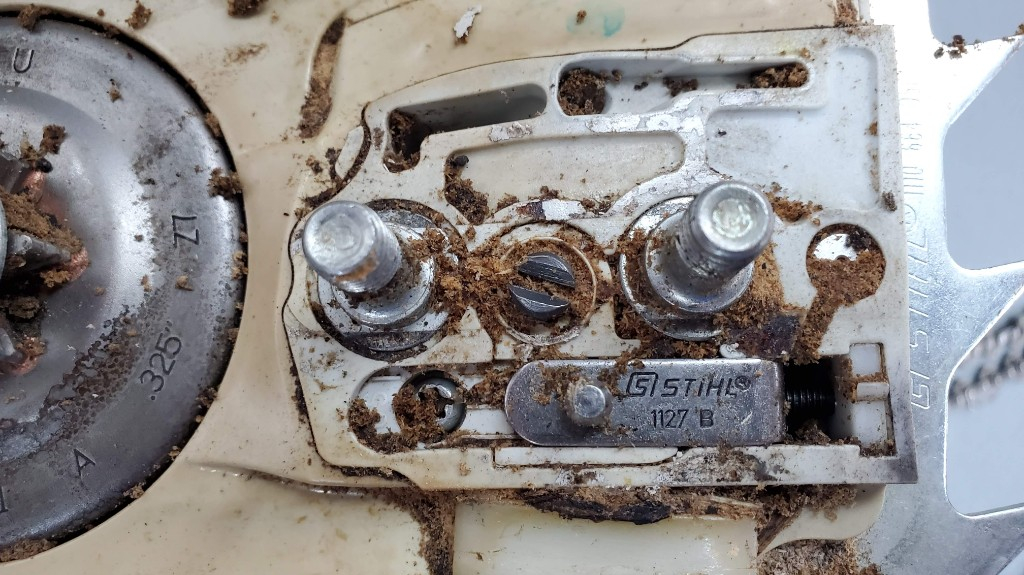
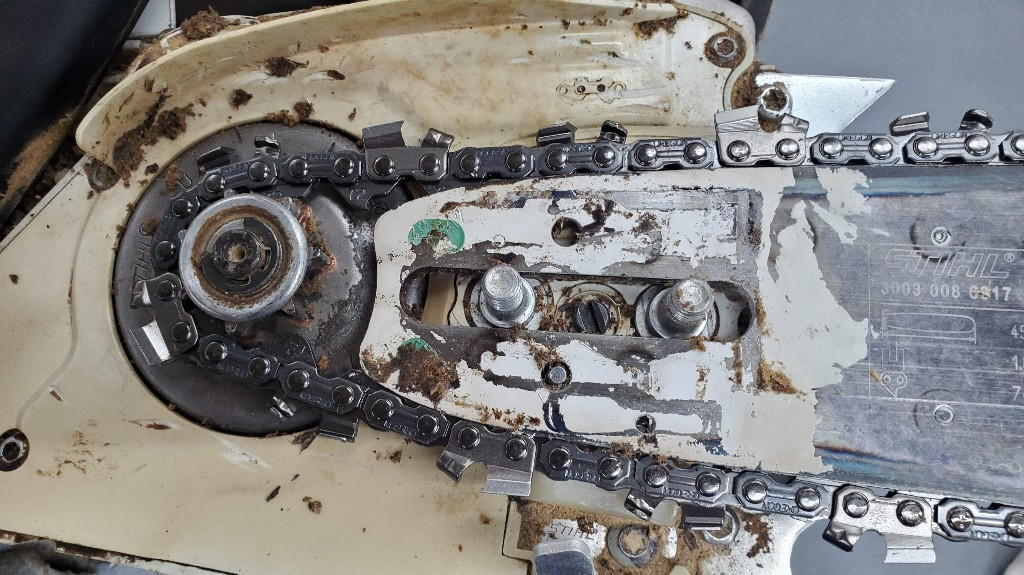
The sprocket, tensioner pin, and chain are visible.
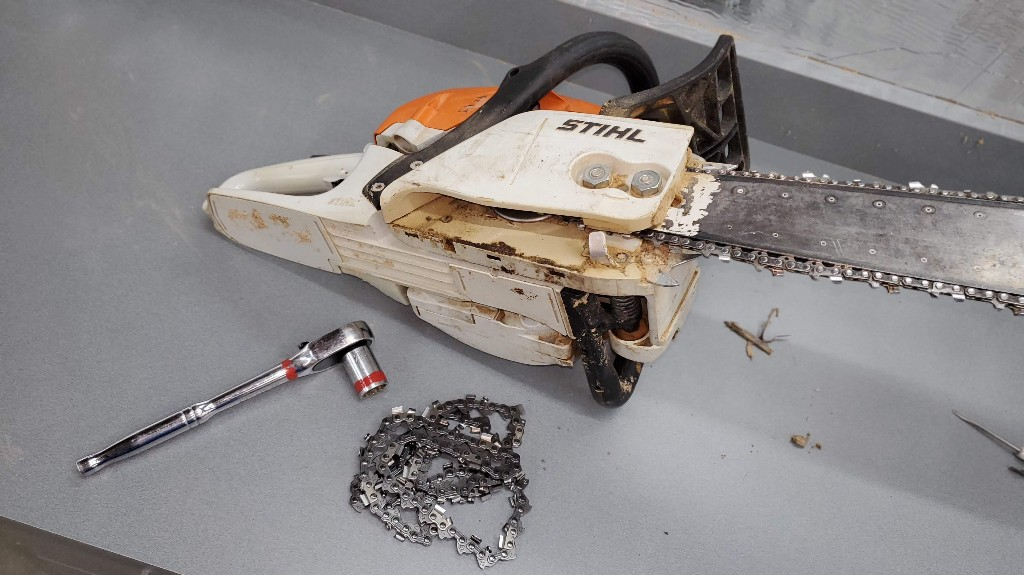
Step 2: Remove the Bar and Chain
Remove the bar and the old chain.
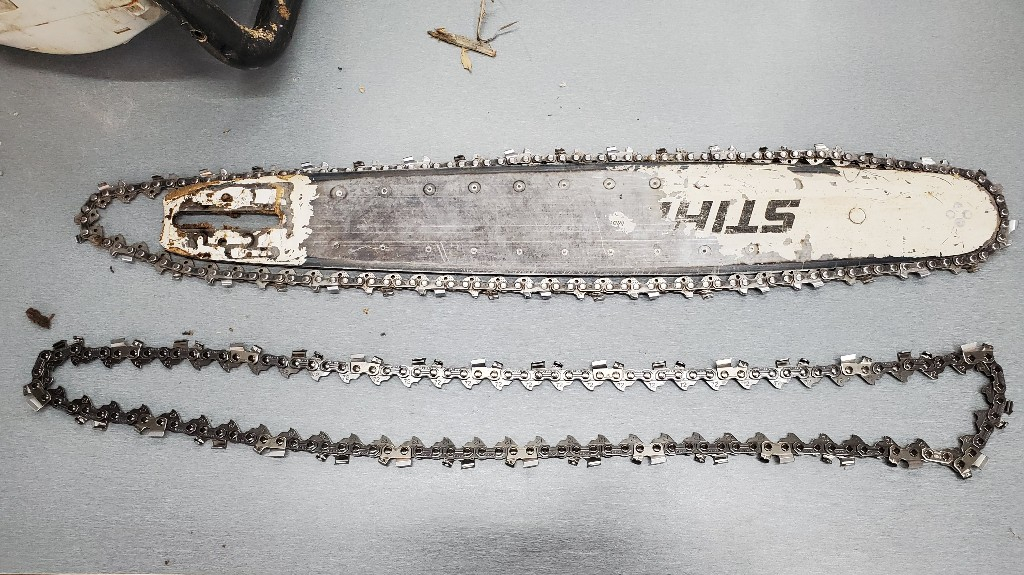
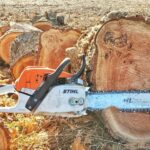
This old chain had been sharpened quite a few times and was due for a change. The new chain is on the left, and the old chain is on the right in the picture below.
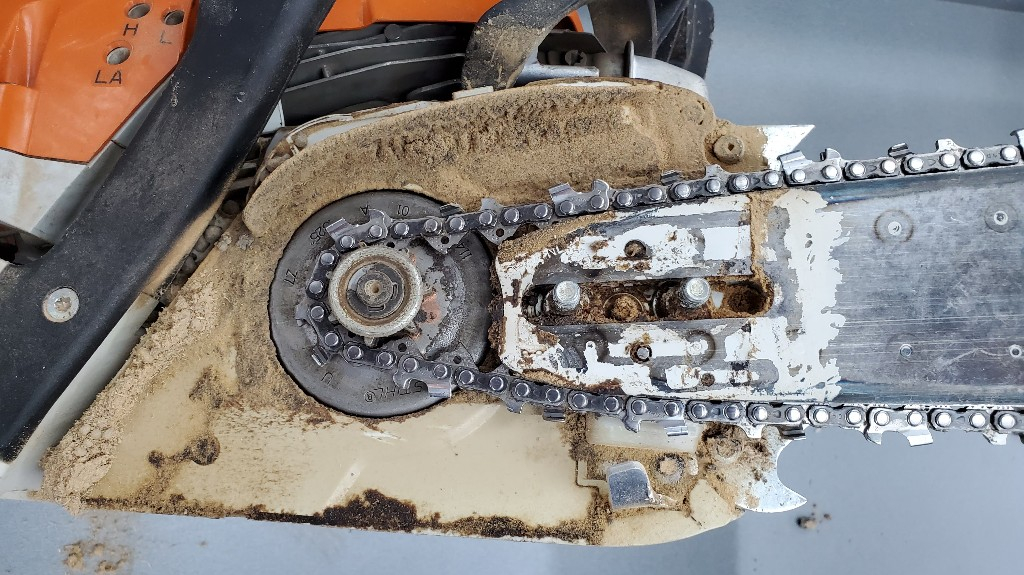
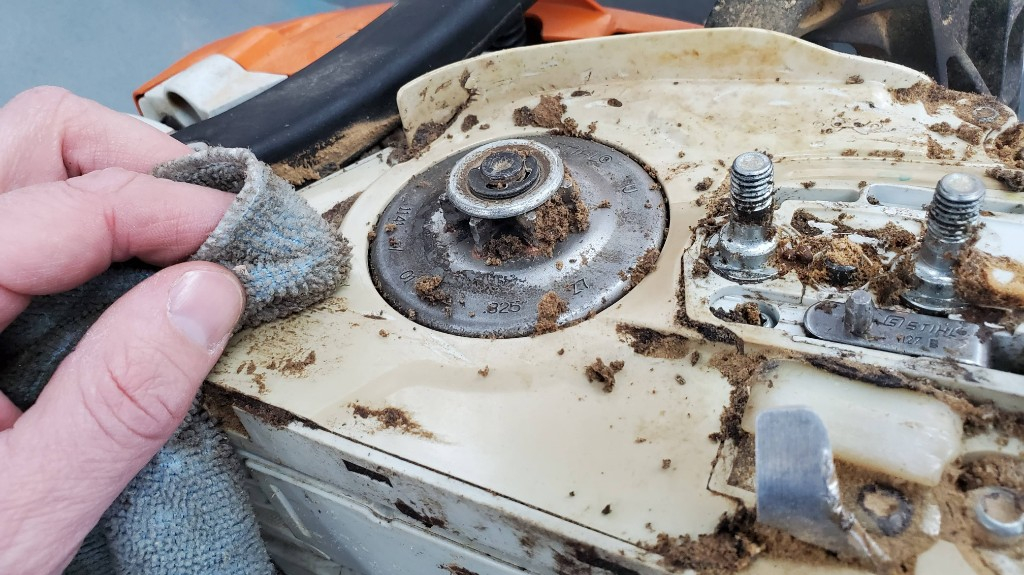
Step 3: Clean Residue from the Sprocket
This is an excellent opportunity to clean the debris from the sprocket and bar studs.
Here is a close-up view of the tensioning screw and tension pin.
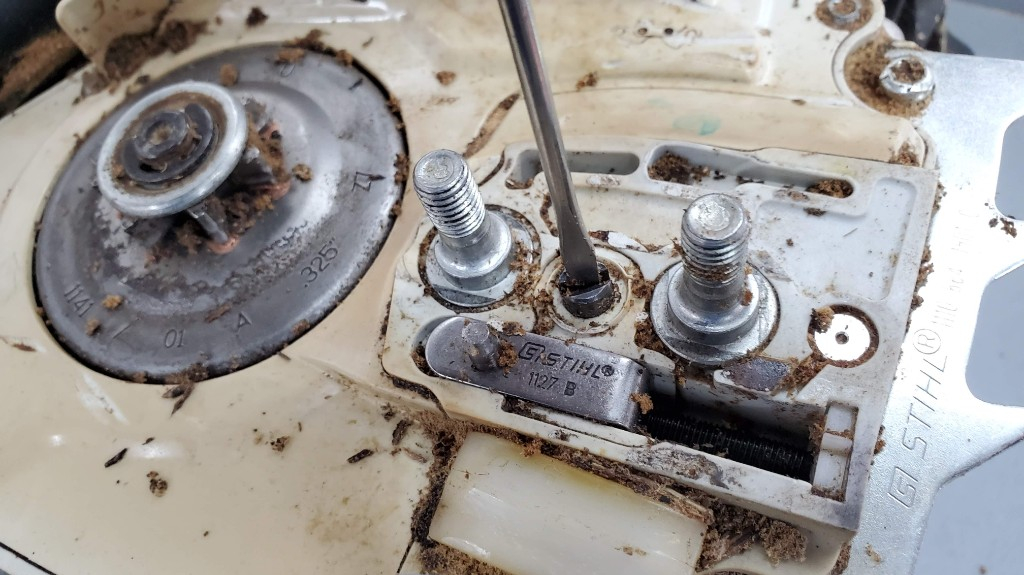
Step 4: Relax the Tensioner Screw
The old chain will likely have stretched, and the new chain will be shorter. Back up the tension pin by screwing the tensioning screw counter-clockwise.
Step 5: Flip the Bar
It is a good idea to flip the bar every time you change the chain in order for the bar to wear more evenly.
Step 6: Put on the New Chain
Take the new chain and line it up on the bar. Note that the cutting surfaces should face outward on the top of the bar, and in (toward the engine) on the bottom of the bar.
Step 7: Place the Bar and Chain onto the Saw
While holding the chain on the bar, put the bar and chain back onto the saw. Loop the chain over the sprocket drive.
Step 8: Line Up Tension Pin
Make sure the tensioner screw is in the corresponding hole on the bar.
Step 9: Tighten the Tensioner Screw
While holding the bar and chain so that the bar does not come off the tension pin and the chain stays on the sprocket, use a flat-blade screwdriver to tighten the tensioner screw by turning it clockwise. Do not worry about getting it super tight. We will adjust the tension in a later step.
Step 10: Put the Cover Back On
While holding the bar and chain in place, fit the bar cover back on.
Put the 2 nuts on and tighten them finger tight.

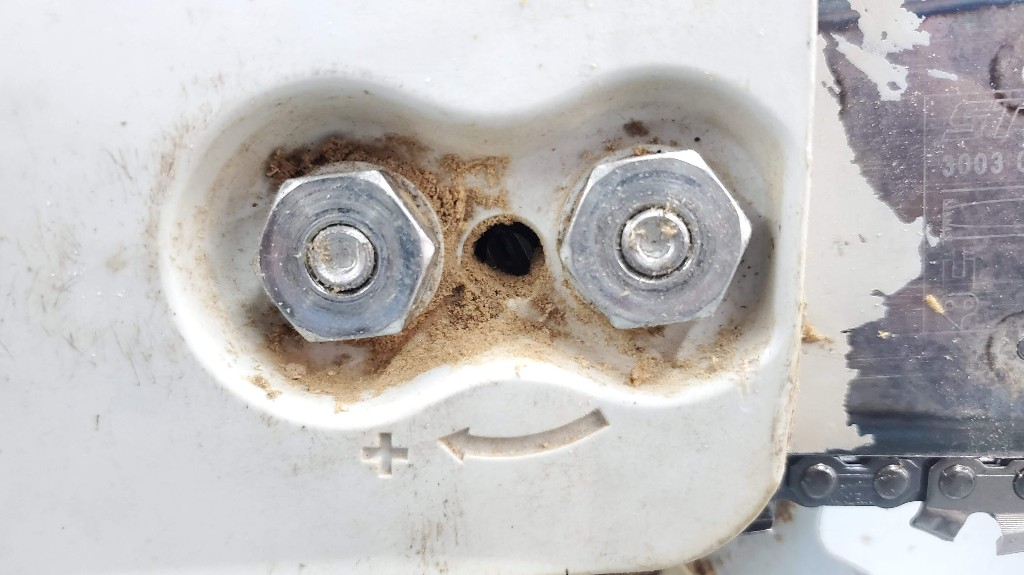
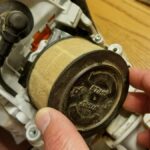
Step 11: Adjust the Chain Tension
Using the flat-bladed screwdriver, tighten the tension by turning the screw clockwise.
(I always think these nuts and the arrow look like a smiley face! He’s pleased when you properly adjust his tension!)
The proper tension is achieved when you pull on the chain and it comes away from the bar by about 1/4″ – 1/2″, or to where the drive links are just about to come out of the bar groove.
Step 12: Fully Tighten the Cover Nuts
Fully tighten the cover nuts with the 3/4″ wrench.
Step 13: Verify the Chain Tension
After tightening the cover nuts, verify once again the tension of the chain. Re-adjust if necessary.
Conclusion
That’s about it. I hope this was helpful. This is the chain I use on my 18″ bar.
Here are a few more pictures showing the old and new chain side-by-side.

I recommend using only Stihl chains, I use and recommend the 26RM3-74 Stihl chain.
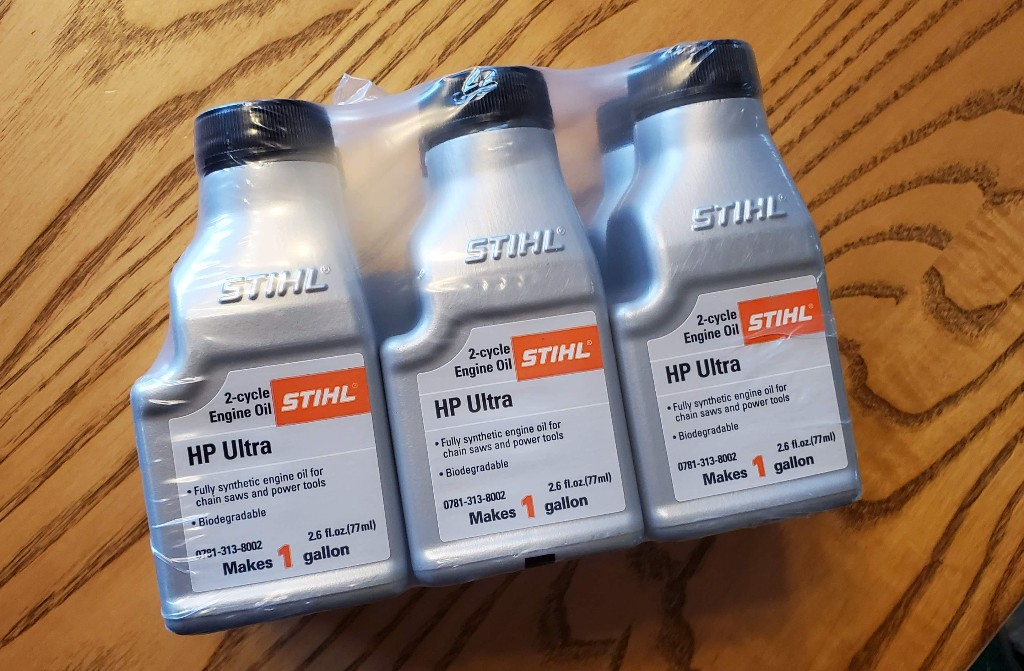
By the way, I only use the genuine Stihl 2-cycle oil to assure long life of the saw.

Add 2.6 oz per gallon of gas.
Thanks for reading practicalmechanic.com!


I have ms291,can I use a 3/8 chain w/18in. Bar ,and wanting to know if thier is a sprocket that will accomandate,the 3/8 chain,the same size sprocket if you were to use a 3.25 chain?
i-have-a3/8chain-20inchbar36240050072-33rs3-72willitworkonms271stihl