How to Stop a Smoke Alarm From Chirping
Is your smoke alarm chirping or beeping? This always seems to occur in the middle of the night in my house. Here are the steps to follow to stop the incessant beeping!
Smoke Alarm Beeps Every 30 Seconds
If your smoke alarms are like mine, when the battery starts to run low, they chirp approximately every 30 seconds. It is incredibly annoying and usually happens at the worst possible time (2 am). These alarms have a low/missing battery monitor circuit that causes the alarm to “chirp” every 30-40 seconds for a minimum of 7 days when the battery gets low! Usually replacing the battery will fix the problem.
Note: It is not necessary to disconnect the alarm from the AC power when replacing the battery, though be forewarned, that it may beep or chirp while you are replacing it!
Steps to Reset a Fire Alarm
- Determine which smoke alarm is going off.
- Open the hatch and remove the old battery.
- Insert a new 9 volt battery.
- If the problem persists, remove the smoke alarm from the receptacle.
- Use a vacuum cleaner or “canned air” to blow out the smoke alarm.
- Remove the battery and press and hold the reset button for about 30 seconds.
- If it’s still not working, replace the smoke alarm with a combination (recommended every 10 years).
If you purchase through links on this site, we may earn an affiliate commission at no extra cost to you.
I highly recommend getting the Carbon Monoxide/Smoke Alarm Combination Detector. As you know, carbon-monoxide is a colorless, odorless gas, so having a detector for that is very important in addition to smoke detector.
- Hard-wired Carbon Monoxide/Smoke Detector (KN-COSM-IBA)
- Battery Carbon Monoxide/Smoke Detector (KN-COSM-BA)
The following contains details for these steps, including pictures.
Detailed Instructions for Resetting a Fire Alarm
Step 1: Determine which smoke alarm is going off.
Have someone stand under each one to determine which one is actually sounding.
Step 2: Open the hatch and remove the old battery.
Most smoke alarms have a hatch that slides open. Slide it open, push the battery towards its terminals, and pull the back out.

Step 3: Insert a new 9 volt battery.
Put the new battery in. Look inside the battery hatch to make sure you have the (+) and (-) in the right way.
I usually buy 9 volt batteries from Amazon.
Hint: The hexagonal terminal is the (-), and the round terminal is the (+).

That should fix the problem. But…if it doesn’t, continue to the next step.
Step 4: Remove the smoke alarm from the receptacle.
Many smoke detectors attach to the receptacle by a twist lock. Untwist the alarm by turning counter-clockwise.

The smoke detector will now be dangling by the wiring harness.
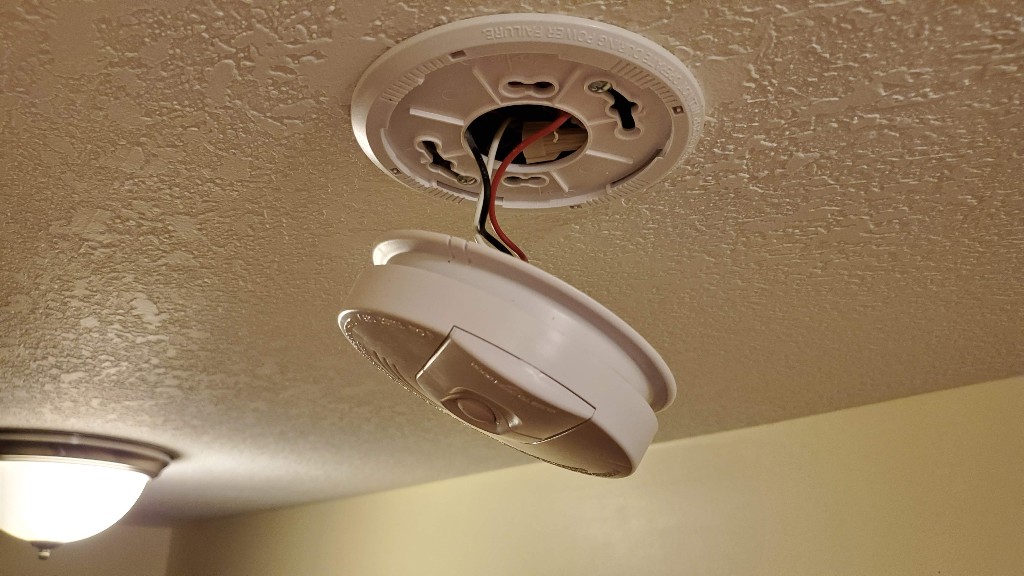
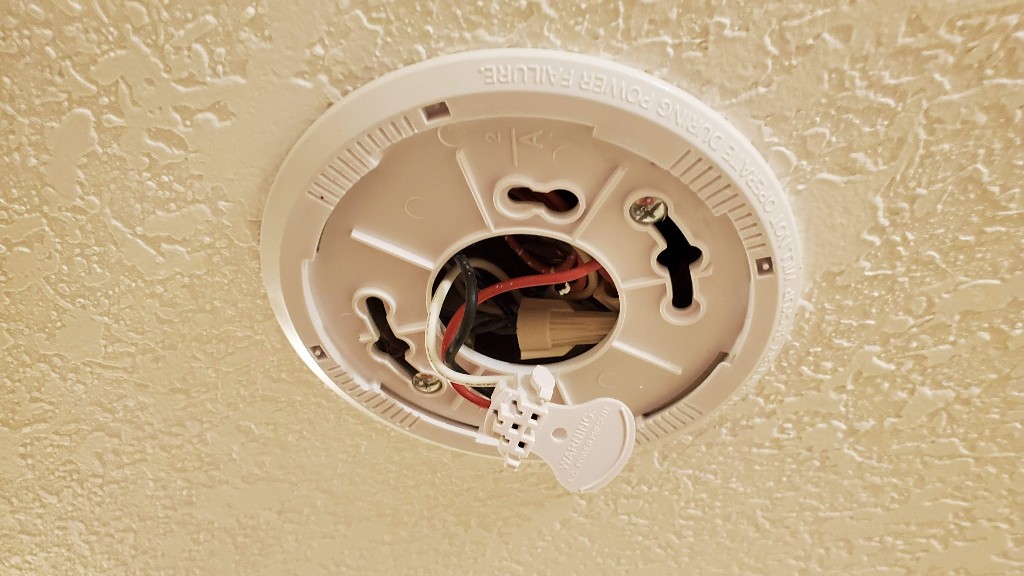
Disconnect the wiring harness by pressing the 2 tabs on the sides and lifting up on the big flat tab.

Pull the plug off.

Step 5: Use a vacuum cleaner or “canned air” to blow out the smoke alarm.
Sometimes small insects such as bugs or spiders can cause the sensor in the smoke alarm to go off (disgusting…). Use a vacuum or some other method to blow out any dust, cobwebs, or dead bugs.
Step 6: Remove the battery and press and hold the reset button for about 30 seconds.
Sometimes the smoke alarm just needs to be reset. To do this, with the smoke detector unplugged, remove the battery. Press and hold the reset button for about 30 seconds or so to reset it. Then put the battery back in, plug it back in, and see if it is working okay.

Step 7: If it’s still not working, replace the smoke alarm.
If the smoke alarm is still beeping intermittently, it may be time to replace it. It is generally recommended to replace your smoke alarms every 10 years or so.
The smoke alarm shown in this post is no longer available, and as been superseded by the backward-compatible CO/Smoke detector (safer version):
- Hard-wired Carbon Monoxide/Smoke Detector (KN-COSM-IBA)
- Battery Carbon Monoxide/Smoke Detector (KN-COSM-BA)
And a link to the batteries for purchase:
I hope this helped solve your problem; thanks for reading practicalmechanic.com!