5-sided Nut – How to Lower the Spare Tire on a Toyota Sienna and Highlander
What in the world, Toyota?!? Why do you use a non-standard, 5-sided nut to lower the spare tire? In this post we talk about why the spare lowers with a 5-sided nut, and more importantly, how to get the right tool!
Note: PracticalMechanic.com is reader-supported. If you buy through links on our site, we may earn an affiliate commission – at no cost to you. I do not put any other type of ads on this site because I think they are annoying. Thank you for your support!
What Were They Thinking?
I’m in an emergency situation, with a flat tire, and I need to lower the spare tire – where am I going to find a 5-sided socket? Here is a link to the official tool:
5-sided Socket Tool (Toyota Part#51942-28010, 51942-48010, 04004-66108)
What Size Penta Socket is Used on Toyota Sienna?
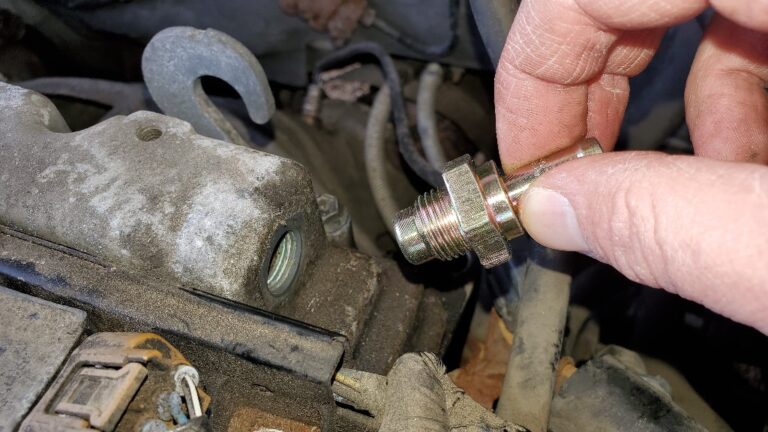
The 5-sided nut used by Toyota for lowering the spare tire is a 15/16 inch or 23mm Penta Socket. The way that you measure these is from point to flat.
Previously I had mistakenly written that a smaller 13/16 inch penta-socket would work (used for turning on/off city water valves) – which is NOT the case, thankfully a reader caught this error and corrected me on this (Thank you Ron).
A Little Background
Some time ago, Toyota issued a recall for the 1998-2010 Toyota Sienna and 2003-2019 Highlander (Safety Recall A9E) spare tire cable. The spare tire is stored under the vehicle, and apparently the steel cable could corrode and break, causing the spare tire to fall off. If this happens at highway speeds, this could be a very dangerous situation. The recall states:
The subject vehicles are equipped with the spare tire stowed under the vehicle. If the vehicle is operated in the cold climate regions of the United States where road salt is frequently used, water splashed backwards with high concentrations of road salt can reach the spare tire carrier and corrode the spare tire carrier assembly cable.
The solution was to apply rust-prohibitor on the cable and change out the original 21mm nut used to lower the spare tire, with a special 5-sided nut instead. Why, you ask? The 5-sided nut requires a special tool that limits the amount of torque that can be applied when tightening the nut. Apparently using a regular hex socket (or impact wrench) could cause the cable to be tightened too much, accelerating the cable failure.
Step-by-Step Procedure to Access the Spare Tire on a Toyota Sienna and Highlander
The following is a detailed description of how to access the spare tire on a 2003-2019 Highlander, 2006-2019 Sienna, as well as others.
Where is the spare tire?
The spare tire is located under the vehicle, on the passenger’s side, underneath the sliding door.

How do you remove the Spare Tire on a Toyota Sienna?
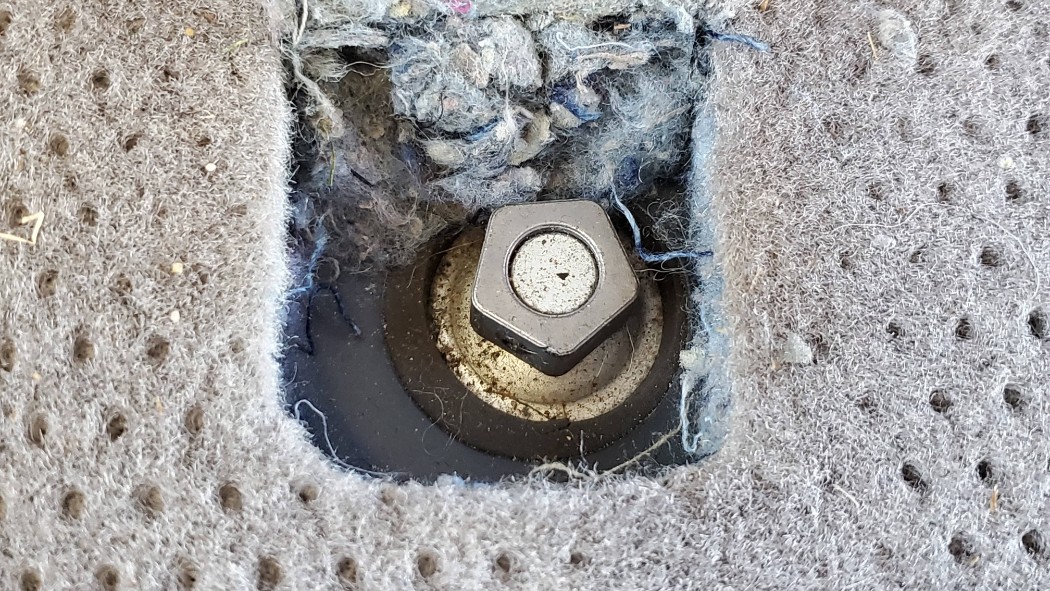
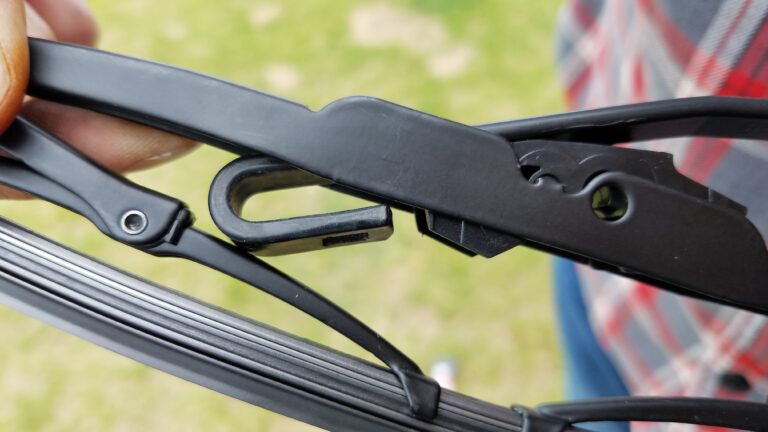
The spare tire is held in place with a cable. In order to lower the spare tire to the ground, remove the floor mat from behind the front passenger’s seat, and locate the lowering nut.

If your van has had the recall fix applied, it will have a 5-sided nut, as shown. Normal sockets or wrenches will not work on this!
As part of the recall, the dealer should have placed the special 5-sided socket tool in your glovebox. Check there first. It looks like this:

The part number for the 5-sided socket tool is:
5-sided Socket Tool (Part#51942-28010, 51942-48010, 04004-66108)

Place the tool on the 5-sided lowering nut.


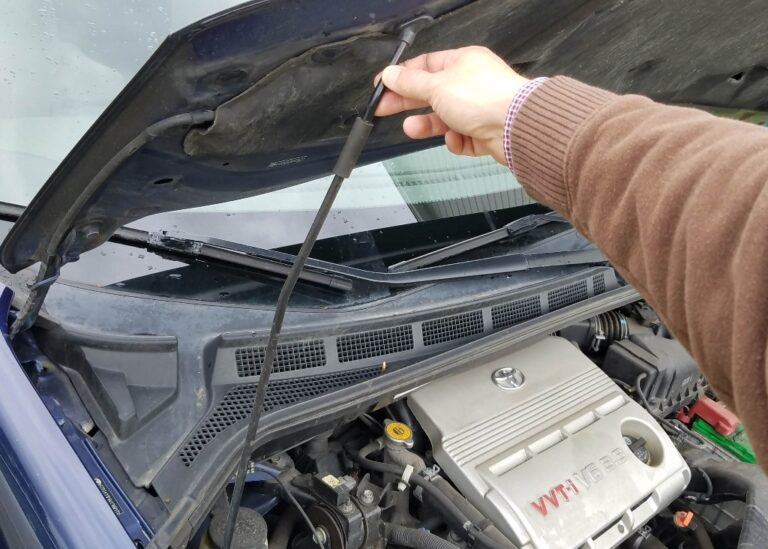
Now locate the crank from your car’s jack. It is located in a side panel in the trunk area.

Slip the hook through tool.


Start cranking to lower the spare tire.

Once the spare touches the ground, keep lowering the nut until you can fit the clasp at an angle through the rim hole to get the tire free of the carrier.

By the way, they even provide a plastic bag for you to put the flat tire in, it’s located in the back of the plastic panel where the jack is.

Hey, I hope this helps! Thanks for reading,
Richard
The part number for the 5-sided socket tool is:
5-sided Socket Tool (Part#51942-28010, 51942-48010, 04004-66108)


Toyota has very intellegent engineers. If they tell some 250 pound gorilla not to overtighten a nut, it will fall on deaf ears, and the nut will be overtightened because too tight is always better than not. The cable will be damaged and could cause the wheel to fall off. So many philistines comment on bad design. They have never designed anything, but feel qualified to judge based on ignorance. So glad that airplanes are maintained by trained, intelligent persons else I would never fly on one.
Hi Richard,
I received my 2014 Toyota Sienna van as part of a modest bequest from a deceased friend. He had purchased the car at a local auto auction place. We took it to our trusted mechanic to have it looked over. They did some routine work and replaced a wheel bearing. I bought four new tires but I wanted to know if there was a spare tire or a donut just in case. So I took it to a small shop today. The guys told me they found the little tool but it wasn’t the right one. They said they got it off and looked at the tire and it was good. When we got back to our Airbnb, my husband researched and found your website.
I had no idea this would be so complicated and scary!
To learn that there was a recall and that my life could be in danger blew my mind. […apparently the steel cable could corrode and break, causing the spare tire to fall off. If this happens at highway speeds, this could be a very dangerous situation.] !!!
I’m in Denver now, 120 miles from home and wondering if I should drive it home.
If you’re worried about it, you can always take off the spare and put it into the back (“trunk”) until you get a chance to take it in for the recall. Good luck!
Great info,
Just went through this, had the carrier replaced at the dealer but they didn’t reinstall the tire. So, I got tired of it sitting in the back of the van and went to put it back under the van, so I unwound the carrier by hand, hooked it to the tire and went to wind it back up. I could not find a socket or wrench to fit. I then took a good look at the nut and found it to be this 5-sided nut. I then went through whole van trying to find this mysterious 5-sided socket. Nothing! Good thing I wasn’t on the side of the road!!!
Exactly! This is a really bizarre design decision on the part of Toyota. But anyway, glad you found out about it before it was an emergency!
Just want to thank you for this important info. I wanted to be prepared to change a tire myself on my 2005 Sienna. I searched youtube, couldn’t find the info I needed. So glad I found this. I wouldn’t have known about the special part without your post. I just checked, and mine is stuffed in with the jack
Glad it helped! Good idea to go through it ahead of time before you’re on the side of a dark cold freeway in the middle of nowhere!
How do you put the spare tire back under the car? Obviously, I’ll need the socket you mentioned, but what else needs to happen to secure it? Step by step is best. The person who changed the tire was not me, so I never saw the process of getting the tire out to begin with.
Bummer! Luckily it’s a fairly straightforward process.
The spare is held onto the car by a plate at the end of a cable. The cable is extended or retracted by turning the 5-sided nut discussed in this article. So for your case, I would recommend the following:
1. Place the spare tire under the car.
2. Turn the 5-sided nut to extend the cable/plate underneath the car until you can feed the plate through the center hole in the rim of the spare tire. You will need to tip the plate to get it through.
3. Once the plate is through, position it evenly in the rim hole.
4. Turn the 5-sided nut to retract the cable, and in turn this will eventually lift the spare up into place underneath the car.
5. Continue turning until the spare is positioned tightly and snugly.
Hope this helps!
I don’t believe the dealer left us anything after the recall–not in the glove compartment, not in the jack compartment, not anywhere. I’d not seen it until I saw the photos above. However, I did find that I had a basin wrench that just fit into the area around the 5-sided nut, and I was able to retrieve the spare pretty easily.
Thanks for your exceptionally clear and helpful post and pictures. I discovered the 5-sided nut when I went to top up the air in my spare. The dealership that did the recall didn’t tell me about the necessary special tool and didn’t leave it in the glovebox. Luckily, I found it stowed in the jack compartment. I also totally agree with other comments that Toyota made a very bad choice with this one.
Totally agree! Also, thanks for the feedback on another alternate place to check for the tool (jack compartment). All the best!
I give a F to the team that decided to make this adaptation. I dont see how using a 5 sided nut will lessen the torque. The nut is close to 1″ in size. You can still put an enormous amount of torque on this nut.
Did they not think about the numbers of people who will be stranded without this special tool? Anytime you add a special tool to be able to operate something, you add complexity, and the tool being small and easy to loose, is bound to become a major cause of frustration to many.
A woman I tried to help with her flat, didnt have the tool, I could help. She called roadside service and he was also unable. He called another and the second guy also was unable. The fact that 3 different mechanics could not help to me shows poor design and will never get my approval. Its always best to standardize and simplify. I am left shaking my head at this poor design. Criminal practically.
Totally agree!
Fil this under “things I wish I knew before my flat tire!” Thh hi and you, this is great info. My roadside service was frustrated at the missing tool, which was NOT left on my glovebox after recall fix.. and I didn’t even know it was missing…. Well they figured out how to lower the tire and thanks to your post I’ve now been able to get the key and restore the spare. Great info -thank you
Was completely stranded with no idea what to do or how to do it! THANK YOU for your helpful post!
Glad this helped!
I just experienced this issue for the first time on Sat. after my wife had a flat tire. I ran to her rescue and after running home twice getting all my larger sockets, realized the stupid nut was 5 pointed. WHAT A DUMB IDEA! SO DISAPPOINTED IN TOYOTA. Anyway, my large crescent wrench worked well and I was able to get the spare down. Now to find one of those wacky 5 pointed nuts. My search landed on your website. You did a great job of laying out the situation and even provided a link to the tool as well as some good pics. Thanks so much.
I fully agree! Glad you got it worked out, and glad I could help!
I was excited to get my 13/16″ socket from Amazon. Unfortunately It’s too small to fit the nut on the Toyota spare tire release mechanism. The Toyota adapter is 1/16″ wider from corner to opposite flat side.
Back to square one…
File the socket bigger not much extra material to work with. File the nut smaller, which involves removing mechanism to get a good file angle on nut. Or do I figure out a socket or vise grip that works on the under side of the car. The small shaft that has small retaining pin going through it.
Greatly disappointed.
’04 sienna after recall replacement.
Hi Ron,
I am sorry. I mistakenly wrote that a 13/16″ penta-socket (commonly available for turning on/off city water supply lines) would work, but I was wrong. The Toyota 5-point socket is larger, closer to 23mm as you point out. I was unable to find a 15/16 inch penta socket available online, other than the Toyota Part#51942-28010.
Thank you for letting me know, I have corrected this post based on your note. Once again, sorry about that.
Richard
No worries. I spent over an hour filing out the inside of the socket. It fits now and solved my dilemma. Van build made access nearly impossible so getting the socket was really the only best solution.
I’m glad you figured out a work around!
Was excited to discover the penta socket to lower my spare. Ordered a 13/16″ from Amazon and it arrived today. It’s 1/16″ too small… It won’t fit on the nut.
Back to square one.
Trying to decide do I drop the whole mechanism to file the nut smaller, file the socket bigger (not a lot of extra material to take off), or devise a way to release spare from under the car (vice grips?) by turning the crank from the bottom…
Thank you for the tip. You explained it well. I just learned that my spare was flat and I didn’t have the required 5-pt socket. I know Toyota has some smart engineers, but they didn’t assign this project to one of them.
Haha! I think you hit the nail on the head!
I was not aware of the need for a special tool, checked my car and it was not there.
I tried some 12 point sockets and 13/16 does the job.
Thanks for the tip, Scott! I tried a bunch of different sized metric sockets, hoping one would sort of “bind” well enough to get it loose at least, and ended up using a vise-grip pliers. (Before finding the actual tool in the glovebox) The good news is that it is not super tight, so hopefully no danger in stripping it. Good to hear that a 13/16 can work in a pinch!