
How to Change Front Brake Pads on a Toyota Corolla
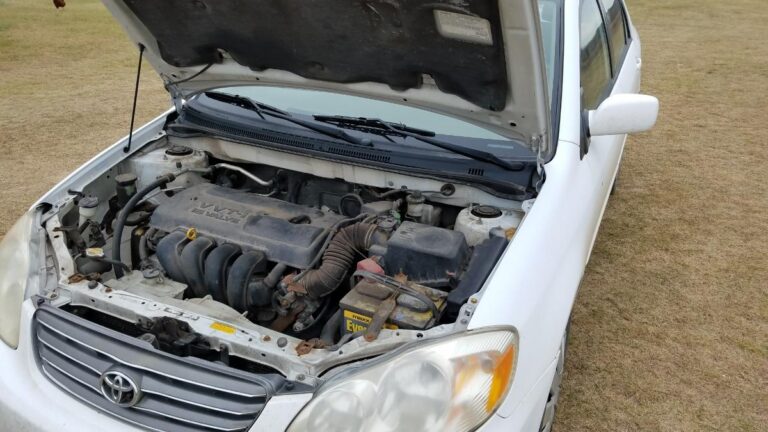
Follow this picture guide to change the front brake pads on a Toyota Corolla, Matrix and Pontiac Vibe. This is a pretty straightforward repair. This article includes lots of pictures to help in getting all of the brake components back into the correct positions. The vehicle shown here is a 2004 Toyota Corolla CE, and the procedure is almost identical for 2002-2018 Toyota Corollas.
Note: If you buy through links on our site, we may earn an affiliate commission – at no cost to you. Thank you for your help keeping this site active.
Background
This guide covers the replacement of front brake pads on a Toyota Corolla. I recommend the following brake pads:
- 2002-2008 Toyota Corolla – Bosch BE923H Brake Pads
- 2009-2018 Toyota Corolla – Bosch BC1210 Brake Pads
Not sure which brake pads to buy? Check out my post on the Best Brake Pads for a Toyota Corolla.
For REAR brakes, check out this article for similar details on replacing REAR brake shoes on a 2003-2008 Corolla.
Note: If you also experience vibration when braking, there is a good chance your rotors are warped and need to be resurfaced or replaced. Check out this post for replacing rotors (it is usually cheaper to replace rotors than pay for the labor of having your old ones turned down). And if you have a jammed caliper pin causing uneven braking, check out this post for replacing a jammed caliper pin.
This guide covers replacing front brake pads on a Toyota Corolla, Matrix, and Pontiac Vibe.
Tools required to change brakes on a Toyota Corolla:
- Brake Pads (#BE923H) – these for 2003-2008 Corolla
- Brake Pads (#BC1210) – these for 2009-2018 Corolla
- caliper holders
- car jack
- jack stands
-
 impact wrench with ear mufflers (optional)
 - 13/16″ lug nut socket
- socket wrench with 14 mm socket
- torque wrench
- brake cleaner spray
- anti-seize lubricant
- Rotors (2003-2008 Corolla) – Optional (if current rotors are warped and you experience vibration when braking)
- Rotors (2009-2017 Corolla) – Optional (if current rotors are warped and you experience vibration when braking)
Alright, let’s get started!
(FYI, I put all of this into a pdf file for ease of printing to bring in to the shop. Click here for a printer-friendly version of this guide.)
Step by Step Instructions for Changing Brakes
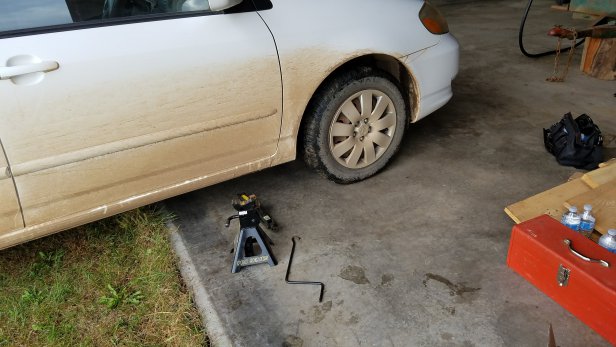
The first step is to jack up the vehicle. If you have some jack stands, go ahead and use those. Otherwise throw a big stump under the car, you don’t want it to come crashing down on you while you are working.

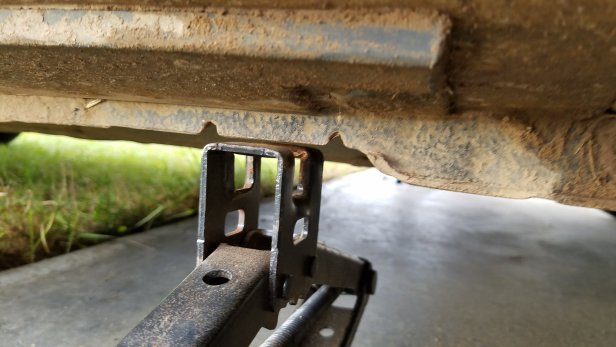
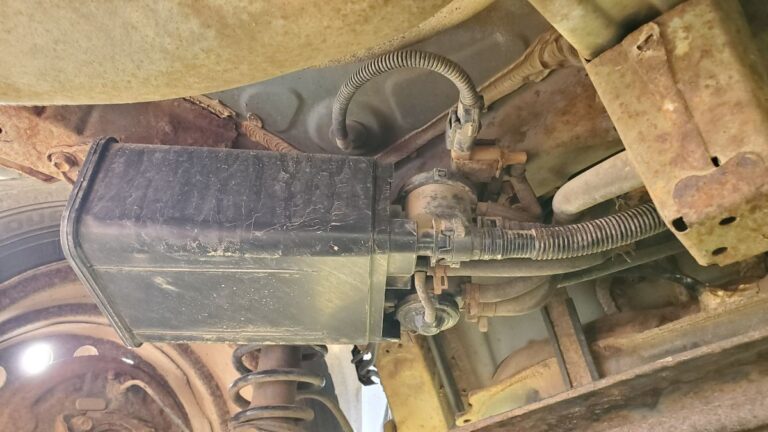
If you’re using the car’s jack, note the two notches underneath the frame near the front wheel.
This is where you are supposed to position the jack when jacking up the front wheel.
Just put the jack stand next to the jack. I usually kind of lower down the jack a bit so that it’s resting on both the jack stand and the jack. That way you have both holding up the vehicle. Just an added layer of safety.

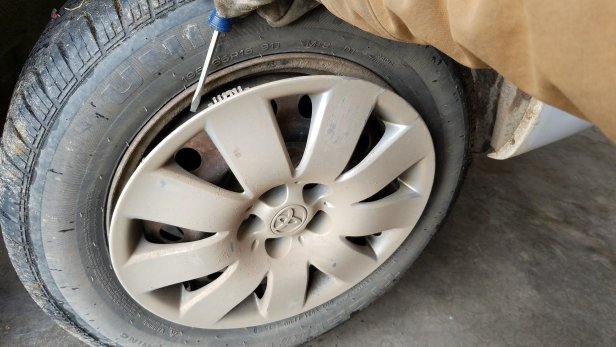
Pry the hub cap off with a large screw driver, as shown. Work your way around, little by little. Don’t get hasty; you don’t want to crack the plastic.
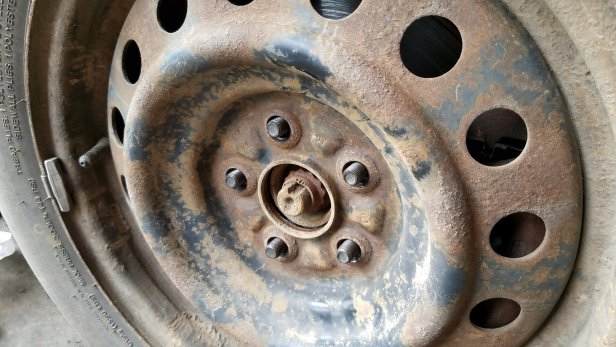
Remove the lug nuts with an impact wrench. Standard ones use a size 13/16” socket.
Give the tire a kick, to loosen it. And then pop it off. If the tire won’t come off, check out this post where I describe methods to release the tire if it is rusted on.
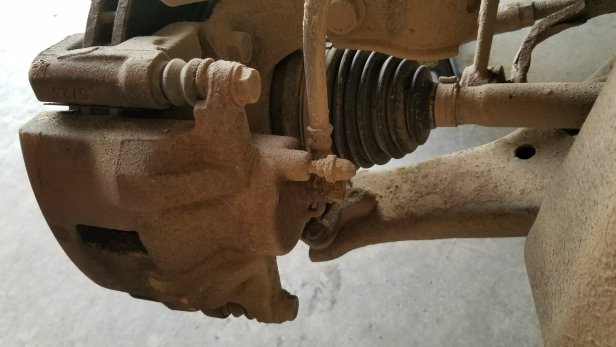
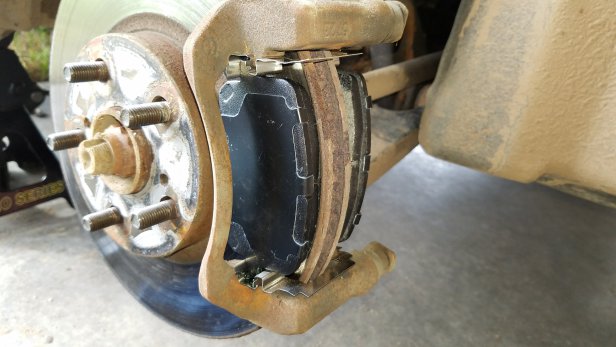
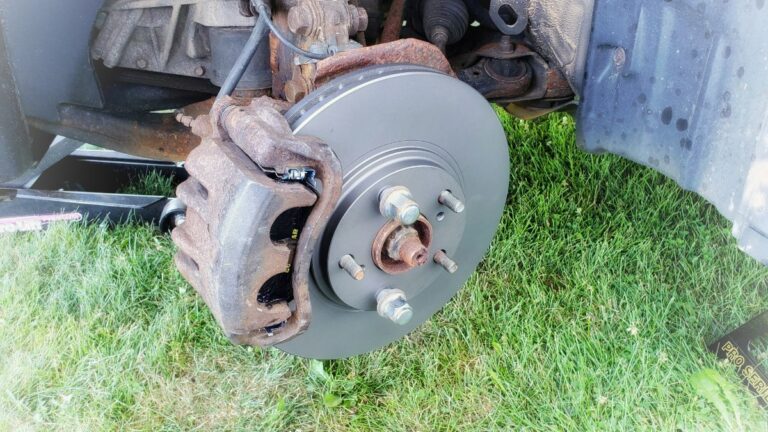
This is what you are left with. To take off the brake pads, we need to remove 2 bolts. These are 14 mm, so grab your socket wrench.
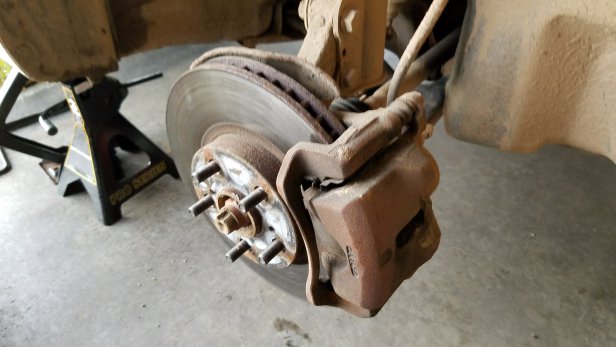
The bolts are around back. This image gives a good view of the two that need to be removed.
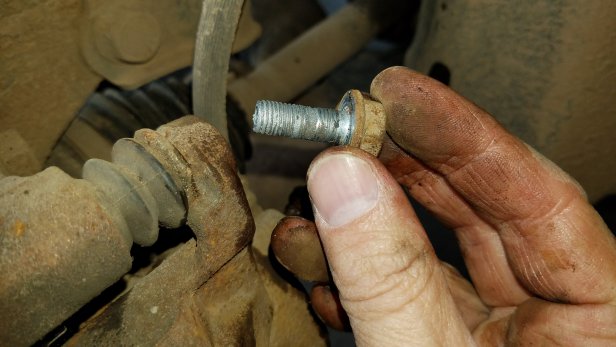
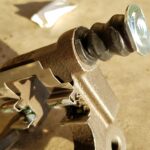
Take out the top bolt.

And the bottom bolt.
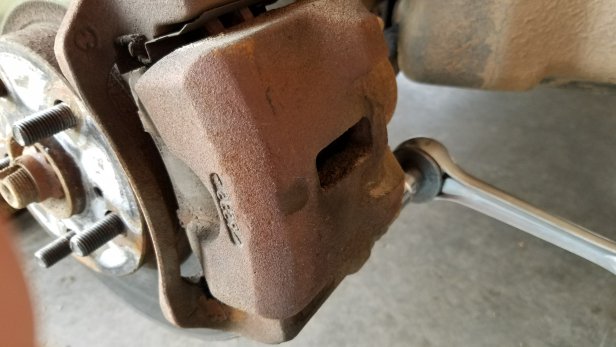
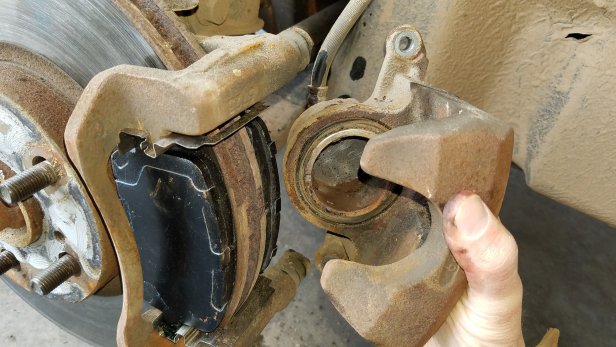
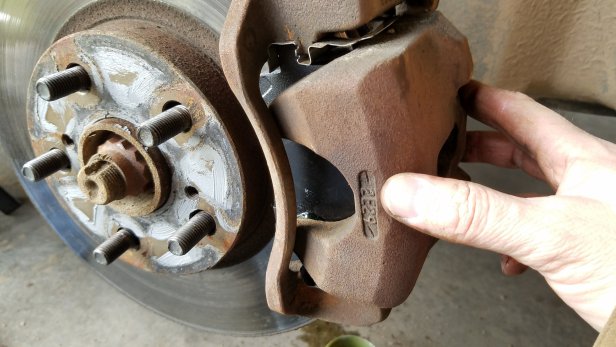
Then slide the brake caliper off.

The only thing connected to the brake caliper now, is the brake line. You don’t want to put a lot of stress or strain on this, so don’t hang it from the brake line!
A lot of guys will use a piece of wire or a coat hanger to wire this up to something up above, so that there is no strain on the brake line. That is a good method.
I typically hang the caliper from the front strut spring as shown in this next image. Just be sure that you don’t knock it down, and ripped out the brake line.
If you want to do it the right way, get a set of caliper hooks to secure the brake caliper from the strut while you are changing the pads. These are nice to have and I should probably invest in a set of these myself…!
(Update 2022: I did, and they’re great!)

You want it out of the way, so that you can work on removing the old pads, and put in the new pads.
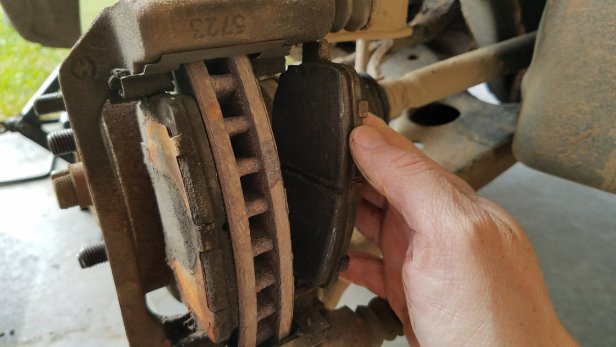
The next step is to pull the old pads away from the rotor. In this next picture, the pad closest to the engine is being pulled away.
Now remove the pad closer to the outer side of the vehicle.
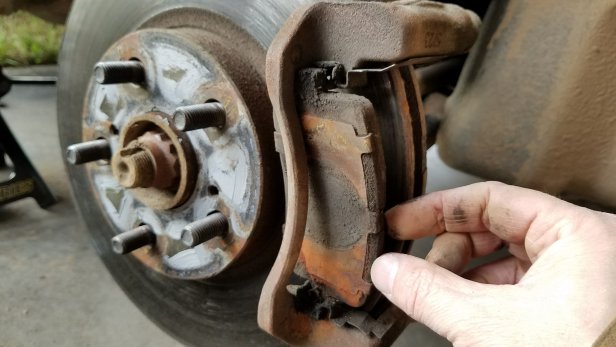
Don’t throw the old pads away just yet, we will use these in a future step. So set them aside.
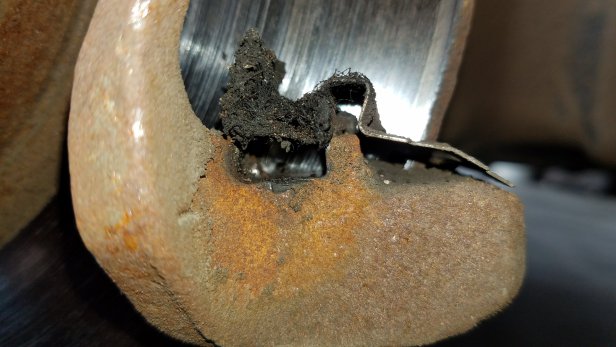
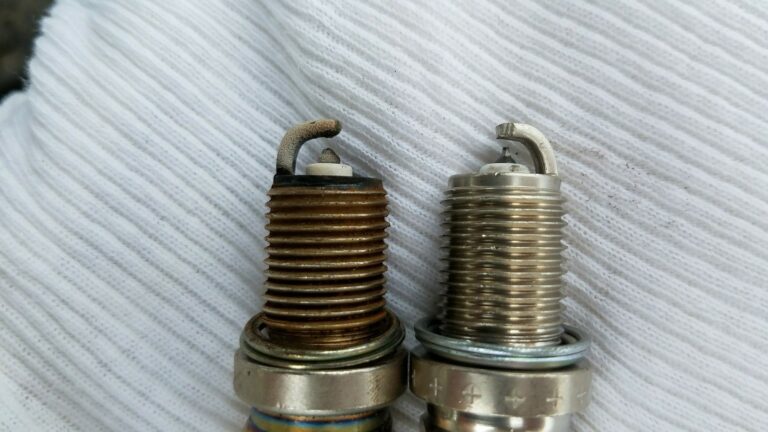
This is also a good time to check the condition of your rotor. You don’t want there to be grooves in the rotor. This should be very flat and smooth. If you have grooves in the rotor, you probably want to replace them. You can also take them into be reground, but rotors are surprisingly cheap, so you might be better off just replacing them all together. These are the rotors I recommend:
- 2003-2008 Toyota Corolla – Bosch QuietCast (50011343) Brake Rotor
- 2009-2017 Toyota Corolla – Bosch QuietCast (50011478) Brake Rotor
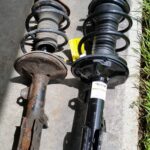
I replaced the rotors at a different time due to shimmying (shaking) of the vehicle during braking, and I describe the process to replace rotors in this post, in case you are interested in that.
I ordered the high-quality Bosch brake pads from Amazon because I think they are about the best brake pads you can get and the price is actually quite good for this quality, and not a lot more than you would pay for low-quality (thin) brake pads at a local auto store chain. Anyway, these are the brake pads I both use and recommend:
- 2002-2008 Toyota Corolla – Bosch BE923H Brake Pads
- 2009-2018 Toyota Corolla – Bosch BC1210 Brake Pads
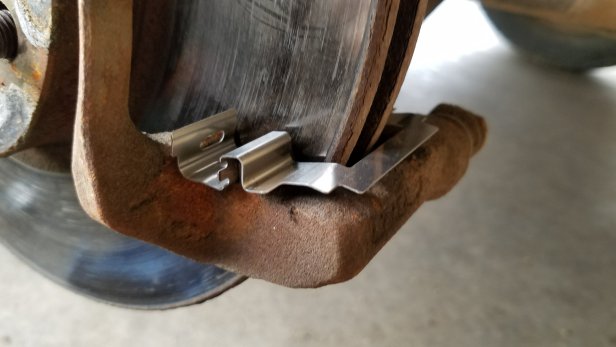
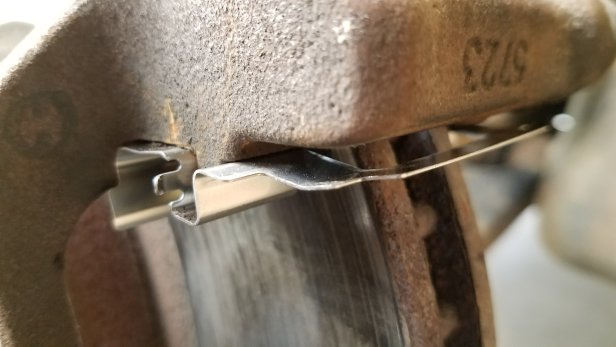
If the new brakes you bought came with slide clips, then you can remove the old ones. Use a small screwdriver and just pry them out of the grooves.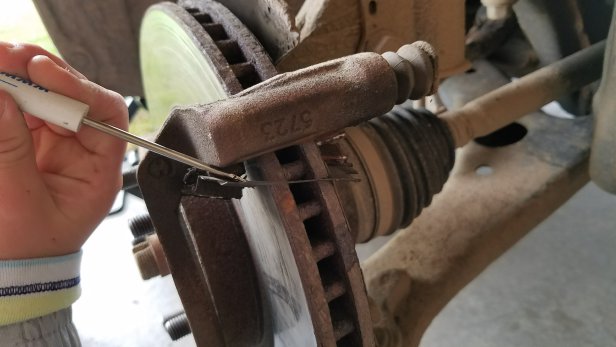
Then pop the new ones into place. There should be a new one on the bottom and on the top.
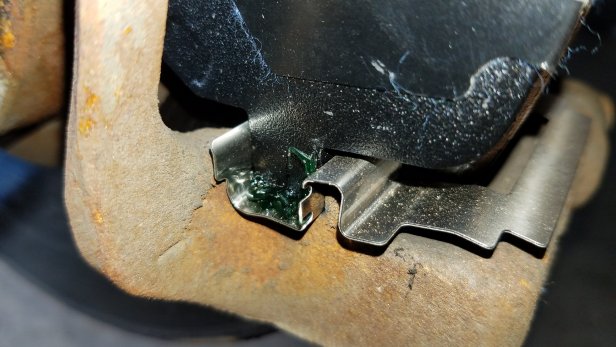
Put a little bit of caliper grease on to the slides, where the new brake pads will slide in and out. Then go ahead and push the new brake pads into place. Just push them up snugly against of the rotor.
Put some of the caliper grease in the groove. You want to make sure there is plenty of grease here so that the new brake pad doesn’t rattle around, and so that it doesn’t squeak every time you apply the brakes.
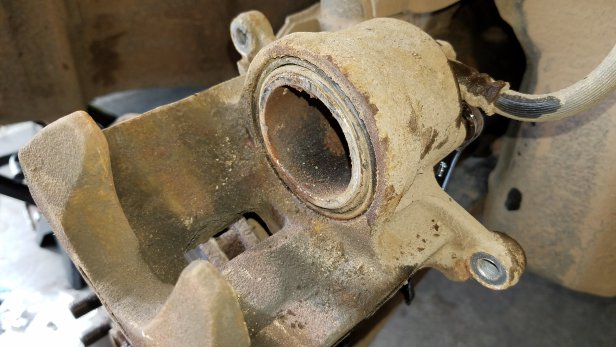
We’re now ready to put the brake caliper back on. The only issue now is that since the brake pads are much thicker, than the old ones, the caliper won’t fit on. We have to press the brake cylinder back into the housing, so that there is enough clearance to put the caliper back on. This is where we will use the old brake pad. It gives us something to clamp against.
Note: If the caliper boot is ripped, or the caliper is in rough shape, you may need to replace it. Make sure you buy the right one, since they are different for the driver’s and passenger’s side. Or you can just purchase the whole brake kit and replace both calipers, both rotors and pads. This is not a bad idea if all your parts are rusty and in need of replacement. Doesn’t really cost that much either!

Find a large C-clamp, and put it over the break caliper has shown. Use the old brake pad against the caliper piston so that you don’t damage it.

Tighten the C-clamp until the brake cylinder is pressed back sufficiently to fit it over the new brake pads.
Note: You may not need to press it all the way back into the cylinder. Just press it in enough so that it will fit over the new brake pads.
Then go ahead and slide the caliper back on to the brake pads.
Line up the holes so that you can re-insert the 14mm bolts.
Put the bolts back in, and tighten them. Don’t overdo it. Use a torque wrench to tighten them to 25 ft-lbs. If you have some anti-seize, go ahead and put some on the threads so that they are easier to get out next time.
Once you tighten to the caliper bolts. Go ahead and move the caliper back and forth. You want to make sure that there is a little bit of movement, and that the pins have sufficient grease on them to move.
It’s also a good idea to put a little bit of caliper grease on the points where the caliper contacts the new brake pads. This will help reduce squeaking.
That’s pretty much it. Good work. Now you can put the tire back on, And put the lug nuts back on as well. Tighten the lug nuts in a star pattern to 76 ft-lbs. Use your torque wrench and 13/16″ socket.
Not sure how to use a torque wrench? Check out this post on the proper way to use a Torque Wrench.
Don’t over tighten the lug nuts. This can damage the threads.

Once the lug nuts are tight, go ahead and put the hubcap back on, and lower the vehicle. When you’re putting the hubcap back on, make sure that the small groove where the Schrader valve is, is positioned correctly. You don’t want to damage the Schrader valve.
Repeat the same process for the other side of the vehicle, and then you are done.
Note: Before doing the other side, you may want to press the brake pedal a few times to fill up the brake lines again. Since you just got done pressing the brake piston back in, a fair amount of brake fluid has now backed up into the brake fluid reservoir. By pressing the brakes, the fluid level will go back down. Now, when your compress the brake piston on the other side, the reservoir is less likely to overflow. (This was a tip from a reader, thanks Matt!)
When you have finished both sides, don’t forget this critical last step, after you have replace the brakes and lowered the vehicle, make sure that you pump the brake pedal several times to refill the brake lines. They will be mushy the first several times you press the brakes, and you don’t want to run into something.
Now take the vehicle for a test spin. A lot of guys like to burn in the new brake pads by going about 30 or 45 miles per hour, then slamming on the brakes. This is a good way to seat the brake pads to your rotors. Just do this about three or four times.
After you’ve driven the vehicle for about 50 to 100 miles, re-torque the lug nuts, to make sure that they are still at the proper tightness.
Not sure which brake pads to buy? Check out my post on how to select brake pads for a Toyota Corolla.
That’s it, I hope you found this helpful!
For more information on Toyota Corolla maintenance, check out these articles.
The following is included for your info, and includes links for the parts/tools that I used for this job.
Tools and Supplies List:
- brake pad hardware set (#BE923H) – these for 2003-2008 Corolla
- brake pads set (#BC1210) – these for 2009-2018 Corolla
- caliper holders
- car jack
- jack stands
- impact wrench with ear mufflers (optional)
- 13/16″ lug nut socket
- socket wrench with 14 mm socket
- torque wrench
- Rotors (2003-2008 Corolla)
- Rotors (2009-2017 Corolla)
If this post was helpful, sign up for our mailing list and get articles like this direct to your inbox!


Finally a set of “print instructions” instead of videos, but, why do you NOT make any reference to the 8 wear indicator clips that came with my bosch BE923H brake pad kit? Can’t even find any information on Bosch website. Makes me wonder if they’re just spare parts!
Thanks so much for this easy to follow step by step instructions on changing the pads. First time ever doing this and it literally took me an hour or so, and saved me over $200 from having a repair shop do the work.
Jeff,
That’s awesome, I’m glad to hear that, makes my day!
Thanks for the feedback,
Richard