How to Bleed the Brakes – Toyota Corolla
Do your brakes feel spongy? Does the brake pedal travel all the way to the floor? How long has it been since you last changed your brake fluid (hint: it should be done every 2-3 years!)?
In this post we walk through the steps to quickly and easily flush out the old brake fluid and replenish it with fresh stuff!
Note: PracticalMechanic.com is reader-supported. If you buy through links on our site, we may earn an affiliate commission – at no cost to you. Thank you for your help keeping this site active.
This is a pretty easy maintenance item to perform on your vehicle, it will take you about an hour or two depending on how quickly you can take tires on and off. If you take your Toyota Corolla to a shop, a brake fluid flush will cost you about $100-200.
Tools and Supplies:
- 8mm box-end wrench
- rag
- DOT3 or DOT3&4 Compatible brake fluid
- rubber tubing (preferably transparent)
- empty bottle (preferably transparent)
- a partner who is good a following directions…
Easy Steps for Flushing Brake Fluid
Okay, we’re ready to go! Follow these steps to bleed the brakes. By the way, I am going to go through the manual method which I use here. I should mention that there is a ‘hands-free’ method that involves purchasing a device like this, which connects to shop air and you basically have an air compressor powered vacuum bleeder – no brake pumping required! It is actually a pretty neat method that I may need to invest in one day. But for now…!
Step 1: Remove the tire from the brake furthest from the brake master cylinder.
This is the rear passenger’s side tire. Use a jack and be sure to use jack-stands for safety purposes. Jack up the vehicle and remove the tire. This will provide access to the brake bleeder screw, which is what we want.
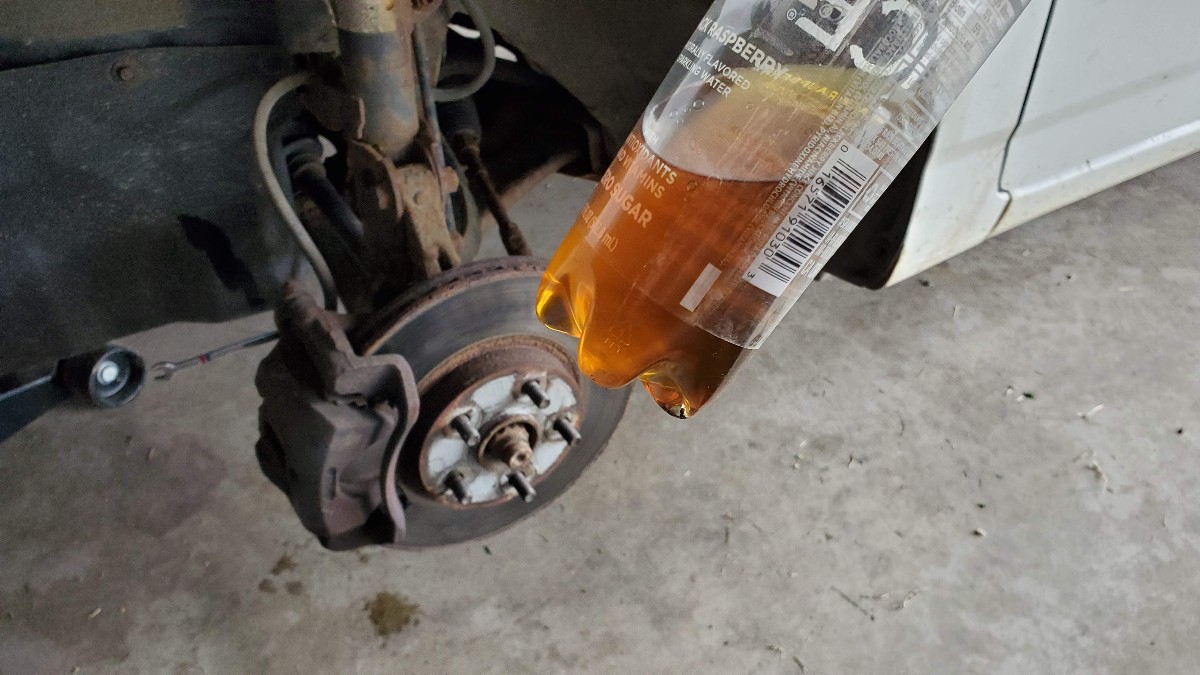
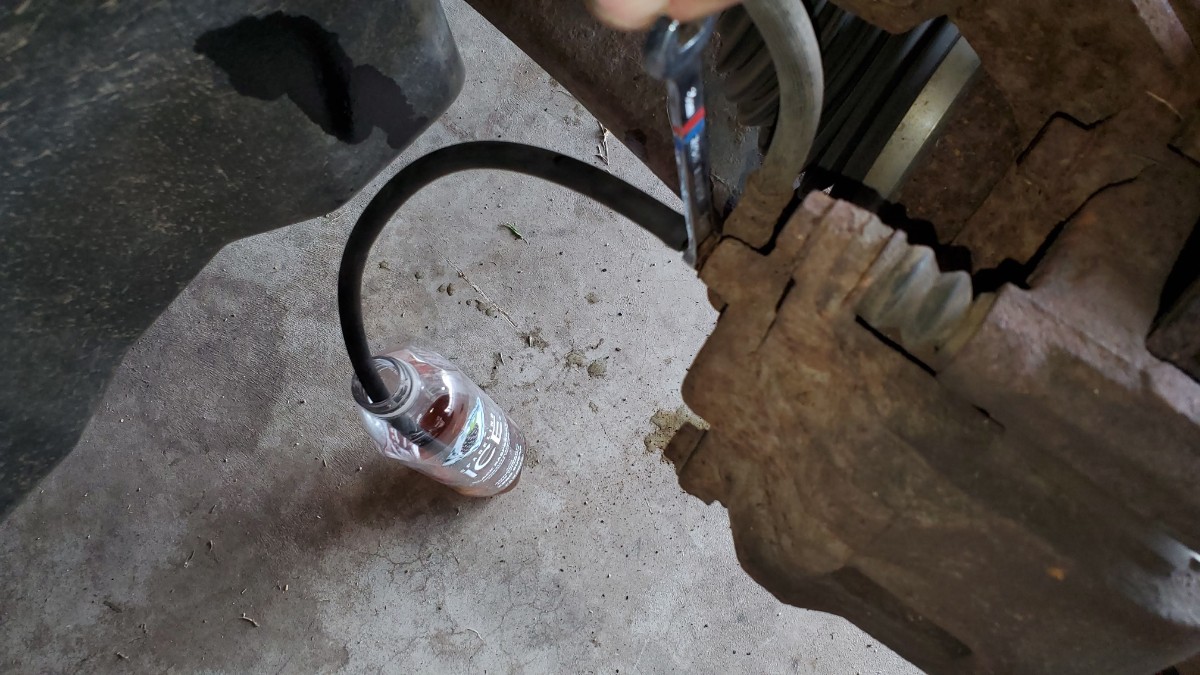
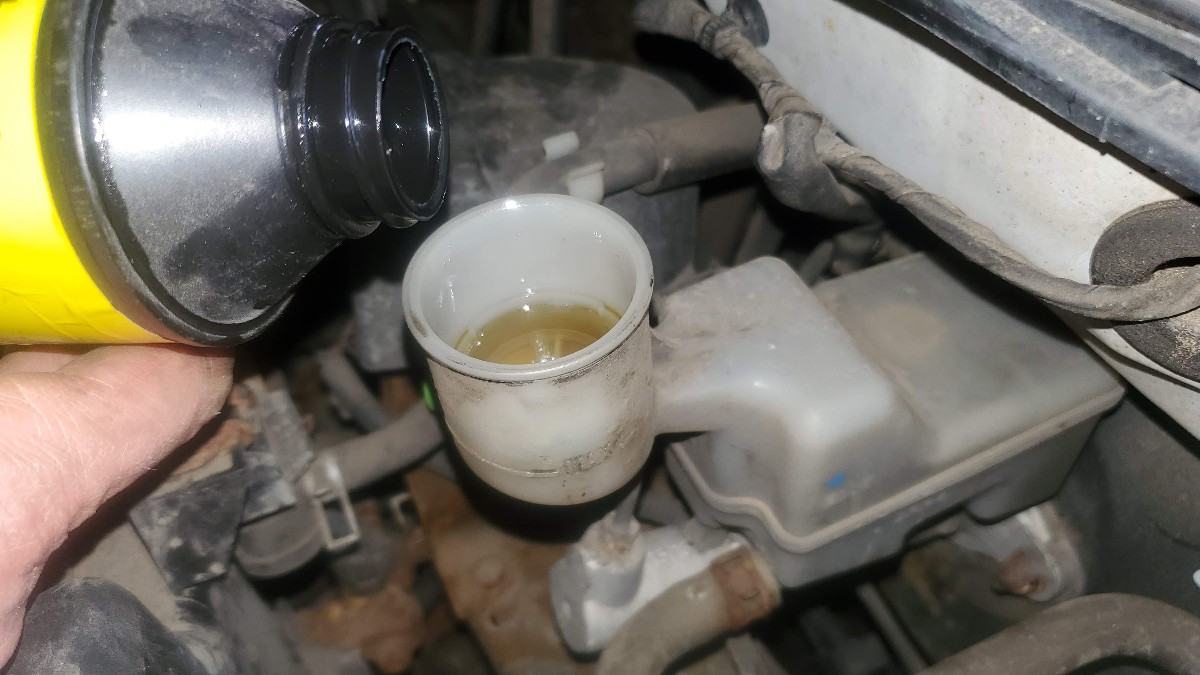
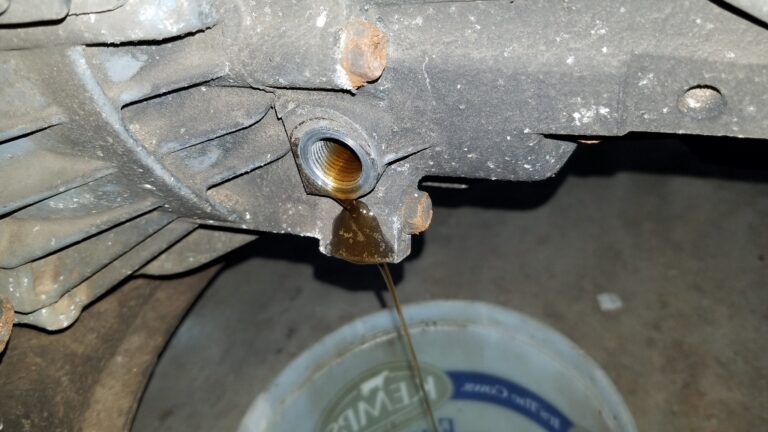
(Here is a shot of the old brake fluid, hint: it shouldn’t be brown…)
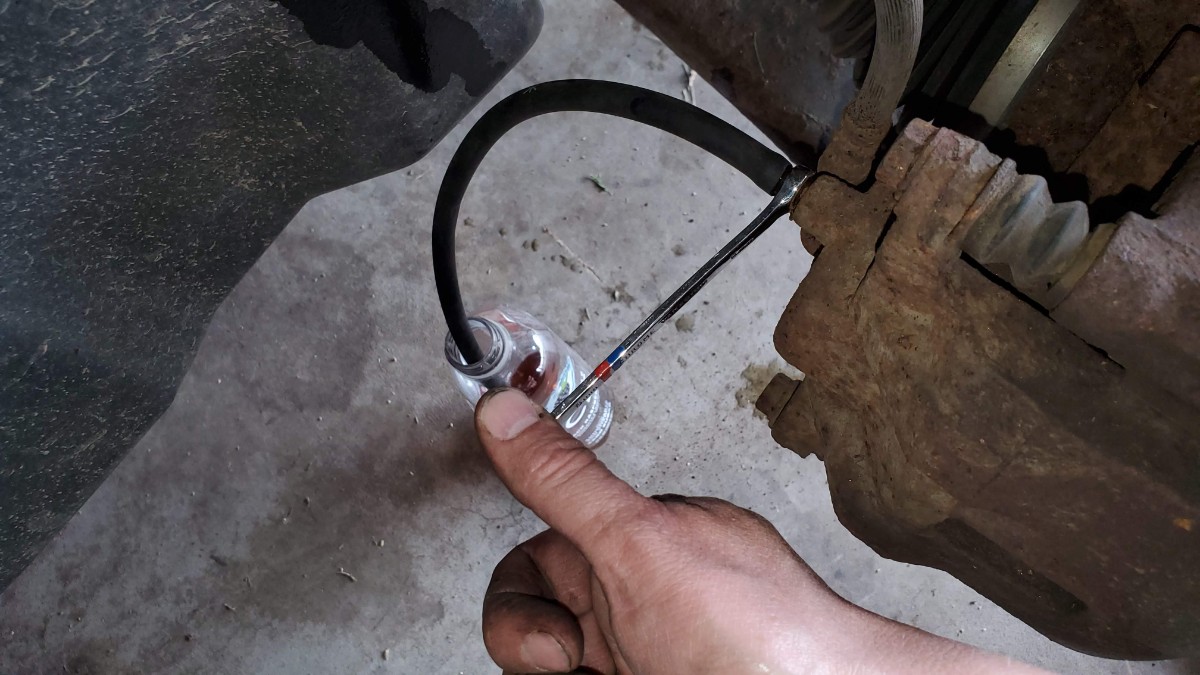
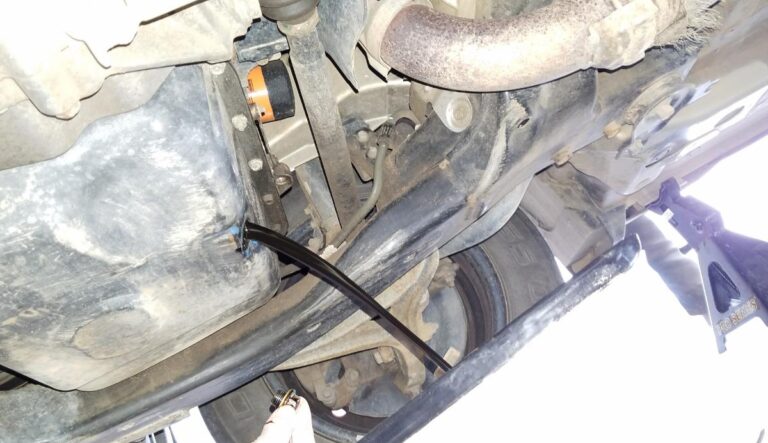
Step 2: Locate the Bleeder Screw and Attach the Tubing.
Locate the brake bleeder screw, looks kind of like a grease zirk, if you know what those look like. Put your 8mm box-end wrench on there. Then put the clear tubing onto the nipple. I only had black tubing, so that can work in a pinch, however transparent tubing is better so that you can see if there are any bubbles in the fluid.
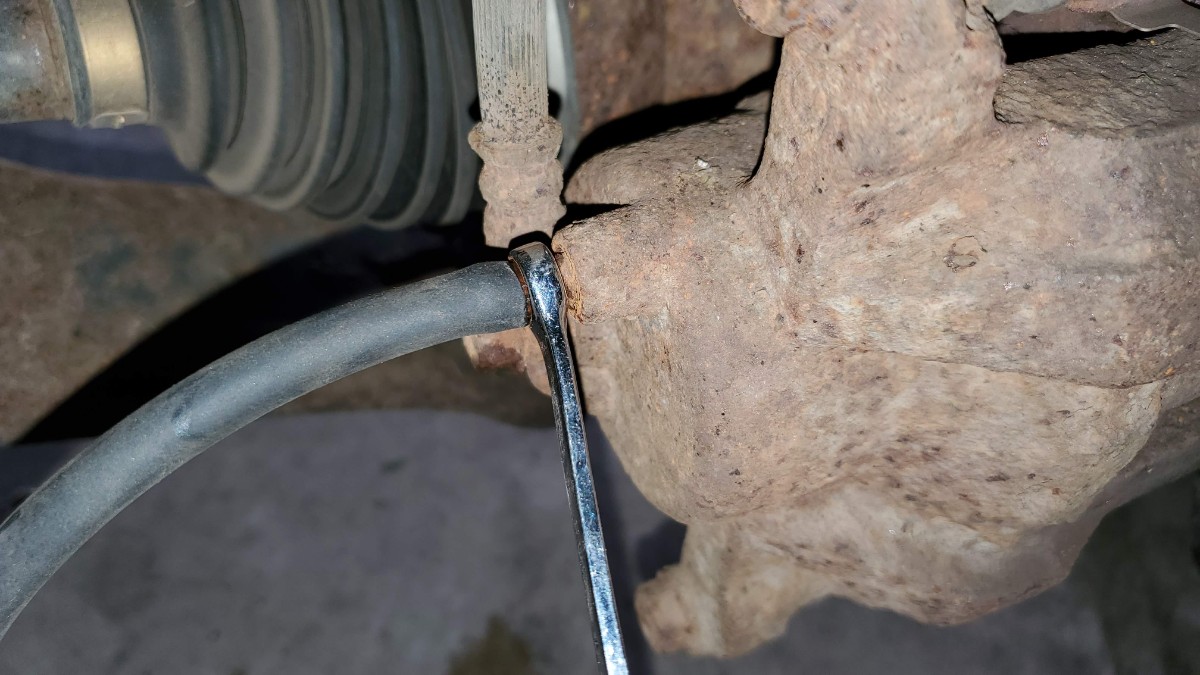
Put the other end of the tube into a clear plastic collection vessel, like an empty water bottle.
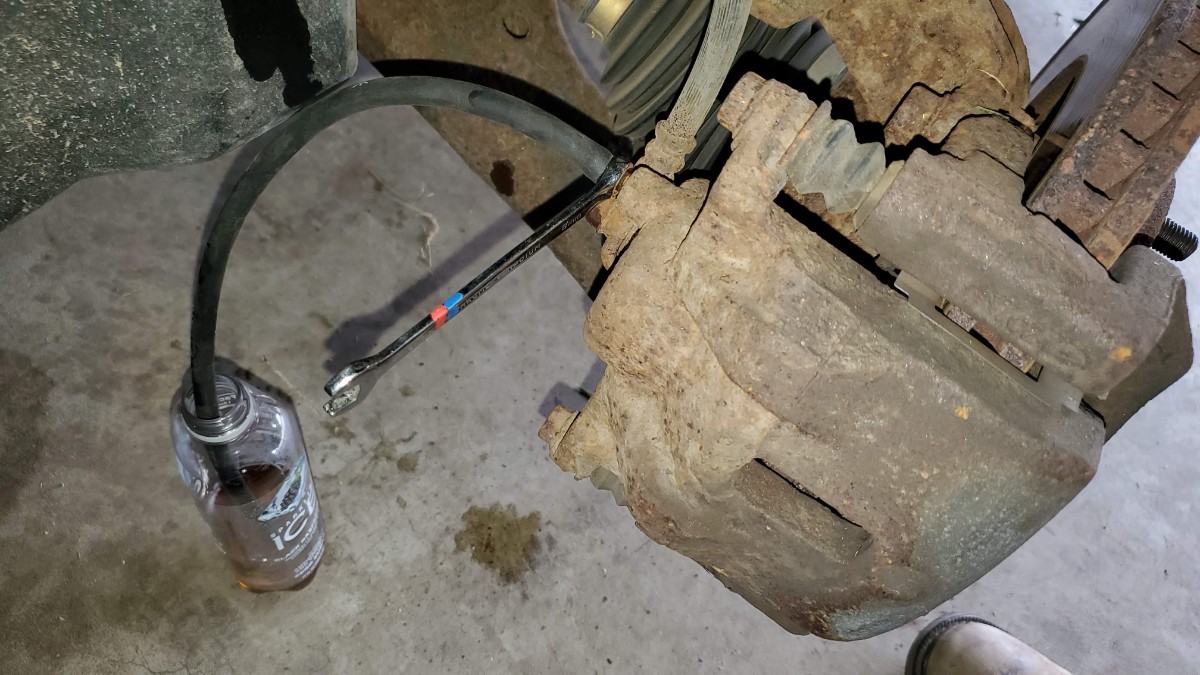
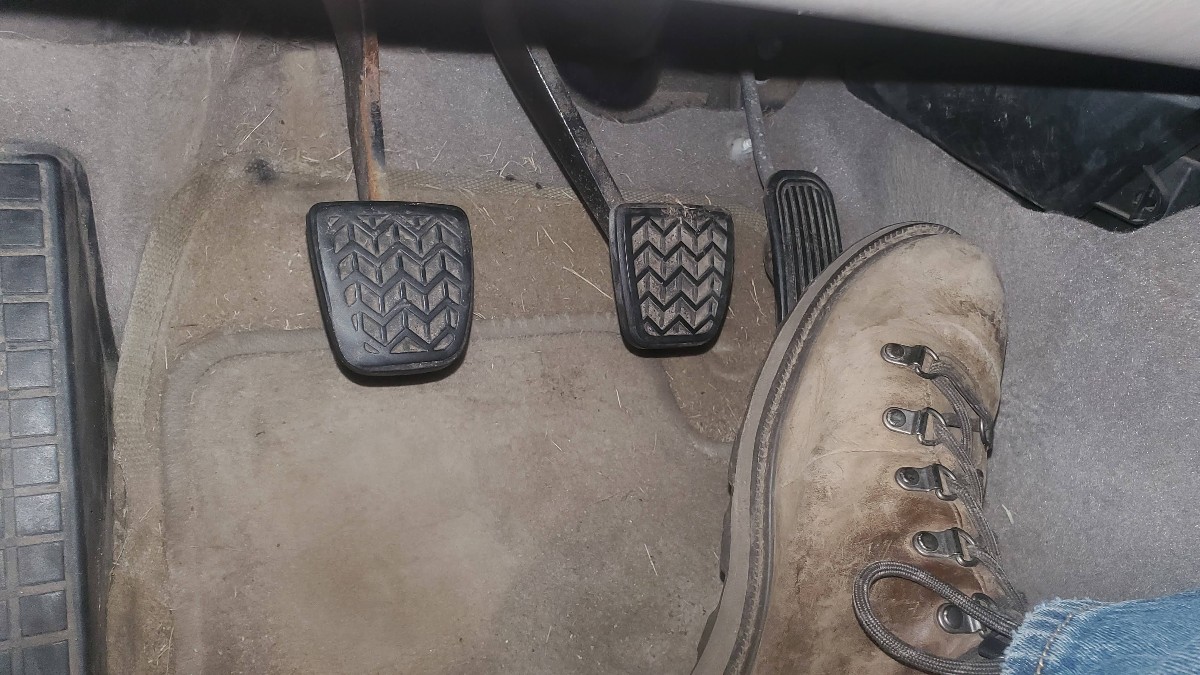
Step 3: Apply pressure to the Brake Pedal and Open the Bleeder Screw.
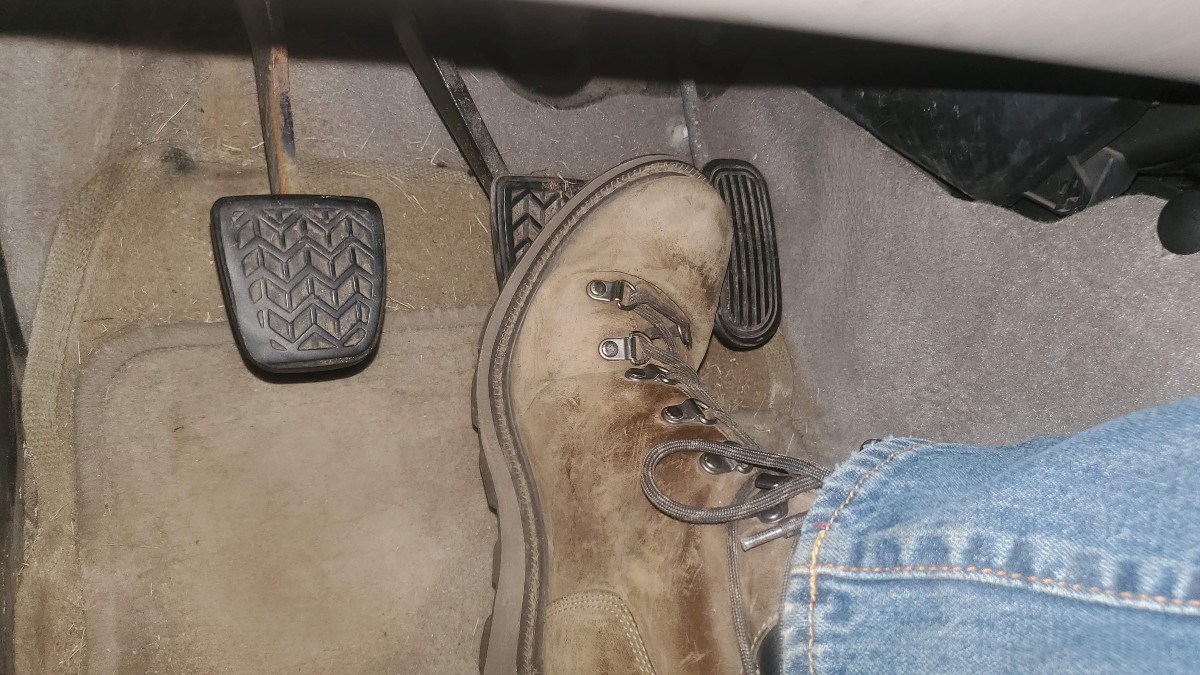
Ask your partner to apply pressure to the brake pedal and hold it.
While your partner is applying pressure to the brake pedal, open the bleeder screw by turning it counter-clockwise. I found that a 1/4 turn was enough.
Brake fluid will begin to flow out of the tube. Your partner will notice that their foot begins to go down toward the floor.
Step 4: Close the Bleeder Screw and Release the Brake Pedal.
When the brake fluid coming out of the tube begins to slow down, close the bleeder screw.
When the bleeder screw is closed, your partner can release the brake pedal.
Step 5: Repeat Steps 3 and 4 Several Times, Keeping an Eye on the Brake Fluid Level.
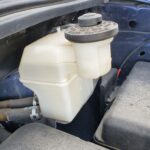
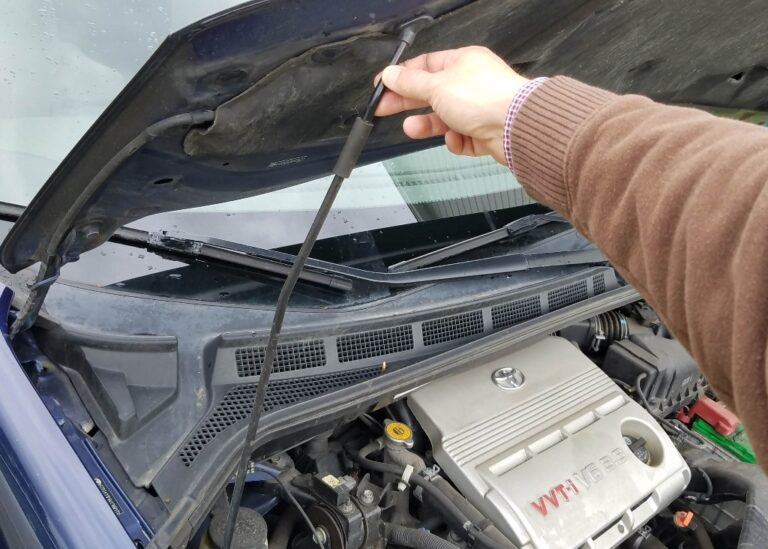
Every 2-3 times you pump fluid out of the brake system, check the brake fluid reservoir. Do not let the level drop below the minimum mark, or you may begin to introduce air bubbles into the system!
Repeat this process 10-15 times per brake.
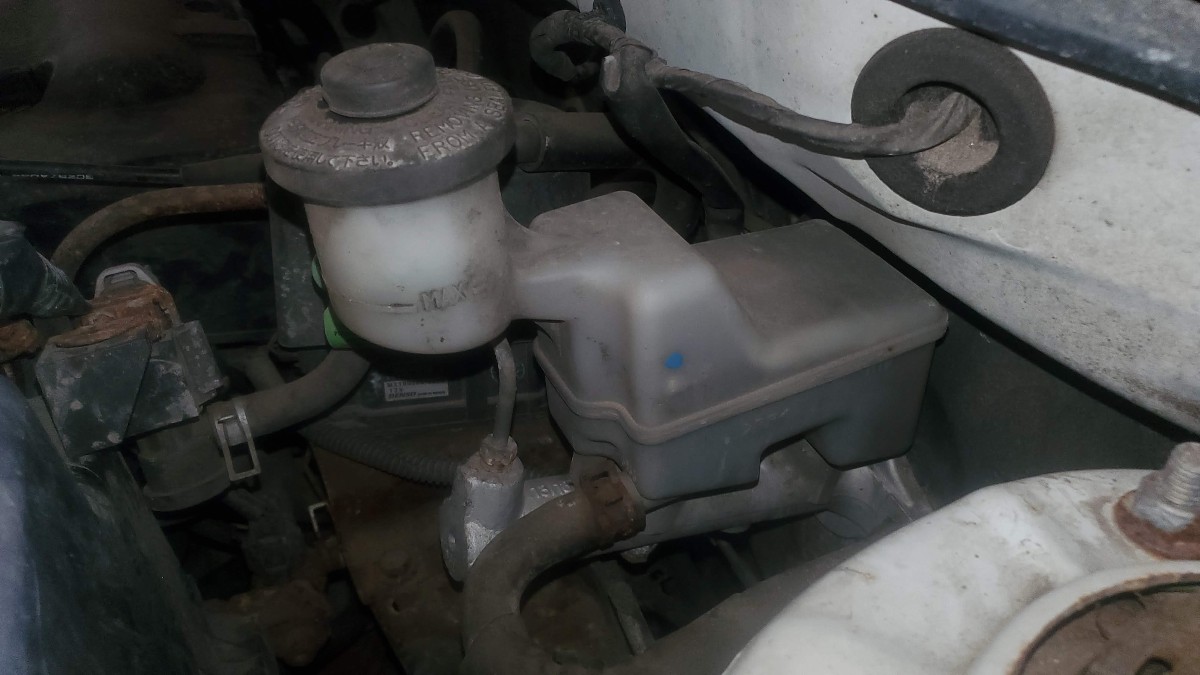
Step 6: Add Brake Fluid to the Max Fill Line.
When the fluid level is low, add the correct brake fluid (check your vehicle’s manual). Generally you will want a brake fluid that is DOT3 compatible.

Don’t leave the cover off the brake fluid reservoir or the brake fluid bottle for too long. Brake fluid will suck up moisture if exposed to the air too long.
Step 7: Repeat the Same Procedure for the Rest of the Brakes.
The correct order is to go from the Passenger’s side rear tire, to the Driver’s side rear tire, to the Passenger’s side front tire, to the Driver’s side front tire.
I hope you found this guide helpful! As always, if you have any comments, questions, or suggestions, please leave me a note in the comments section below!
Tools and Supplies Used:
- 8mm box-end wrench
- rag
- DOT3 or DOT4 brake fluid
- rubber tubing (preferably transparent)
- empty bottle (preferably transparent)
- a partner who is good a following directions…


I changed shocks on my Toyota Corolla car back shocks that is had to brake the lines loose to change them in haven’t been able to bleed brakes since then don’t know what the Hell is going on