
How to Change the Rear Bearing Assembly – Toyota Corolla
This picture guide walks you through changing the rear bearing on a 2003-2006 Toyota Corolla. I hope someone out there finds this helpful and maybe lets you save a few bucks!
Usually, the first sign that you have a bad bearing is a loud roar coming from that tire. It can be a bit difficult to diagnose.
Usually, you can tell whether it is coming from the front or the back of the vehicle (though sometimes that is not straightforward either).
For details on how to check if you have a bad bearing (and which wheel it is), check out this article which describes the procedure for changing the front bearing.
If you buy through links on our site, we may earn an affiliate commission – at no cost to you.
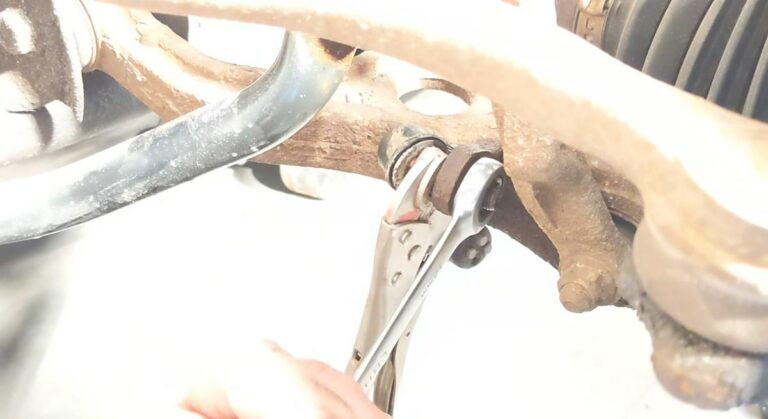
Okay, so now let’s assume you have narrowed down the problem to one of your rear bearings. The most common way to replace this on a Toyota Corolla is to replace the entire Wheel Bearing Hub Assembly.
This article is written based on the work done on a 2004 Toyota Corolla CE, but also applies to 2003, 2005, 2006, 2007, and 2008 Toyota Corolla’s as well.
If you have a Toyota Camry, check out this article on changing the rear bearing assembly in a Toyota Camry.
Tools and supplies you need:
- Car jack
- Jack-Stands
- Socket wrench or impact wrench
- 13/16″ lug nut socket
- Torque Wrench
- Metric Socket Set ½” drive
- Anti-Seize
- Brake Cleaner
- Rear Bearing Hub Assembly (2003-2008 Corolla)
- Rear Bearing Hub Assembly (2009-2018 Corolla)
- Pack of 4 Hub Attachment Bolts
Rear Bearing Replacement Instructions – Toyota Corolla
The first step is to jack up the rear wheel, and put a jack-stand under there. Pry off the hubcap and set it aside.
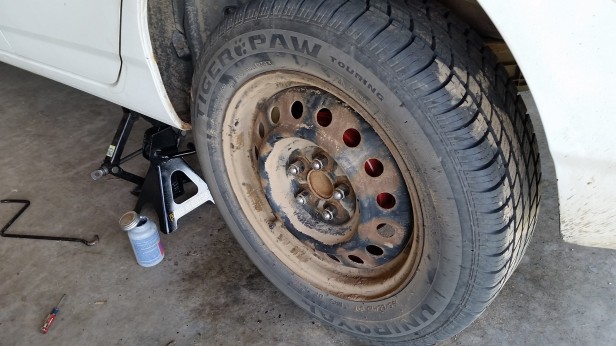
Remove the lug nuts. I use this impact wrench. It saves a significant amount of time as compared to the elbow grease method.
Remove the wheel and set it aside. If the wheel is rusted on, check out this post on how to remove rusted-on wheels, and how to prevent it in the future.
Often the brake drum is rusted onto the hub. Use the 2 holes in the drum to remove it. Insert a bolt into those and tighten it slowly until the drum pops off.
These were metric in my case, M8 x 1.25. Meaning 8 mm in diameter and 1.25 mm thread pitch. See the two unused holes in the brake drum below.
Next, slide the brake drum off of the hub.
If you’ve never changed them, this is an excellent time to replace your rear brake shoes and drums (check out this article for step-by-step instructions for replacing rear brake shoes).
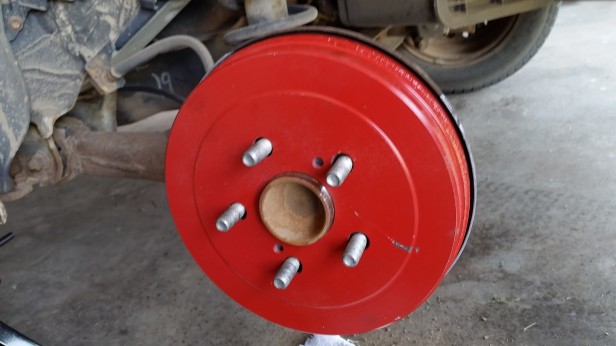
This is what you will be faced with. I like to put a little anti-seize on the hub plate to keep the wheel from rusting to it.

Now move to the back of the hub assembly, and remove the 4 bolts.
Here is a picture of the hub assembly from the back, once the hub had been removed.

Update December 2020: Even after the bolts are removed, the old hub assembly will likely be difficult to remove due to the press fit and rust that has built up over the years, at least this was the case for me.
I first tried using a slide hammer, but it seemed like it was going to do some damage so instead, I did the following, refer to the diagram below.
Using a hammer, I pounded out 2 of the studs in the old bearing assembly, so that there were 2 holes approximately across from each other in the front bearing plate.
I then put in two 1/2″ bolts (one is shown in blue in the diagram) into those holes and put a nut (shown in yellow) on the back of them.
I then tightened that nut so that the bolt was pressing against the back brake plate (dark gray), and the nut was pressing against the hub plate (light gray), forcing it off. I used 2 bolts so that it was not forced out crooked.

And here is a shot of the old hub assembly. (Note that for my case, the two 1/2″ bolts did not have enough threads so I had to use a spacer, in this case, a 3/4″ nut, but the idea is the same.)

Also, I broke 2 of the 4 bolts when removing the hub assembly, they were just so rusted.

If the bolts appear in rough shape like those, take the safe route and replace them. I purchased a pack of 4 of them off of Amazon.
Pack of 4 Rear Hub Assembly Attachment Bolts from Amazon
Clean the mating surfaces with a wire brush as best you can without disturbing the brake shoes.
Click on this link to see an article on how to change the brake shoes and drums on a Toyota Corolla.

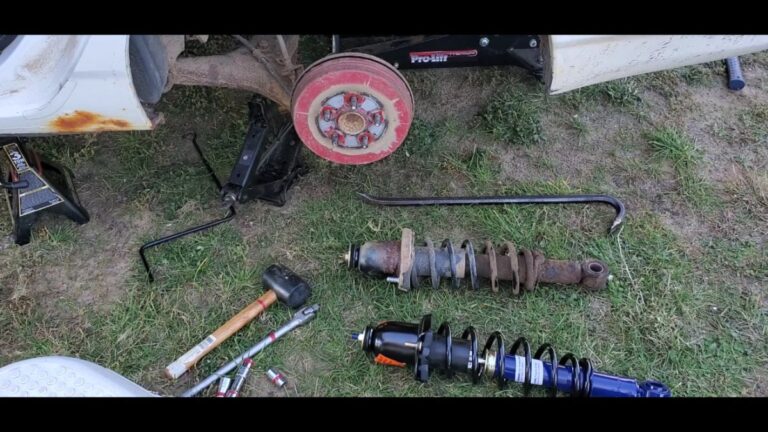
Here’s a shot of the old and new hub assemblies side by side.


Then insert the new hub:
- Rear Bearing Hub Assembly (2003-2008 Corolla)
- Rear Bearing Hub Assembly (2009-2018 Corolla)
and tighten it in place. Use a torque wrench, and torque those bolts to 41 ft-lbs.

Carefully re-install the brake drum, put on the tire, and tighten the lug nuts to 76 ft-lbs.
Remember to re-torque your lug nuts after driving for 50-100 miles to make sure they are still tight.
And that’s it. Nice work! Doing this job yourself can easily save you a couple hundred dollars. And it will probably take less time than taking your car in and waiting for someone to get to it!
Thanks for reading! I truly hope this helped you!
Richard
Tools and supplies you need:
- Car jack
- Jack-Stands
- Socket wrench or impact wrench
- 13/16″ lug nut socket
- Torque Wrench
- Metric Socket Set ½” drive
- Anti-Seize
- Brake Cleaner
- Rear Bearing Hub Assembly (2003-2008 Corolla)
- Rear Bearing Hub Assembly (2009-2018 Corolla)
- Pack of 4 Hub Attachment Bolts
Did you find this article helpful? If so, sign up for our mailing list and get similar articles right to your inbox!


never said why the two 1/2 inch bolts and nuts were installed in the holes in the old hub / where as the hub pictued in one of the pictures have no holes in the hub ? these hubs just dont fall out once the bolts are removed /// didyou use a slide hammer / ?
Hi, yeah, good point, sorry, I should have said more about that in the original post. If the old bearing hub assembly is very tight (or rusted in place) it will be difficult to remove. I remember first trying a slide hammer, but wasn’t successful (I felt like it was going to damage something). Instead, I knocked out 2 of the studs in the old hub with a hammer, then put those two 1/2″ bolts (as shown in the photo) into the now empty stud holes. I put a nut on the backside and screwed it so that the nut was pressing against the hub forcing it out, and the end of the bolt was pressing against the brake support plate (you can see two dents in the brake plate in a later photo). The 1/2″ bolts didn’t have enough threads, so I used a 3/4” nut as a spacer (those are shown on the bolts in the photo). This process forced the old hub out. I hope that is clear. If not, let me know, I’ll try to add a diagram.
I got to thinking about it more, and added a diagram and more of a description in the article, I hope it helps.
Excellent helpful guide, you are genius, this is for model upto 2008 but what about corolla hatch back 2012 model? Could you explain what is difference? ?
I would highly appreciated if you could please guide me.
Hi Mahesh,
Thanks for the kind words! Based on what I was able to find, the process for changing the rear bearing on the 2012 Corolla hatchback is very similar to that shown here. But the wheel bearing hub is different. I believe it is this one:
https://amzn.to/2TEroV9
Thanks for reading!