Wheel Roar – How to Replace the Front Wheel Bearing on a Toyota Corolla
Does your Corolla produce a loud roar or grinding from one of the front wheels? Is it louder when turning? The bearing is worn out and needs to be replaced. This article describes step-by-step instructions for replacing the bearing.
When you buy through links on our site, we may earn an affiliate commission – at no cost to you.
The following article describes the process of replacing the front wheel bearing in a Toyota Corolla, Matrix, or Pontiac Vibe. This method does NOT require a press to press the bearing into the steering knuckle, and since the steering knuckle does not need to be removed, the vehicle will NOT require an alignment when you are done. Instead of a press, a bearing pusher is used; the idea is the same as a press, but uses mechanical action rather than hydraulics, and it is also quite a bit more cost effective.
How do you know you have bad bearings?
First a little background on the symptoms of the problem that led to the bearing replacement.
My 2004 Corolla slowly developed much louder road noise when driving over the course of about 6 months, particularly above about 50-60 mph, though could be heard faintly at speeds lower than this. The noise wasn’t a grinding so much, as just louder than normal. I heard it described as a ‘roar’ coming from the front of the vehicle. At first it was faint, and I could at times convince myself that it was just the road or the tires. But over time it got louder.
The car needed new tires. I was thinking of selling it, so I just replaced the 2 tires that were the worst, thinking this would fix the problem. It did not fix it; the problem remained.
Thinking the problem was a front bearing, I took the car to a local shop to diagnose the problem. They said no, it was the 2 remaining bad tires causing the issue. I bought 2 more tires from them. This did not fix the problem either, at which point they said it was a bad bearing and they would replace it for $400. I said forget it and brought the car home.
The loud road noise sound was significantly more pronounced when turning to the right, say for example on the freeway, going 70 mph, and taking a gradual curve to the right, the sound would get louder. A similar turn to the left made the sound become quieter, or even disappear. This led me to believe initially that the problem was with the front left bearing, since a turn to the right would put more pressure on the left bearing, and I assumed that would make it louder.
This was incorrect. For some reason, when the load was LIFTED from the bearing, that is when the noise got louder. Anyway, eventually (after about 6 months of louder road noise) the car began to develop a vibration felt primarily through the steering wheel but quite pronounced. It did not seem safe to drive the vehicle over about 65 mph at that point.
Also one of the days when I drove it at highway speeds for about an hour, the front right wheel was very hot when I arrived. I began to suspect a problem with the front right brake caliper, and took the wheel and brake off to inspect, and it looked fine. I suspect that the bad bearing was causing excessive play in the wheel that caused the rotor to wobble and contact the brake pads, which caused the vibration.
How to Diagnose a Bad Bearing
I finally diagnosed the problem by performing the following:
- Jack up the car in the front on both sides. Put jack-stands under both sides.
- Removed both front tires.
- Remove both front brakes (to eliminate the sound of the pads sliding on the rotors).
- Remove both rotors (to eliminate the sound of the rotors clanking).
- Use a mechanics stethoscope (screwdriver) and press the tip onto the strut, and the end of the handle against the ear. Then put the car in neutral and rotate the axle by hand.
- Try this on both sides. The left front side was virtually silent (I had just replaced the wheel bearing on that side). The right front bearing produced a rubbing, sand-paper-type sound.
This led me to believe that the front right was the problem, which turned out to be correct. After replacing the front right bearing, both the road noise and the vibration were no longer an issue.
These are the Tools and Supplies I used for this repair. Click the links to learn more about each part at the Amazon product information pages:
Supplies and tools needed:
- Wheel Bearing – Corolla (pn510070)
- Axle Nut (Optional)
- Bearing Retaining Clip (Optional – only needed if you destroy the existing one)
- Bearing Pusher – Puller Tool
- Hub Puller (Slide Hammer) Set
 Axle Nut Socket 30mm
- Torque Wrench 1/2 inch Drive
- Air Impact Wrench (Optional)
- Ear Mufflers (Optional)
- jack stands
Note:
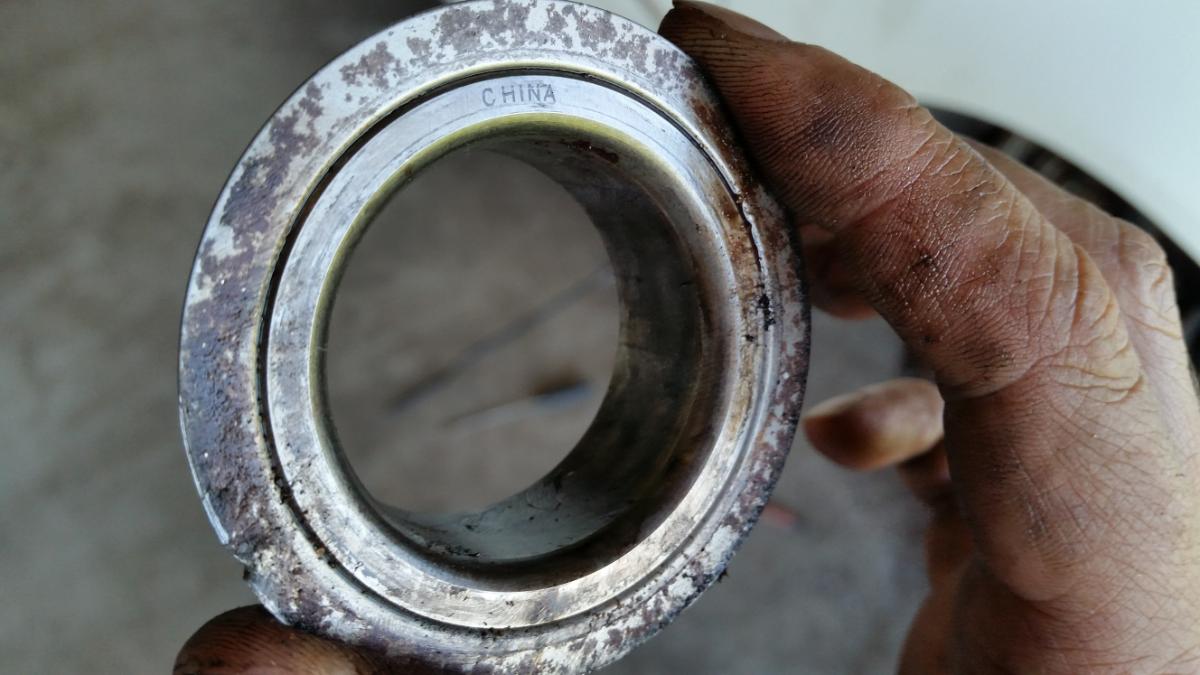
Originally I bought a “Duralast” bearing, purchased at O’Reilly’s because I needed it fast, for $33. It was made in China, and looked and felt visibly cheap. It turned out to be a big mistake, as it only lasted about 5 months, and the grinding sound returned. I had to replace it.
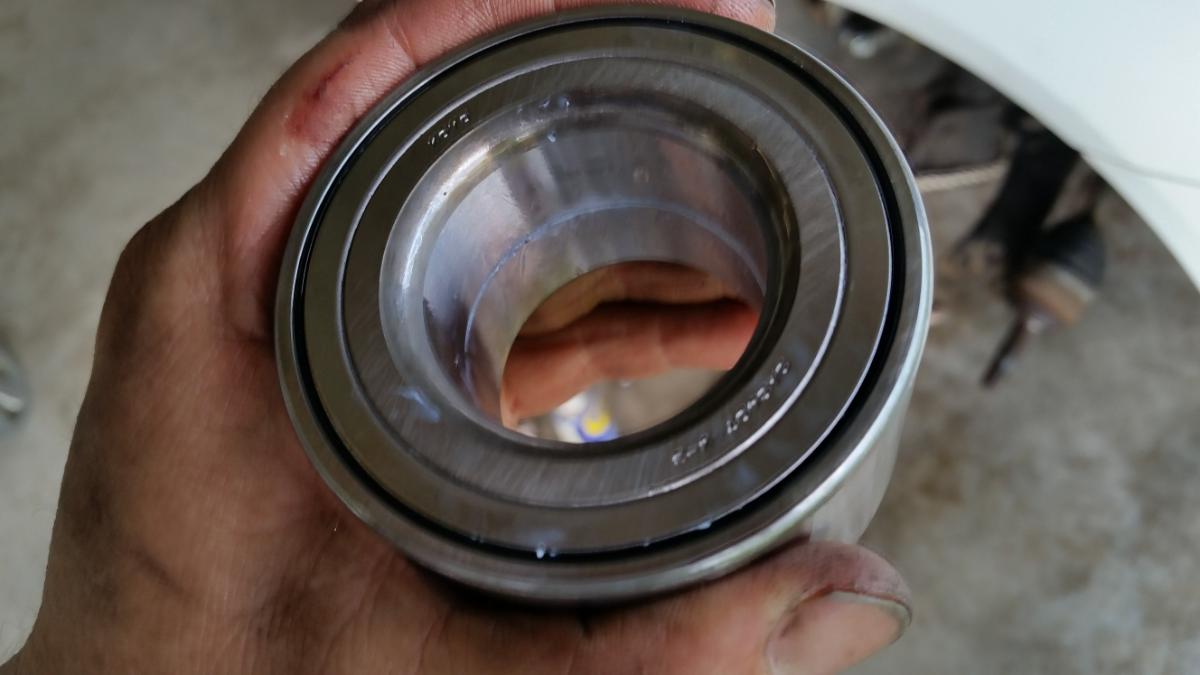
The second time I used a Timken bearing (pn510070). This one is made in USA or Canada. It has lasted at least three years at this point with no problems whatsoever.
How to Replace the Front Bearing on a Toyota Corolla – Procedure Step-by-Step
The following describes the procedure to replace the front wheel bearing on a 2003-2008 Toyota Corolla. The vehicle used here is a 2004.
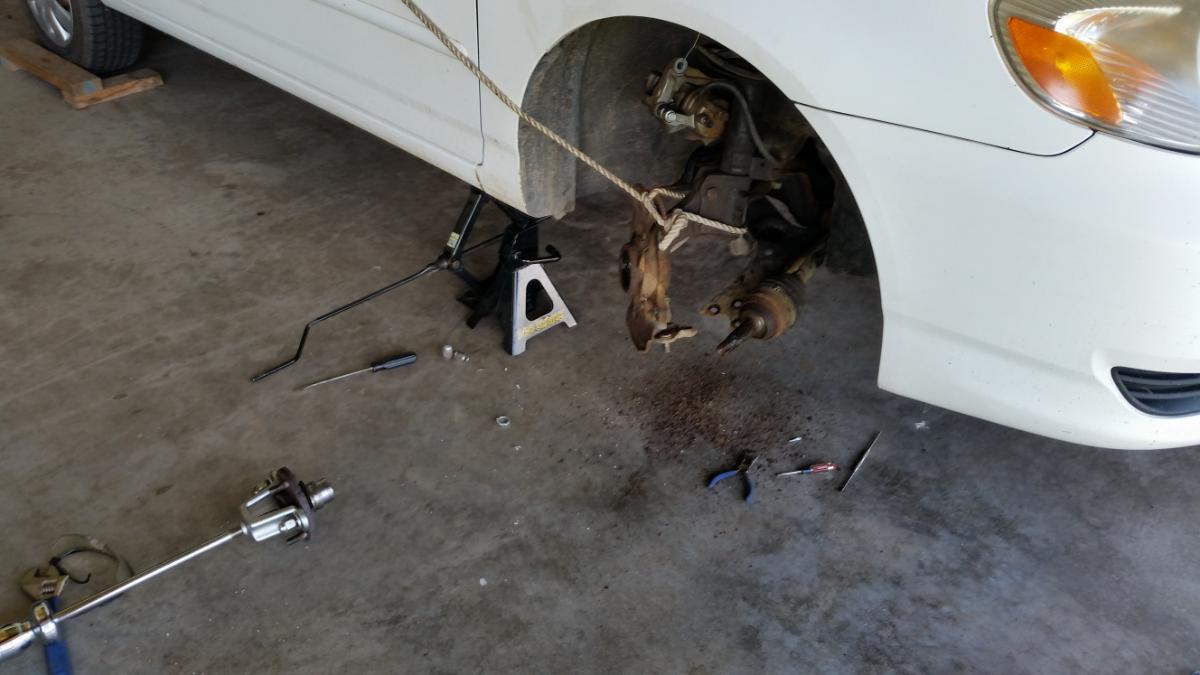
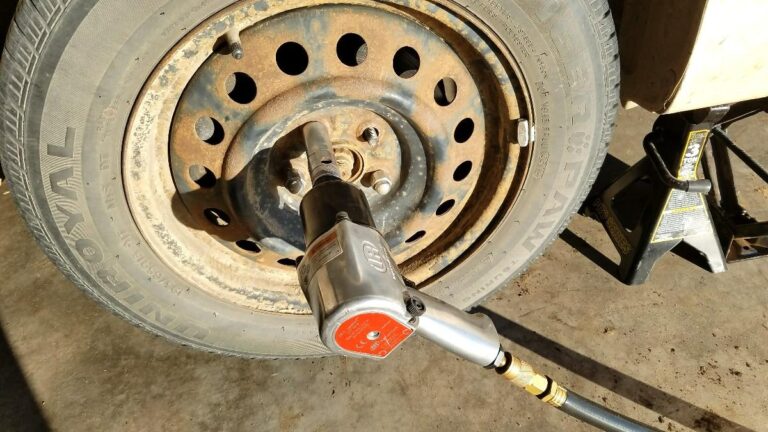
Jack up the tire with the bad bearing. Put a jack-stand under there for purposes of safety.

Remove the lug nuts and remove the tire.
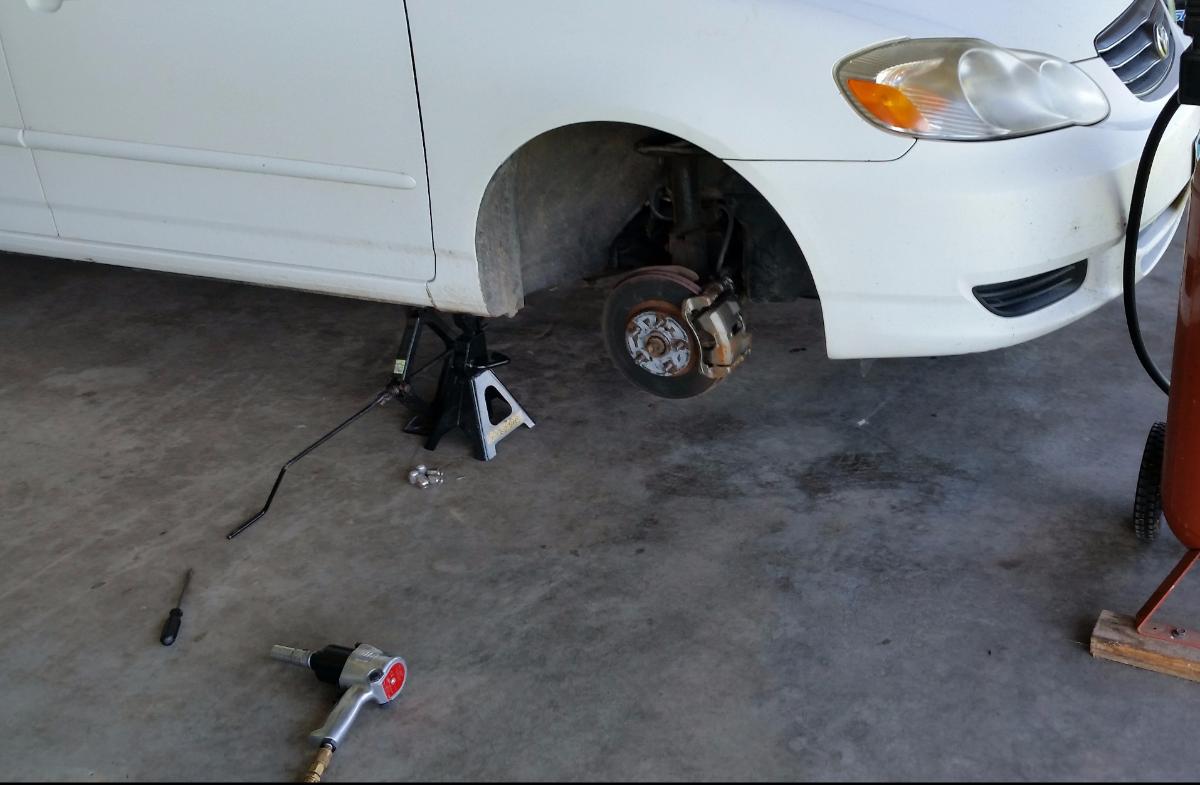
Remove break caliper and rotor.
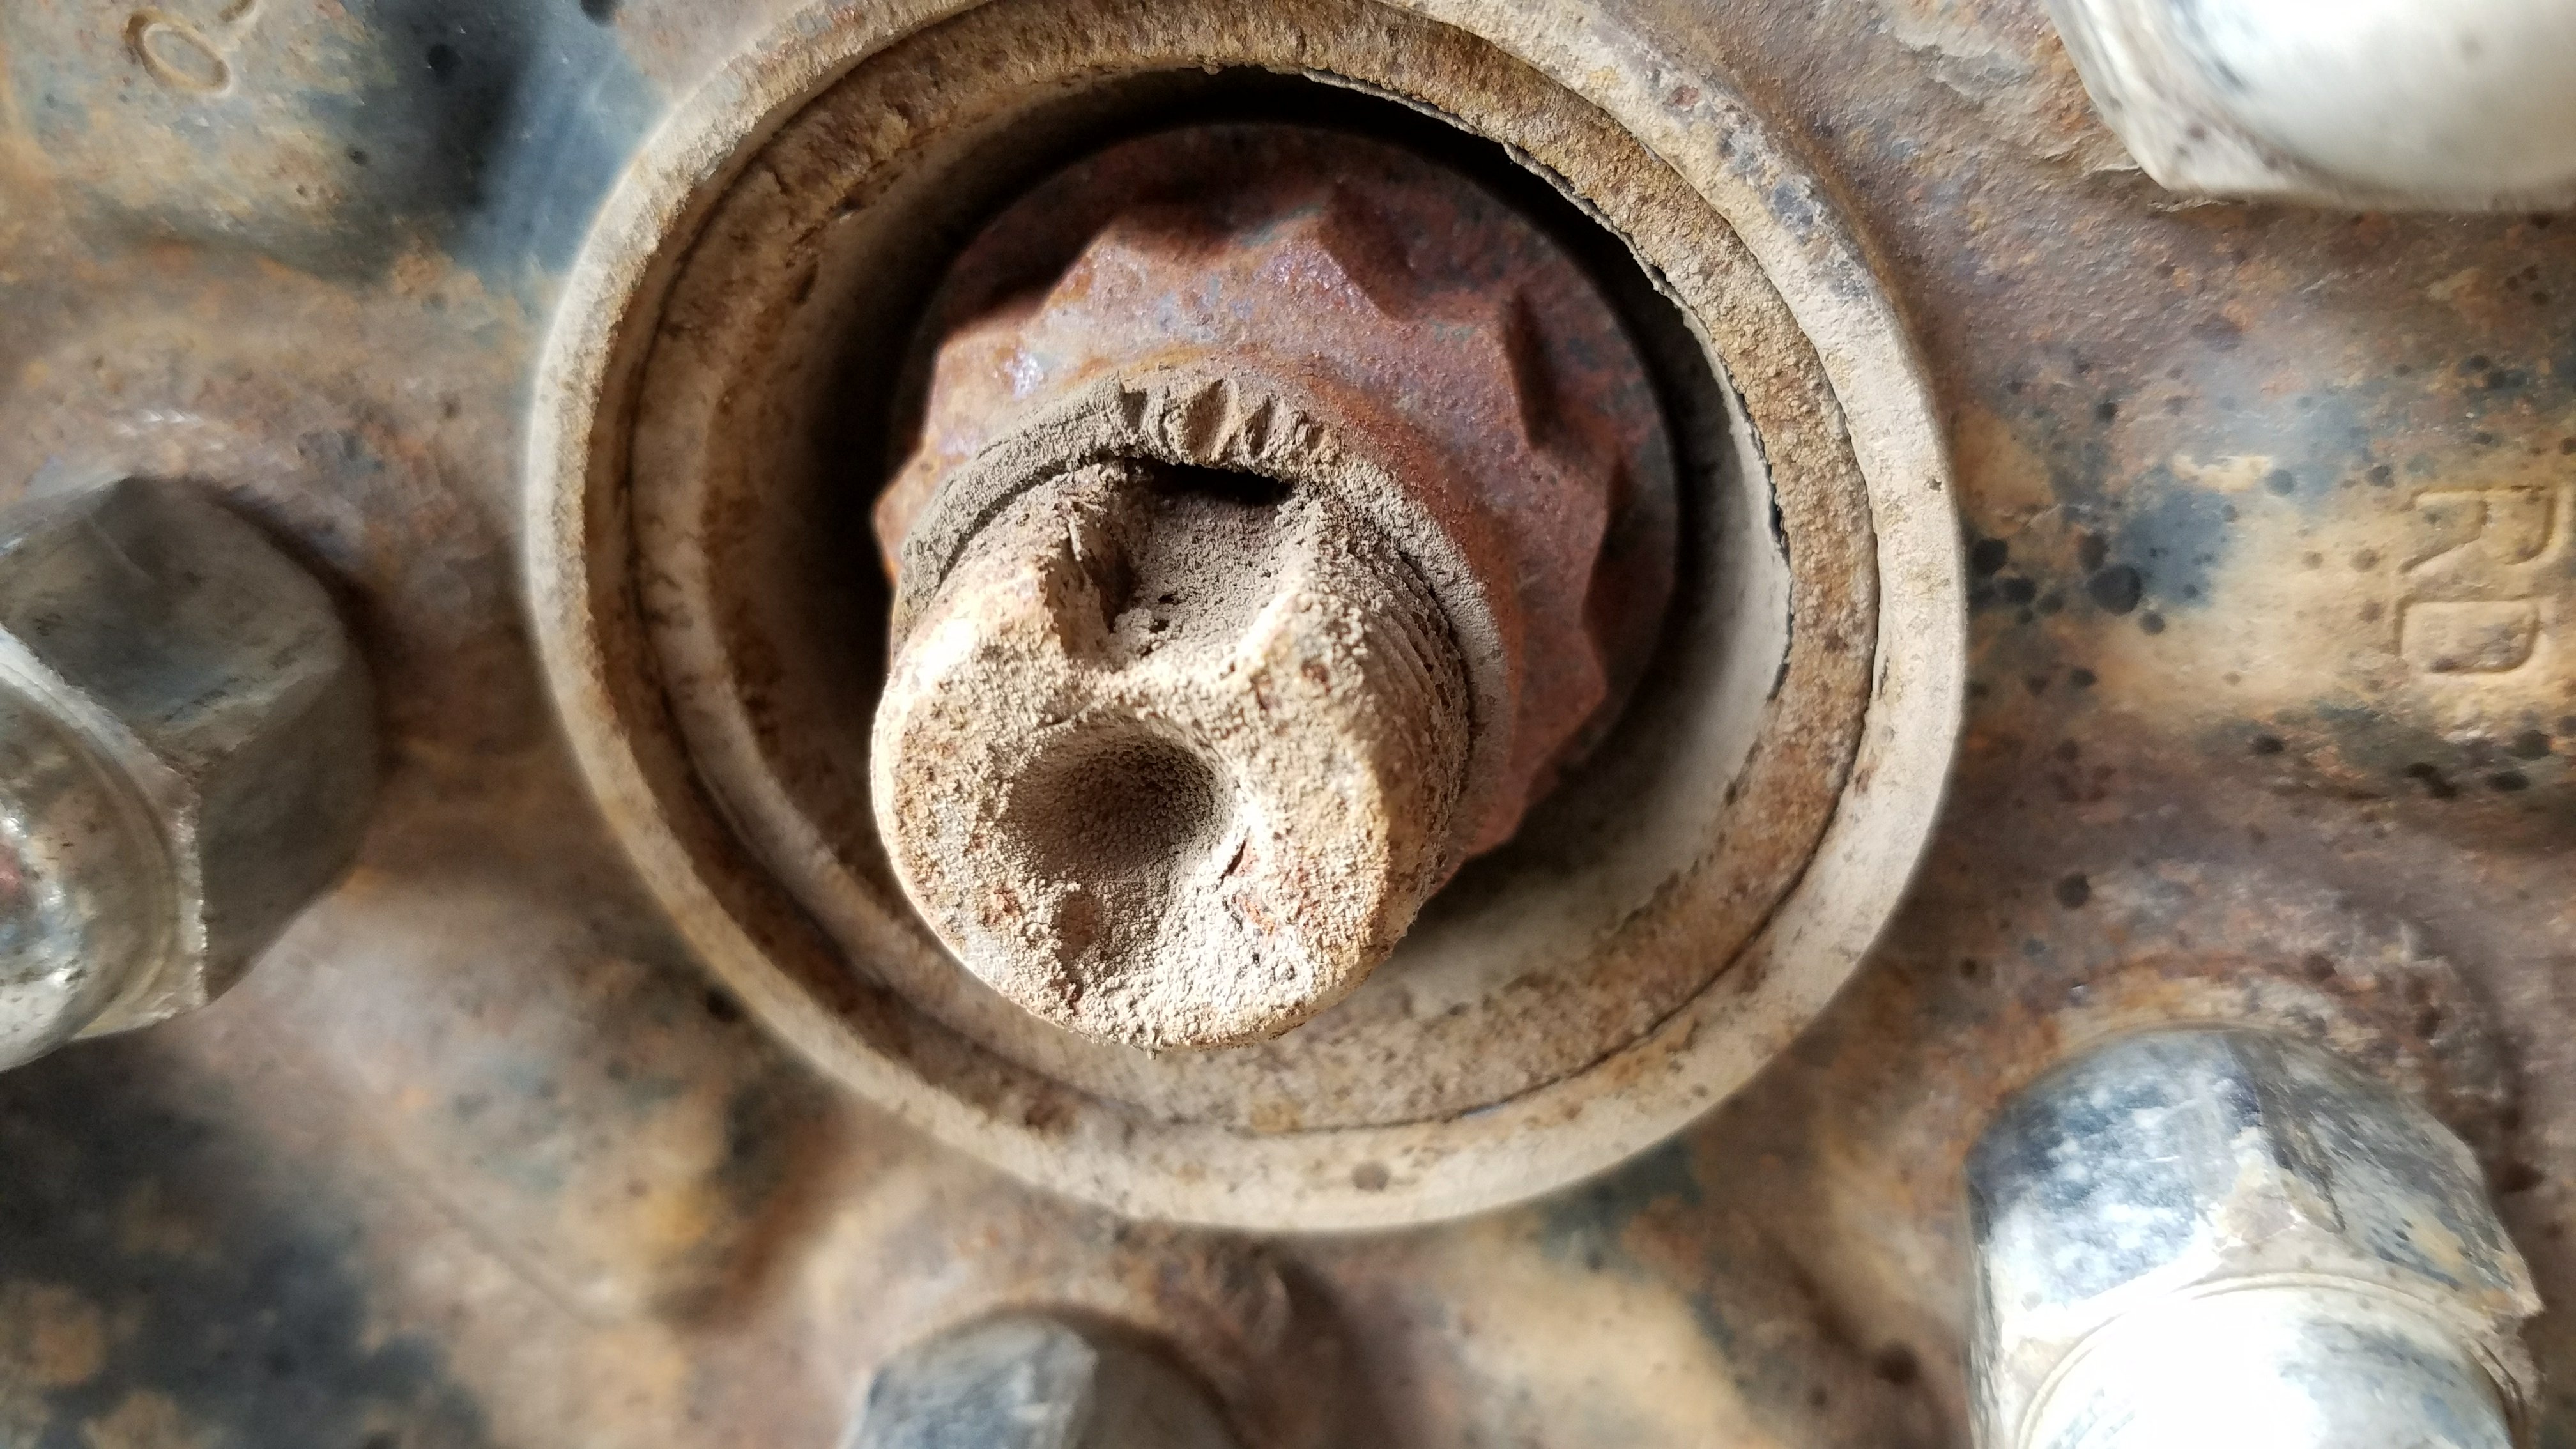
Remove axle nut using the axle nut socket and wrench. The axle nut is deformed into a notch in the axle. I used a screwdriver and a hammer to pound out the notch in the axle nut.
Remove the hub using the hammer puller tool. This attaches to the hub using 3 of your lug nuts.
I bought a Slide Hammer Puller Set off of Amazon, and I am quite pleased with the quality of this set. I have used it to pull 5 bearings now in various vehicles, and it works great.
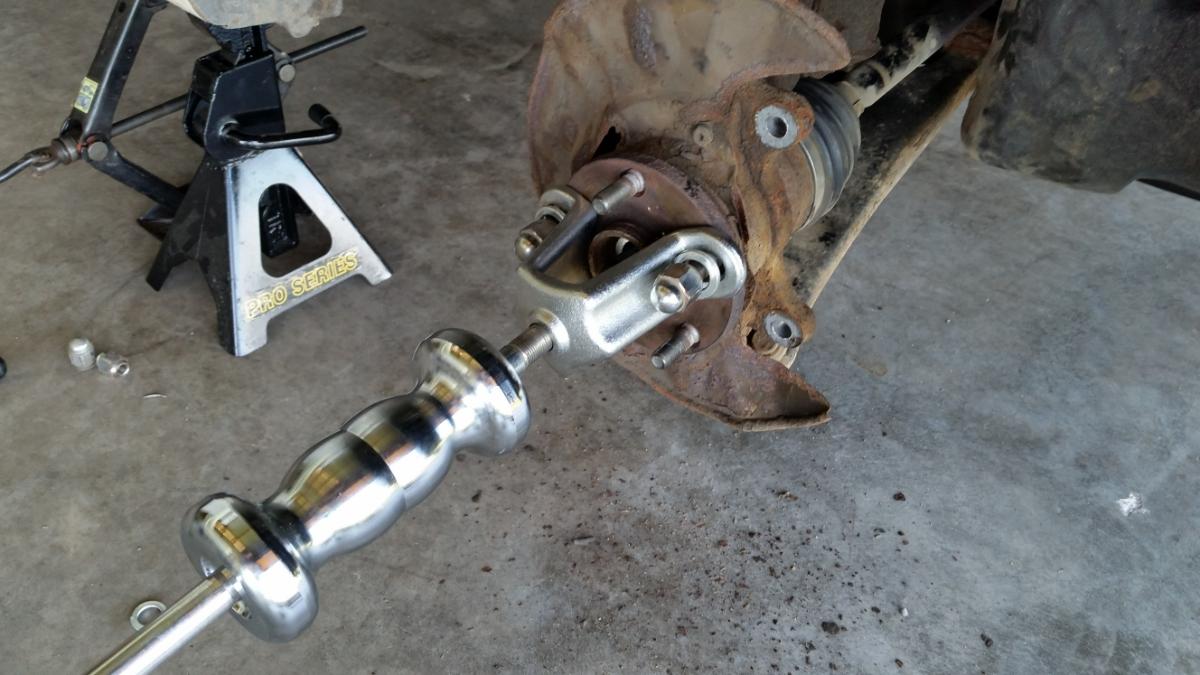
In an effort to not damage the lug nuts (or the hub threads), several washers were used (see the picture). As you are hammering the hub off, make sure to periodically tighten the lug nuts onto the puller so that they do not get loose and damage the threads.
Keep in mind that it may take a few whacks to get the hub out. Note that the old bearing will be damaged in the process or removing it. This is normal and expected, and it is likely already damaged – since you are replacing it.
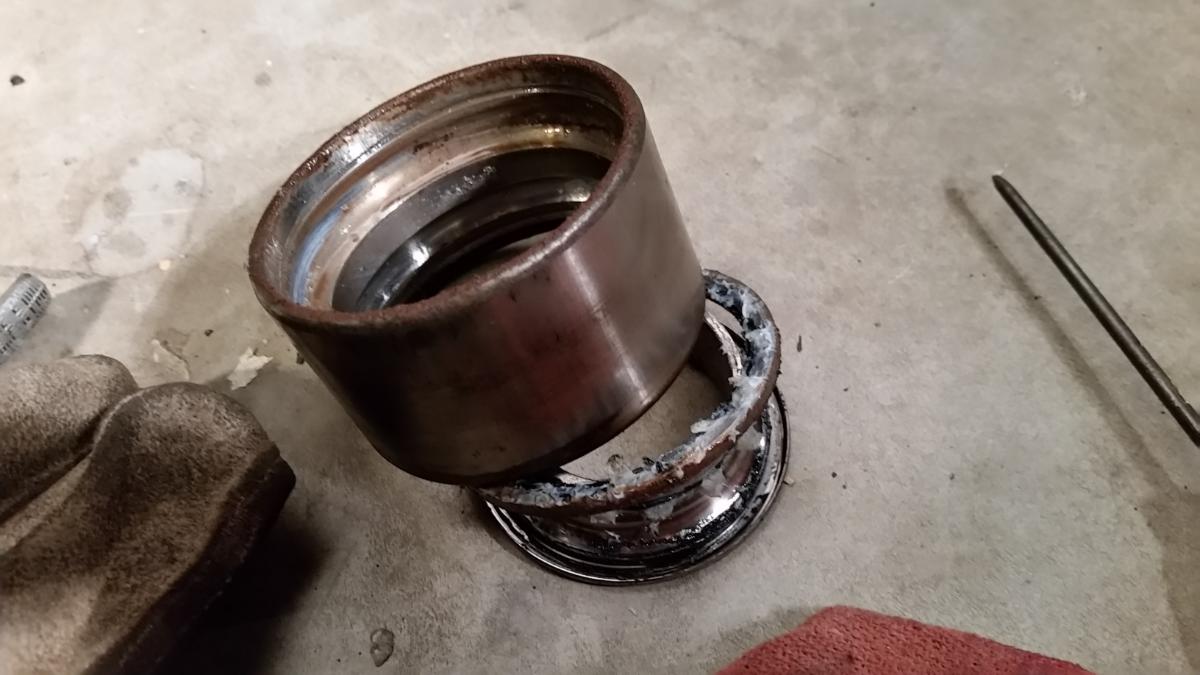
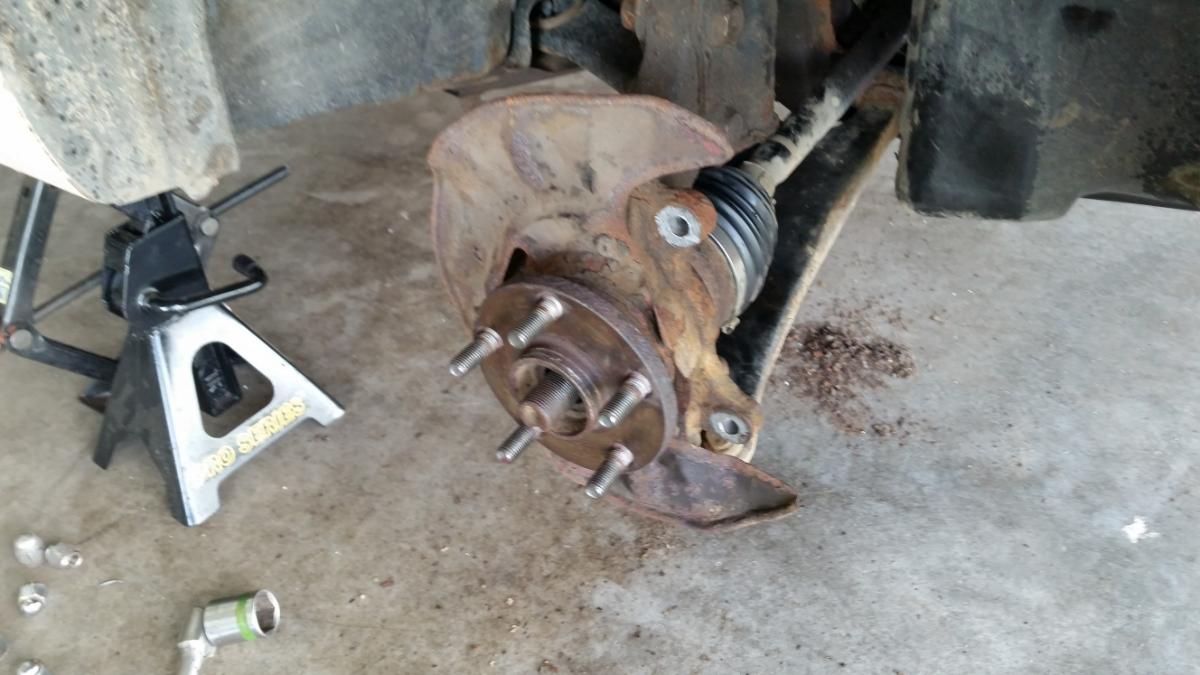
Here is the hub removed, with the race of the old bearing still attached. You have to get this off.
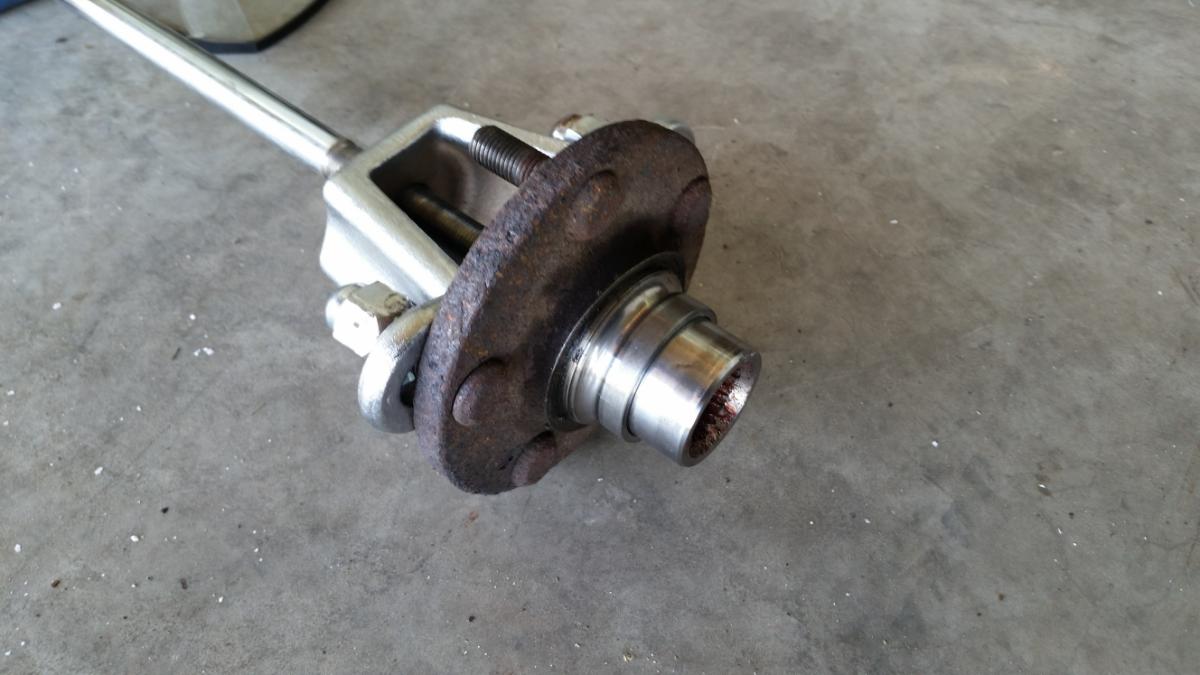
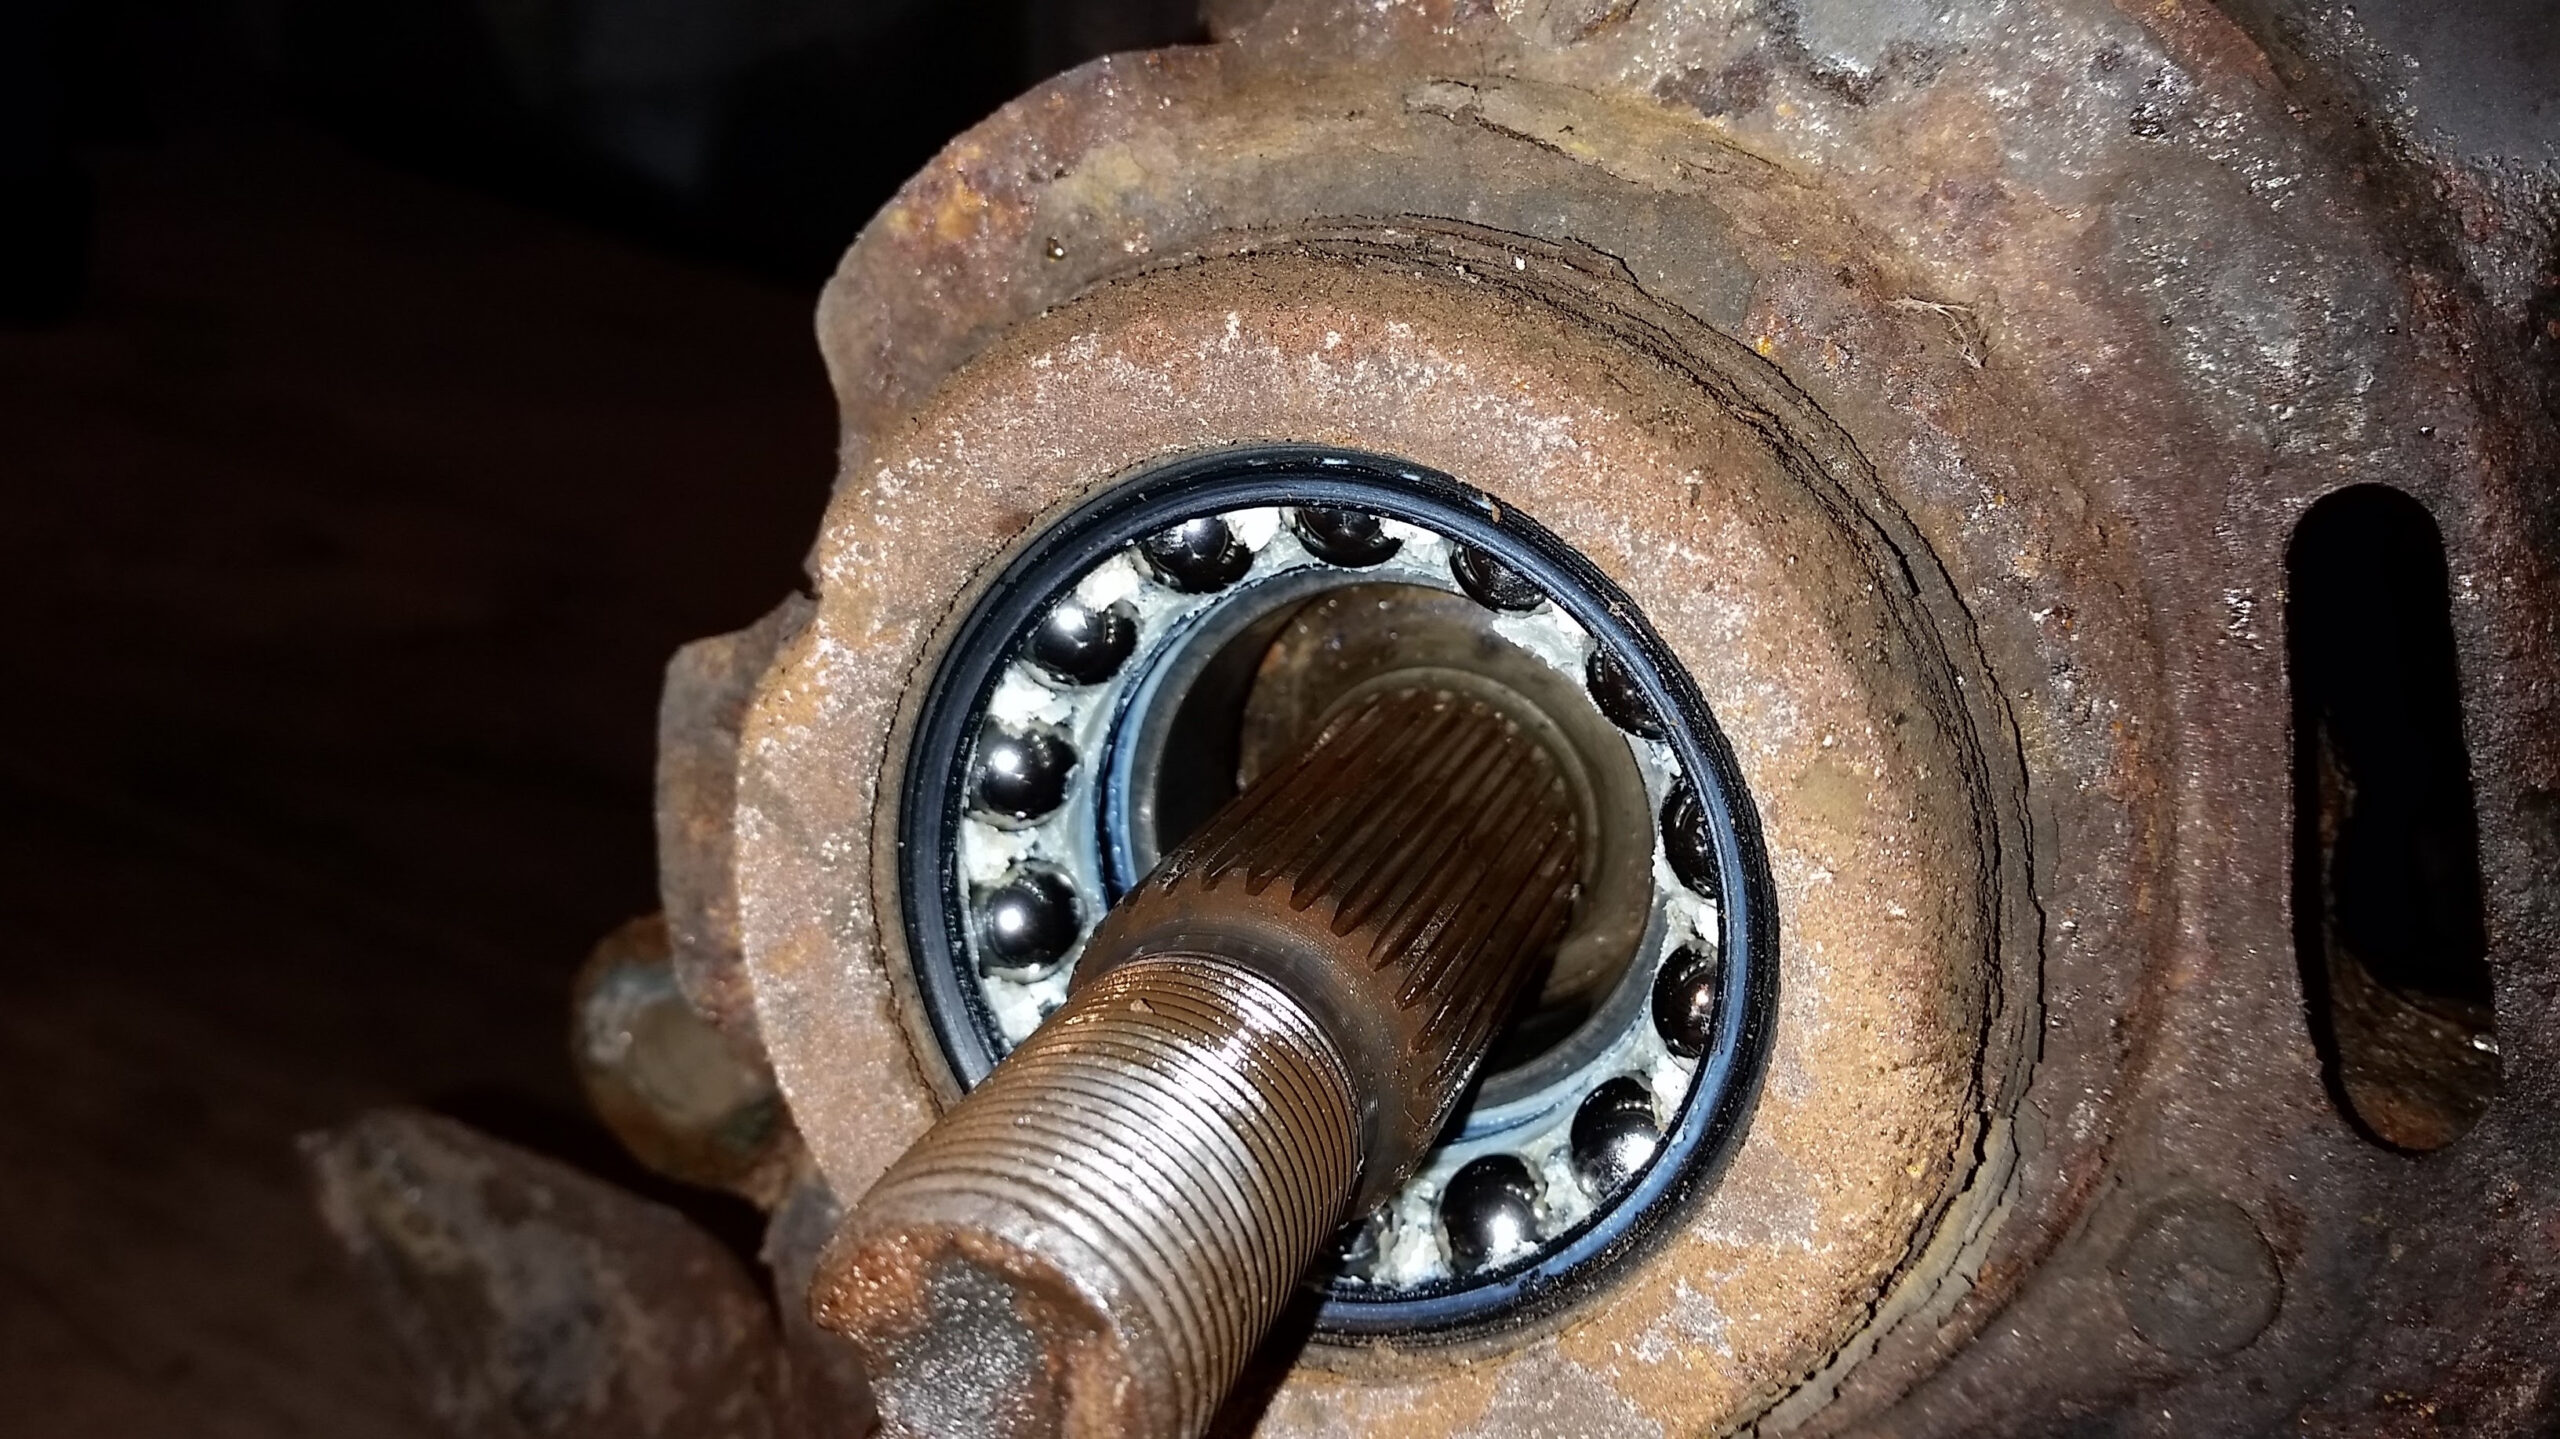
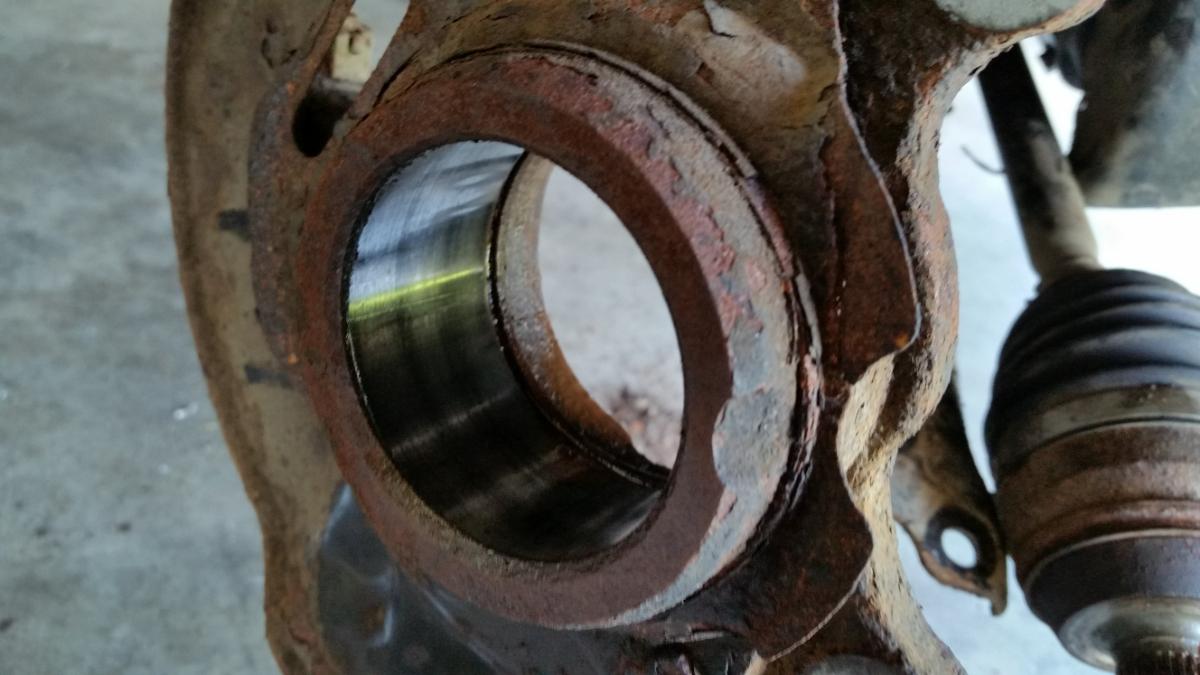
The inside of the steering knuckle looks like this, with the remains of the old bearing still inside. You’ll need to push this out in a later step.
I used the following process to remove the old race from the wheel hub. Put the hub in a vice, and use a chisel and hammer to pound a gap between the race and the hub.
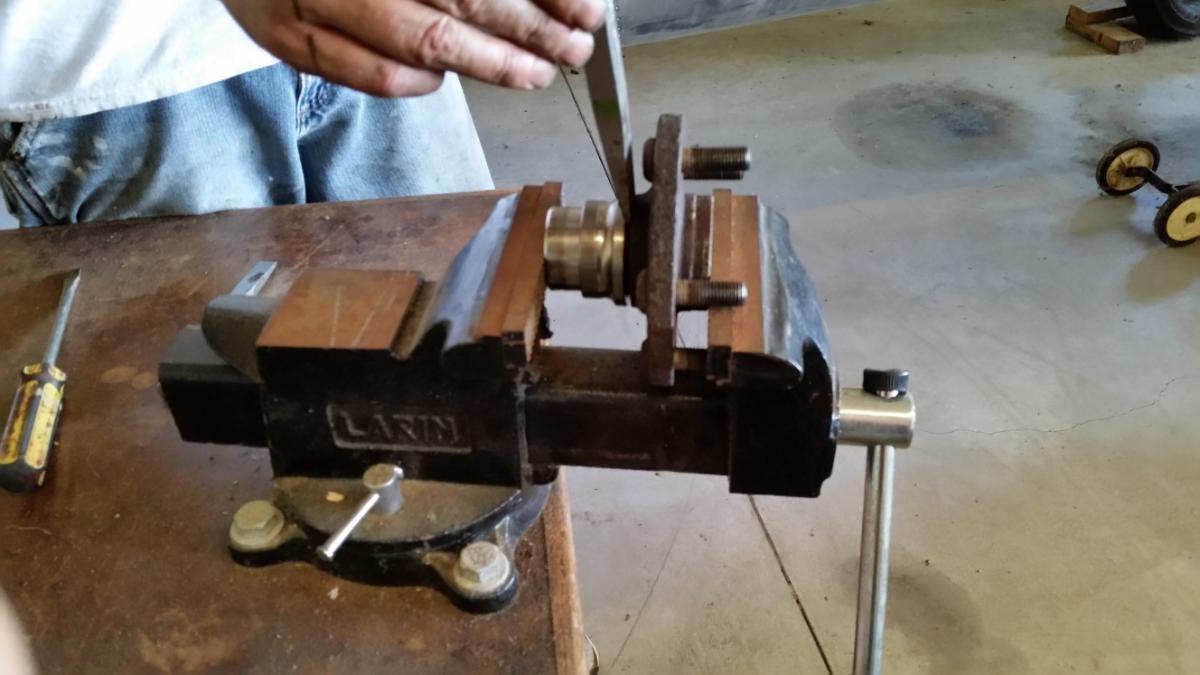
Once it is separated a little bit from the hub, use the hammer puller with the hook fingers to hammer off the race. I did this by putting the hub in a vice, and using the slide hammer upward, with the fingers of the hub removal tool grasping the race.
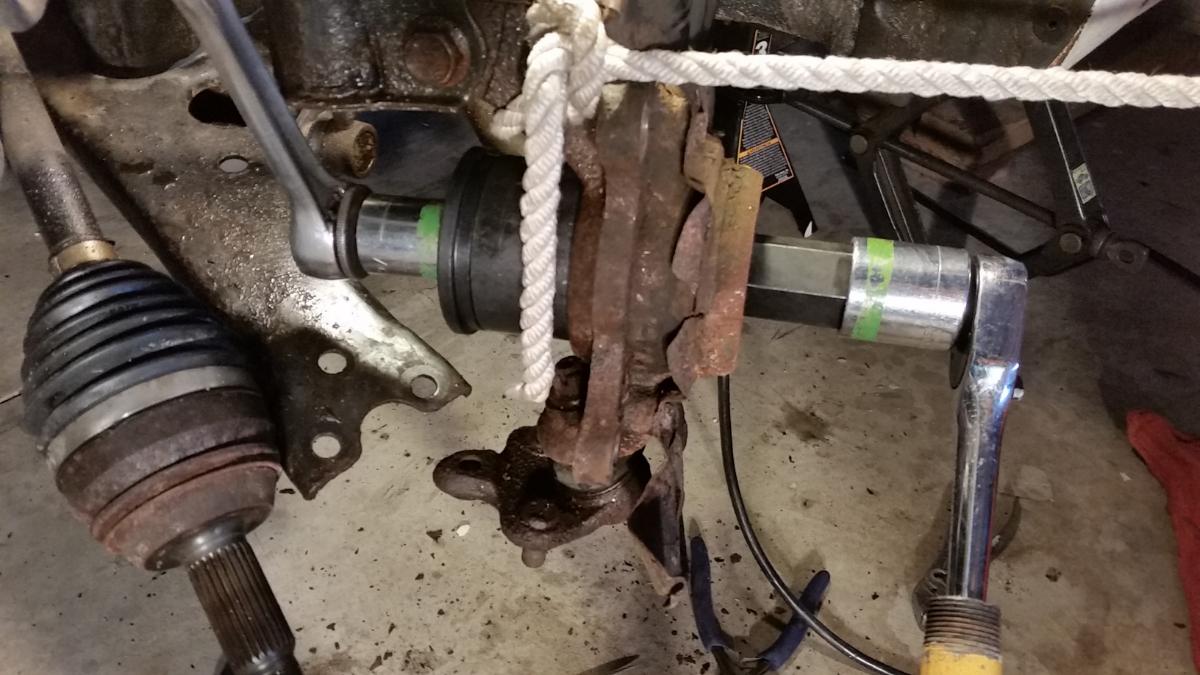
Remove 2 nuts and one bolt from the bottom of the ball joint.
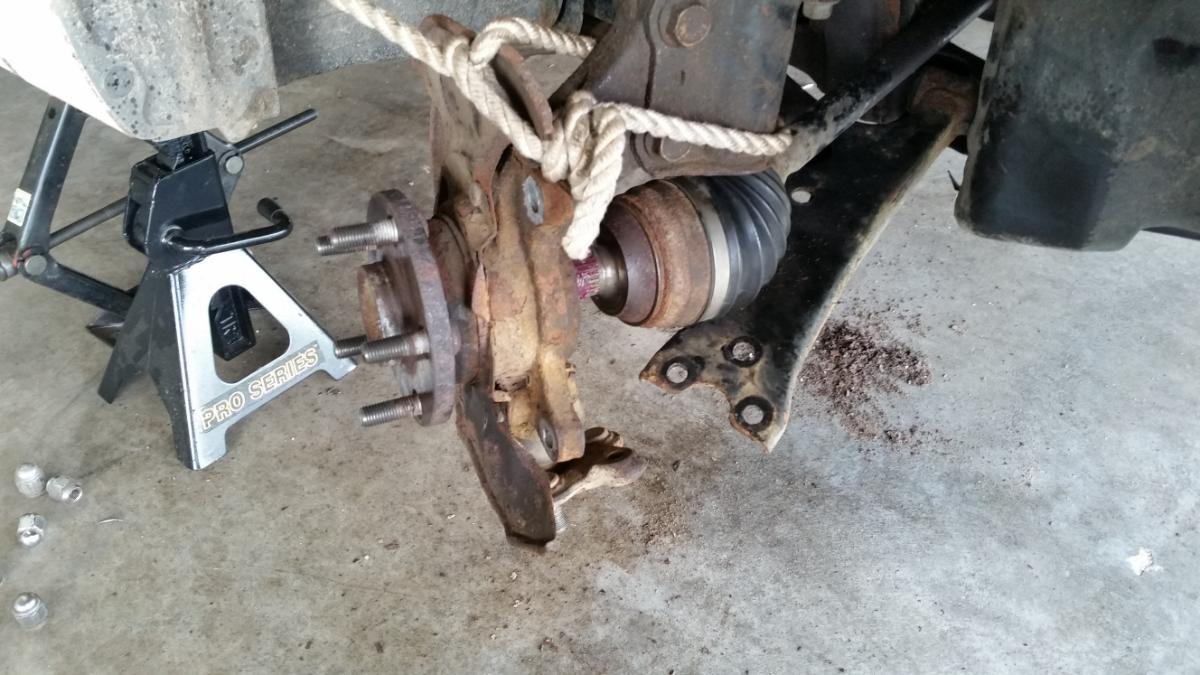
Pull out the axle and tie the steering knuckle to one side. One benefit of replacing the bearing in this way is that you are not removing the steering knuckle, so the vehicle will not require a re-alignment.
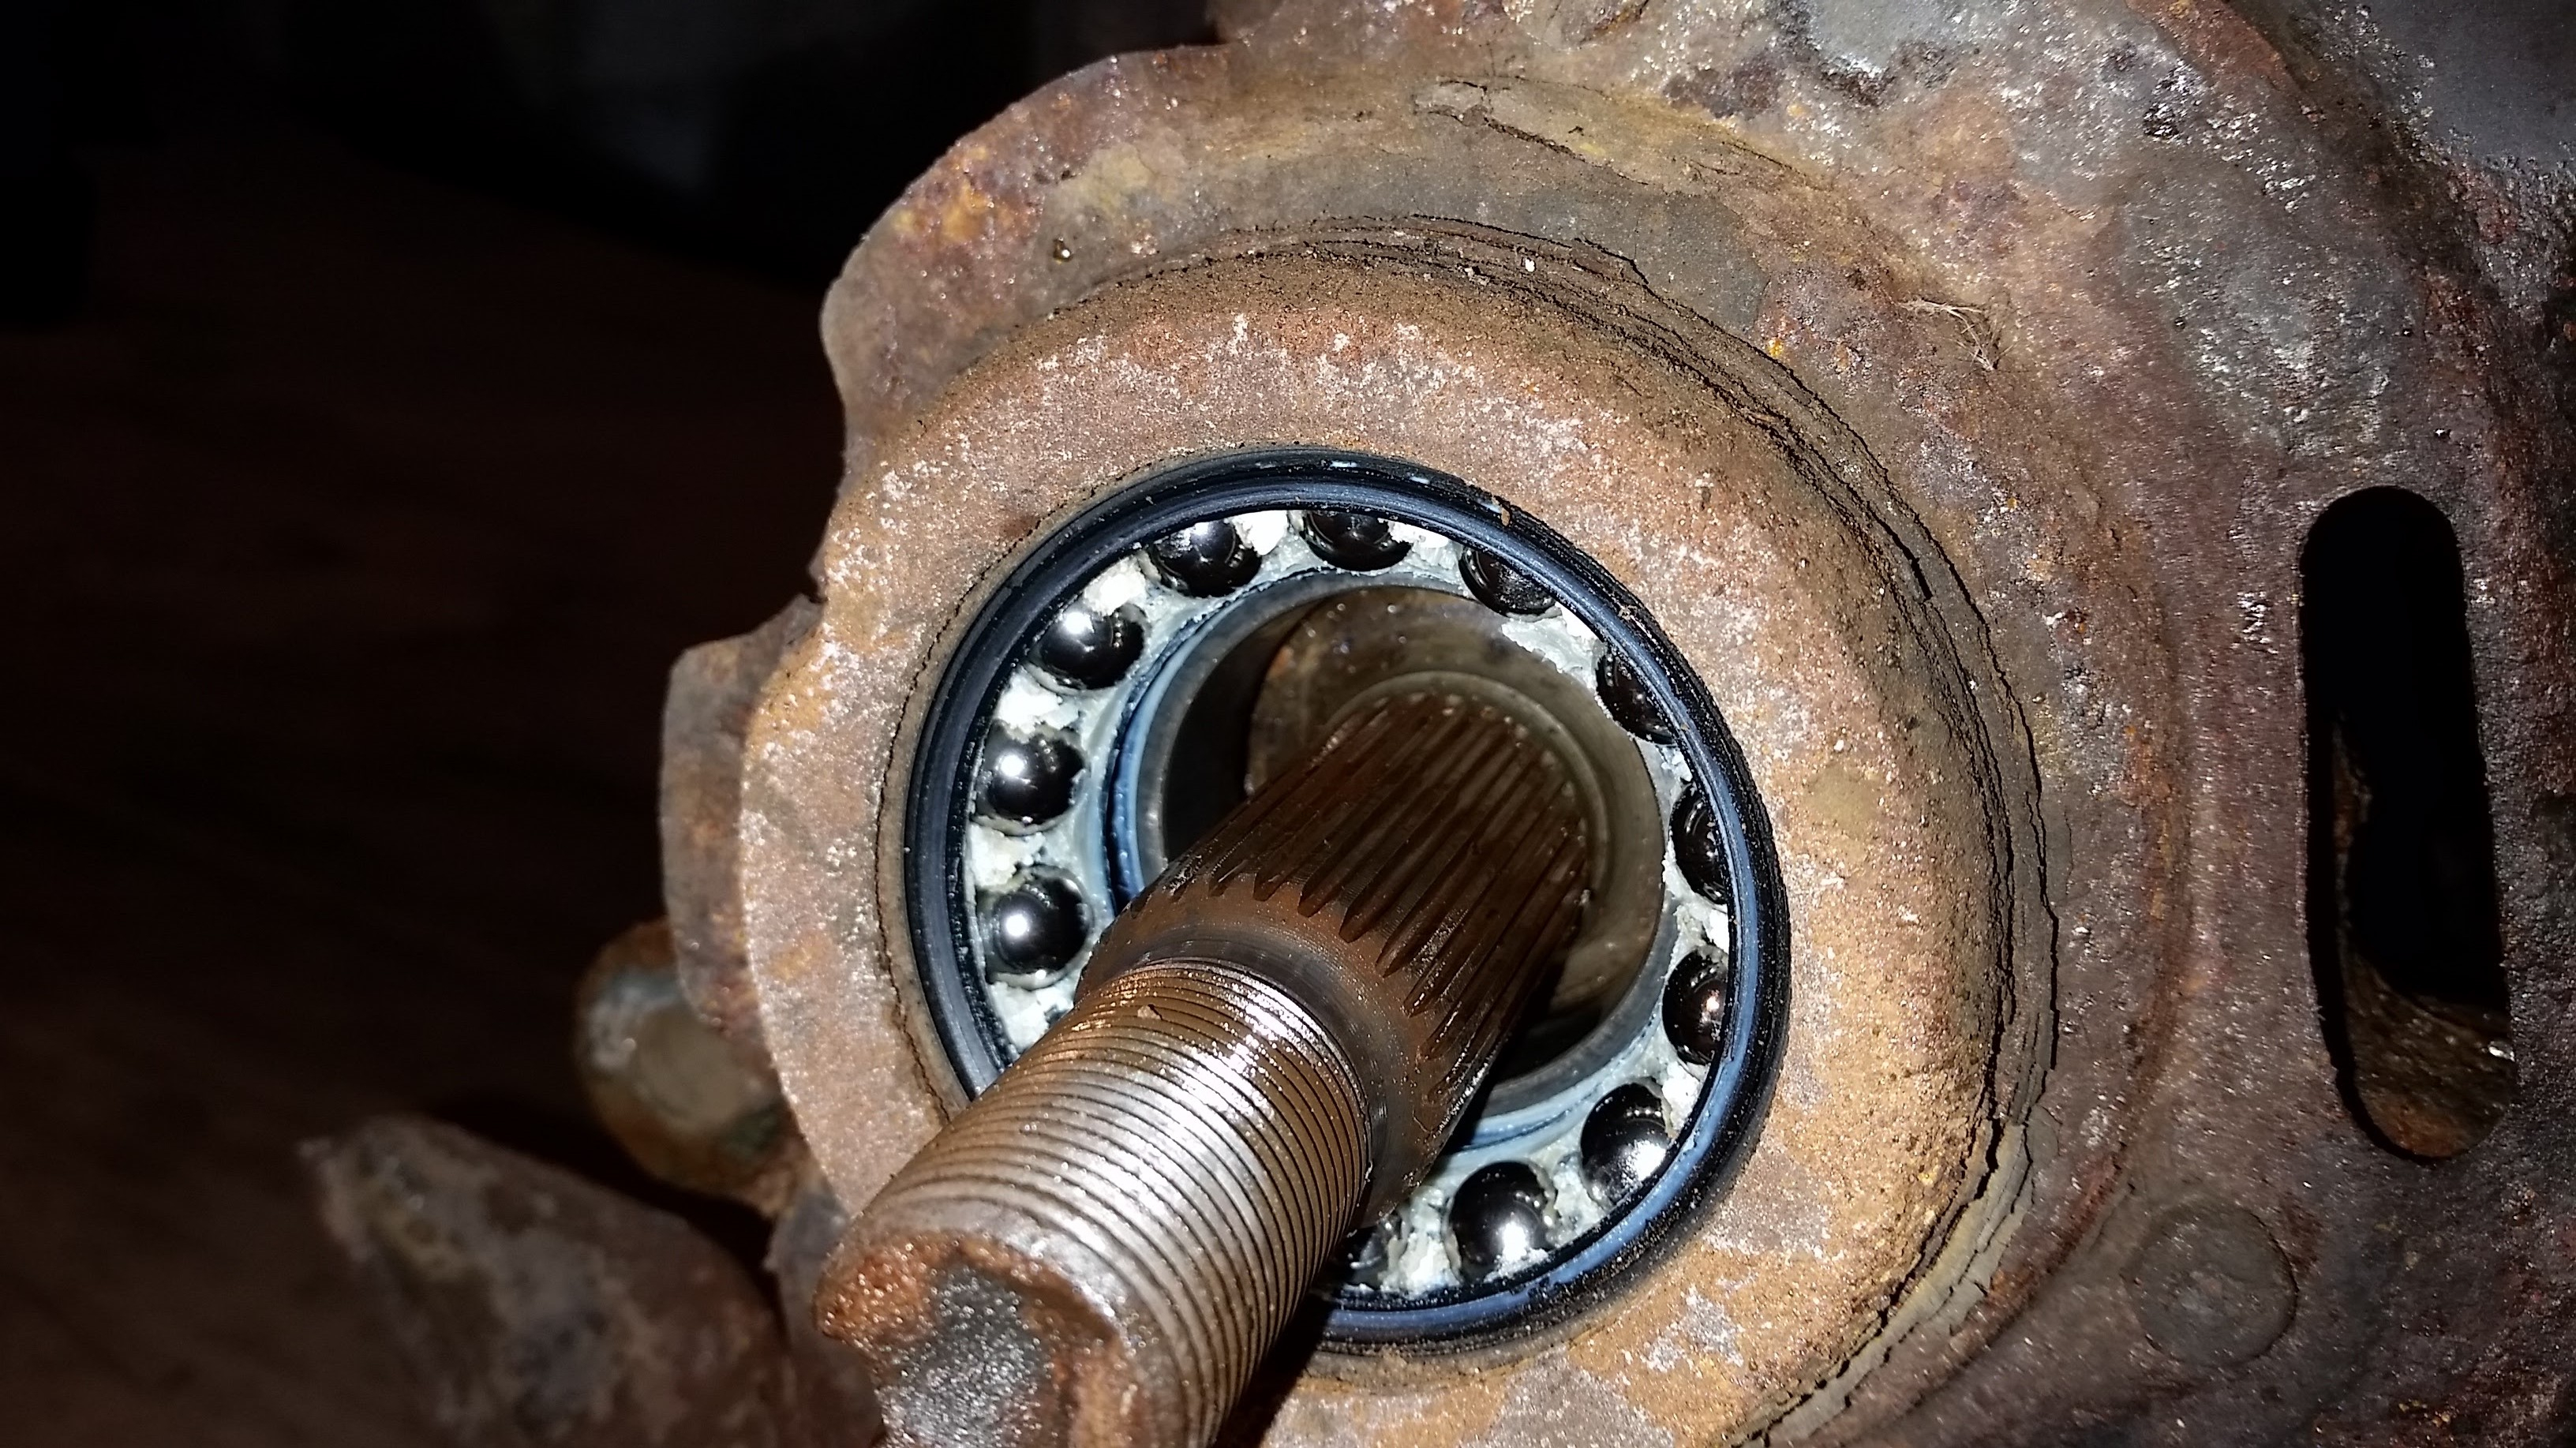
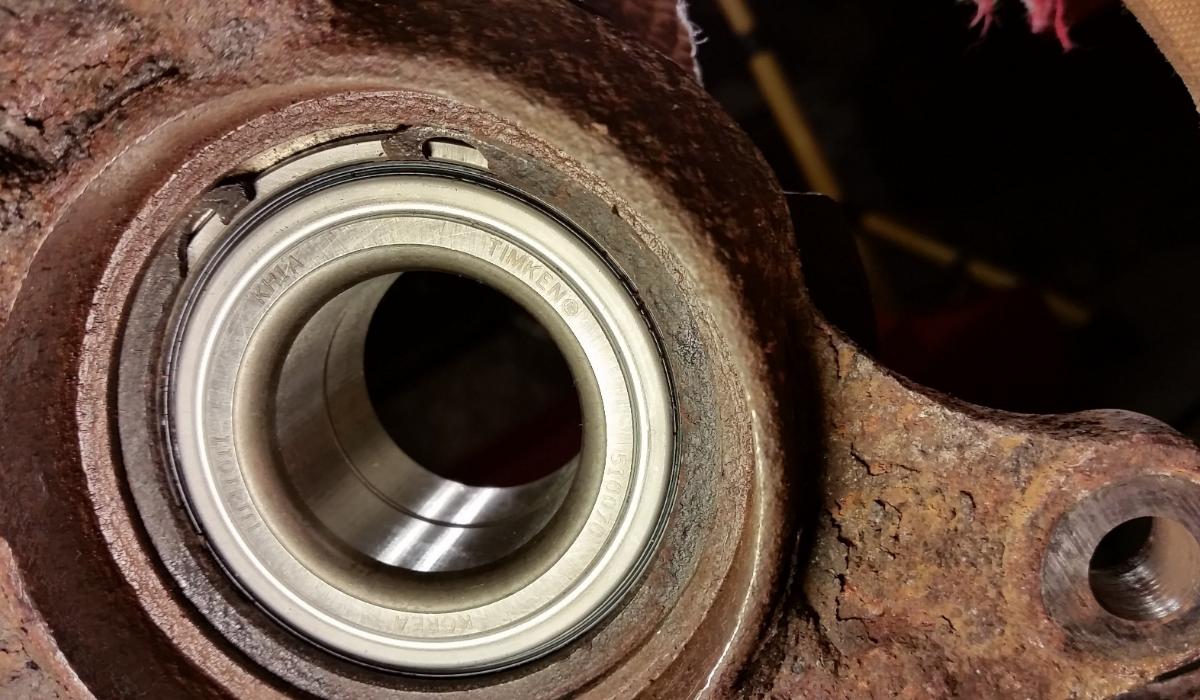
Take the rest of the bearing out the back of the steering knuckle by using the bearing pusher. In order to do that, you have to first remove the snap ring (bearing retaining clip). Here is a good view of that (though this picture was taken after the new bearing was installed). It was VERY rusted in place. I got it out using a needle-nose pliers and a screwdriver to pry it inward and then out. Be careful not to damage it, as you can reuse this if it is not damaged. If it is too mangled in removal, you’ll have to get a new one.
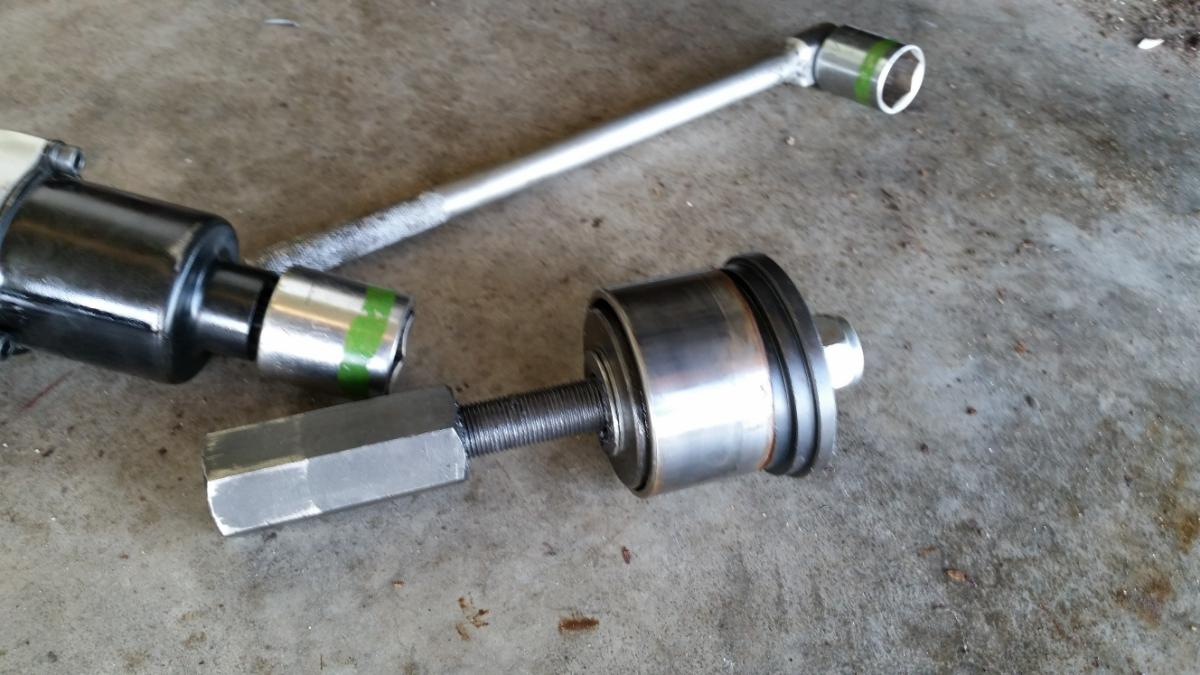
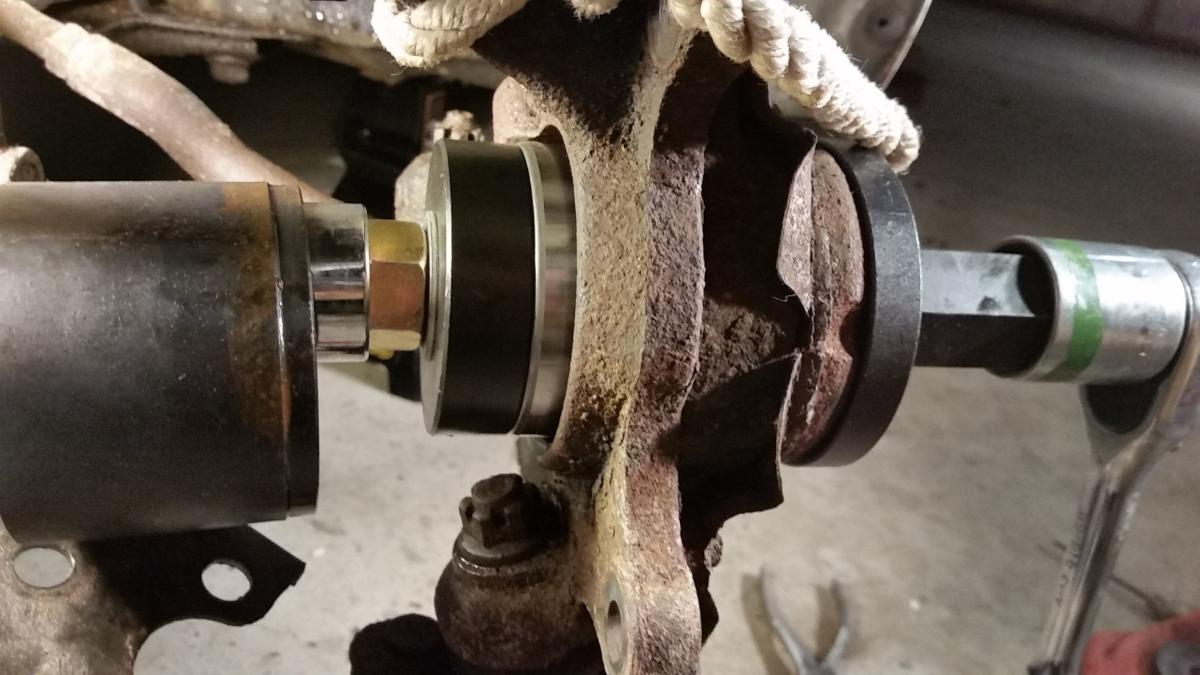
After the snap ring (bearing retaining clip) is removed, use the bearing pusher tool to push out the old bearing. You have to select the proper sized disk to put on the outer part, then put the large nut over that. On the inner part, put the ‘can’ and the proper sized disk outside of that, then tighten the two socket wrenches toward each other. Double check that you are not binding against something, and that you have chosen the correct disk sizes.
The old bearing pushed part of the way out using the bearing pusher tool:
The old bearing pushed out:
The old bearing completely removed:
Here is the bad bearing, note the Made in China markings. Don’t get this type of wheel bearing.
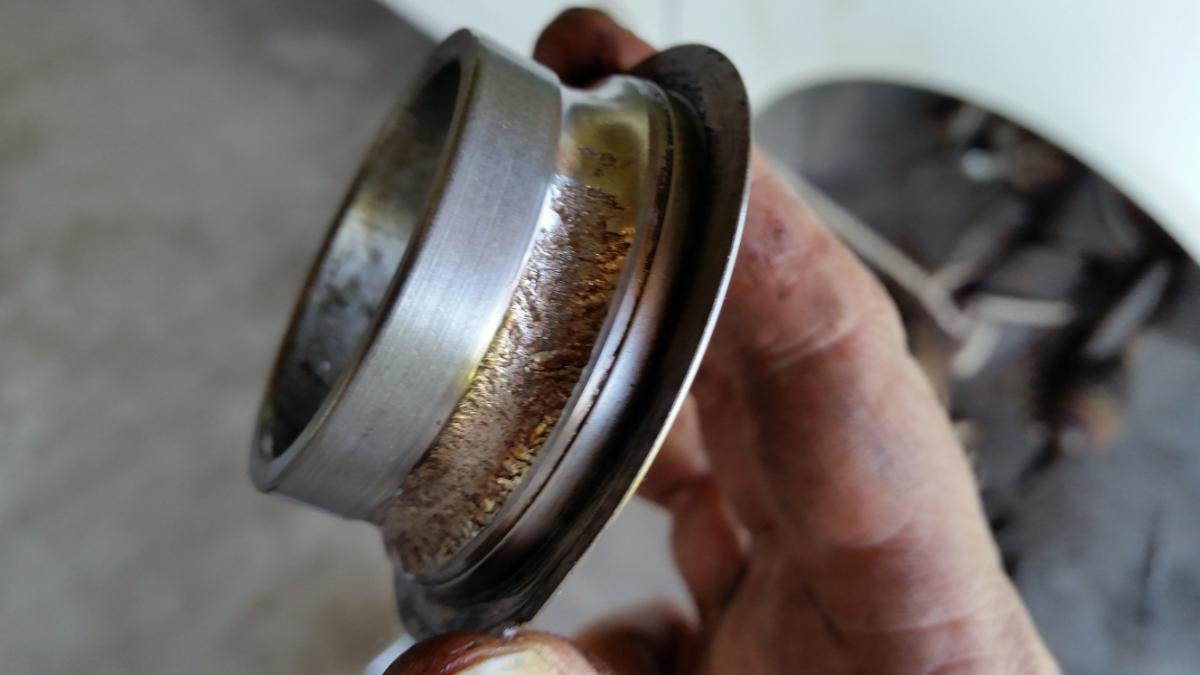
This is the inside of the old bearing. This is supposed to be smooth! No wonder there was a roar when driving!
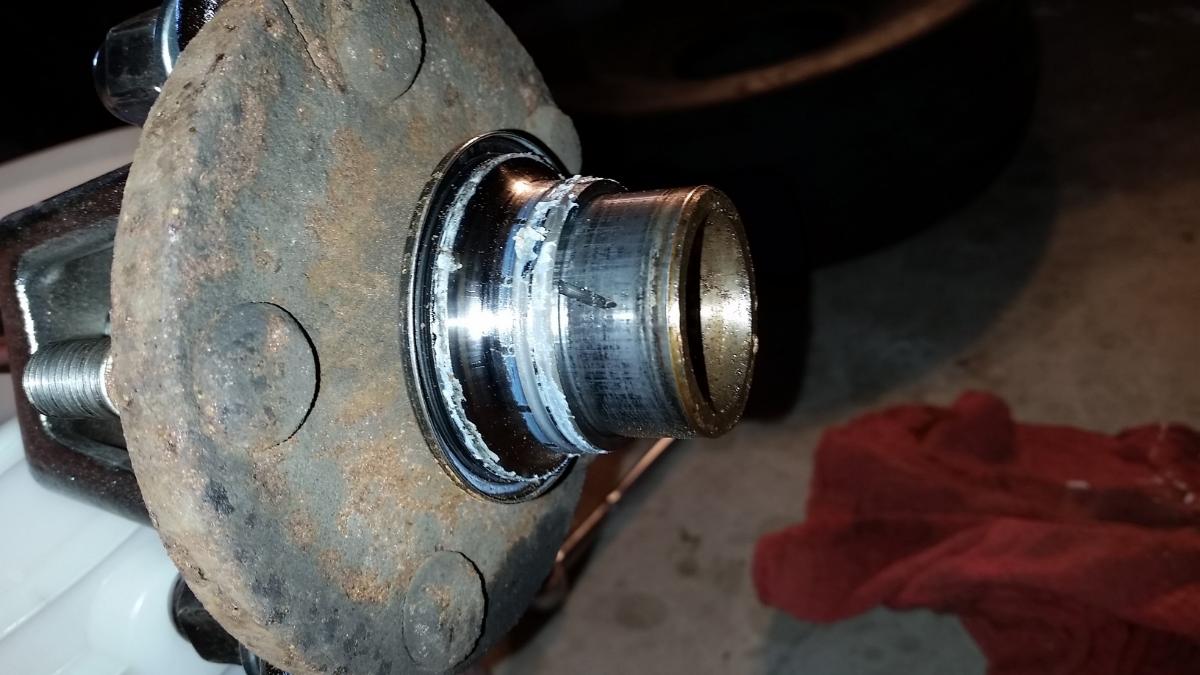
Time to put in the new bearing. Some guys keep this in the freezer overnight before putting it on. It will fit in better if it is cold. I’m not sure how much difference this made, but I did it anyway.
Clean out the hub. Put a little grease in there to assist in the assembly.
Here is the order to put the pieces of the bearing pusher to push in the new bearing. Push the bearing in first, then in a later step we will push in the hub.
Here is a photo showing the bearing pushed partially into the steering knuckle. It is a good idea to check often, to make sure that you stop when the bearing is pushed in to the correct position. Do not keep pushing after the bearing is already seated!
Push it in just far enough so that you can get the snap ring back in. Don’t overdo it!
This is the photo from before, showing the position of the snap ring re-installed:
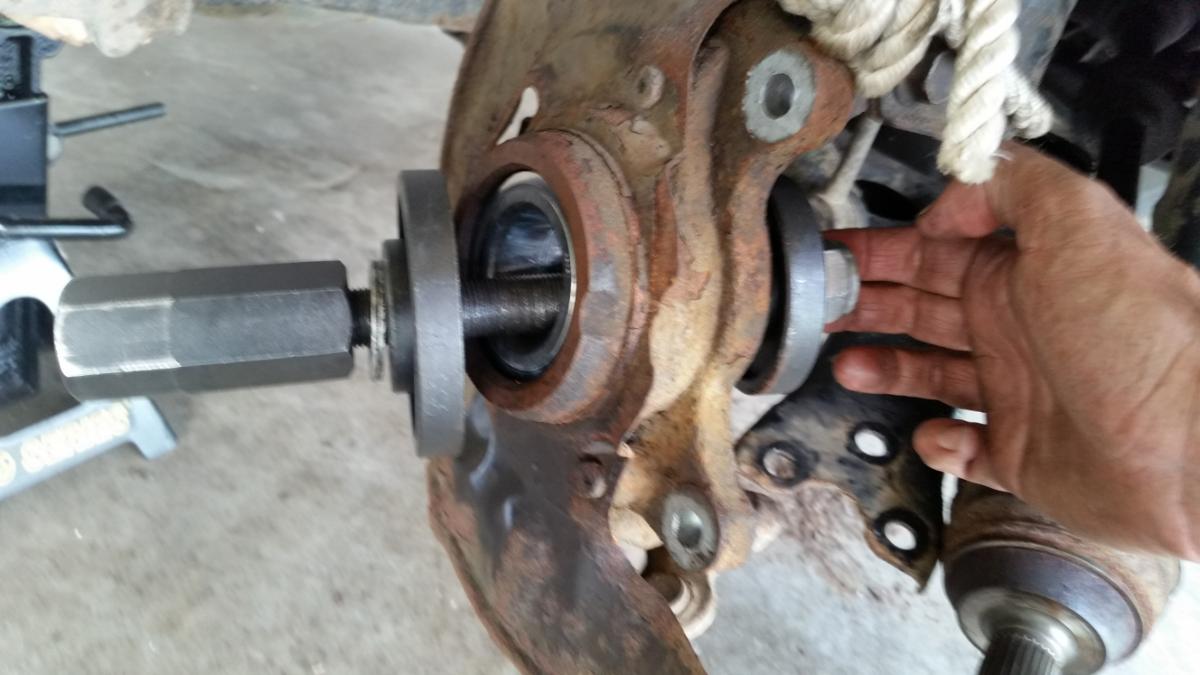
Now push in the hub. For this step, use the bearing pusher tool, make sure to push against the inner race of the bearing on the back side, so that you do not destroy the new bearing!
Grease the axle, and push it into the hub.
Re-install the 2 nuts and one bolt on the ball joint.
Now put the brake caliper and rotor back on. Then we will tighten the axle nut. Putting on the rotor and caliper helps because you can put a screwdriver in there to hold it still while you tighten the axle nut.
CAUTION!!! Tightening the axle nut is possibly the most important step of this whole process. Please don’t screw this up, or you will be repeating this again in 6 months. If it is too tight, it will cause undue stress, and the new bearing will wear prematurely.
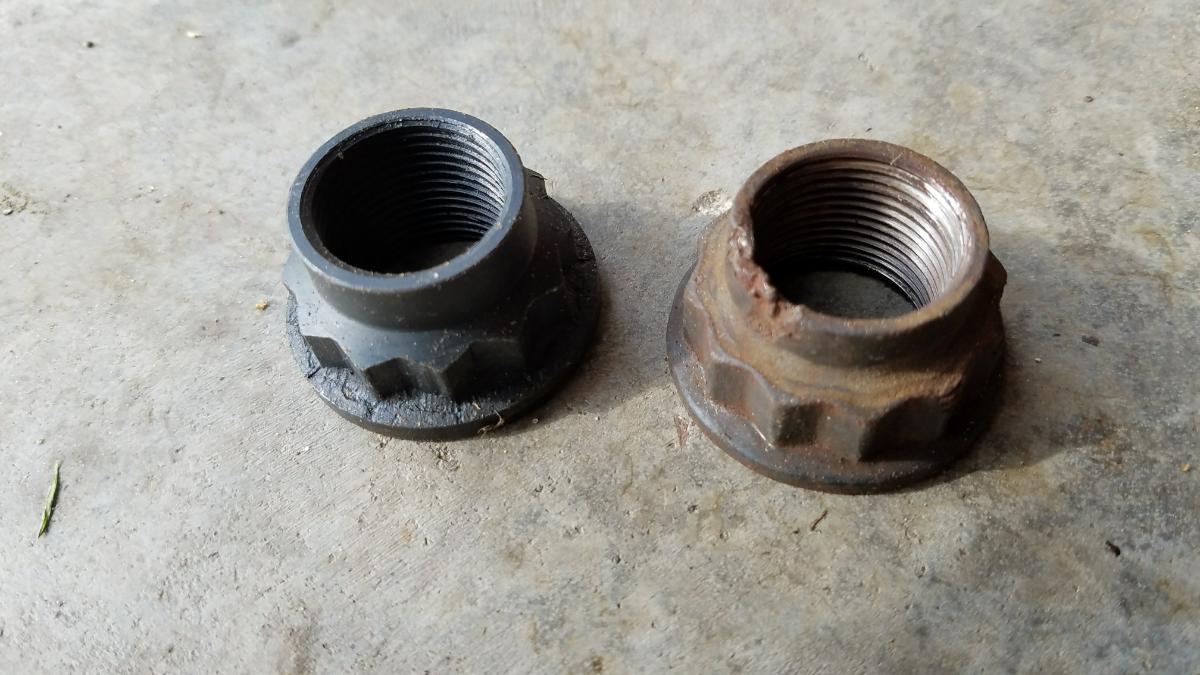
Here is a photo of the old and new axle nuts side by side.
Note:
It is very important to torque the axle nut correctly! If the axle nut is not tightened correctly, damage can be done to the bearing, and it will not last very long, and you will be repeating this repair in another 10k miles or so! The following steps are very important!
Use a proper torque wrench. If you don’t have one, please get one and read this article on the correct way to use it. You will use it for all sorts of things, and it is much better not to damage threads or other things (such as bearings) by over-tightening. For the axle nut, the torque is commonly ~180 foot-pounds, but may be more, so check the spec for your vehicle. The spec may also be included with the bearing. For the 2004 Corolla, the spec was 159 ft-lbs.
Also, don’t put any weight on the bearing until the axle nut is properly tightened. Don’t set the vehicle down to hold the wheel while you tighten the axle nut!
When you tighten the axle nut, move the wheel an 1/8 to a 1/4 of a turn or so every time you tighten. This allows the bearing to be properly seated. After several rounds of tightening, end on the proper torque. Do not over tighten.

After putting the axle nut back on, and torquing to the correct specification. Be sure to notch the nut again in the groove.
Put on wheel and tighten lug nuts to 76 lbf-ft.
Once again, the supply list. Some of these are optional based on your specific needs. The links are to these supplies and tools on Amazon, but you should be able to get these parts at your favorite auto parts supplier. Even if you don’t buy these, you can click the links to get the correct part numbers.
Hey, good luck on this repair! When I was doing this for the first time, I scoured the web looking for good information and found very helpful nuggets of information from a variety of different sources. My goal here is to try to consolidate all of the information that I could have used, in one place. I honestly hope this helps someone out!
Did you find this post helpful? What is missing? Please let me know about it in the comments at the end of this page!
Click here for the Toyota Corolla/Matrix/Vibe Maintenance Archive.
Supplies and tools used:
- Wheel Bearing – Corolla (pn510070)
- Axle Nut (Optional)
- Bearing Retaining Clip (Optional – only needed if you destroy the existing one)
- Bearing Pusher – Puller Tool
- Hub Puller (Slide Hammer) Set
- Axle Nut Socket 30mm
- Torque Wrench 1/2 inch Drive
- Air Impact Wrench (Optional)
- Ear Mufflers (Optional)
- jack stands


Hey man, I own a corolla and this site is an unbelievablely good resource for me. Thanks a lot for all you’ve done here you’ve saved me a ton of money!
Thank you! I really appreciate it