
Find and Repair an A/C Leak Using UV Dye – Honda Accord
A/C problems are some of the most frustrating to diagnose and fix. This pictorial article walks through the steps I took to diagnose, find, and repair an air conditioning leak in a 2004 Honda Accord.
Background
It started about 6 months ago. The air conditioning compressor stopped coming on when the a/c was turned on. I read about this a lot and discovered (through the use of a manifold pressure gauge set) that the refrigerant R134A was low. I recharged the system with 2 cans of R134A, and everything was working again…for 2 weeks.

Then the compressor stopped coming on and everything was hot again. I figured it was a leak, since the refrigerant was low again. But how to find the leak?
Note: PracticalMechanic.com is reader-supported. If you buy through links on our site, we may earn an affiliate commission – at no cost to you. Thank you for your support!
I put some soapy water on the Schrader valve for the low pressure side, and it formed bubbles. I took this to mean that it was leaking. I replaced the Schrader valve, recharged the system, and everything was cold again…for 1 week.
Not only did that not fix the problem, it was getting worse.
The following article details the process I went through to find and fix the leak.
Tools and Supplies used:
- manifold pressure gauge set
- vacuum pump
- AC Discharge Hose
- 10 mm wrench (I like ratcheting wrenches)
- UV Dye
- UV Flashlight and Glasses
- 3 Cans of R134A Refrigerant
Alright, let’s get started!
How to Use UV Dye to Locate an AC Leak
The first step in the process is to add dye to the system. I bought a small bottle of this uv dye.
Take your manifold pressure gauge set. Attach the red, blue, and yellow hoses to their corresponding connections. Then pour a small amount of the dye into the open end of the yellow hose.
The entire bottle is 1 oz, and I used about 1/2 the bottle or less, maybe 1/3. Then attach the end of the yellow hose to a can of R134A. Recharge the system as described on the can. This will introduce the dye into the AC system.
Then drive the vehicle with the A/C on as you normally would, for several days. Make sure the A/C compressor is turning on during this time, so that the dye is being circulated.
Next you need to use the UV flashlight and glasses to find the leak.
A lot of UV glasses and lights are kind of expensive, but I noticed that there also exist UV lights for checking for pet urine… These are much cheaper. I took a risk and bought a set advertised for detecting pet urine, with hopes that it would also work for A/C dye leak detection. Fortunately the UV flashlight and glasses worked very well! These are the ones I bought:

It is best to do this in a very dark place, such as a windowless garage, or at night. I performed this operation in the dark of night. Put on the glasses and shine the UV flashlight along all of the A/C lines. All around the compressor, and around the low and high pressure inlet ports. Keep in mind that a little dye on the low pressure side port is normal, since that is where the dye was added.
I’m not sure what I was expecting, but the leak was easily identifiable.
I put the glasses over my camera lens and took the following picture:

The UV light (with glasses on) makes everything look blue or purple. The dye will fluoresce green. Notice the green splotch on the A/C discharge hose line coming out of the compressor. This hose, was the source of the leak.
Be sure to continue checking even after you have found the leak, since there may be more than one leak.
I ended up finding a replacement a/c discharge hose on Amazon.
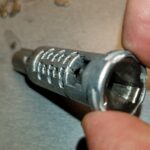
Replacing the hose is very straightforward. The hose is connected by two 10 mm nuts. One end is connected where the hose goes into the compressor. In this picture, the 10 mm nut has already been removed.

And the other is where the hose enters the evaporator. In this picture, the 10 mm nut has already been removed.

Take off the old hose, snake it out, around the radiator, and put in the new hose. Here is a picture of the new hose ready for installation.

Try to do the swap as quickly as possible. You want to avoid contaminants and moisture getting into the system as much as possible.
Here is a photo of the new hose installed.

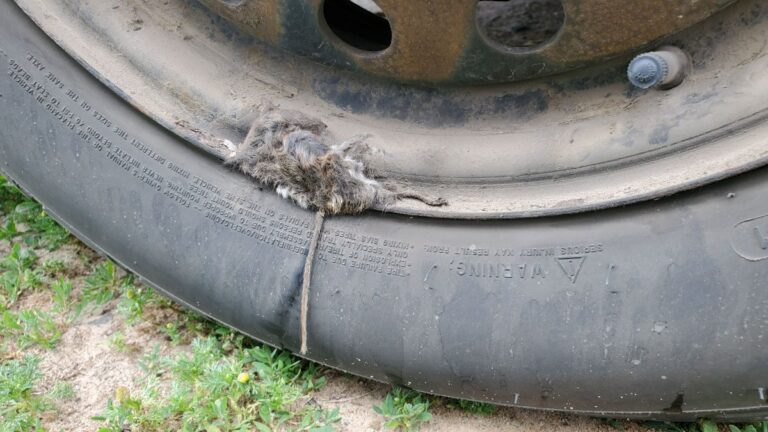
Here are a few pictures of the old hose. Notice the thick (wet) black sludge around the area of the leak (lower left part of the image). This should have been another clue that this was the source of the leak.

These are the ends of the old hose.


That’s it, the new hose has been installed, and the leak is fixed.
The next step is to vacuum the system and recharge with refrigerant. I bought this vacuum pump for this job, and it worked very well.![]()
Attach the blue hose to the low pressure A/C port. Attach the red hose to the high pressure A/C port. Attach the yellow hose to the suction port on the vacuum pump.
Start the pump, and open the blue valve on the manifold pressure gauge set.
Keep the vacuum on for at least 1 hr. This step evacuates humid air and moisture from the system.
The next step is to recharge the system with fresh R134A. Follow the directions on the can for recharging the system.
The A/C system in a 2004 Honda Accord takes 19 oz of R134A. Since the cans come in 12 oz each, this means that you will use approximately 1 and 1/2 cans.
That’s it, well done.
Take the vehicle for a test drive and verify the A/C is working properly.
I sincerely hope you found this post helpful! Click here for more of my maintenance tips on Honda Accords!
You are a fantastic teacher. Though I have not tried it, your explanations are very straight forward and easy to comprehend. Many thanks.