How to Replace Rear Struts – Toyota Corolla 2004
This post details the procedure for replacing the rear struts on a 2004 Toyota Corolla. The step by step process is similar for 2003-2018. I hope you find this useful!
Problem Description
My 2004 Toyota Corolla is coming up on 300,000 miles, and driving over bumps and potholes keeps getting more and more jarring and the bouncing continues even after the obstruction is long past.
One problem that was especially concerning is that when hitting a bump at higher speeds, the rear-end tends to skitter to one side as the back end continues bouncing. This does not give a comforting feeling and is unsafe.
When you buy through links on our site, we may earn an affiliate commission – at no extra cost to you.
I had already replaced the FRONT struts on my Corolla, but now it was time to replace the rears. Honestly, I wasn’t expecting the car to last this long, so I had been putting it off.
If you find that your back end is too bouncy, consider replacing the rear struts. It is an easy repair and gives you a much safer and more comfortable ride!
Tools and Supplies:
- Rear Struts: Left (181373L) and Right (181373R) <- 2003-2008 Toyota Corolla
- Rear Struts: Left (172599L) and Right (172599R) <- 2009-2013 Toyota Corolla
- Rear Struts: Left (172991L) and Right (172991R) <- 2014-2019 Toyota Corolla
- Socket wrench (14mm, 19mm)
- Lug Nut Socket
- Jack
- Jack-stands
- Crowbar
- Button-puller and Spare clips
- Large flat-bladed screwdriver
- Torque Wrench
To see this repair on video, check it out the Rear Strut Replacement Video on my youtube channel.
How to Change Rear Struts on a Toyota Corolla
I ordered Monroe quick-strut assemblies off of Amazon. These are the ones I used for my 2004 Corolla, and they worked very well:

Before starting, I sprayed a little penetrating oil on the lower mounting nut and gave it some time to penetrate.

Put some chocks under the front wheels to keep tcar from rolling, then I used a hydraulic floor jack to jack up the rear of the vehicle using the central jack point under the trunk.

Put some jack-stands under the car as well for purposes of safety.

When the car is secured safely, remove the rear tire.

Now, open the trunk and locate the plastic button along the side near the back of the back seats. Use a screwdriver or button-puller to pry out and remove the plastic button.

With the button removed, carefully pull back the carpet revealing the top of the rear strut.
Note: Don’t remove the nut on the very top of the strut.

Use a 14mm socket to remove the gold-colored mounting nuts on either side of the strut.
Note: There is another, larger nut that is welded in place, don’t try to remove that one! That one has a bolt coming from underneath that will be removed.

Remove the other gold-colored nut as well with a 14mm socket.

Underneath the vehicle, remove the 19mm nut from the bottom of the strut.

There is a large washer also securing the strut, remove it and put it in a safe place.

Now we can remove the final mounting bolt. Use a 14mm socket to remove it. Mine was a bit rusty, so I used a 9/16″ socket (which is just a little larger) in order to get it off.

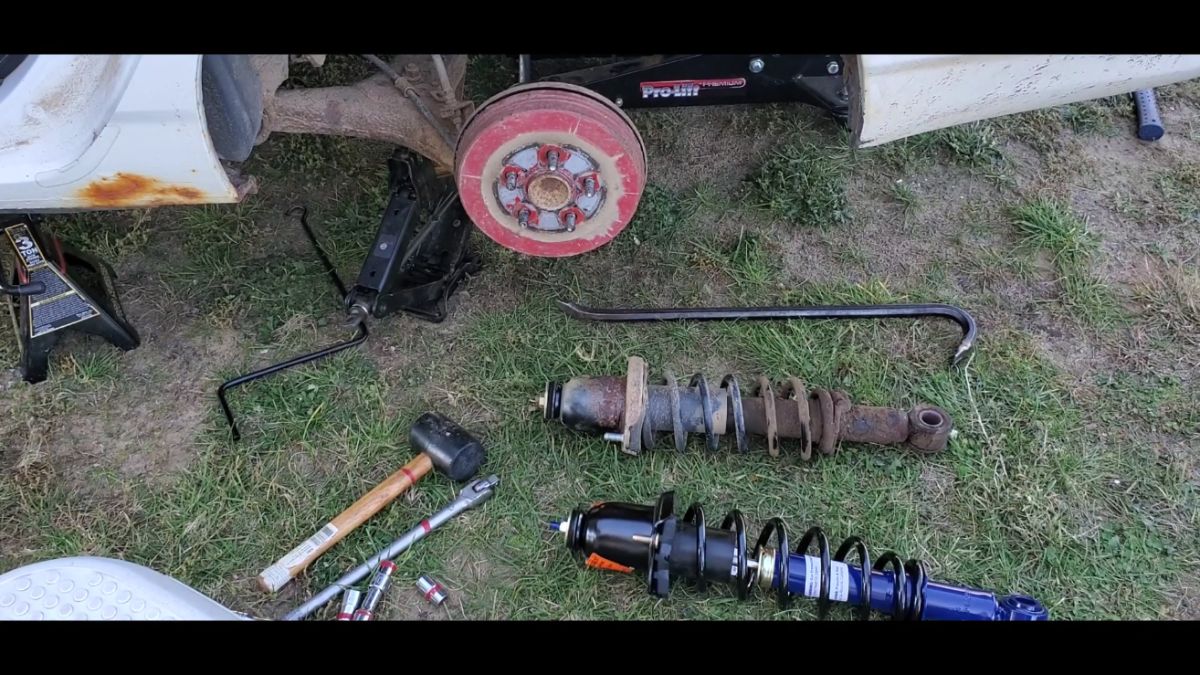
Now the strut is free, but we need to pry it off of the lower mounting pin. Use a crowbar or large screwdriver to pry it off.

Now you can wiggle the old strut out and remove it from the vehicle.

Okay, we’re half-way done, time for a joke-break…
Joke Break
A guy walks into an auto shop and says, “I’d like a gas cap for my 2004 Kia.” The mechanic thinks for a few seconds then says, “Ok, that seems like a fair trade.”
Installing the New Rear Strut
Alright, moving on…
Take out the new strut and compare to the old one. The new strut will have an “L” for left (or “R” for right) stamped on it somewhere. The left or right is in reference to the driver sitting in the driver’s seat.

Feed the new strut up into the top mounting hole.
Note: Don’t worry about getting the bottom strut mounting hole onto the pin at this point, just position it alongside at this point. We will get that in during a later step.

Insert the upper mounting bolt and get it snugged-up finger tight for now.

Next, go inside the trunk and reinstall the two 14mm mounting nuts.

Now go ahead and snug-up the upper mounting bolt.

With the top of the strut now secured, go to the lower part of the strut. I used a 3-ft or so metal pipe, but you could use any sort of pry bar. Put it inside the suspension pipe and use your weight to pry it down. At the same time, use a crowbar to pry the strut inward and onto the lower mounting pin.
To see this step on video, click this link.

With the strut on the lower mounting pin, use a rubber hammer to tap the strut into place.

Install the large washer and the lower mounting nut using a 15mm socket.


It is now time to torque all of the mounting bolts. They should all be torqued to 59 lbf-ft, as can be seen from the diagram below.

Use a torque wrench to torque the lower mounting nut (19mm) to 59 lbf-ft, as well as the (14mm) upper mounting bolt and the two nuts in the trunk to 59 lbf-ft as well.

With the rear strut now installed, put the tire back on. Tighten the lug nuts to 76 lbf-ft.
Note: After driving for about 100 miles, re-torque the lug nuts to 76 lbf-ft.

Re-install the hub cap. Line up the ‘notch’ in the hubcap with the valve stem.

Remove the jack stands and lower the vehicle.
Inside the trunk, re-install the plastic button clip by feeding it through the carpet and then into the small hole in the frame.

And that’s it for the rear strut replacement. Repeat the procedure for the other side.
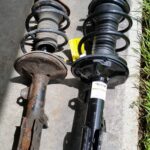
Here’s the new strut with the 2 old struts removed.

Wrap Up
One thing to note, is that the car will likely sit a little higher now that the new struts are installed. You can see the difference below. This will settle down over time, typically a month of 2 of regular driving.

I hope this post was useful and that you are able to save some money by performing this maintenance yourself.
Take Care,
Richard Tomlinsen
To see this repair on video, check it out the Rear Strut Replacement Video on my Practical Mechanic YouTube Channel.
Tools and Supplies Used:
- Rear Struts: Left (181373L) and Right (181373R) <- 2003-2008 Toyota Corolla
- Rear Struts: Left (172599L) and Right (172599R) <- 2009-2013 Toyota Corolla
- Rear Struts: Left (172991L) and Right (172991R) <- 2014-2019 Toyota Corolla
- Socket wrench (14mm, 19mm)
- Lug Nut Socket
- Jack
- Jack-stands
- Crowbar
- Button-puller and Spare clips
- Large flat-bladed screwdriver
- Torque Wrench


Do you have the part number for the upper mounting bolt and where to buy it?