
How to Change the PCV Valve in a Toyota Corolla
Is you Corolla leaking or consuming oil? Giving off a whining or whistling sound? Fouling up its air filter with oil? Or not giving you the same gas mileage as it used to? You may have a clogged or sticking PCV valve.
Read on to determine how and when to change the PCV valve in a Corolla. This guide should apply to the following year Corollas: 2003-2008. The vehicle shown here in this guide is a 2004.
Diagnosing a Bad PCV Valve
A PCV (positive crankcase ventilation) valve is about a $10-part that plays an important role in routing partially combusted air and fuel from the crankcase part of the engine back through the intake manifold to the cylinders. If this were not done, the gases would be released into the atmosphere. Problems arise when the PCV valve is clogged or not working properly.
Typical problems associated with a bad or plugged PCV valve include:
- vehicle hesitation while driving
- oil leaks
- excess oil consumption
- oily or otherwise fouled engine air filter
- whining noise coming from the engine bay
Even if you aren’t experiencing any of these problems, many people replace the PCV valve every 50,000-100,000 miles, as a sort of cheap insurance. Since continuing to drive with a clogged PCV valve can lead to engine sludge, running low on oil, and other problems, it is not a bad idea to change it somewhat regularly, if not frequently.
Note: When you buy through links on our site, we may earn an affiliate commission – at no cost to you. Thank you for your support.
A shop will charge you around $75 to change the PCV valve in your vehicle. But it is a really easy part to change, and the actual part is about $10, therefore I recommend doing it yourself. It will take about 30 minutes if you take your time.
Tools and Supplies Used:
- socket wrench
- 22mm socket
- 10mm socket
- torque wrench
- pliers
- PCV valve (Toyota Part# 12204-22041)
PCV Valve Replacement Guide – Toyota Corolla
Here is the procedure for changing out the PCV valve in a Toyota Corolla
Step 1: Acquire a New PCV Valve
PCV valves are relatively cheap. They’re a lot less expensive if you buy them online vs an auto parts store. The genuine Toyota genuine Toyota PCV valve (Toyota Part# 12204-22041) is recommended. Alternatively, you can also buy 3rd party units, like this Fram on I bought.


Step 2: Pop the Hood and Remove the Plastic Engine Cover.
First, pop the hood and prop it up. Use a 10mm socket to remove the 2 nuts holding on the plastic engine cover.

Don’t drop the nut like we did. It tends to get lodged somewhere underneath near the alternator.

Lift the plastic housing off of the engine.

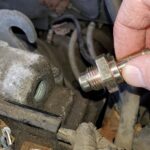
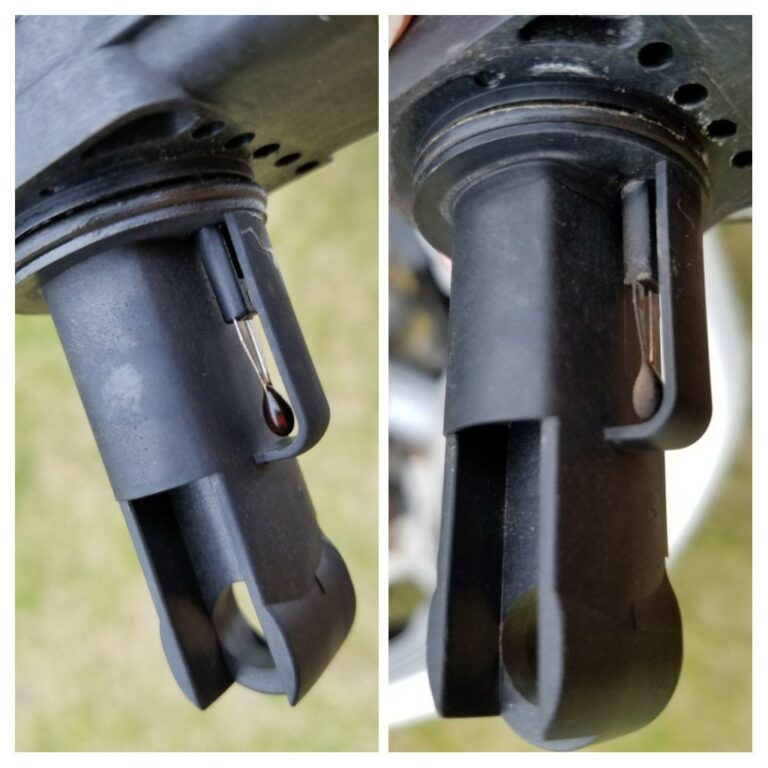
Step 3: Locate the PCV Valve.
The PCV valve is located near the back right side of the engine aft of the oil fill cap, with a hose coming out of it.

Here is a little closer view.

And here is an even closer view.

Step 4: Use a Pliers to Remove the Hose Clamp.
With a pliers, squeeze the hose clamp and pull the hose off of the old PCV valve.


Step 5: Use a 22mm Socket to Remove the Old PCV Valve.
A deeper socket will work best, since the stem of the PCV valve sticks out a ways, although this one worked fine. Alternatively, use a 22mm wrench or crescent wrench (gasp!).

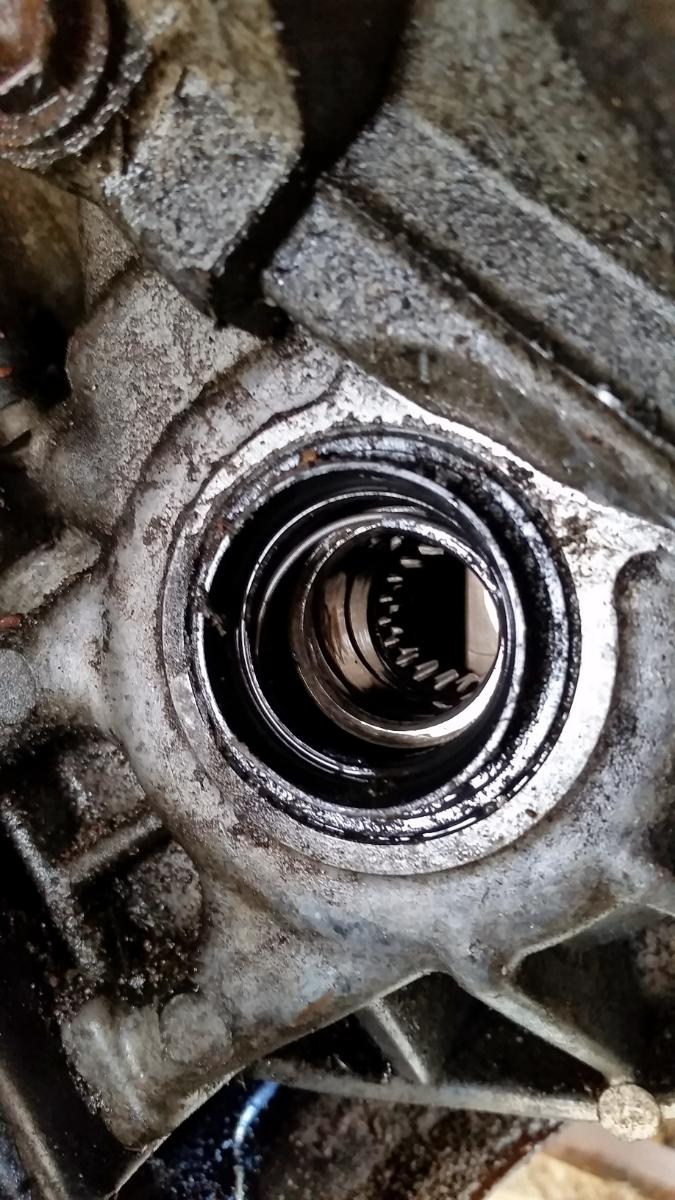
Step 6: Pull out the Old PCV Valve and Inspect.
This one was due for a change. This car has 293,000 miles on it, and the PCV valve has never been changed.

Try to minimize the amount of debris that falls into the valve port.

Inspect the old PCV valve. Shake it back and forth. If you hear something freely rattling around in there, it is probably still okay. If you don’t hear anything, or if it takes more than a gentle shake to hear something, it is clogged or fouled and should be replaced.

Step 7: Insert the New PCV Valve.
Take the new PCV valve and screw it into the port.

Don’t over-tighten it, ideally use a torque wrench. The torque specification is 22 ft-lbs, which is not a lot!

Step 8: Slide the hose onto the PCV barb and fit the hose clamp.
Press the hose onto the barb and slide the hose clamp over it.


That’s it for replacing the PCV valve.
Step 9: Put the Plastic Cover Back On.
Put the cover back on and line up the holes with the two studs to tighten it down.

Put the 10mm nuts back on the studs to hold the cover in place.


And that’s it for replacing the PCV valve in a Toyota Corolla. Thanks for reading!
For the next generation of Toyota Corolla’s (2009-2014), use this genuine Toyota PCV valve (Part# 2204-28030).
Tools and Supplies Used:
- socket wrench
- 10mm socket
- 22mm socket
- torque wrench
- pliers
- PCV valve (Toyota Part# 12204-22041)

Looks easy to do but, I don’t understand why the dealership charges $320 to change this PCV. Any thoughts?
Good question, one that has been asked many, many times over the years for a variety of different repairs, and is one reason why you may hear the dealership referred to as the “stealership.”
Now, at the end of the day, the dealership mechanic’s kids need to eat, too… and the salesman’s kids… and the manager’s kids… and the secretary’s kids… and the finance manager’s kids… and the customer service rep’s kids .. and the owner’s kids… and the…
Thanks for this description. Will make this job much easier.
Robb
Great! Glad to hear it, and good luck!
Muchas gracias’
Importante información paso ha paso vien explicado”
¡Gracias por las amables palabras! ¡Todo lo mejor para usted!
There are two possibilities.. a 22mm like in your example, and a 19mm.
The 22, when removed, will have green loctite on it (assuming it hasn’t been worn away).
The 19mm will have pink loc-tite. The two are NOT compatible, and can cause damage to the threads if you try to force the 22 into the 19 (for obvious reasons).
The Toyota Part Numbers are:
22mm variant: 12204-22041 (This is the updated version of 12204-22040, is compatible.)
19mm variant: 12204-22051 (This is the updated version of 12204-22050, is compatible)
-B. Hall