
How to Replace the Struts on a Toyota Sienna
This picture guide walks through all the steps I took to replace the shocks and struts on my Toyota Sienna. The problem started when the Sienna started making clunking and clanking noises while driving. The sound seemed to be coming from somewhere behind the speedometer. The problem was a bad strut! In this post I show pictures and the steps to take to replace the struts in a 2006 Toyota Sienna.
If you buy through links on our site, we may earn an affiliate commission – at no cost to you.
What Bad Struts Sound Like
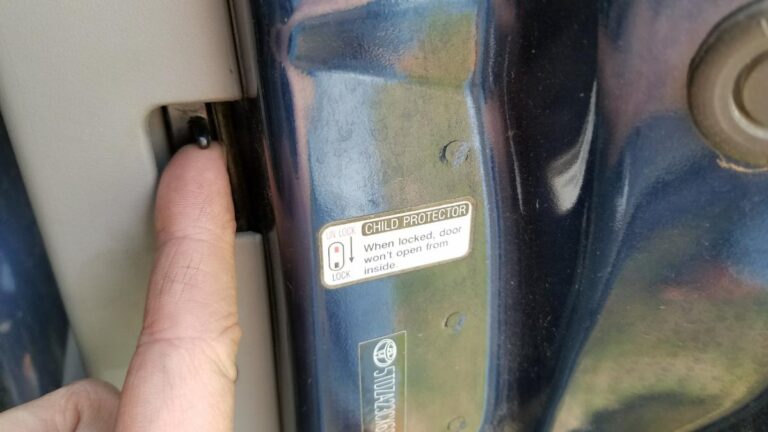
The problem started when my wife was driving the Sienna and would occasionally hear a clunk or clank. It wasn’t too frequent and was hard to pinpoint where the sound was coming from, so we assumed it was just some road noise or running over a nut or bolt or something. Over time, the clanking got more frequent and louder, eventually it was almost non-stop whenever the car was moving: a constant rattling or clunking coming from behind the dashboard. After ruling out a broken door weld, bad tie rods, sway bar link or ball joint going bad, I finally deduced that the problem was the driver’s side strut. After some disassembly, this is what I found:

In this post I go through the details with photos the steps I took to replace the struts. This should apply to 2003, 2004, 2005, 2006, 2007, 2008, and 2009 Toyota Siennas, as well as probably others.
Tools and Parts Required for this Repair:
- car jack
- jack stands
- front, left strut (SR4178) – KYB are excellent struts
- front, right strut (SR4177)
- sway bar linkages (optional – recommended)
- 10mm, 12mm, 14mm, 15mm, 22mm socket
- socket wrench and pneumatic air gun (optional)
- 15mm, 17mm wrench
- 6mm Allen wrench
- torque wrench
- flat screwdriver
- pliers
- penetrating oil
Torque Specs for Toyota Sienna Struts
These are the torque specifications for the components you need to tighten when replacing the struts on a Toyota Sienna.
- sway bar linkage – 55 ft -lbf
- upper strut mounting nuts – 59 ft-lbf
- lower strut to knuckle mounting bolts – 155 ft-lbf
- wiper motor mounting bolts – 4 ft-lbf
- wiper arms – 15 ft-lbf
How to Replace the Struts on a Toyota Sienna – Step-by-Step Guide
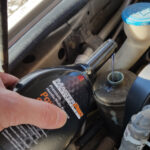
The first thing to do is several days before you plan to tackle this repair, take a can of penetrating oil and go ahead and spray a shot of it on all of the nuts and bolts you will need to remove. Especially make sure to hit the sway bar linkage nuts. These gave me fits, and I eventually had to cut them out with a sawzall!
Spray Nuts and Bolts with Penetrating Oil
Here I’m spraying the sway bar nut.
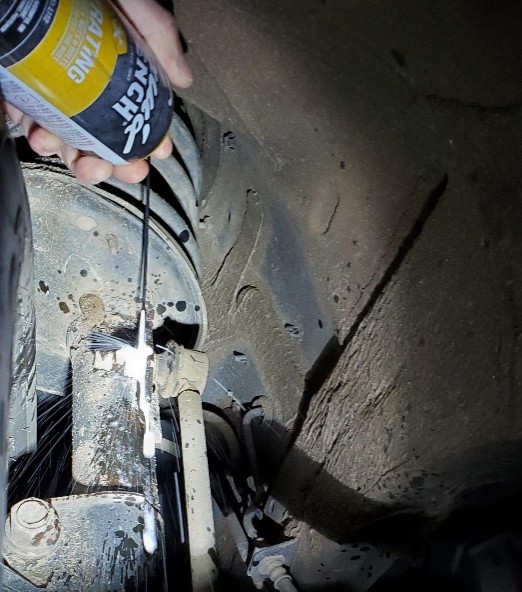
As well as the main mounting bolts of the strut.

I ordered the struts off of Amazon (right-SR4177 and left-SR4178). I went with the KYB struts due to their higher quality. I also purchased the sway bar links. I recommend replacing these at the same time you replace your struts, since it is a convenient time, they do tend to go bad, and they aren’t that expensive so you might as well. Besides, if you end up needing to cut them out (like I did), it is nice to have them!


On the top of the strut are arrows indicating how the strut should be installed. The arrows should point OUT, away from the vehicle.

Step 1: Remove the Wiper Motor
In order to get at the top mounting bolts of the strut, you need to remove the windshield wipers and the windshield wiper motor. To do this, use a flat screwdriver to pry off the plastic clips on the top of both wipers.


Use a 14mm socket to remove the wiper nut and pull off both windshield wipers.


Next we’ll remove the plastic cover over the wiper motor. There are a long series of clips along the underside of the cover. Squeeze these with a pliers, and push them up and through the mounting holes, as shown.


Remove the plastic vent cover.

Now the wiper motor is exposed. This is really easy to remove, so go ahead and take it out.

Looking through the wiper linkages, you can see the top of the strut to inspect the damage.

Use a 10mm socket to remove the 4 bolts holding it in.

Press the tab on the plastic clip, and pull off the electrical connection on the wiper motor.

Then the wiper motor should lift right out.

Once the wiper motor is removed, you have space to work to get at the top strut mounting nuts.

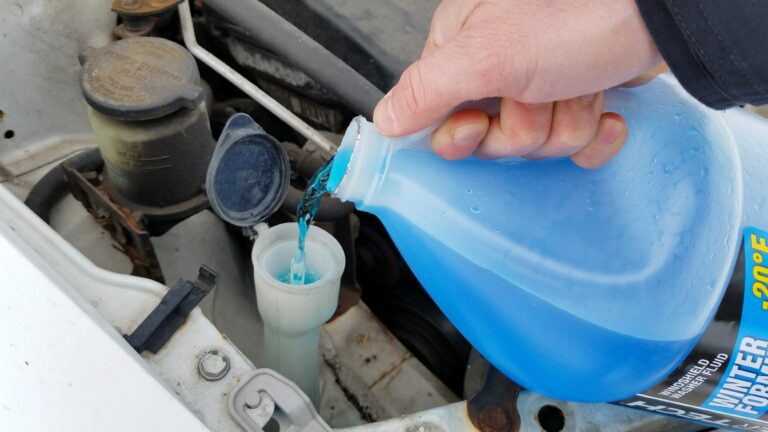
I think part of the reason it went bad is that water is able to pool up in this location, speeding up the rusting and degradation process…

Before removing these nuts, we must disconnect the strut from below.
Step 2: Remove the Old Strut
Jack up the car and place jack stands under it. Then remove the tire.

This shot shows on overall view of the 5 nuts/bolts that must be removed to take out the old strut. We’ll go into detail on each subsequently.

Start by removing the 12mm bolt securing the brake line and the anti-lock brakes wire.


Next, unclip the plastic anti-lock brake connector. It pulls off.

This is a good time to put a support (I used a small scissor jack) underneath the ball joint in order to hold everything up once the strut is disconnected.

Next, remove the sway bar linkage. This requires a 17mm wrench and a 6mm Allen wrench. The idea is to hold the bolt stationary with the 6mm Allen key, then unscrew the nut with the 17mm wrench. These components are notoriously rusty. The 6mm Allen recess is not very deep and is very easy to strip out. Another option is to use a vice grips on the back of the strut tab.
I recommend cleaning out the Allen hole as much as possible, and make sure the 6mm key is seated very, very well before beginning. Also might be a good idea to put the vice grip on the back as well.

Unfortunately, the hex part of the old sway bar bolt stripped out on mine, so I had to cut it out with this Sawzall.


Now, remove the main strut nuts/bolts. These are 22mm. Unscrew the nut and hold the bolt stationary with another 22mm wrench.


Pull the bolts out, or gently tap them with a hammer to get them out.


The steering knuckle will drop when you get these bolts out, so that is when it is nice to have the support underneath.

Now go up under the hood and remove the 3 top mounting bolts holding the strut in place.

These are 14mm nuts on the struts I removed. (The new struts I put in used 15mm nuts.)

There are some access issues because the windshield is right above these mounting bolts. For this reason, you may need to use a socket wrench in order to fit under the windshield. I also used a cheater bar to save knuckles.

Get all but one of the nuts off, then reach under the wheel well with one hand and support the spring, while you finish removing the last nut. Then feed the strut out the bottom.

Here is the part number SR4178 for the driver’s side replacement strut. (The passenger’s side strut is part number SR4177.)

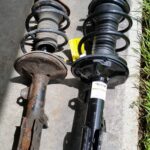
The old strut removed, and the new strut ready to be put in.


Use the 17mm wrench and the 6mm hex key to remove the bottom sway bar link nut (if you are replacing them). I cut this one off as well…

Put on the new sway bar linkage.

The nice thing about this design, is that you do not have to use the hex key to tighten/loosen it! It has a 15mm wrench fitting, so a 15mm and a 17mm wrench can be used to tighten it.


Use a torque wrench to tighten the linkage to 55 ft-lbf.

Step 3: Put in the New Strut Assembly
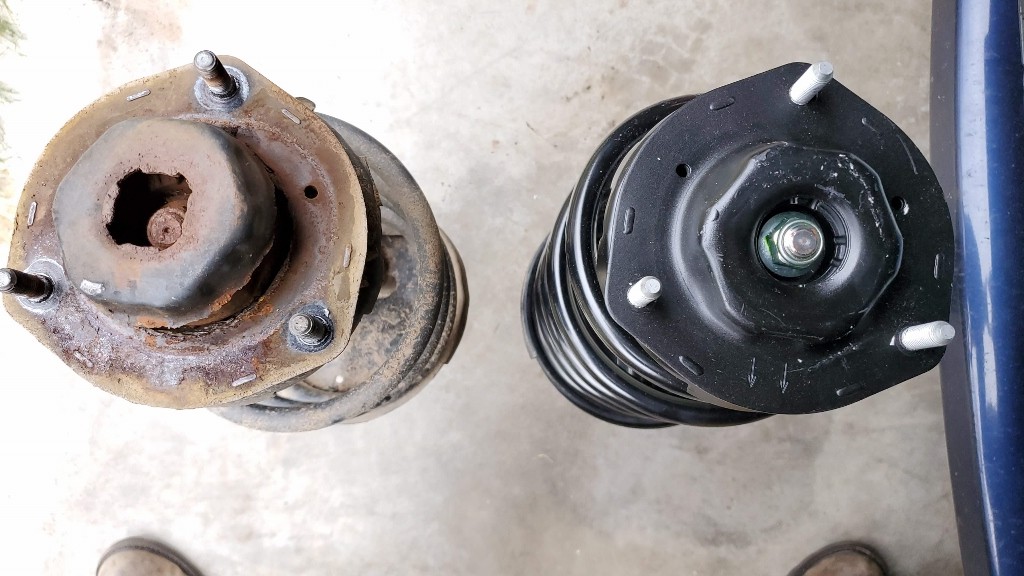
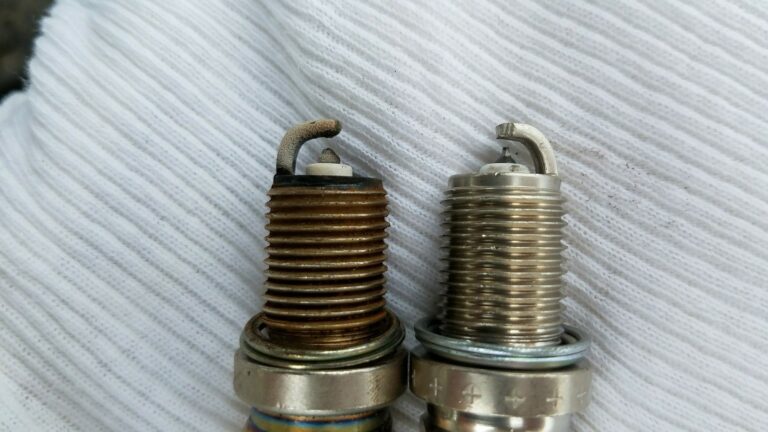
Here is a photo of the old and new strut assemblies side by side. It was due for a change… Recall that the arrows on the top plate indicate the orientation of the strut as you put it in. These arrows should point out, away from the vehicle.
Clean off the mounting surfaces, then feed the strut assembly up through the 3 upper mounting holes.

Use a torque wrench to tighten up these nuts to 59 ft-lbf.

Now move to the lower part of the strut assembly.

Line up the steering knuckle with the bottom 2 mounting holes.

Put the large mounting bolts into the holes.

Use the 22mm socket and torque these mounting nuts to 155 ft-lbf.

If necessary, use a jack to lift the steering knuckle so that the upper sway bar link can be inserted into its mounting hole.


Torque the upper sway bar linkage nut to 55 ft-lbf.

Put the brake line mounting bolt back in and tighten it with a 12mm socket.

Clip the plastic anti-lock brake sensor bracket onto the strut. The clip fits into 2 small holes on either side.

Look everything over and verify that you didn’t forget anything, removed all tools, and everything has been torqued properly.
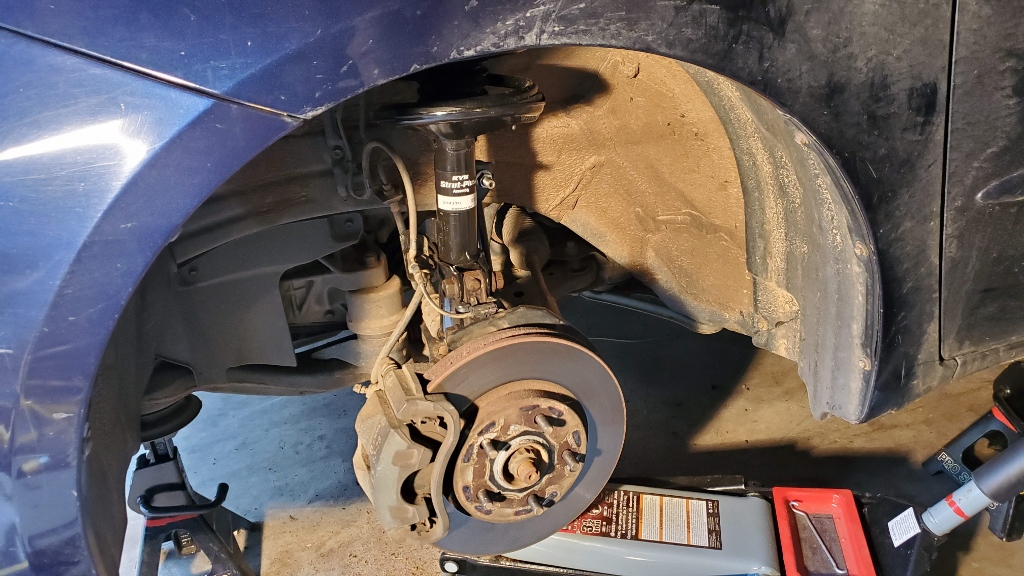
Here is a view with the new strut installed.

Step 4: Replace the Tire
Put the tire back on and torque the lug nuts to 76 ft-lbf.

This completes the driver’s side strut assembly replacement! Repeat the same procedure for the passenger’s side. It is recommended to change struts in pairs.
Step 5: Re-Assemble the Windshield Wiper Motor and Arms
Now go back up under the hood and put the windshield wiper motor back on.
Torque the 4 mounting bolts to 4 ft-lbf.
Remember to plug in the wiper motor! (I forgot and had to disassemble…)
Put the plastic cover back on and press into place all of the plastic connectors (otherwise you will hear rattling inside the vehicle when you’re driving).
Put the wiper arms back on and tighten the nuts to 15 ft-lbf.
Press the plastic tabs back onto the wiper arms.
That completes this repair!
I hope this was helpful to you!
How was the level of detail? Too much? Not enough? Please let me know in the comments section!
Tools and Parts Used for this Repair
- car jack
- jack stands
- front, left strut (SR4178)
- front, right strut (SR4177)
- sway bar linkages (optional – recommended)
- 10mm, 12mm, 14mm, 15mm, 22mm socket
- socket wrench and pneumatic air gun (optional)
- 15mm, 17mm wrench
- 6mm Allen wrench
- torque wrench
- flat screwdriver
- pliers
- penetrating oil


Wow, really well done Dustin! Not a lot of unnecessary dialog or detail and very clear pics. You ought to do these instructions for a living! Thank you for saving me a bunch of time – and money.
You’re welcome, glad it helped!
– Richard
This is a wonderful right up! I will say this though, double check what struts fit your specific vehicle, because I have the XLE-Limited w/ AWD and those models you listed are not the correct fit for mine. I’m stuck between Monroe OE Spectrum or assembling OEM Toyota from scratch… Going the OEM route because I like to learn things and have a small challenge.
Thank you it is a very good explanation
Thank you, Ken, I appreciate the feedback!
Great pictures and instructions. THANK YOU!. I replaced the strut boots, lower rubber insulator/damper and strut bearings on my 2008 sienna (parts listed below). Just the boots were bad, but I ended up replacing the other two items just because the van had high mileage and those parts were original.
Few tips to add:
1. Use a thread chaser 12*1.25 mm on the sway bar bolt. Run that few times with some lubricating spray to clear the threads. Makes removing the nut so much easier and you do not need to replace the bolt if it is in good condition. Most auto part stores carry the tap and die sets as free loaner.
2. Do not remove the strut top nut before removing the strut from the car. Loosen that to come up about 3 mm or so (and not more- it can be dangerous if the mount pops out while pulling the strut out- BE VERY CAREFUL not to loosen the top nut much).
3. Once you pull the strut out of the car, use a spring compressor before removing the nut. If the spindle is rusty, removing the nut is tricky. I had to apply just enough pressure from the spring on the mount to prevent the rotation (by loosing the compressor). If you release the spring much, mount is going to pop out like a projectile when the nut comes off. keep it sideways and away from your body just in case it pops out.
4. To reassemble the strut, compress the spring some more. Notice the slot on the center spindle and the mount and line them up correctly. Pay attention to the outer direction and align the boot, damper, spring, mount correctly. Make sure the bearing is in there with correct orientation. Bearing does not have a notch to face the outer direction.
I did follow all these and the car drives very smooth, turns without any noise. I took it to Firestone for alignment and all the numbers were within spec. I was very happy with the outcome. I am very surprised after 185 K miles my struts still seem to be working well. I did buy a corded 1/2 inch bauer impact wrench from Harbor Freight to loosen the lower nuts. I did use the torque wrench to tighten the nuts per Toyota’s spec values.
Part No.: 90903-63014
BEARING, RADIAL BALL
Part No.: 48158-33031
INSULATOR, FR COIL S
Part No.: 48157-06080
INSULATOR, FR COIL S
I’m glad it worked out! Sienna’s are really great vehicles! Thanks for the tips, I’m sure they will be useful to others as well.
Outstanding writeup, perfect level of detail, great pictures. Job well done, it really helped me.
Thank you! I’m so glad this was helpful!
Better than a video. Excellent pictures . Clear and concise directions in the right order. Thanks for putting this together and sharing!
You’re welcome, thanks for finding and reading my blog! I’m glad it was helpful
Thanks for putting this together. Very straightforward with the right amount of detail.
Thanks a lot, glad it helped!
Hey Richard, just replaced struts on my 2009 Sienna. The process was very simple and straightforward. Thanks for your pix and commentary -took all the guesswork out of it!
Thanks again!
Excellent! So glad it helped, congratulations on changing out struts!
This is a really great writeup. I got through my struts replacement just fine.
I’m so glad to hear that!
All the best!
Why would you cut the sway bar link twice. Wouldn’t that be better if you only cut it from the bottom and left it hanging to the strut assembly.
Just great explanation. Very well done. I am hoping to tackle this job this weekend. Trying to save $180 and get some valuable experience.
Good luck, hope it all goes as planned!
Is this an awd or fwd Sienna? It appears there is a discrepancy in the part numbers. Also what is the best link? I found moog, and can i grease them with silicone grease? Same stuff i use on my mini control arms. Also can you chronicle the rear shocks replacement?