How to Replace a Burnt-out Headlight on a Toyota Sienna with LED Bulbs
The following is a quick and easy picture guide for replacing a burnt out headlight bulb on a Toyota Sienna. I opted to change from halogen bulbs that have traditionally been used, to the newer LED bulbs.
The other day the passenger’s side low-beam headlight burnt out on my 2006 Toyota Sienna. It had been using halogen bulbs. I decided to change to LED bulbs this time around. The following is the procedure I used to change out the bulbs on both the passenger and driver’s sides.
Note: PracticalMechanic.com is reader-supported. If you buy through links on our site, we may earn an affiliate commission – at no cost to you. Thank you for your support!
I was worried that the new LED bulbs would be too bright (even though they are the ‘low-beams’). I don’t want to be that guy. Anyway, I can attest that after driving around at night for about an hour on a two-lane road and passing roughly ~100 cars, none of the on-coming cars ‘flashed’ their brights at me. When I have driven this stretch in the past with my (halogen) high-beams on, I usually get at least 5-10 people flashing. So I took this as a good indication that either people in general are getting more tolerant (unlikely) or the LED bulbs were not too bright for my fellow drivers!
This is a very easy and straightforward repair, but it does help to see a few pictures ahead of time to make it go a little more quickly. I also advise removing the fuse box cover when changing the driver’s side bulb in order to provide a little more easy access which can be helpful if you’ve got big hands.
Alright, let’s get started!
Step-by-Step Picture Guide for LED Bulb Replacement – Toyota Sienna
I went with this set of LED bulbs (model# 9006 low beam) for my low-beam headlights because the driver and fan is integrated into the bulb assembly. You may have heard that in order to use LED bulbs, you need to install a conversion kit. That is true in a sense, but with these bulbs everything is included in the assembly, so you don’t need to worry about it at all.
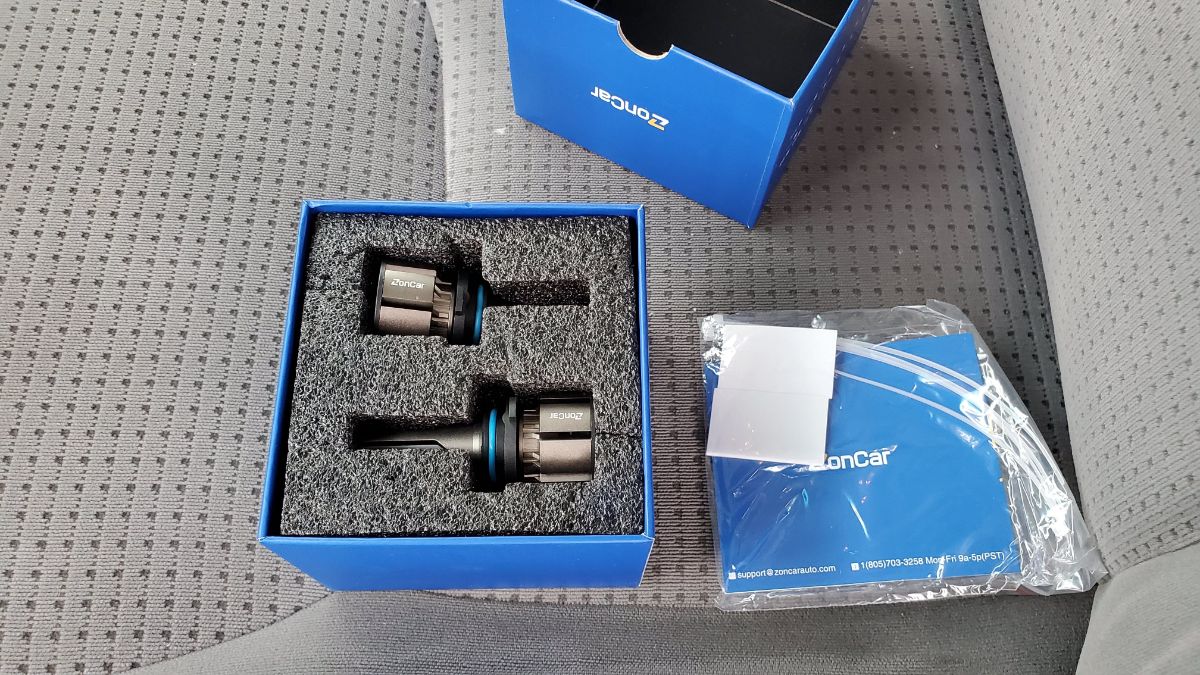
The procedure to change the high beam (part# 9005) bulbs is the same, just make sure you get the right bulbs, as the housings are different and you can’t swap them because they won’t fit.
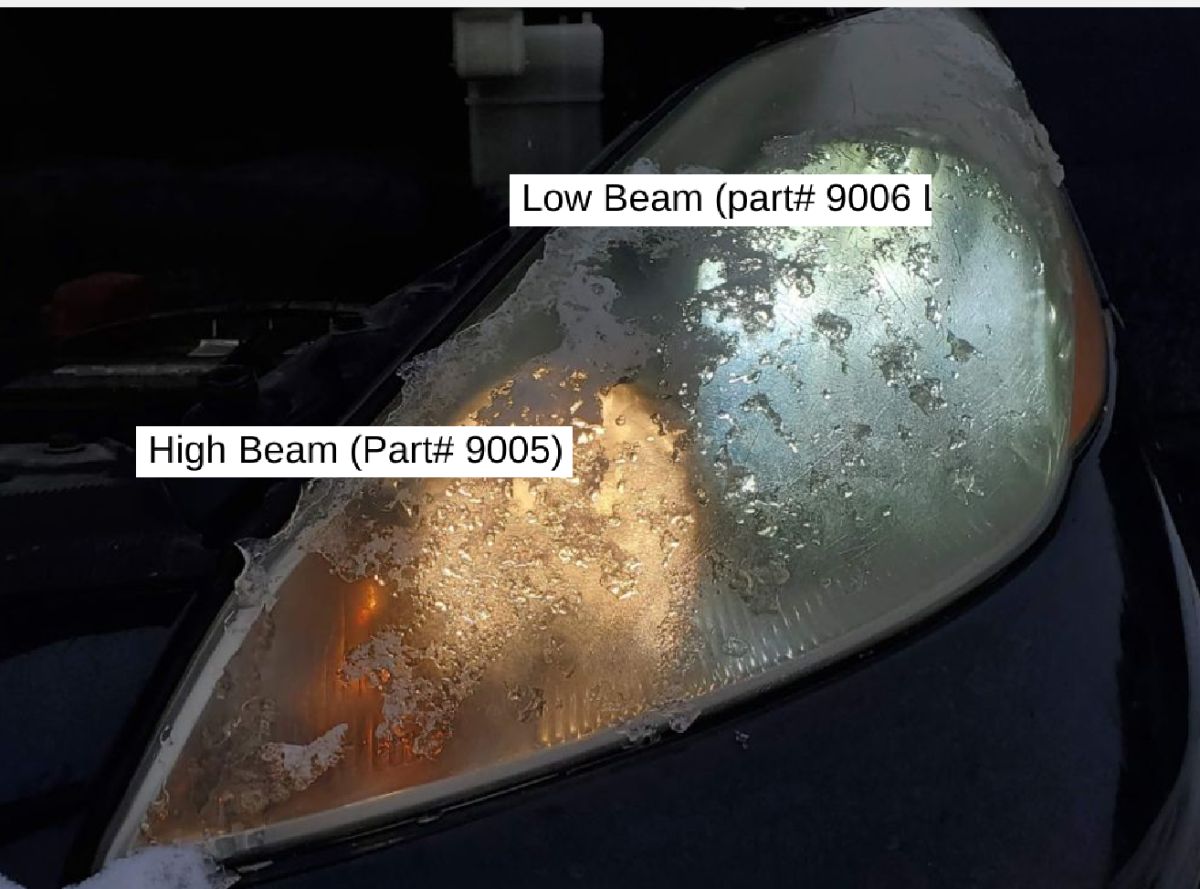
Where is the high beam and low beam on a Toyota Sienna?
Just to clarify, here is a photo showing the positions of the low-beam (9006) and high-beam (9005) lights. This is a picture of the driver’s side light.
Removing the Old Light Bulb
The first step is the pop the hood and locate the back of the headlights.
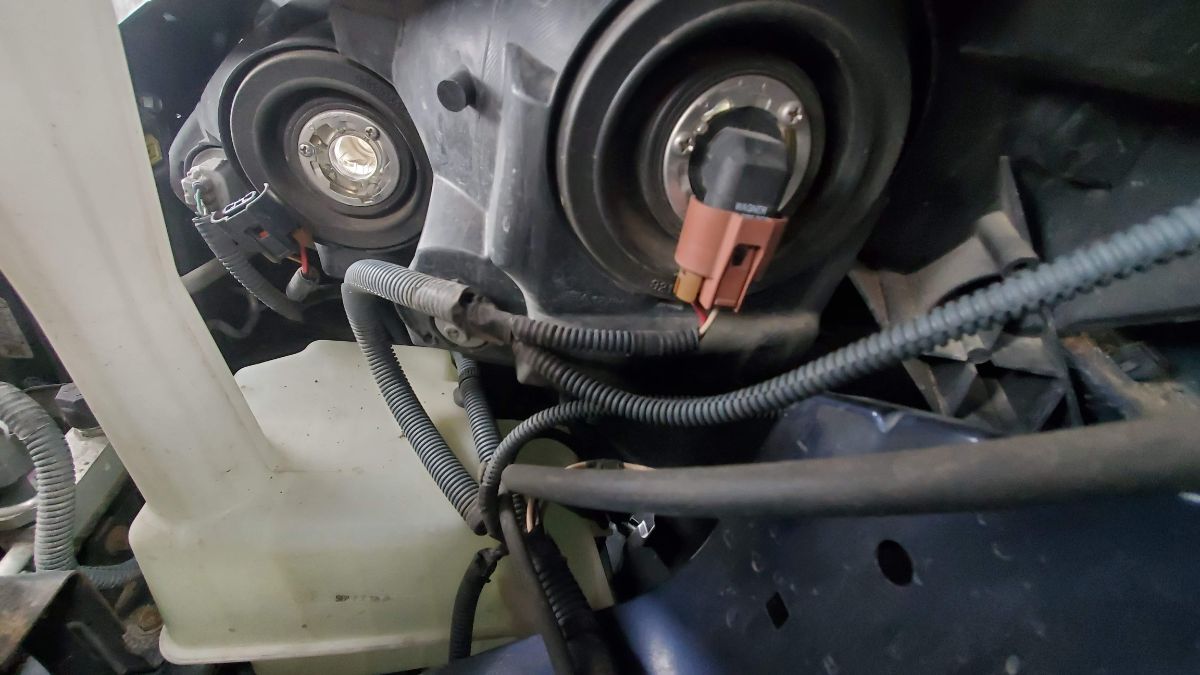
To remove the old bulb, twist the bulb housing counter-clockwise about an 1/8th of a turn until it stops, at which point the tabs in the bulb housing will line up with the slots so that the bulb can be pulled out.
Pull out the old bulb.
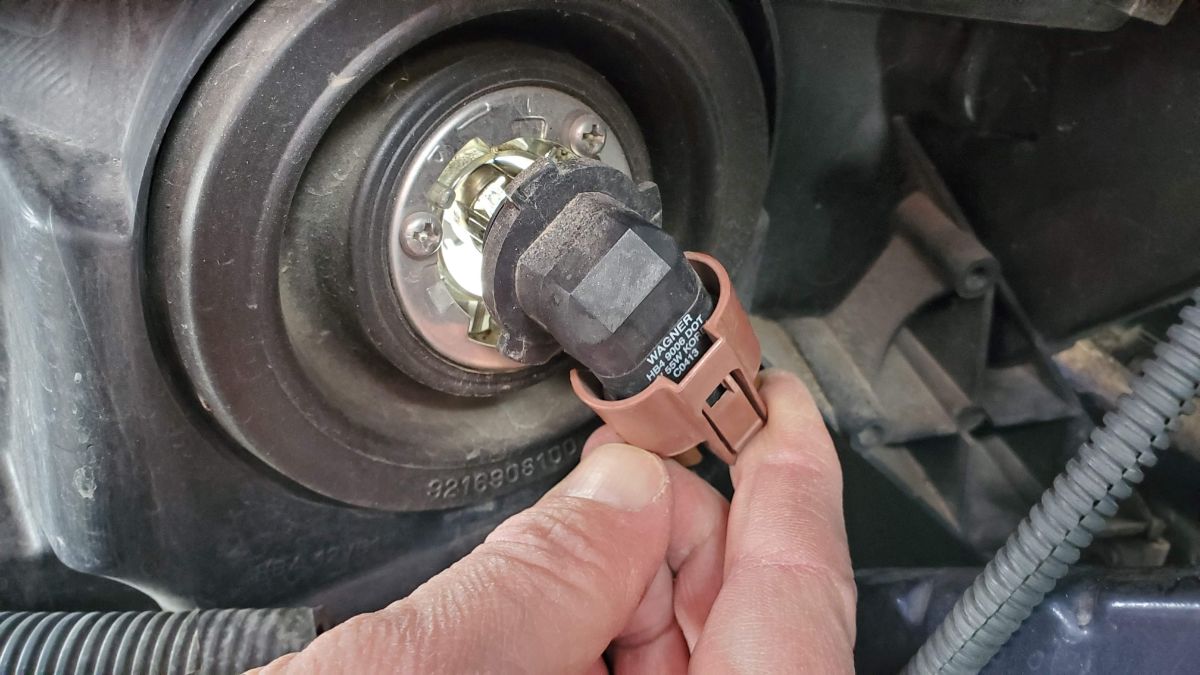
Pull it straight back-out until it clears the headlight.
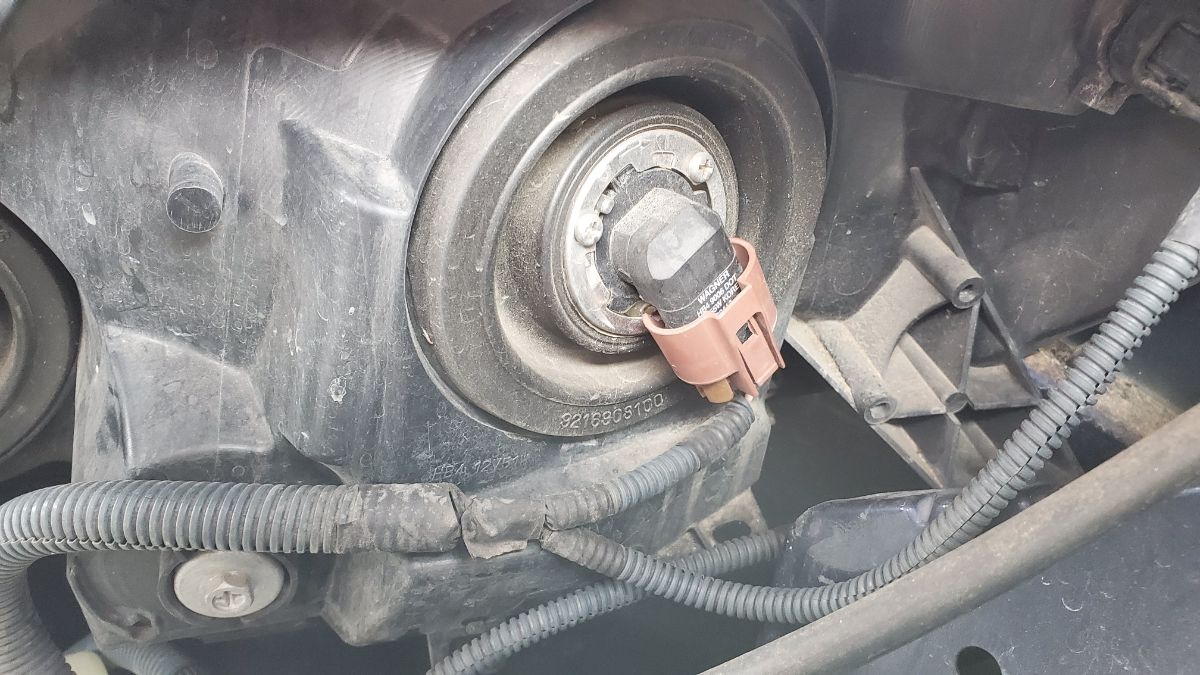
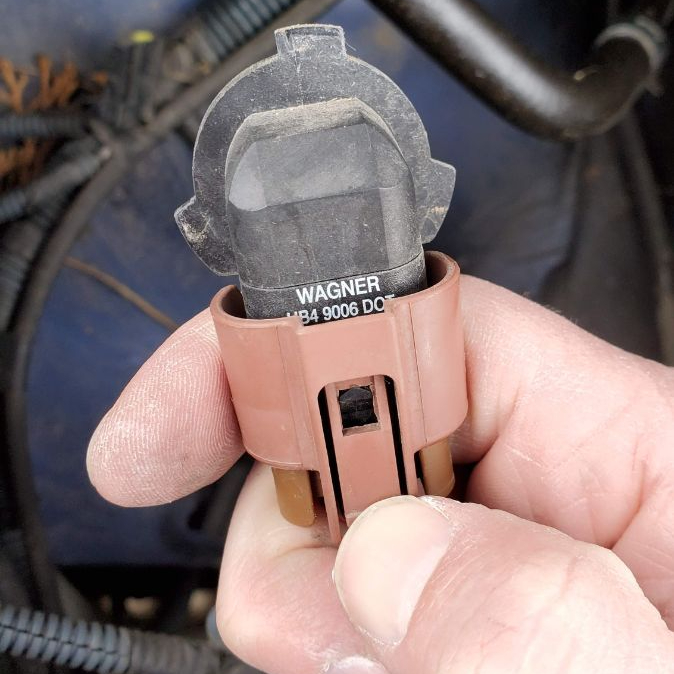
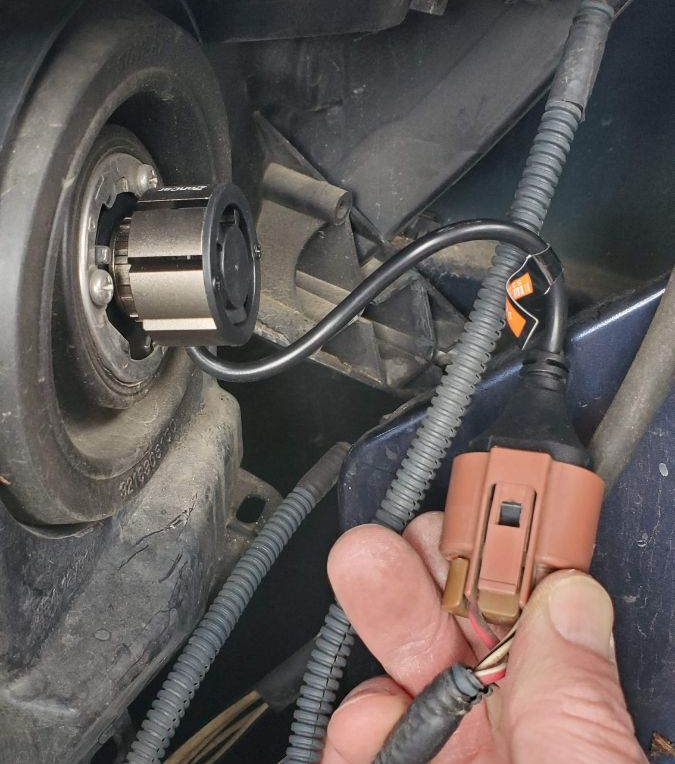
Next, remove the plastic bulb housing from the electrical connection by pressing down on the plastic tab on the connector, then pull the bulb assembly out of the connector.
Installing the New LED Light Bulb
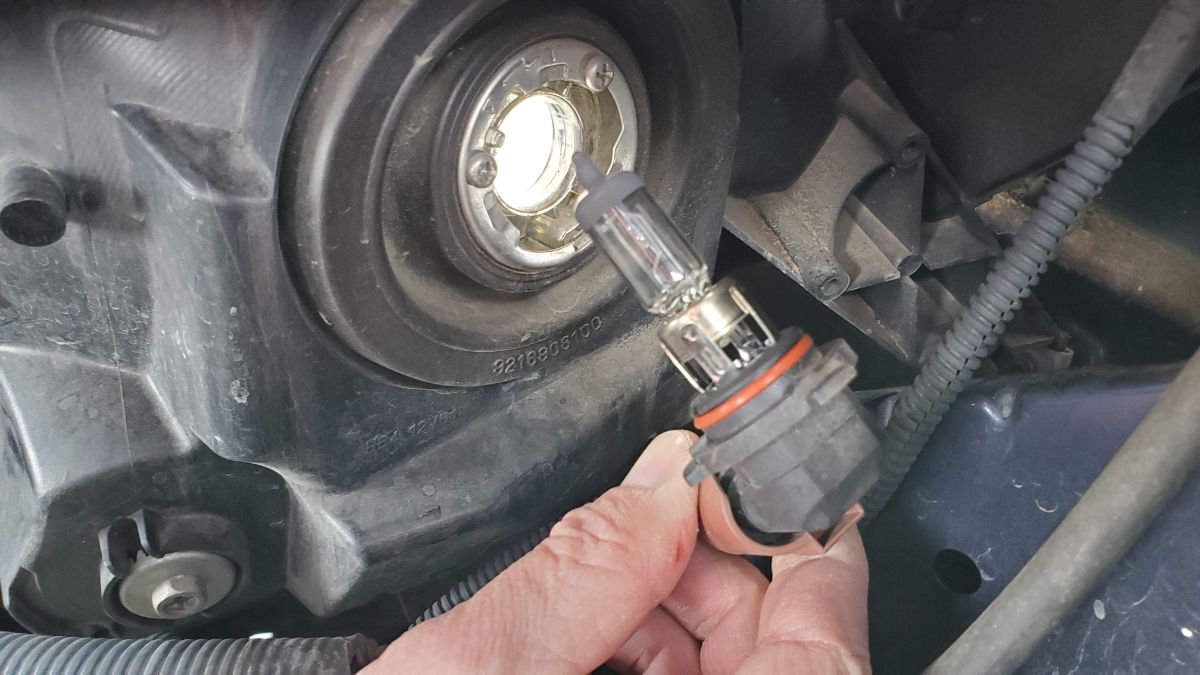
Here is a shot of the old and new bulbs, side by side. Notice that the tabs are in the same locations.

Carefully, take the new bulb and insert it into the headlight socket where the old bulb was. Take care not to touch the LED’s.
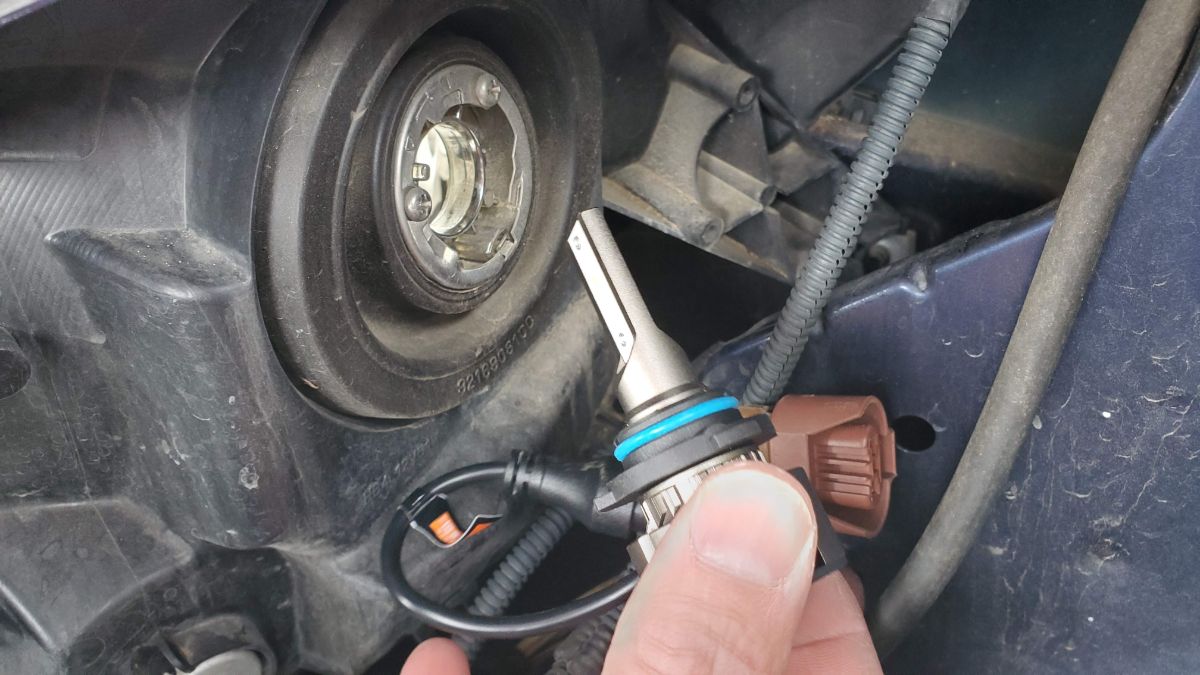
Line up the plastic tabs (the smaller one goes ‘up’). Once the bulb assembly is in, twist it clockwise until it stops (about 1/8th turn, again).
Now, plug in the connector into the electrical wire.
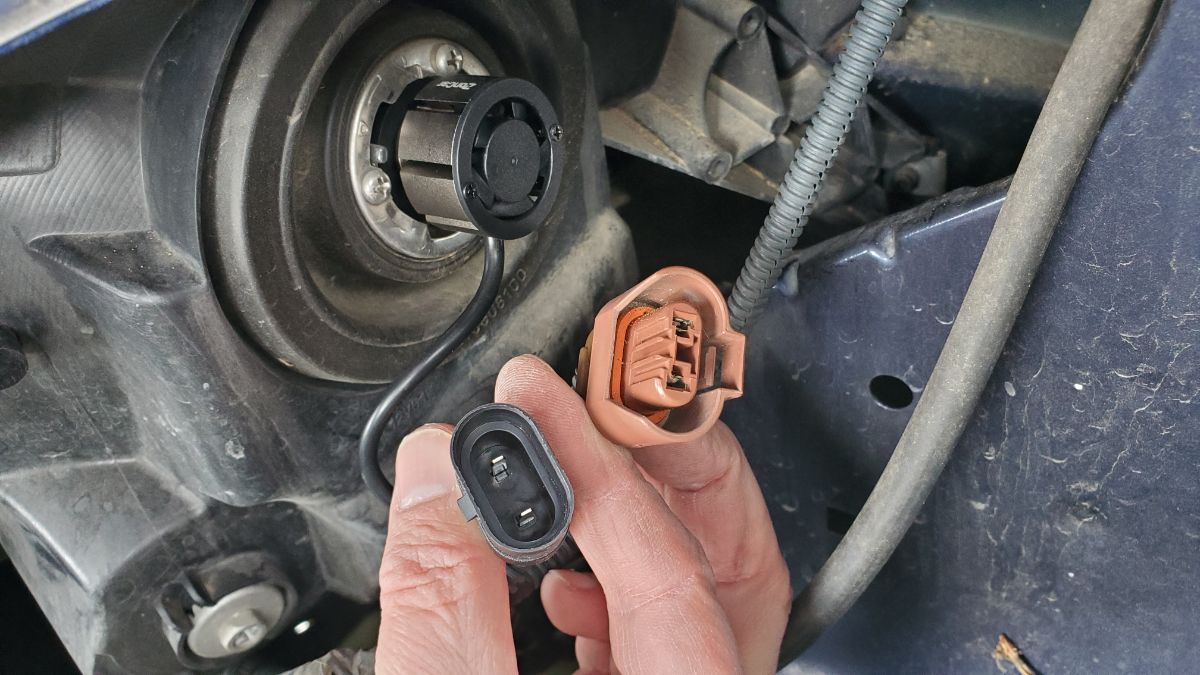
Press it in until it clicks into place with the small plastic tab.
That’s it for the passenger’s side low-beam headlight.
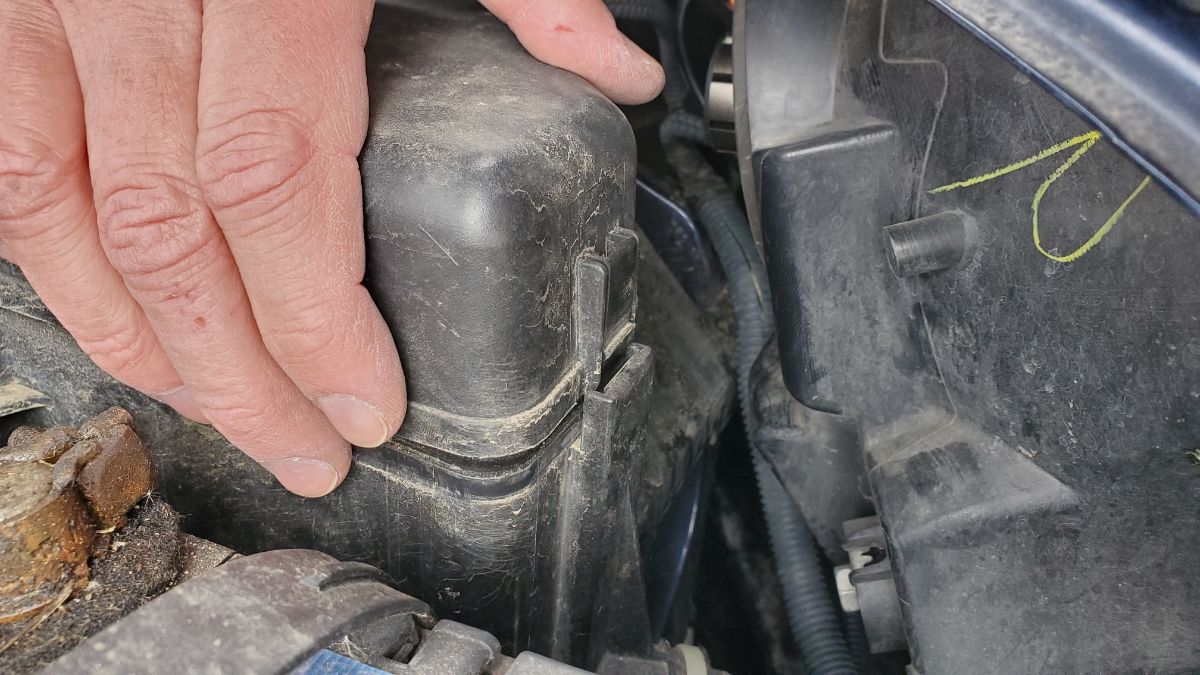
Some Notes on the Driver’s Side Headlight Replacement
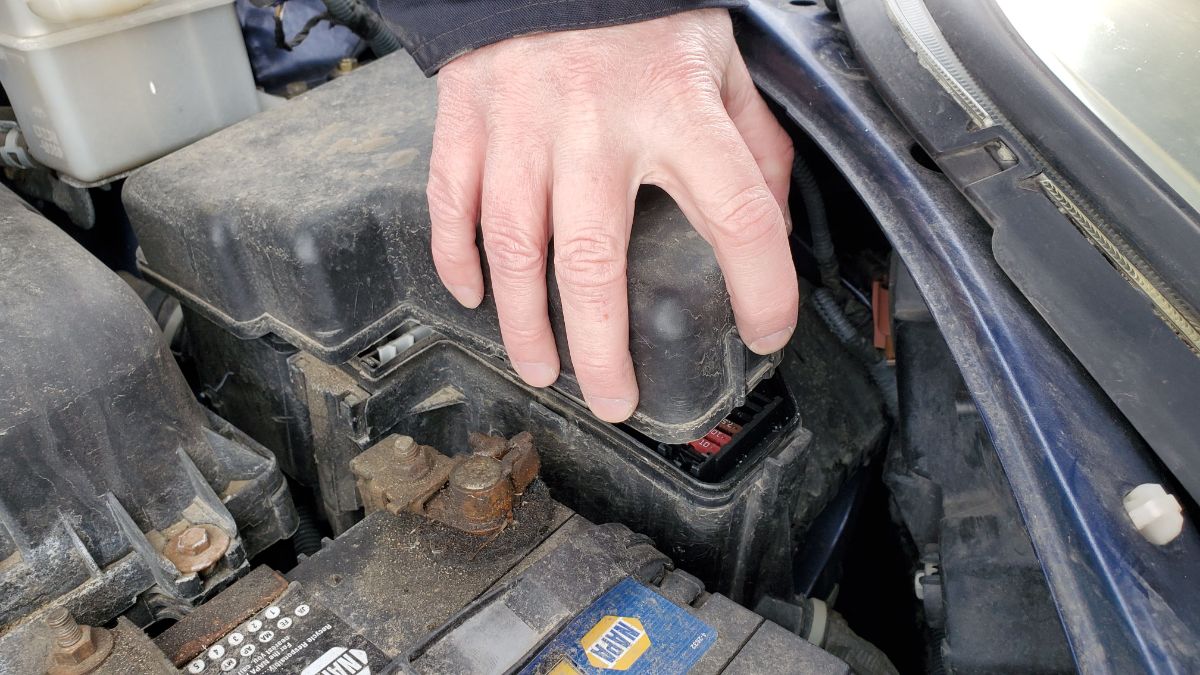
For the driver’s side headlight, I find it easiest to remove the fuse-box housing in order to give a little bit more room to work. Press the tab on the front of the housing box cover, as shown, and then pull up.
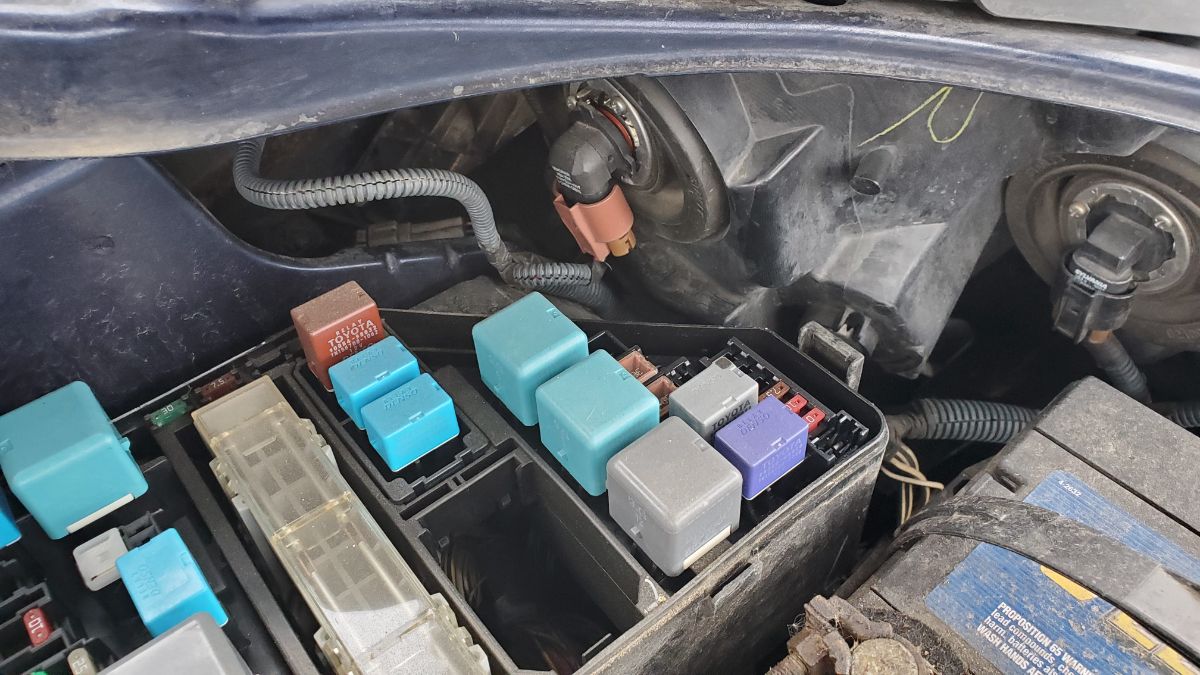
With the fuse-box housing removed, you have a little more room to access the low-beam bulb. Use the same procedure to remove the old bulb.
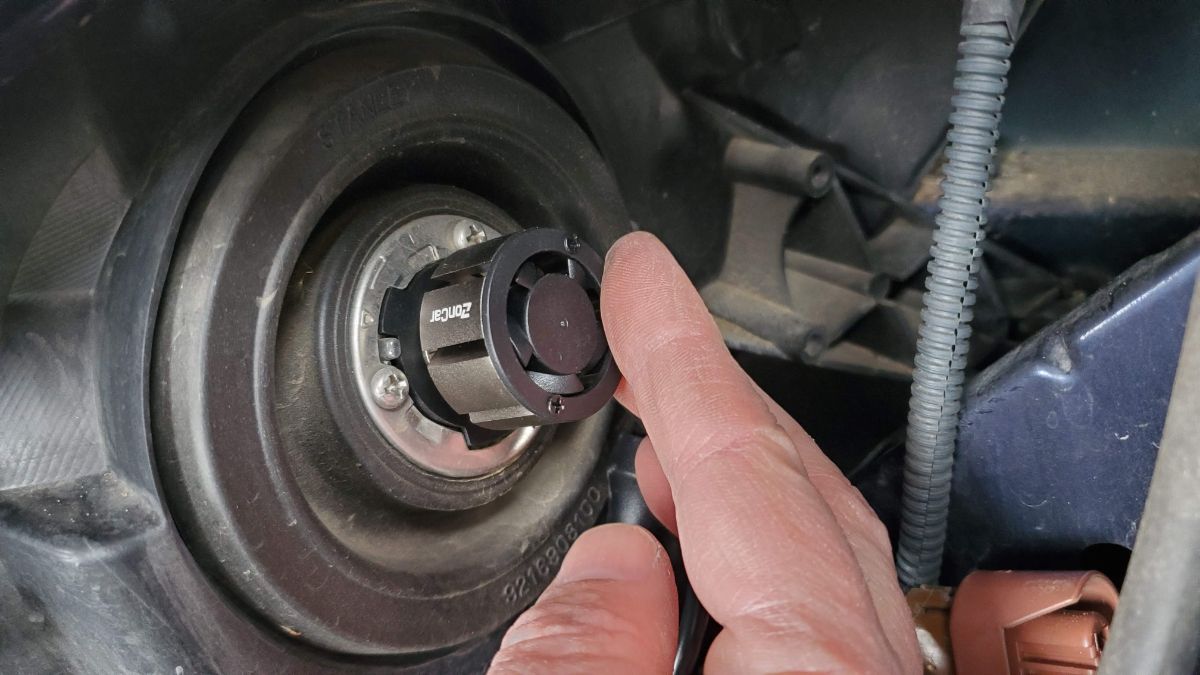
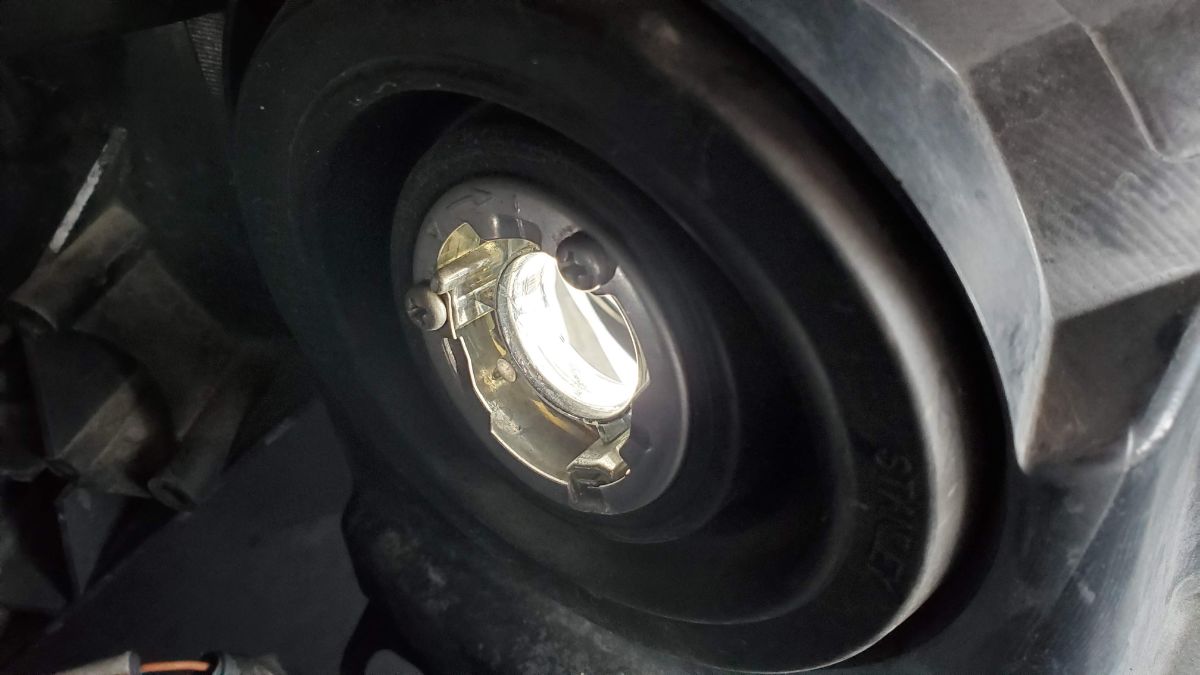
Here is a view of the headlight housing hole where the light bulb goes in, thought this might be helpful for someone who does not have the car immediately available to inspect it.
Insert the new bulb just like on the other side. Plug in the connector.

Put the fuse box housing back on by hooking the 2 tabs in the rear first, then pressing down on the front with the locking tab lined up properly. It will snap shut.
Once again, these are the light bulbs I am using for the low-beam, and recommend for the high-beam as well, once one of those fail.
Alright, I hope this was useful. Thanks for reading!