Easy Fix for Rear Hatch that Won’t Stay Open – Toyota Vehicles
I can’t believe I waited this long to replace the rear struts on the back door of my Toyota Sienna! The rear tailgate would no longer lift itself or stay up, causing us headaches (literally). This repair only took 5 minutes, a screwdriver, and $25 for a pair of new struts. Loading the back of your car shouldn’t be a 2-person job, replace your lift struts!
Note: When you buy through links on our site, we may earn an affiliate commission – at no cost to you.
Table of Contents
- Lift-gate Struts for Toyotas
- Symptoms of Bad Rear Hatch Struts
- 4runner Back Door Won’t Stay Open
- How Much Does It Cost to Replace Lift Struts?
- Procedure to Replace Liftgate Struts on a Toyota Sienna
- Detailed Step-by-Step Guide
- Joke Break…
- Lift-gate Struts for Toyotas
- This repair applies to the following vehicles with both power and manual rear liftgate:
By the way, the steps shown in this article also apply to almost all Toyota vehicles with the same steps, they just use different lift struts (links included below).
Lift-gate Struts for Toyotas
- set of lift struts (2004-2010 Sienna)
- set of lift struts (2011-2017 Sienna)
- set of lift struts (2010-2018 4Runner)
- set of lift struts (2010-2013 Highlander)
- set of lift struts (2014-2017 Highlander)
- set of lift struts (2004-2010 Prius)
- set of lift struts (2011-2015 Prius)
- set of lift struts (2009-2018 Sequoia)
Symptoms of Bad Rear Hatch Struts
The struts on the back tailgate of your van should take over from you once you pull the handle release and raise the door about a foot. After that, the struts should take over and lift the rear hatch from that point on, all the way up to fully open, and hold it there. If your tailgate door doesn’t go up all the way, drifts downward, or won’t go up at all, it’s time for new struts lifts.
4runner Back Door Won’t Stay Open
This is a common complaint for 4Runner owners who are experiencing failed or failing lift-struts. Follow the instructions in this guide to replace your lift struts if this is the problem you are experiencing.
How Much Does It Cost to Replace Lift Struts?
If you go to the Toyota dealership, they will do an excellent professional job, but it will cost you over $600! An independent shop is a good choice and will cost around $100 for parts and labor. To do this job yourself, with almost no skill required whatsoever, will cost you around $25-$35.
Tools and Supplies Needed
- small flat-bladed screwdriver
- set of new lift struts (2004-2010 Sienna) (these are the correct struts for both power and manual lift-gates)
- a friend or loved-one to hold the lift-gate open (or a 5′ stick – hockey stick or ski pole will also work)
Procedure to Replace Liftgate Struts on a Toyota Sienna
This guide will go into the details of the following steps:
- Acquire a new set of liftgate struts.
- Open the rear hatch and have a friend hold it open or prop it with a 2×4.
- Use a small flat-bladed screwdriver to release the top clips on the old struts.
- Repeat step 3 to release the bottom clips.
- Press the new liftgate struts onto the studs, both top and bottom.
- Close the rear hatch.
Detailed Step-by-Step Guide
The first step is to acquire a new set of lift struts:


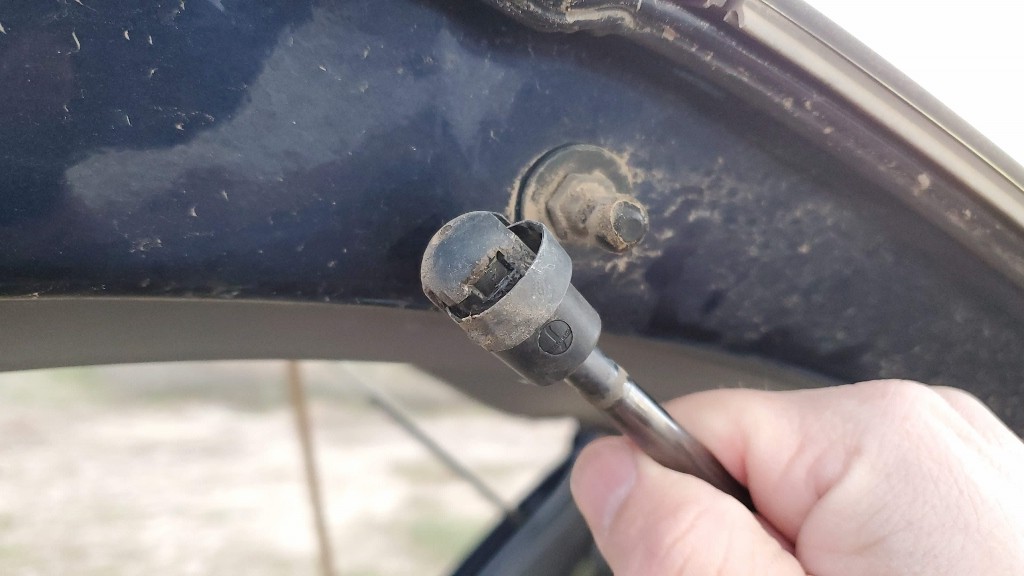
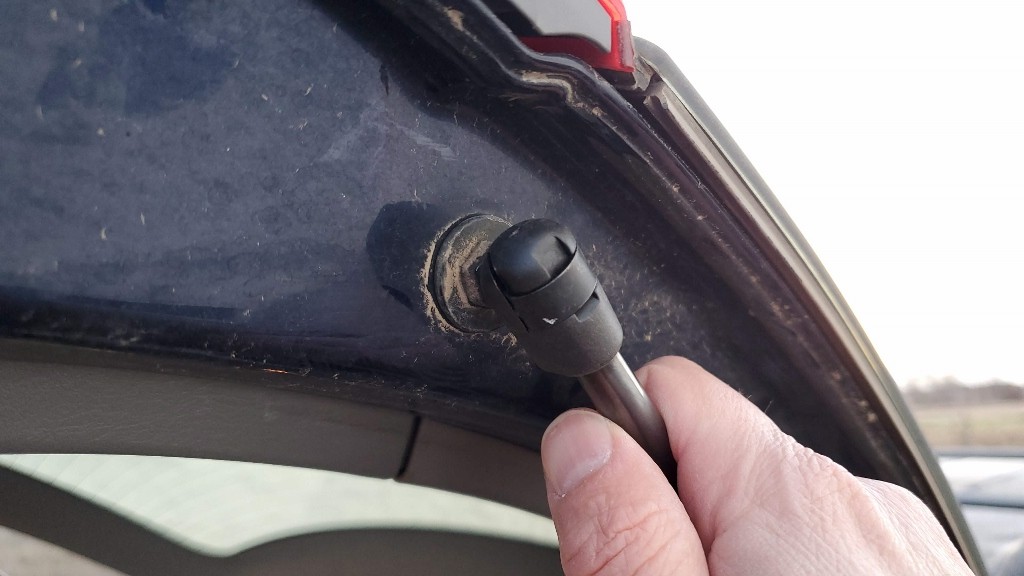
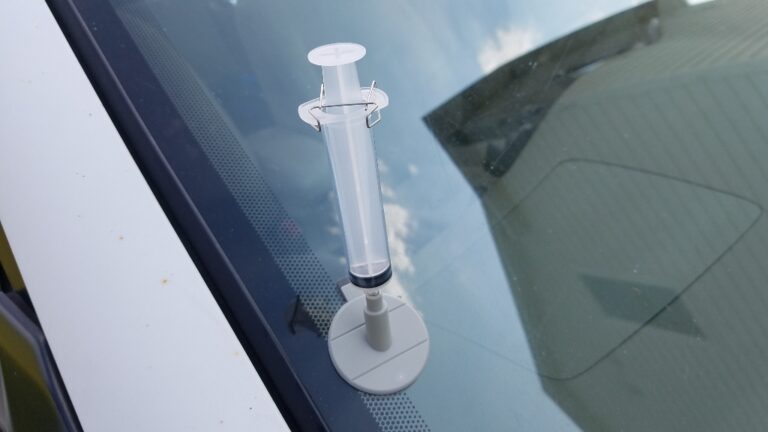
The way that these attach is really simple. Using a small flat-bladed screwdriver (or something similar) pry back the metal clasp. The photos below show the way that the clasp releases when the clasp is pried back.
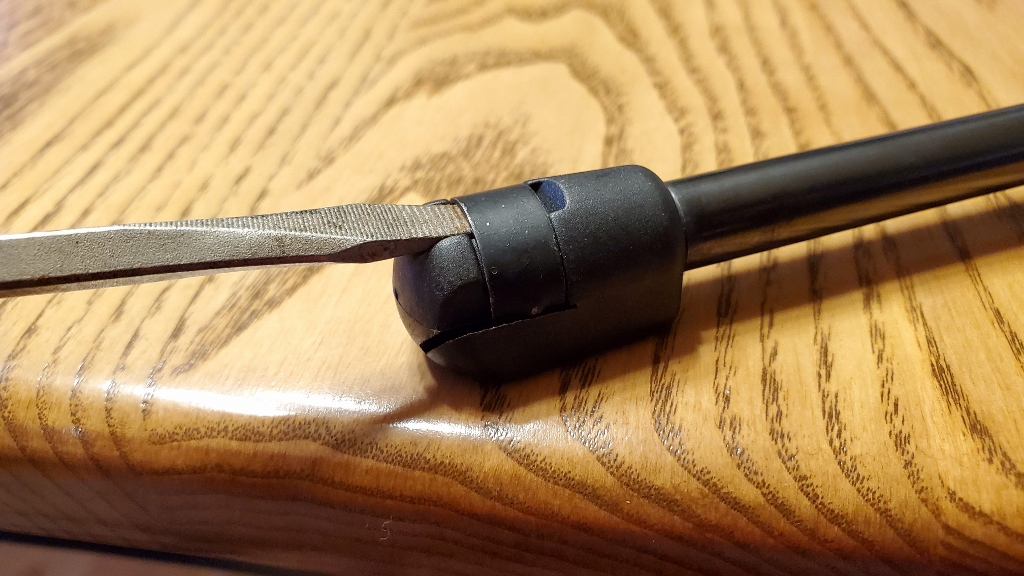
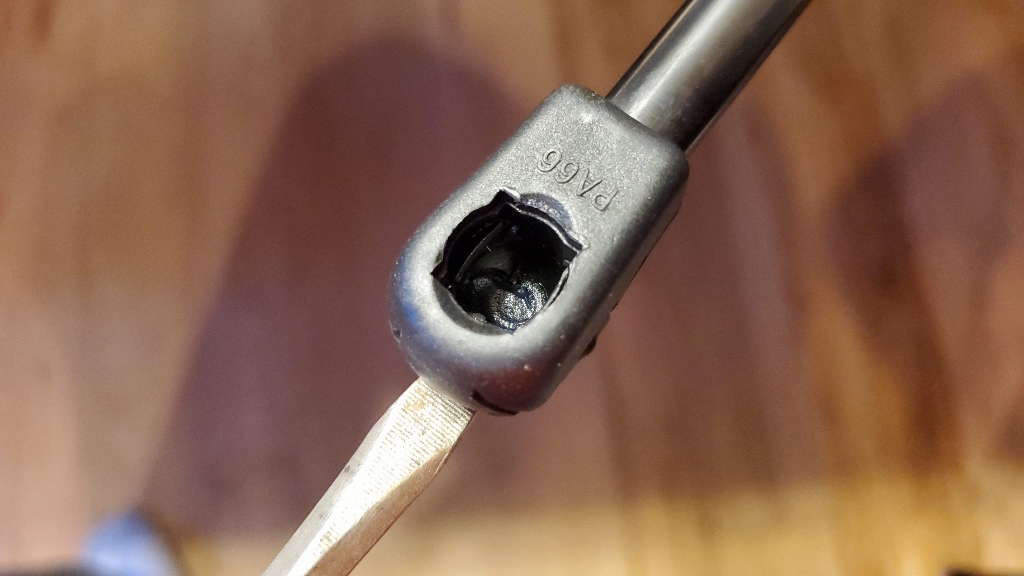
Basically, this is what you will do on the old strut to remove it. Pry back on the clasp, and pull the strut off of the ball that it mounts on to.
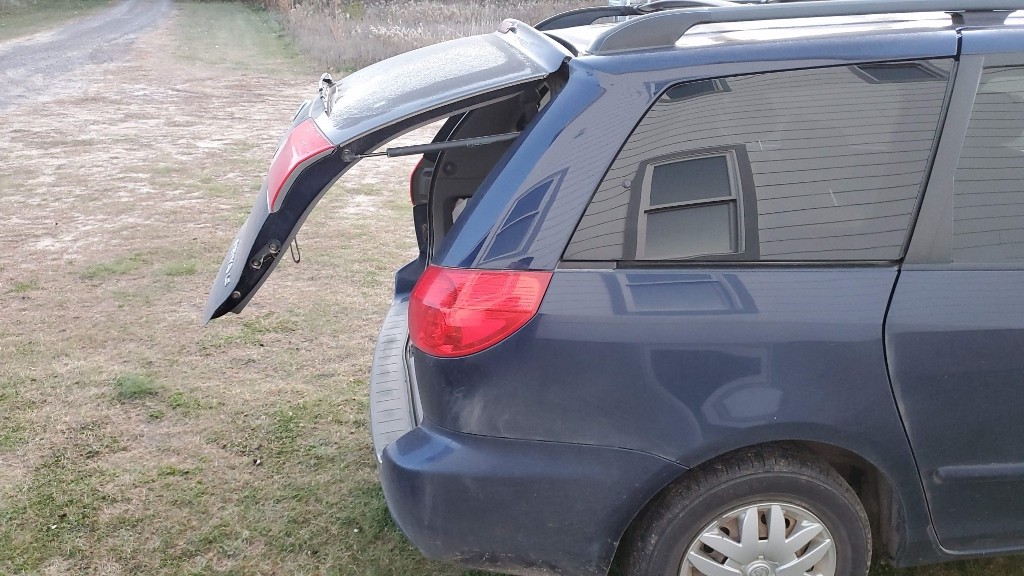
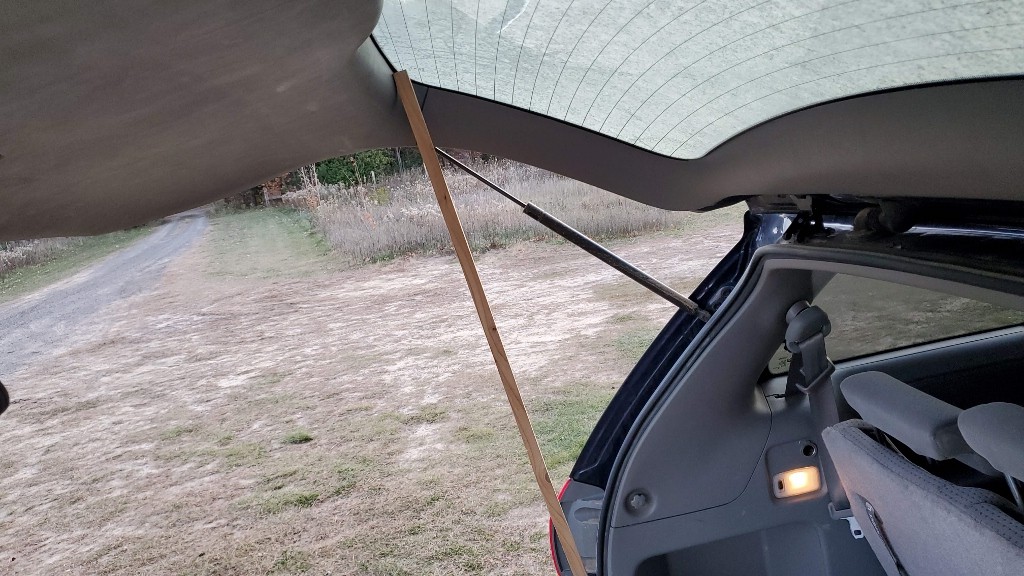
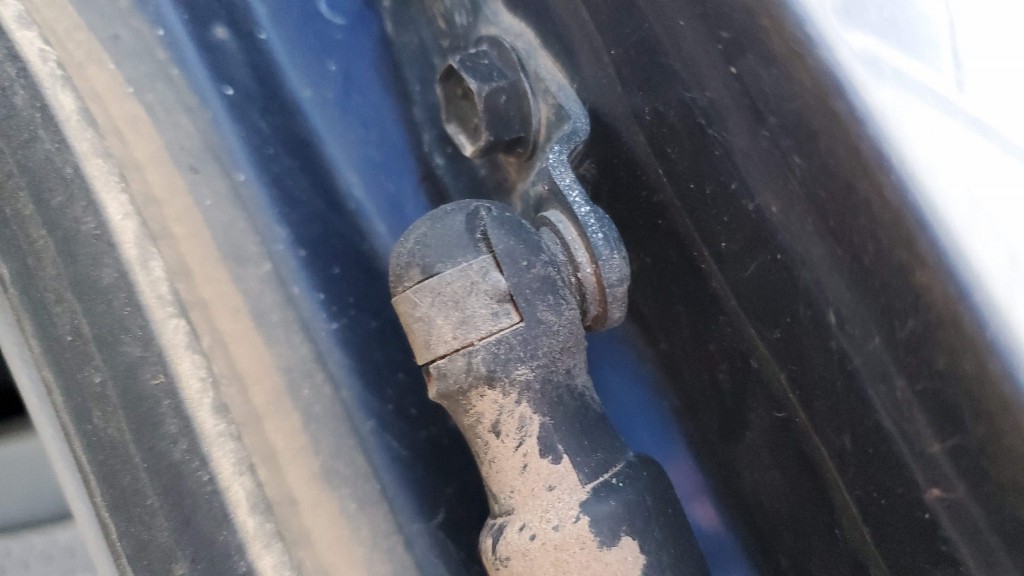
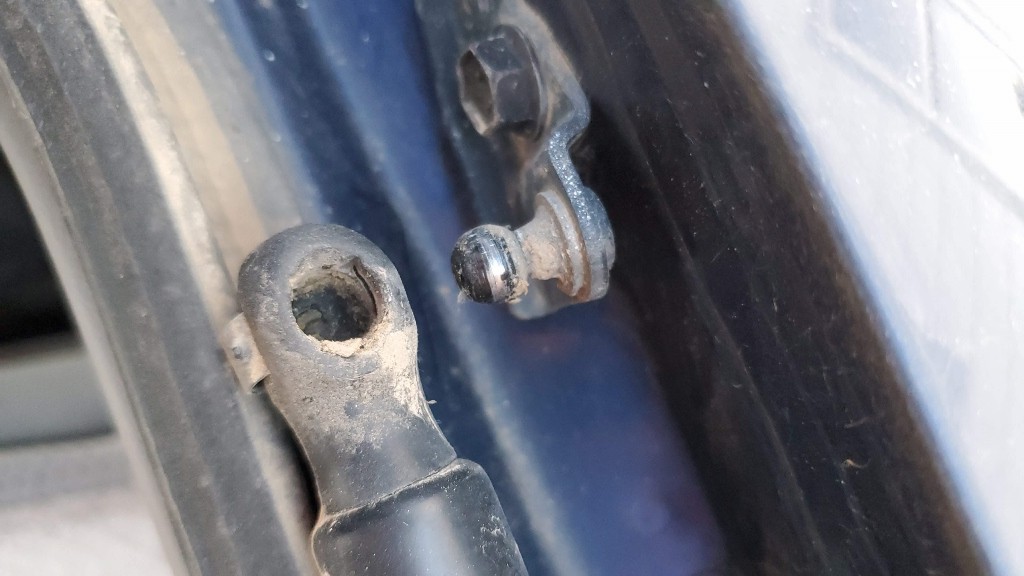
This was the state of my rear hatch before changing out the struts.

Have a friend hold the door open for you while you do this (or a 5 ft stick), once you remove one of the struts, the remaining one will have even less force to hold the door open, and it easily comes crashing down!
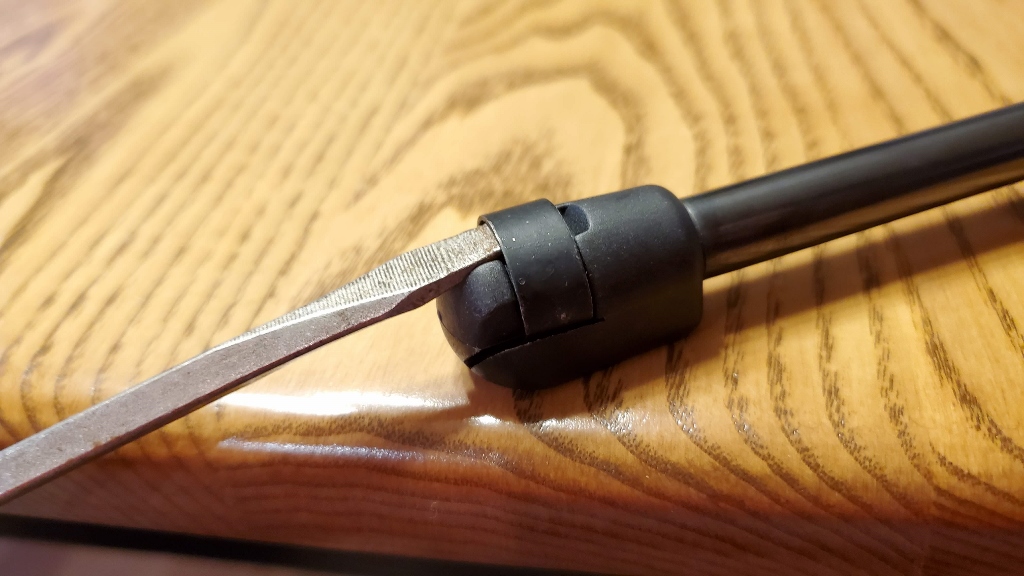
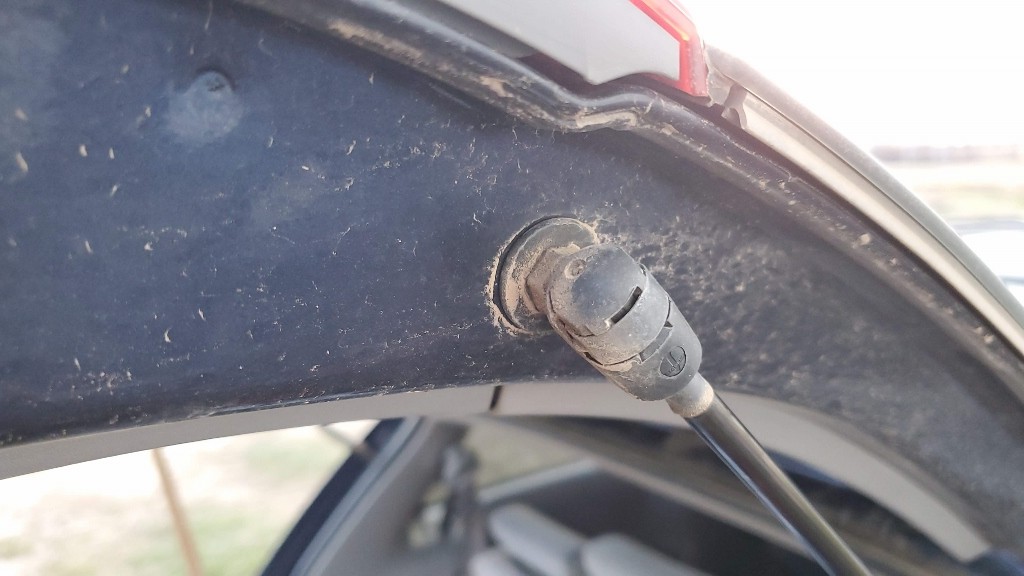
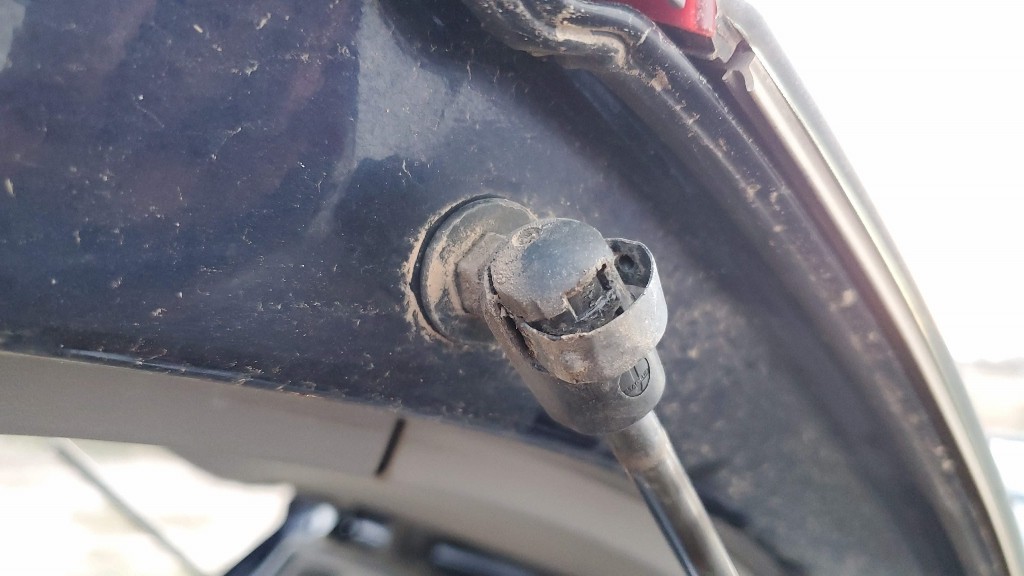
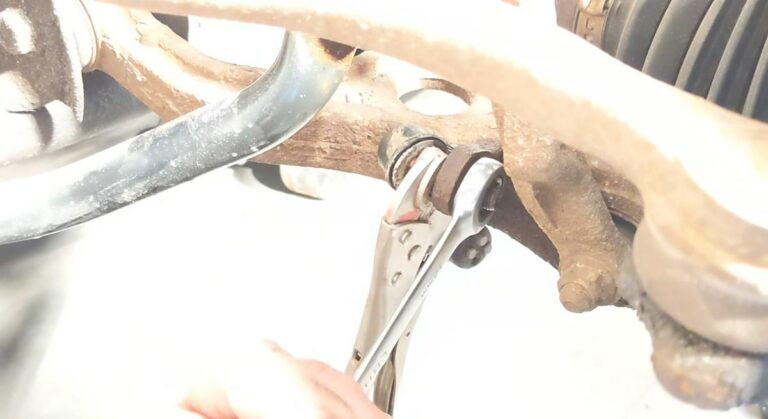
Go to the upper connection point of the first strut. Note the location of the metal clip that secures the strut in place. this will be pried out with a screwdriver.
Insert the screwdriver into the slot, and pry the metal clasp outward.
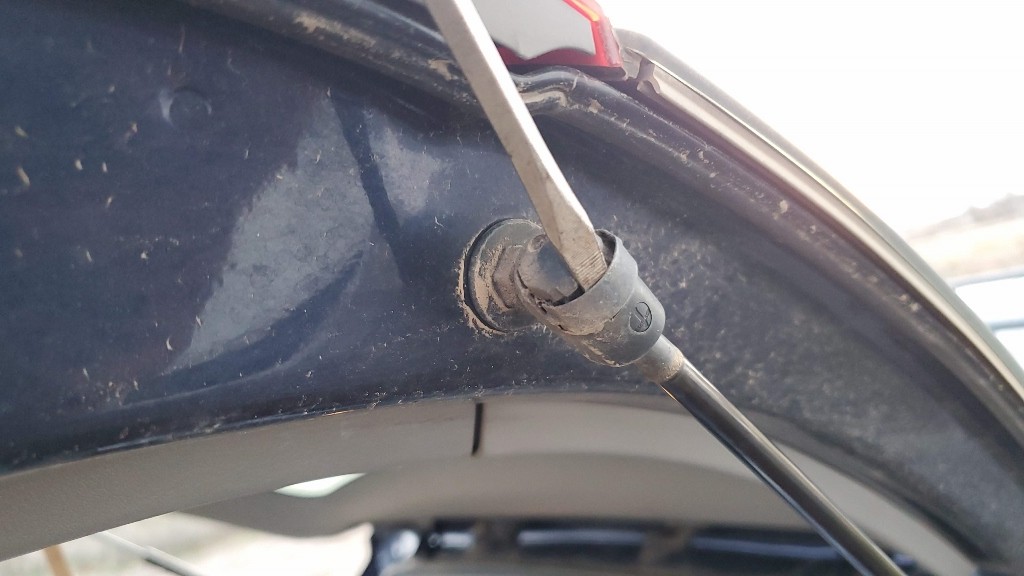
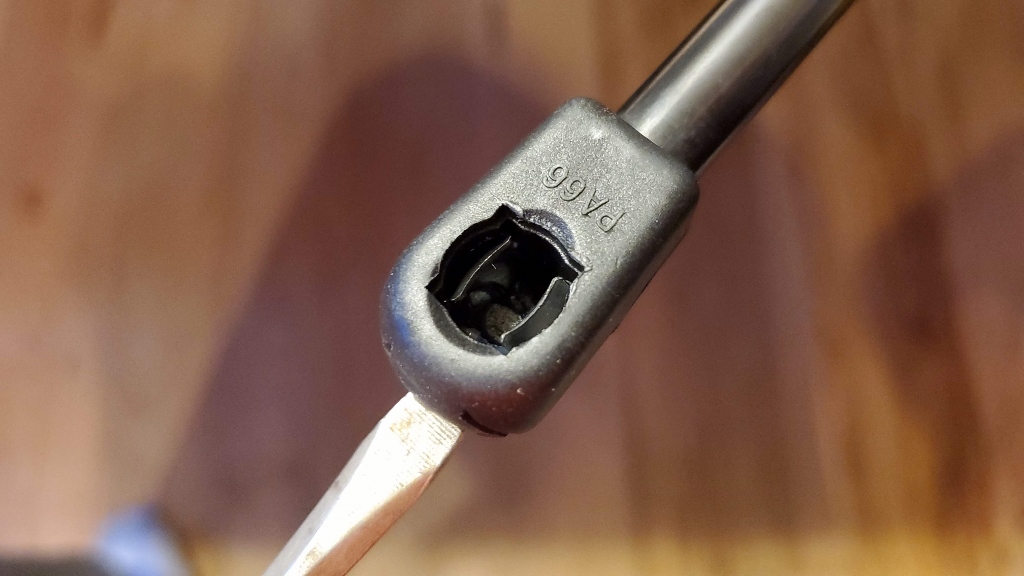
Here the clasp has been pried out.
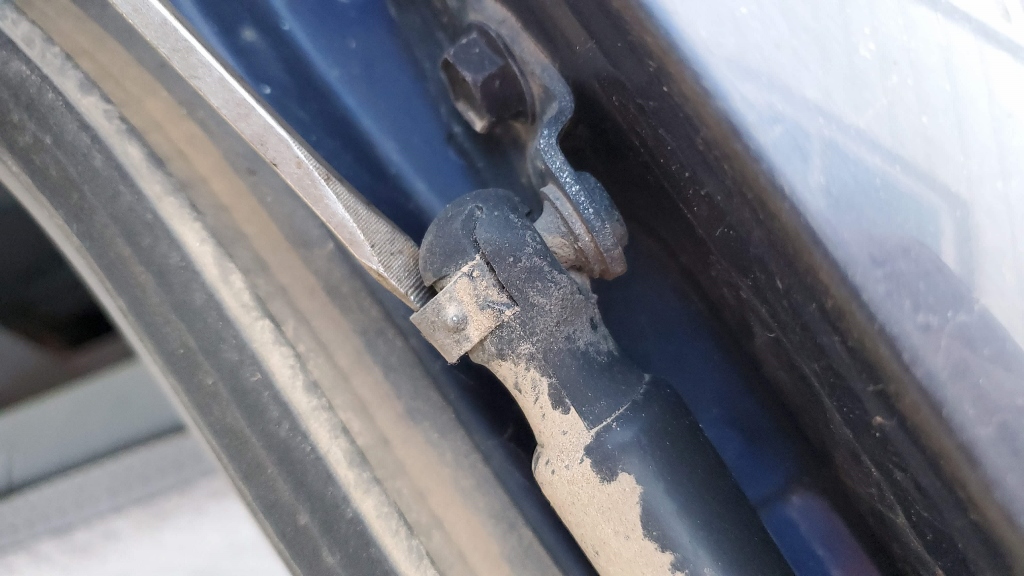
Give the old strut a nice yank to pull it off of its ball joint.
Repeat this process for the lower connection point.
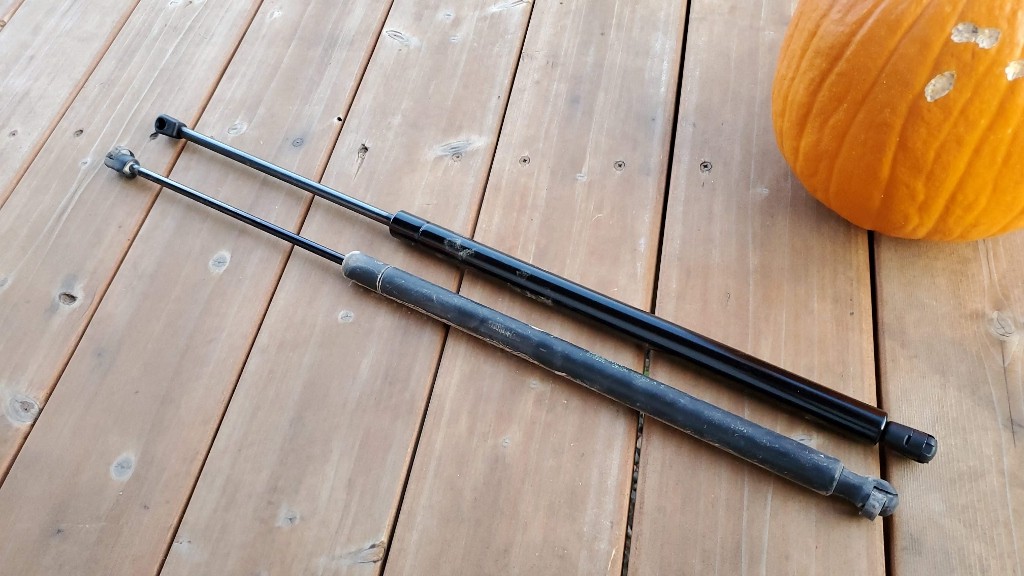
Now that you’ve removed the old strut lift, grab one of the new ones. Here is the old and new strut side-by-side.
Line up the connector of the new strut with the bottom ball joint.
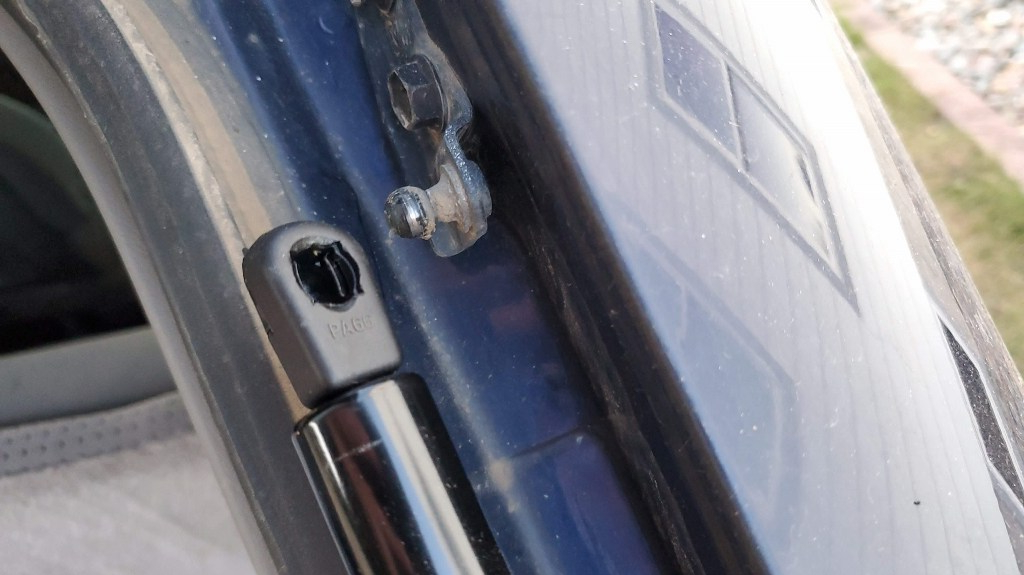
Once lined up, just press the new strut onto the ball joint until you hear a click and it is seated properly. If it is not going on easily, then use the screwdriver to pry back the clasp to open it up to receive the ball.
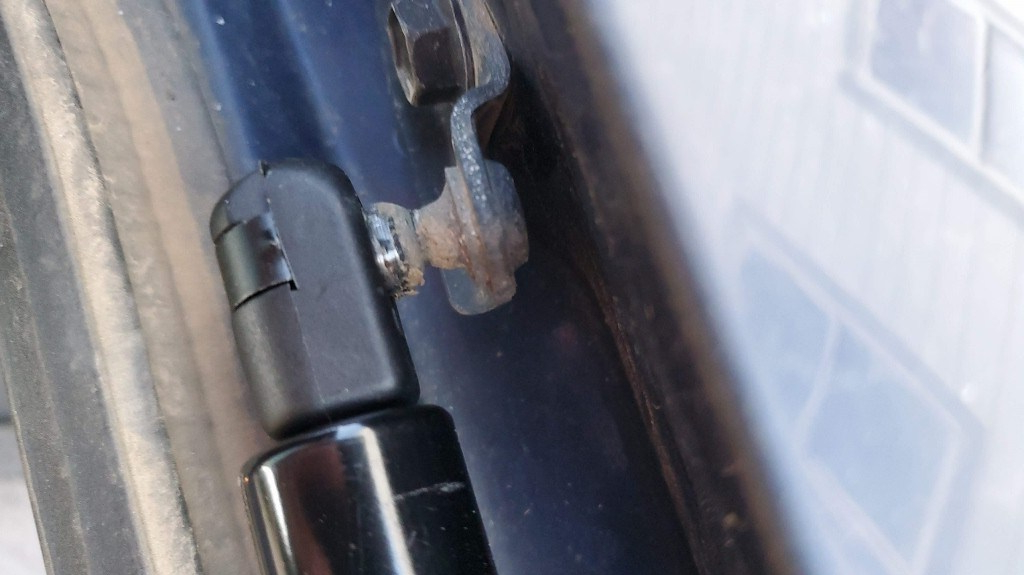
Repeat for the upper joint as well.
Change the other lift strut in a similar manner.
These are the lift struts compatible with my Sienna (2006).
Joke Break…
A retired couple went to Las Vegas every year for vacation. Every time they went, they saw a sign advertising helicopter rides, and every time the woman would say to her husband, “Please take me on a helicopter ride!” Each year the man would inquire about the cost, and each year the pilot would reply, “$100.” Being frugal, the old man would say to his aging wife, “I would take you up, sweetheart, but you know, $100 is $100.” This same scenario played out year after year, to the point where the pilot began to recognize them.
Finally, one year, the pilot felt sorry for the little old lady and said, “I tell you what, I’ll make you a deal. I’ll take you up for free as long as neither of you makes a single sound, but if you shriek, scream, or even gasp, then you pay me $100.” The old man, glad that his frugality had finally paid off, agreed. Once they got into the air, the pilot pulled out all the stops. He dove, swooped, rolled and spun. He performed every acrobatic maneuver he could think of, and still not a sound from the back of the helicopter. Finally, he gave up and landed. Once on the ground he looked back at the little old lady and said, “I thought for sure I had you – I can’t believe you didn’t make a single sound!” The little old lady stared at him, white as a ghost, and said, “Well, to tell you the truth, I was going to say something when my husband fell out, but you know, $100 is $100.”
Moving On…
That’s about it! This is a really quick repair and easy to do. I hope the pictures help, sometimes even though it is easy, it is nice to see the steps ahead of time!
Lift-gate Struts for Toyotas
- set of lift struts (2004-2010 Sienna)
- set of lift struts (2011-2017 Sienna)
- set of lift struts (2010-2018 4Runner)
- set of lift struts (2010-2013 Highlander)
- set of lift struts (2014-2017 Highlander)
- set of lift struts (2004-2010 Prius)
- set of lift struts (2011-2015 Prius)
- set of lift struts (2009-2018 Sequoia)
Was this post helpful? Let us know in the comments!
This repair applies to the following vehicles with both power and manual rear liftgate:
- 2004-2010 Toyota Sienna Base Mini Cargo Van 4 Door
- 2004-2010 Toyota Sienna Base Mini Cargo Van 5 Door
- 2004-2010 Toyota Sienna Base Mini Passenger Van 4 Door
- 2004-2010 Toyota Sienna Base Mini Passenger Van 5 Door
- 2004-2010 Toyota Sienna Base Passenger Van 5 Door
- 2004-2010 Toyota Sienna CE Mini Cargo Van 4 Door
- 2004-2010 Toyota Sienna CE Mini Cargo Van 5 Door
Thanks for reading.


Bought 2 sets now and both sets didn’t work. The lift gate just drops if not held up.is it possible to receive 2 sets of faulty struts. The first ones my husband said he could physically push them in so we returned and ordered another set but the 2nd set don’t work either. So frustrating.
This was no help. We have a 2006 (Hybrid) Highlander, with a rear door that only goes halfway up and we are sad that you do not cover that.
Thank you so much for these great instructions – worked perfectly for my 2004 Toyota Sienna (non-power lift gate)! This was probably the easiest/simplest vehicle repair I’ve ever done. Appreciate you taking the time to provide this.
So glad to hear it went well, I’m happy to have helped!
All the best to you
Hi, thanks so much for this instruction guide! The rear hatch of my 2010 Toyota Highlander would not lift itself or stay open, so I used the link provided to purchase the new struts. My husband and I did the install and it’s working great. Thanks again!
I’m so glad to hear that! The 2010 Highlander is a great car, my brother-in-law has one and loves it. Here’s to another 13 years with a great vehicle!
All the best,
Thanks for your detailed article. It was very very help and save my $100+. God bless you
Thanks for the note, you just made my day!
Thanks for your help with this. It was amazongly easy and done so fast.
Rich, I can’t thank you enough for the time it took you to put this tutorial together. Our 2008 Toy Sienna powered lift gate was falling on us and we needed to get access to third row car seat from the back. The New Lift struts worked great! Easy install and Huge savings. This repair saved Christmas for my 3 kids!! God Bless!
Artie, thanks for the comment, it means a lot to me and makes it worth it, glad it’s working now! Merry Christmas!
Great post. Easy to follow and repair worked great. Thank you
Thank you so much for such a detailed instructional. I have never attempted any sort of repair to my vehicles, because autos are a mystery to me, so I’ve never even considered that there might be repairs I *could* do!
With your help (& my son’s survival knife, since we couldn’t locate the right-sized screwdriver), my 7 & 10-year-old boys & I fixed our hatch today. Such a small thing but empowering (& it saved me paying a lot of money to a mechanic)!
Thank you!!!
returning mine. doesn’t work! swings out wildly
Michelle,
I’m so glad to hear it! Your comment made my day!
You’re a great mom!
Thanks,
Rich
Hi,
I just replaced mine with the link provided and something much be wrong. When I open it , it starts to open up slowly and then all of a sudden comes up quickly (which could be dangerous) and is much harder to close. Do you think there is something wrong with the ones I got or does it take time to break in ?
Thank you.
Hi Dan, I know for mine, it took about a week or two for the struts to “settle in” a bit. They did start out a bit zealous! I hope it is the same for you,
Thanks,
Rich
$25 and five minutes. That’s all it took and my wife is so much happier the gate stays open. Thank you!
Michael, that’s awesome, so great to hear! Happy wife, happy life!
Thank you so much for this. Our 2007 Sienna hatch just started falling on us and I was worried about a huge bill to replace it. I could not believe how easy this was.
One thing to watch out for: there’s another supporting pole with similar ends that I goofed up and took off first. Thankfully I was able to replace it as before, but others might want to double-check they are actually pulling off the struts do they don’t repeat my mistake.
Thanks again!!
Greg, thanks for the feedback, and excellent point. I’m glad you mentioned that. These are the 2 struts located in the sides. I’m so glad it’s working now, isn’t that satisfying!