How to Upgrade to a Larger Battery in a Honda Accord
Does your Honda Accord struggle to start? Do you end up replacing your battery every year or two, when it should last for 5 years or more? Do you use your jumper cables more often than you would like? Do your headlights dim when you turn on the A/C or lower your windows?
I faced all of these issues. This post describes what finally fixed the problems for me, and it was so easy!
So what’s the solution? Upgrade the battery!
If you purchase something through one of my affiliate links I may earn a commission, at no extra cost to you. Thanks for considering it.
Background on the Underpowered Original Honda Accord Battery
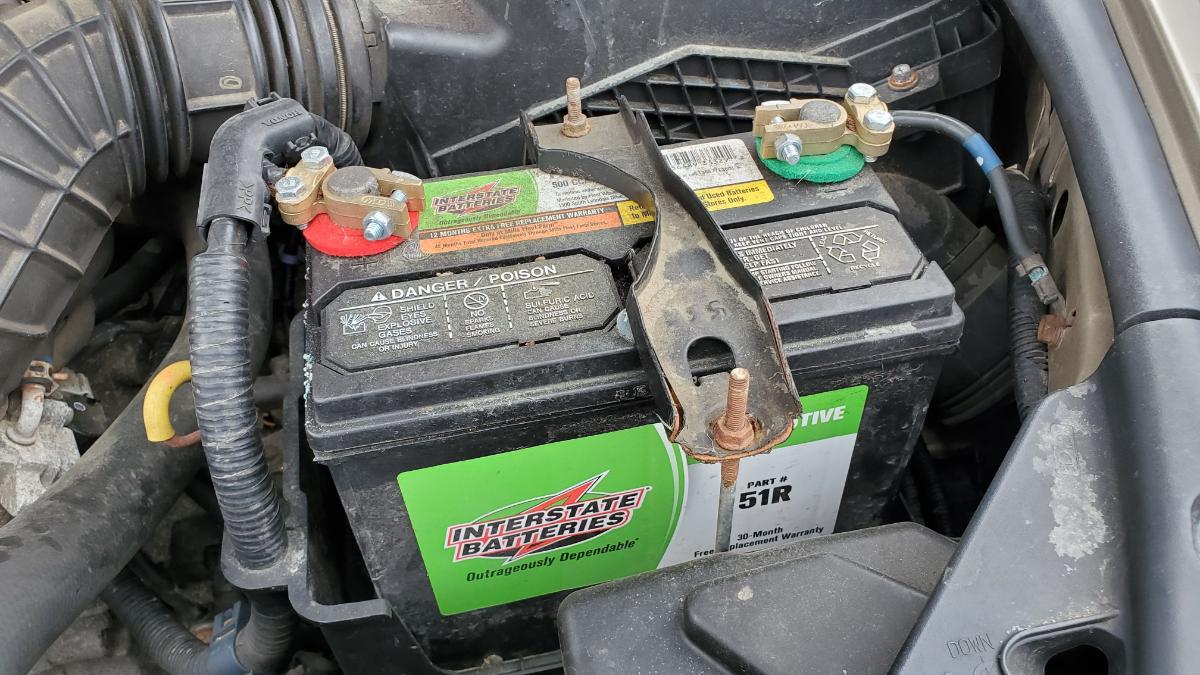
The original battery that is installed in the 4-cylinder Honda Accord is a 51R battery which has a capacity of 500 CCA (cold-cranking amperes). This is horribly underpowered for this vehicle.
The 6-cylinder Honda Accords use a larger battery, and it is a simple upgrade to put that larger battery into a 4-cylinder Honda. I replaced the 51R battery in my 2004 Honda Accord with a 24F battery which has the same voltage but has 750 CCA. (Note: this upgrade can also be done to the 35 battery which has around 640 CCA).
By increasing the CCA’s by an additional 50%, you eliminate a lot of the problems that you face with the underpowered 51R battery that the Accord originally calls for!
What Problems Does Upgrading the Battery Fix?
The following is a list of problems that upgrading the battery will help with:
- Car won’t start (or barely starts) in the winter.
- Frequently need to get a jump-start.
- Frequently need to replace the battery.
- Thinking you may need to replace your alternator.
- Thinking you may need to replace your starter.
- The headlights dim when you put a load on the battery such as lowering the windows or turning on the A/C or heater fan.
I did this upgrade, and if you have a 4-cylinder Honda Accord with a 51R battery, I HIGHLY RECOMMEND that you perform the upgrade as well, there is no downside! The car starts right up and the lights no longer dim when turning on the fan.
Tools and Supplies Needed/Used:
- Honda Battery Box (31521-T2G-A00) and
- Honda Battery Cover (31531-T2G-A00) and
- Hold-down Cross-bar (31512-T2G-A00)
- or a cheaper Generic Battery Tray
- Bigger Battery Grounding Strap (32600-SDB-A00)
- Anti-Corrosion Felt Washers
- terminal brush
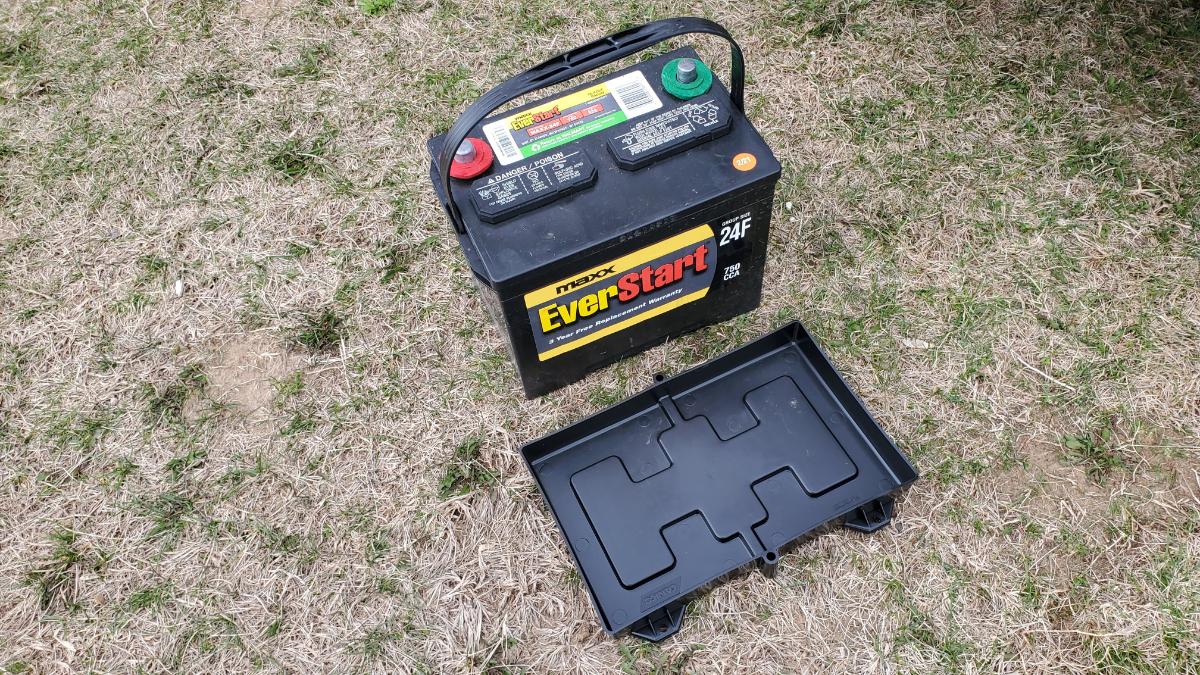
- 24F Battery (I recommend you purchase one at Walmart or Costco)
- 10mm Wrench
How to Upgrade from 51R to 24F Larger Battery – Honda Accord
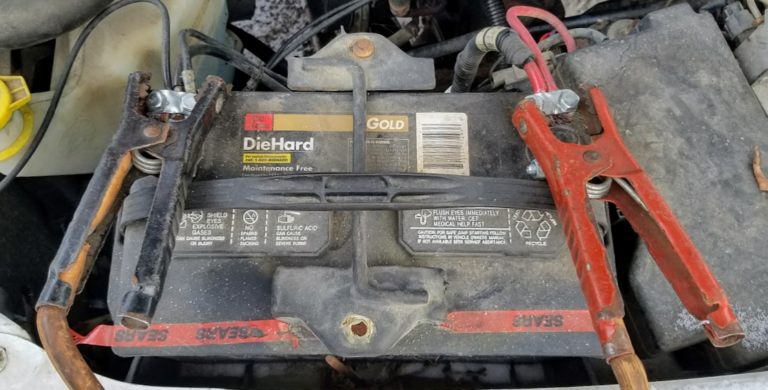
The first step is to remove the battery connectors from the battery. Start with the negative (sometimes black or green) connector. Use a 10mm wrench. Push the connector out of the way so that it is not bumping against the negative terminal while you are disconnecting the positive.
Next use a 10mm wrench to disconnect the positive terminal connector.
Remove the battery.
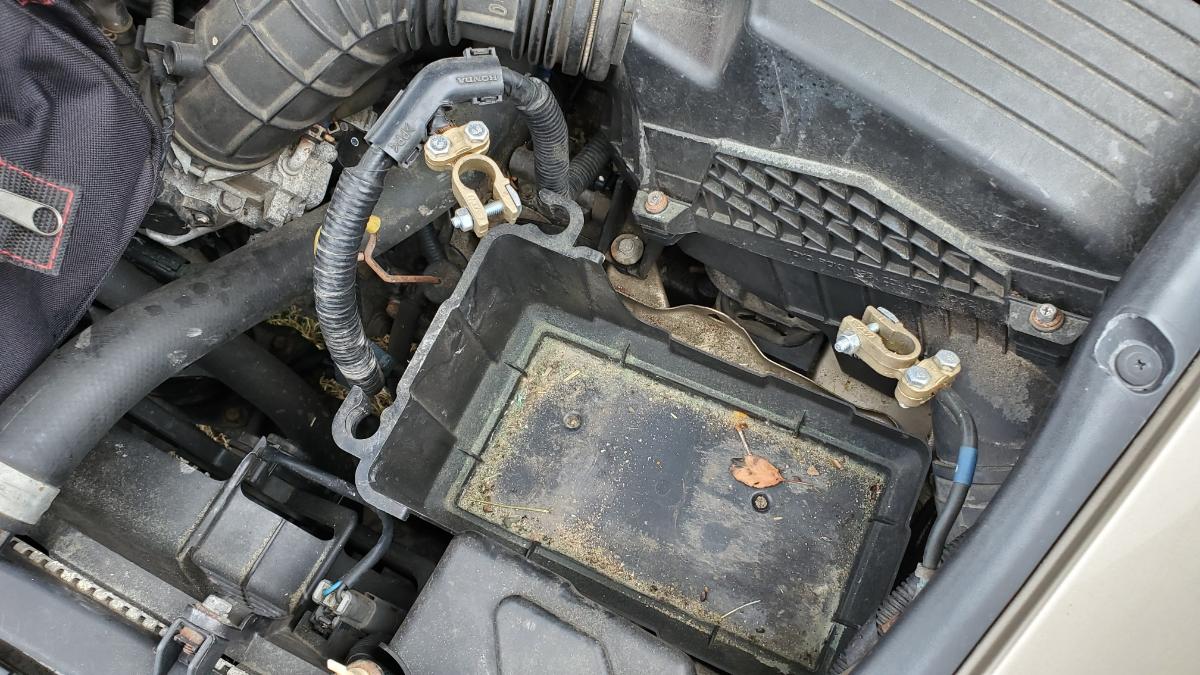
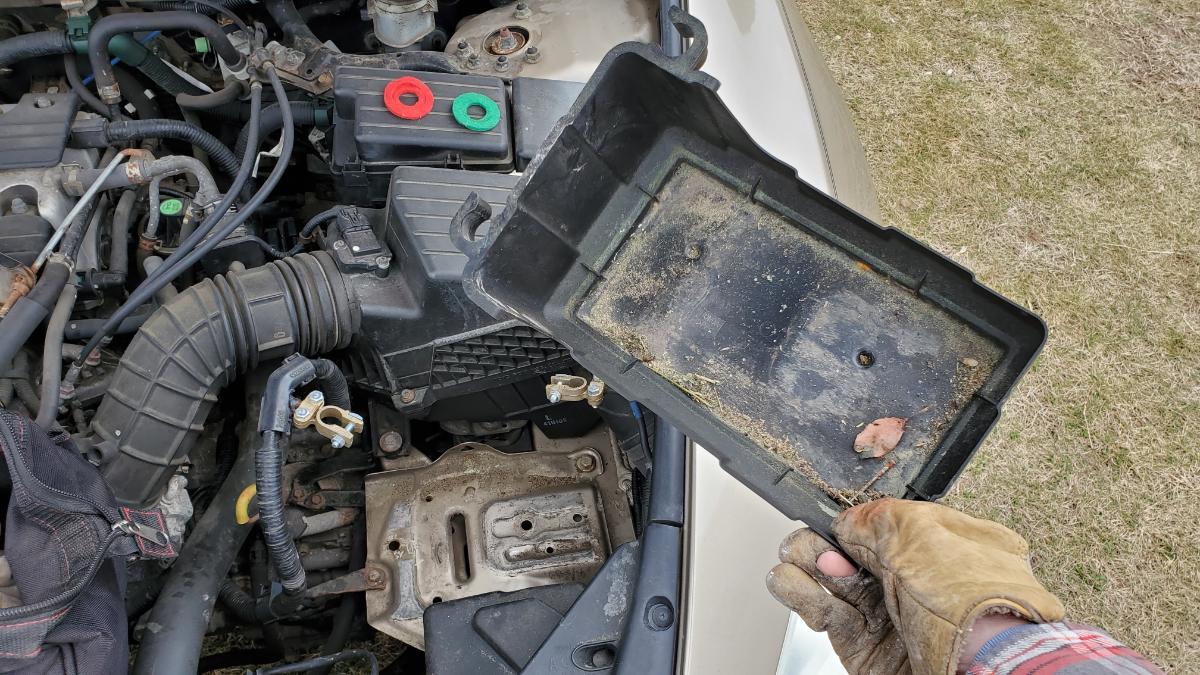
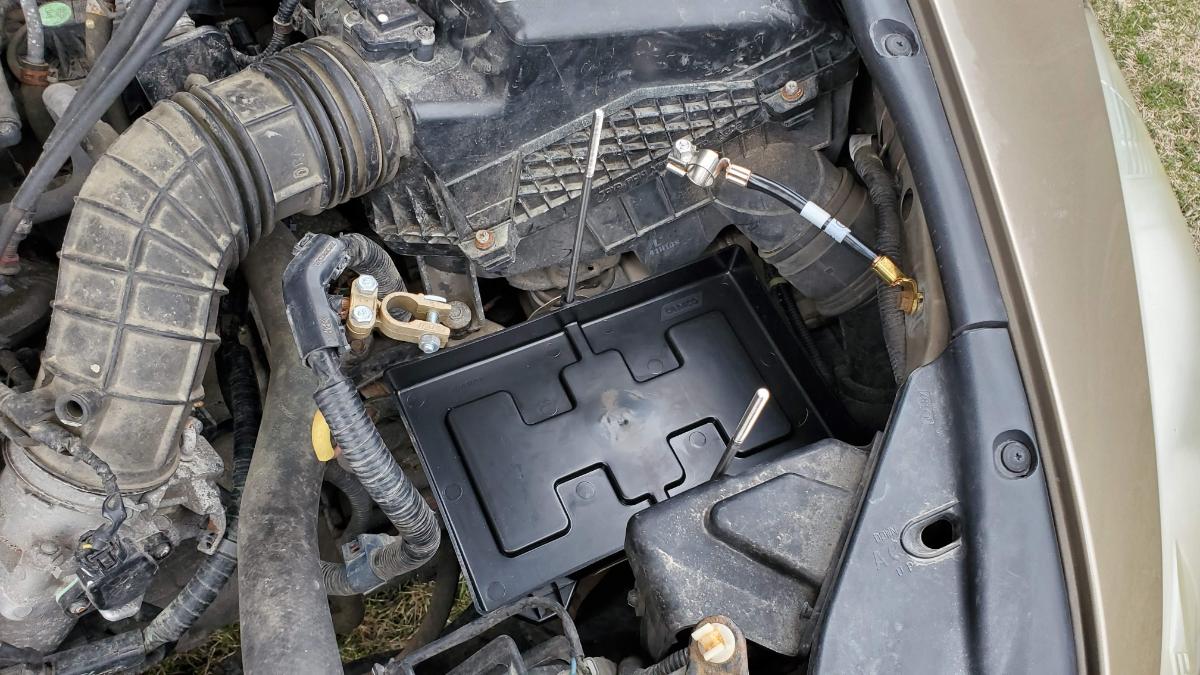
The new, bigger battery won’t fit into the small tray, so remove it.
Get a new tray that will hold the larger battery. If you want it to look stock, get the Genuine Honda Battery Box (31521-T2G-A00), which is the battery box from the 6-Cylinder Honda Accord. Also get the correct hold-down cross-bar (31512-T2G-A00). There is also a battery cover that acts as a shroud around the battery (31531-T2G-A00). I don’t think it is necessary, but to make things look stock, you should get that too. Here are the part numbers for each of these Genuine Honda components:
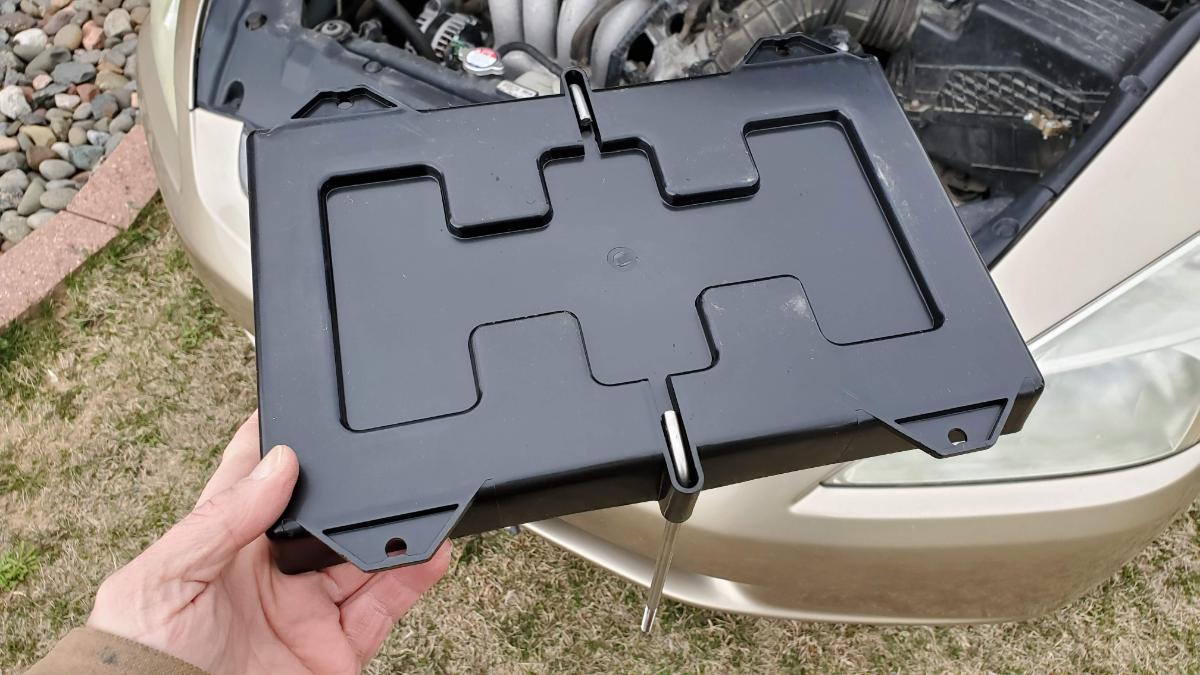
If you want everything to fit nicely, go with the Honda OEM battery tray. However, if you don’t care about the look so much, go with a generic battery tray, which is what I did because it was less expense. Here is the battery tray I settled on:
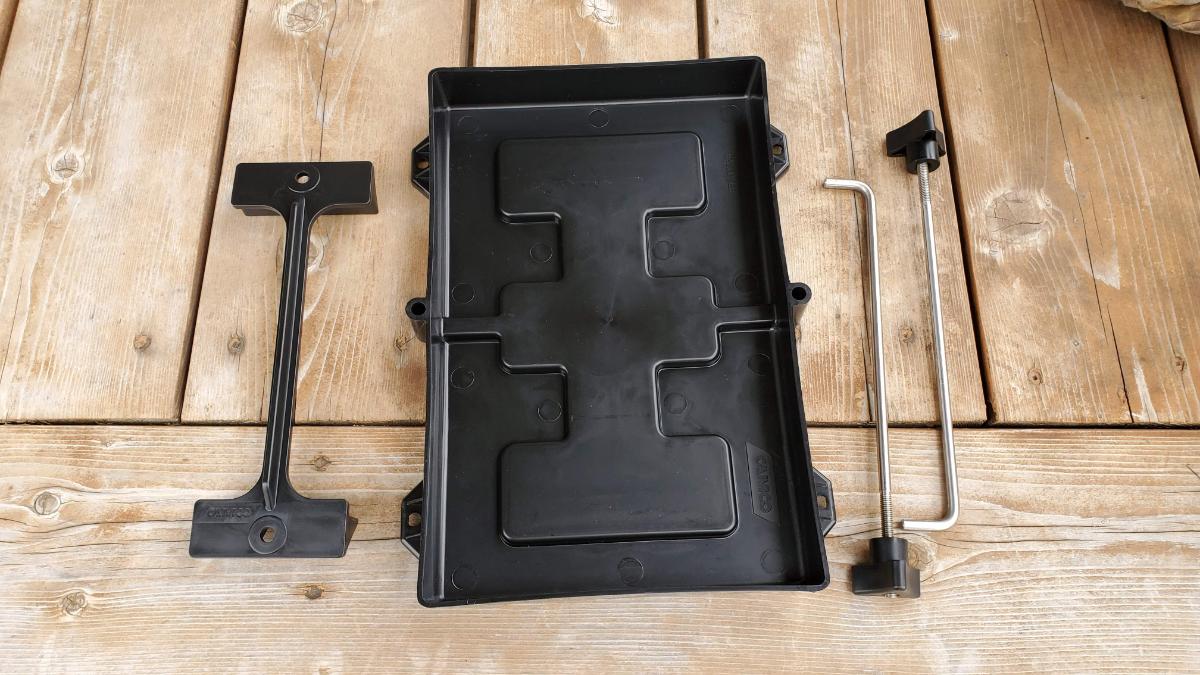
This tray is about 1/2″ too big in the lengthwise direction and about 1/4″ extra in the width.
It is also recommended when you upgrade to the larger battery, that you replace the grounding strap with the beefier one from the 6-cyl Accord as well. This will give more stable current and fewer problems with current draw, like dimming headlights, and etc…
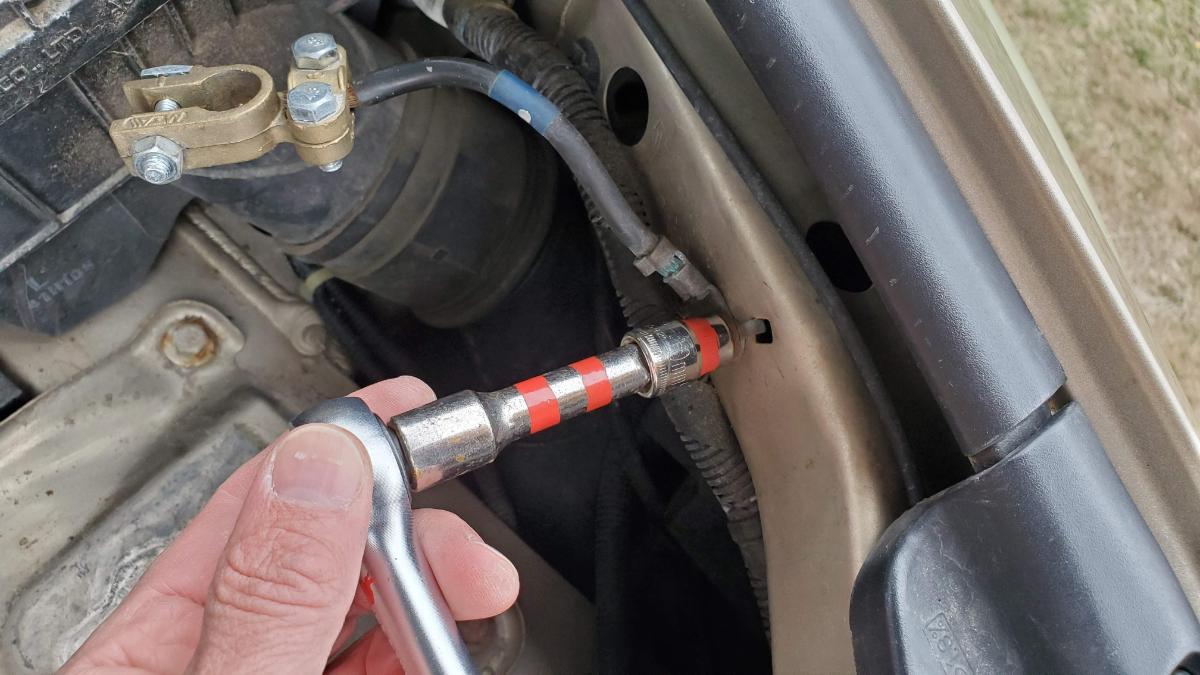
Use a 10mm wrench or socket to remove the grounding strap from the frame of the car.
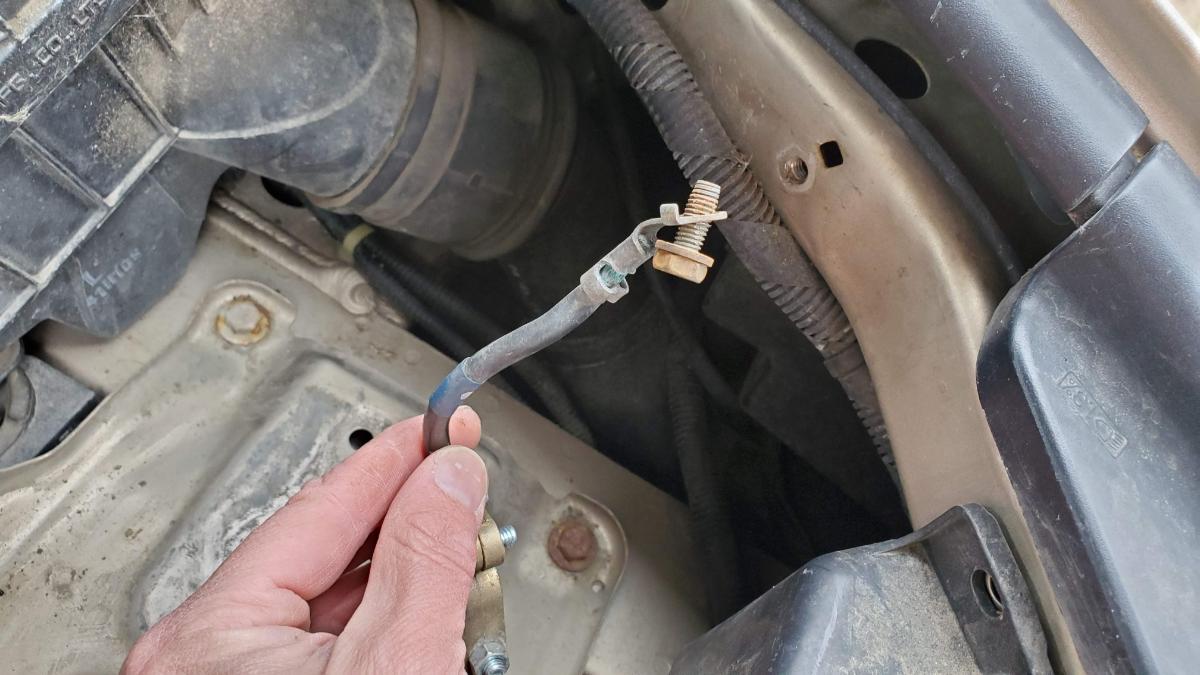
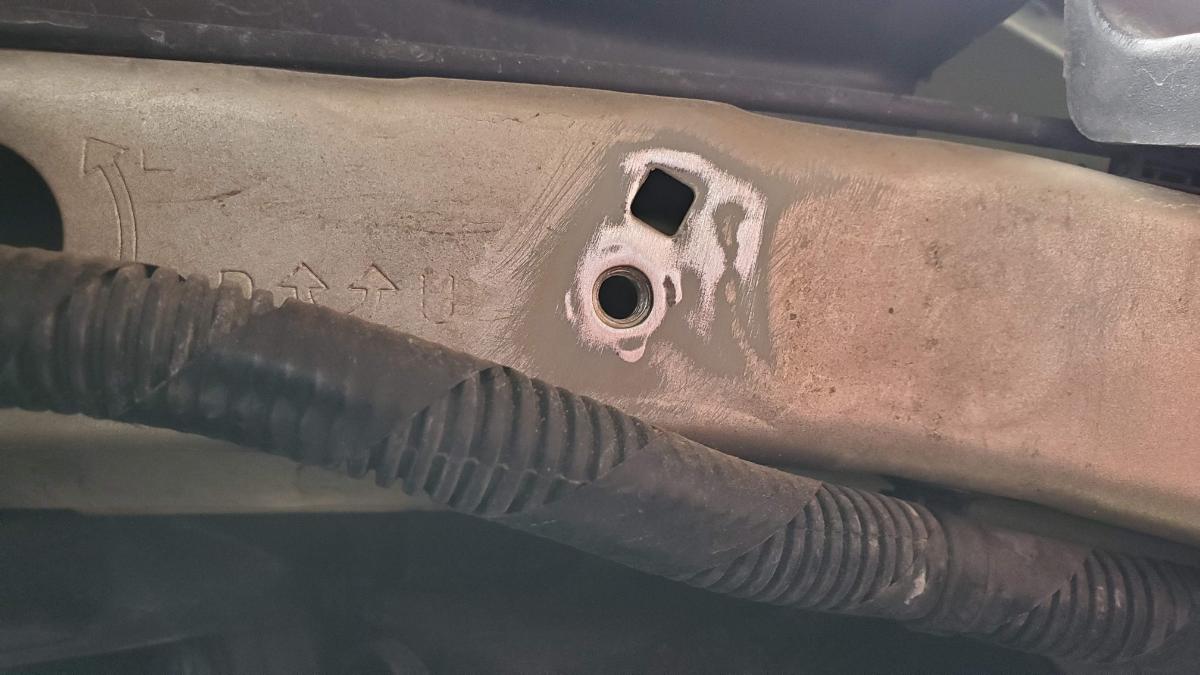
On mine, the frame was painted where the grounding strap attaches, which can’t be good for the connection. I used a bit of sandpaper to remove the paint.
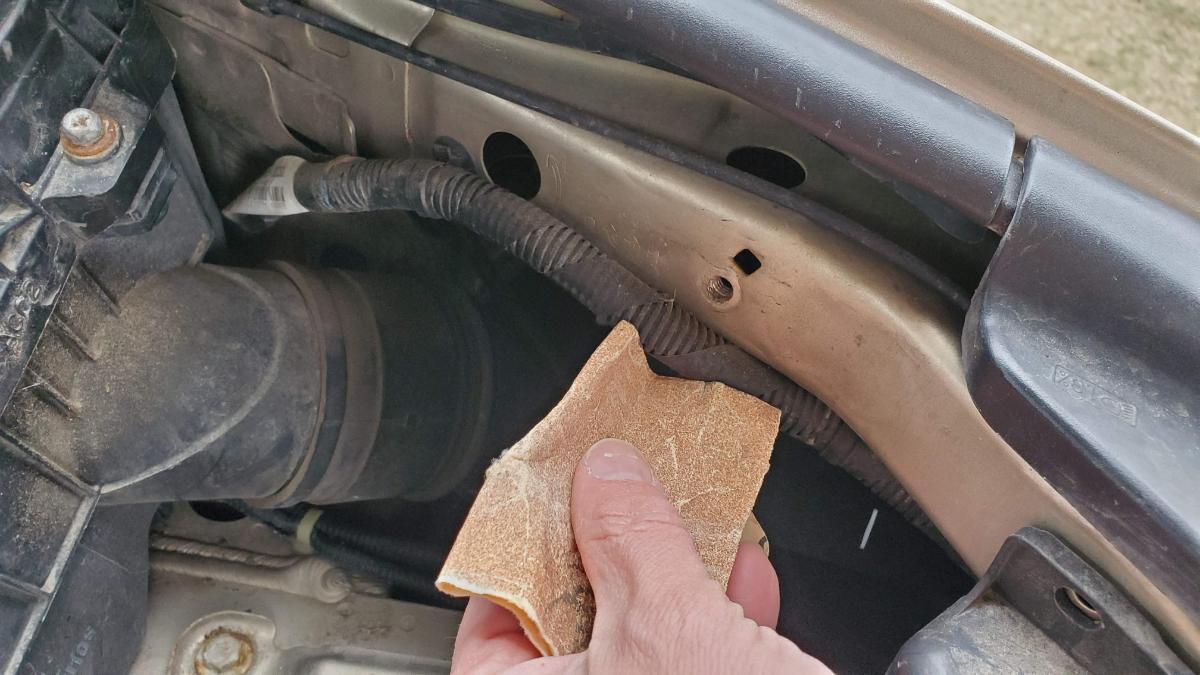
Sanding away the paint will give you a better connection and more stable power.
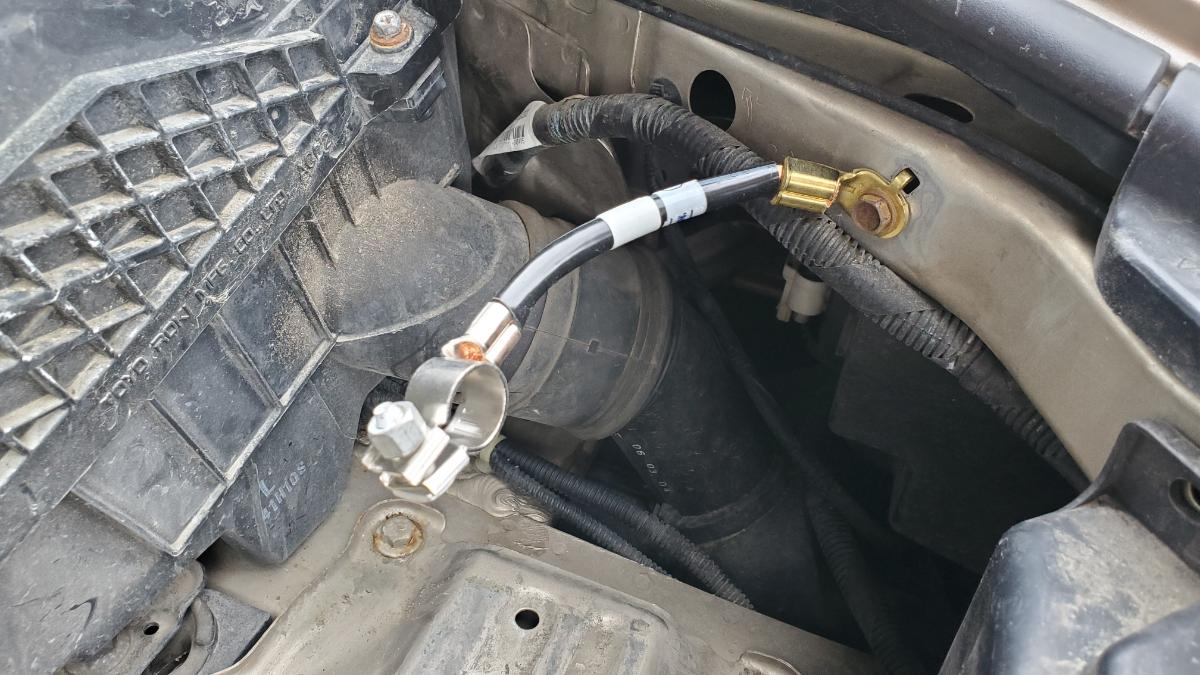
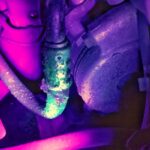
Replace the existing grounding strap with the larger diameter OEM grounding strap (32600-SDB-A00). It looks really short, but it is the right length when you get it installed!
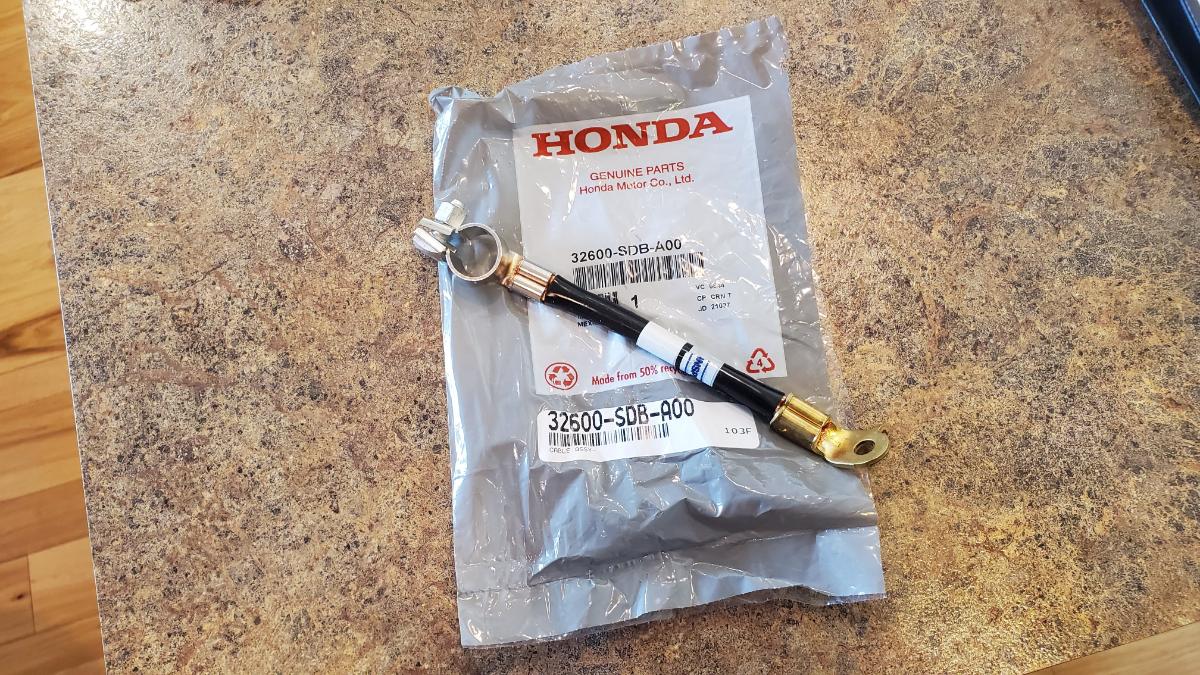
Use the 10mm bolt to attach the new grounding strap where the old one was. It is pretty stiff at first, so go ahead and bend it to the approximate correct position so that the connector will be in the right orientation to attach to the battery terminal post.
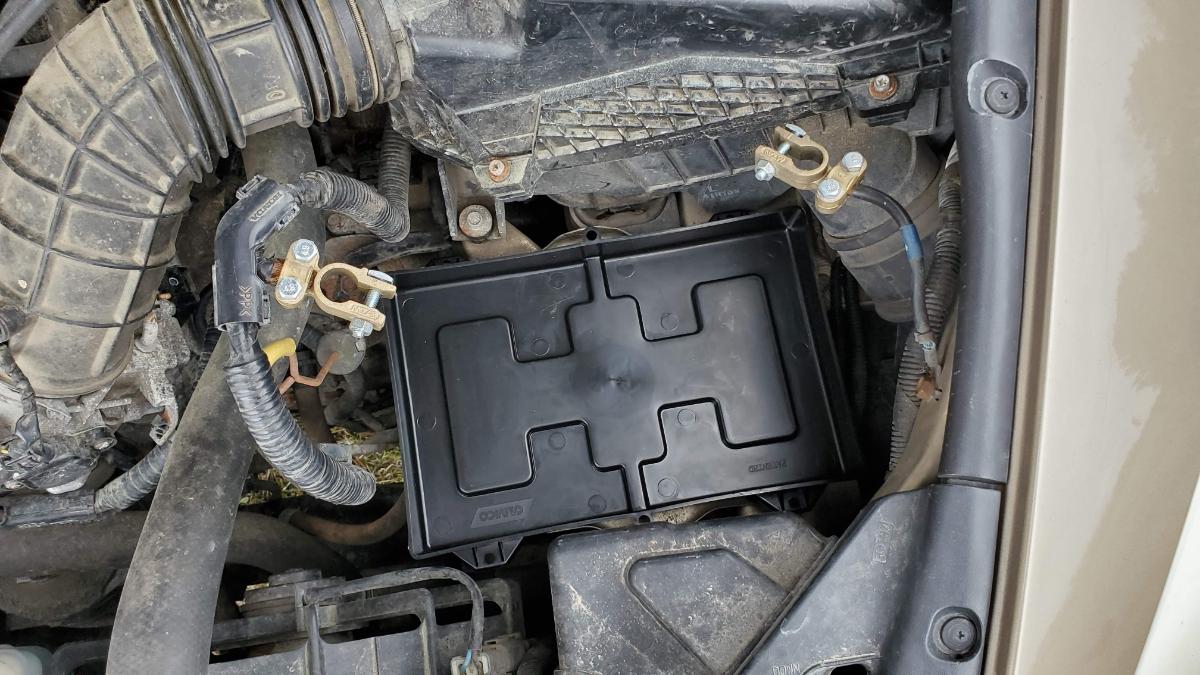
With the new battery tray and grounding strap installed, you are ready to put in the new battery.
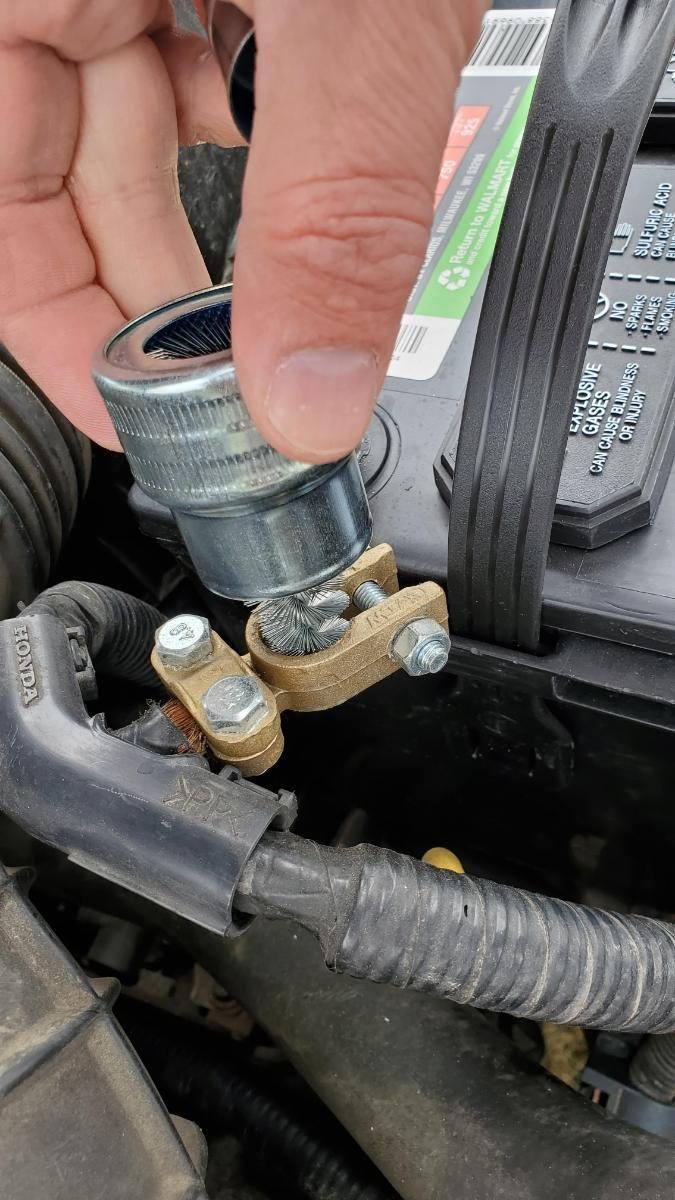
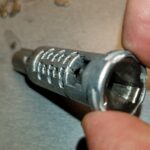
Whether new or old, it is a good idea to roughen the surface a bit for good contact. Use a terminal brush to score/clean the terminals.
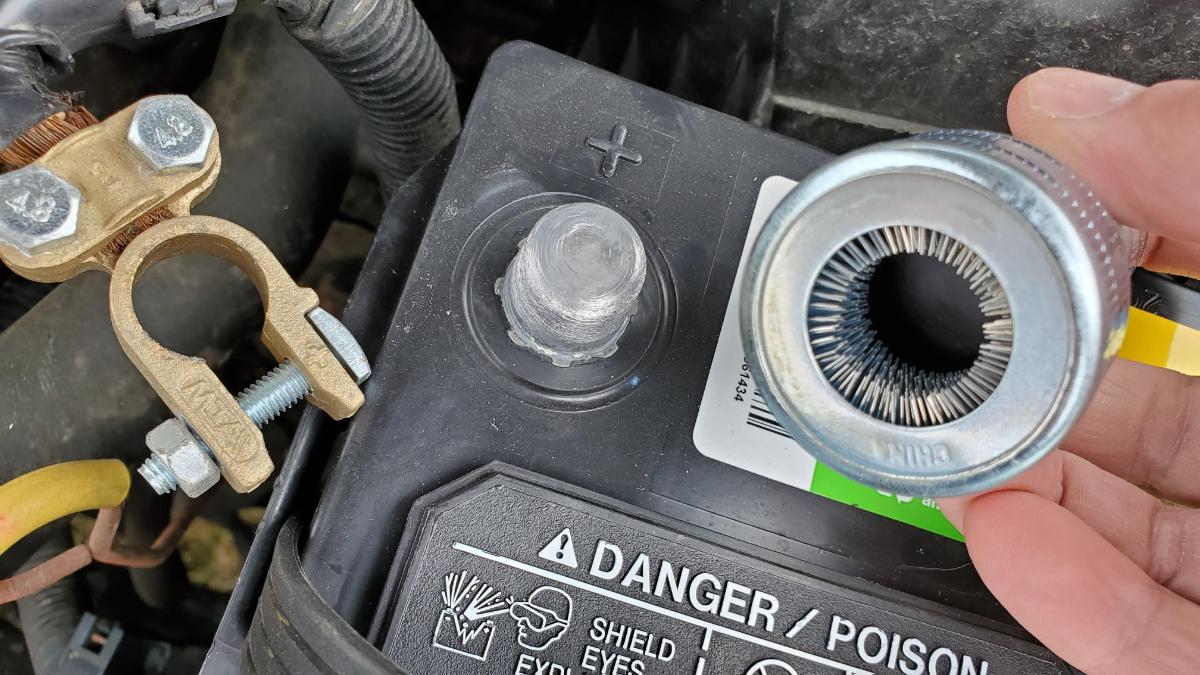
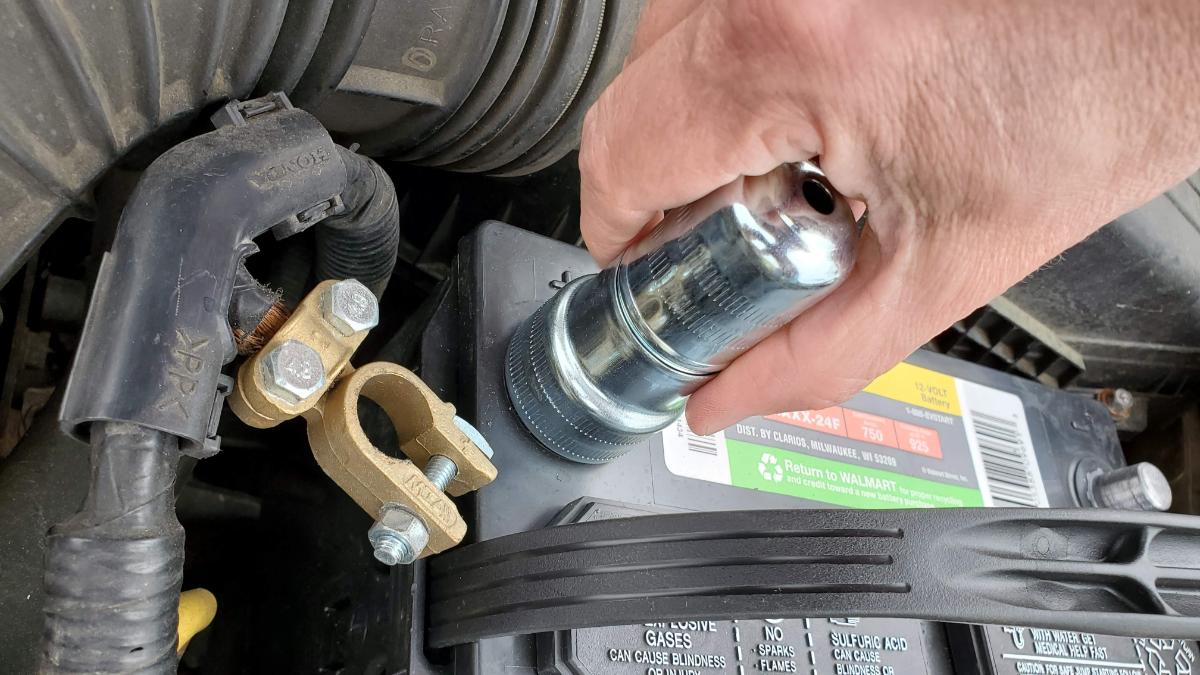
Do the same for the inside of the connectors (take the cover off the terminal brush).
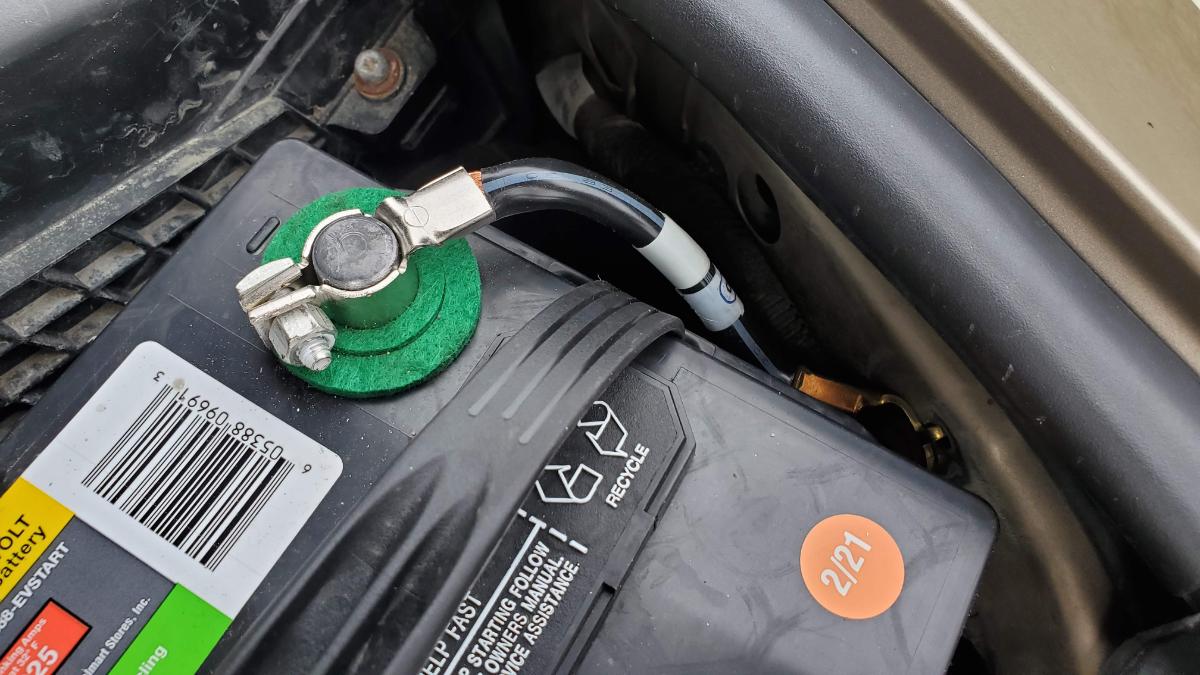
Use a 10mm wrench to attached the battery connectors to the terminals. First put down some anti-corrosion felt washers. Then connect the positive terminal connector first, make sure it is snug for a good connection.

Then attach the negative battery terminal connector (grounding strap).
Finally, put the hold-down crossbar in place and tighten up the nuts to hold the battery down.
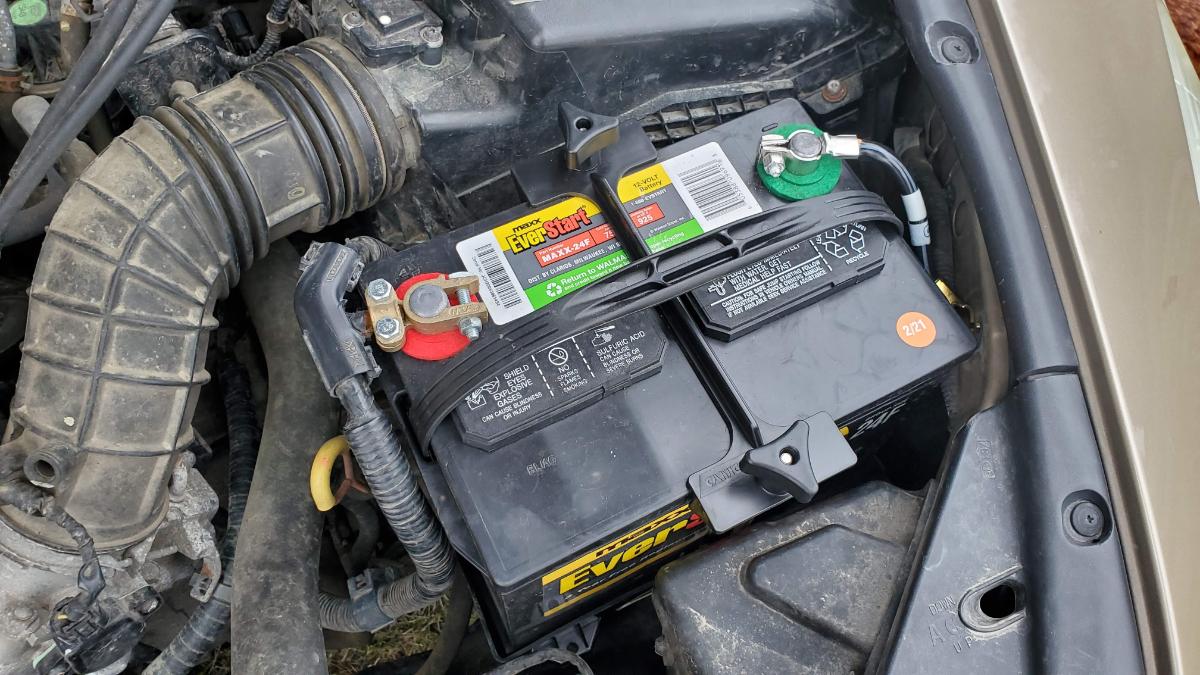
That’s it for the battery upgrade, I think you’ll be very pleased with the results.
How to Reset the Radio Code – Honda
After changing out the battery for the larger one, you may need to re-enable the radio by entering the radio code. If this is you, locate the radio code for your stock radio.
The radio code is either found in the owner’s manual (often in a small plastic envelope from the dealer), or it can be found on the side of the open glove-box. There is a sticker on the side that can be seen from the driver’s seat.
The radio code consists of 5 numbers. Use the numbers 1 to 6 on the radio to enter the code to re-enable the radio.
Tools and Supplies Needed/Used in this Article:
- 24F Battery (purchase one at Walmart or Costco, they are a bit pricey on Amazon)
- 10mm Wrench
- Genuine Honda Battery Box (31521-T2G-A00) and
- Honda Battery Cover (31531-T2G-A00) and
- Hold-down Cross-bar (31512-T2G-A00)
- or a cheaper Generic Battery Tray
- Bigger Battery Grounding Strap (32600-SDB-A00)
- Anti-Corrosion Felt Washers
- terminal brush


thanks for the write up. waited for my battery to finally die and swapped it with a bigger battery per your directions.
Nice. I’m still rocking this bigger battery, and so glad I did. Huge improvement. It’s a nice feeling having a confident start every time!
Are the alternators in the 2.4 and 3.5 the same? If not, will it cause any problems?
This was super informative and helpful. The more common issue I get with the battery is loosing power when accelerating while AC is on. When AC is off I accelerate much more efficiently. I appreciate you breaking down the part #’s as well. I will update everyone when I replace my battery. Thank you.
Thanks for the note, yes, please update us and let us know how it goes!
Rich:
Thanks for your post on this… I plan to do this on my 05 Accord…. I always wondered if I could get a bigger battery in there, and you proved it.
I’m sure some “field modifications” will be needed. But, I’m sure I can get things figured out.regardless, thanks for the write up.
Patrick
Patrick,
Yes, it was a HUGE improvement for me. Hope all goes well!
R
I did the battery upgrade on my 2004 Accord Sedan but I didn’t upgrade the grounding strap. It fixed the long cranking issue but my headlights are still dimming every time the a/c compressor kicks on. Will the grounding strap upgrade definitely fix the headlight dimming issue?
It did for me, but if your AC compressor bearings are going out, it will probably still happen even with a thicker grounding strap.
Hi I have a 2004 Accord and the battery box you recommended doesn’t fit. The bottom pins don’t line up with the holes below it.
Hi Leo!
When using the aftermarket battery tray that I used in this post, it was not fixed down to anything. It is a tight enough fit in the battery compartment without fixing the battery down. If you really want to secure it, you can use several self-tapping screws to attach the tray to the metal underneath it.
Good luck and thanks for the comment!
Thank you but I didn’t use the one in your post I used the actual Honda tray 31531-SBD-A00 that you recommended first. The bottom pins don’t line up with the holes in the metal frame so it doesn’t sit flush with the bottom. The only way it will is if you break off the bottom pins but this negates any of the benefit of buying the official part.
Hi Leo, Sorry to hear that the holes don’t line up for you. In the post, I have listed the 31521-T2G-A00 (not 31531-SBD-A00), I’m not sure what the difference is between those without looking into it more. I used the aftermarket tray, and it didn’t have pins on the bottom of the tray.
Sorry that is the battery cover part number I meant to say I used tray 31521-T2G-A00 and it didn’t fit. The pins are in totally different places than the stock tray
Hey Guys. I wrote to Rick and performed this fix Feb2022 on an 2006 Accord EXL 2.4L Sedan. I realize this post does not address your use of a factory Honda tray, but hoping maybe this helps future you or someone else.
I understand Honda OEM battery trays utilize these “bottom pins” you are referring to, to help keep things from shifting about … true. But for me, I ended up comfortable with a new “generic” tray and battery being held in place by the downward force created by the cross-bar and j-hooks reinstalled and configured EXACTLY AS THEY HAD BEEN originally. Meaning the j-hooks hook into the cars frame [not nested under the tray like the generic tray directions show]. Like Rick noted, its already a tight enough fit, and combined with this downward force, … I don’t see the battery going anywhere.
Small modifications needed … I purchased the “generic” battery tray as advised by Rick, but found I needed to cut off the plastic j-hook eye holes on the bottom of this generic tray [hacksaw] because it interfered with j-hook positioning when reinstalling the “J” into the cars metal tray- frame [actually, I think i only needed to cut off one – the rear one] . I also purchased the appropriate Honda cross-bar [Honda 31512-SDB-A01 at the time $20.00]. Just use the J-hooks as originally intended, and away you go. I can’t figure out how to attach some pics, otherwise I would. Good Luck. Hope this helps.
Great tip, thanks Mike!
Just letting you know that tray doesn’t fit in a 2004 Accord so someone else doesn’t buy it by mistake. Thx
Richard thanks for the info but where can we purchase the whole kit as its not available in UK
Rich, Thanks for the helpful post ! I will be working your battery upgrade magic on my dads 2006 Accord 2.4L Sedan which is located about an hour away from me, and just wish to be prepared before I arrive. Question: Pics appear as if you’re using the new “J” hooks in the new (generic) tray as designed. If so, how are you anchoring the new tray to the car body? … Or were you able to use the new J hooks AND still use the old (j hook) holes as used before the conversion. If the later, I was curious if you encountered any interference with the tray or alignment issues getting the j hooks into position? … Might I need to trim anything? … Thanks for any insight. Mike.
Mike,
It has been a little while since I did this upgrade, so I’m going a little bit off of memory! If I can remember correctly, the battery tray in my case was not fixed down to anything. It is a tight enough fit in there that it’s not really necessary. I know of some people who have used self-tapping screws to attach the tray to the metal underneath it inside the car. That might be an option if you’re worried about it. Concerning clearance issues, I didn’t have any issue with that, as I recall.
Good luck with the repair! My Honda is still working very well with the new battery, definitely very glad I did the upgrade! No more wondering if it’s going to start after a slow turnover in the winter!
Very helpful, I also thought the battery was two small always have a slow start in the winter. I will be changing mine out when it fails. Thank You!!!
thank you for posting this! very helpful
You’re welcome, glad I could help!