How to Make Kombucha – Perfect Recipe – Step by Step Picture Guide
Kombucha is a refreshing probiotic drink. I’ve been brewing kombucha at home for a while now, and this is the recipe I have arrived at after performing minor tweaks to the formula for over a year! In this article I’ll tell you the exact steps to take to make that perfect bottle of kombucha!
What is Kombucha?
Kombucha is a fermented tea. Flush with living organisms: “probiotics” or good-bacteria, assisting your body with everything from depression to gut-health.
The average American drinks over 37 gallons of soft drinks per year (source: Beverage Marketing Corporation), and the health effects are devastating. Frequently drinking sugar-sweetened beverages is associated with weight gain/obesity, type 2 diabetes, heart disease, kidney diseases, non-alcoholic liver disease, tooth decay and cavities, and gout, a type of arthritis (source: CDC).
Here is a brief comparison of the nutrition information for several common beverages.
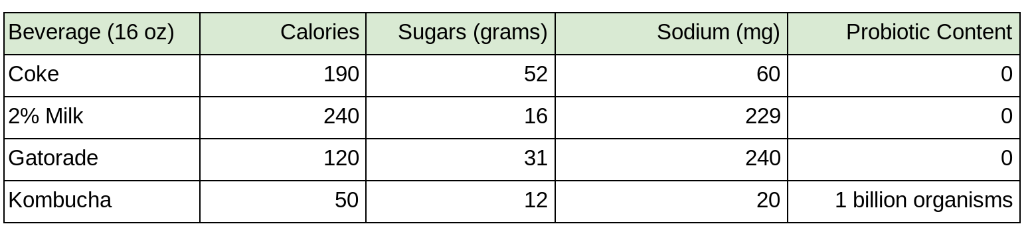
So, is kombucha a health elixir? Maybe, or maybe not… But at the very least, it can’t be worse than the soft drinks we tend over-consume… It also tastes great, and if you are a proponent of the health benefits of kimchi and yogurt, kombucha is a refreshing beverage with plenty of gut-healthy probiotics.
Kombucha Recipe
When I started out brewing kombucha over a year ago, I started out with this recipe. Over time I made some minor tweaks that suited my setup and arrived at the following recipe. This recipe will make kombucha that tastes like GT’s Original, which is what I used as the ‘gold standard’ in developing this recipe and process.
This batch makes about one gallon of kombucha.
Ingredients:
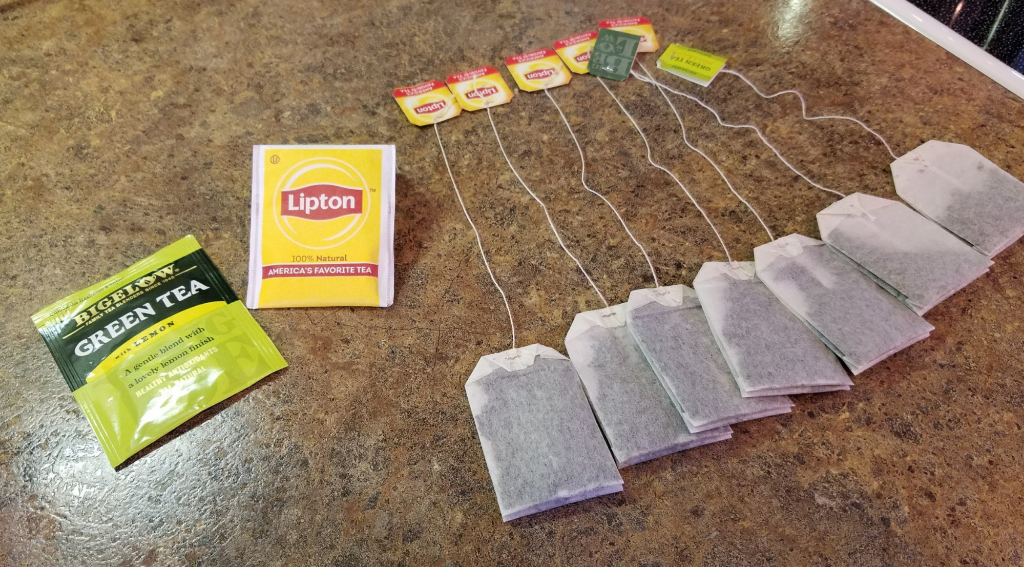
- 8 Tea Bags (4 black tea and 4 green tea)
- or 2 tbsp Loose leaf Tea (1 tbsp black tea, 1 tbsp green tea)
- or 2 tbsp 50/50 kombucha tea blend
- 1 cup white sugar
- 2 cups kombucha (starter)
- 1 Scoby (get one from a friend, buy one off Amazon, or make your own (see end of article for instructions))
- fresh water (no fluoride or chlorine – filter it if necessary)
Supplies:
- 1-gallon glass jar
- large pot to boil water
- re-sealable bottles (~6 bottles)
- temperature strips (optional)
I’ve listed all the supplies and ingredients because you probably have a lot of these things on hand anyway, but if you want to make it easy, buy an entire kit, one that includes everything you would need to get started.
Okay, let’s get started!
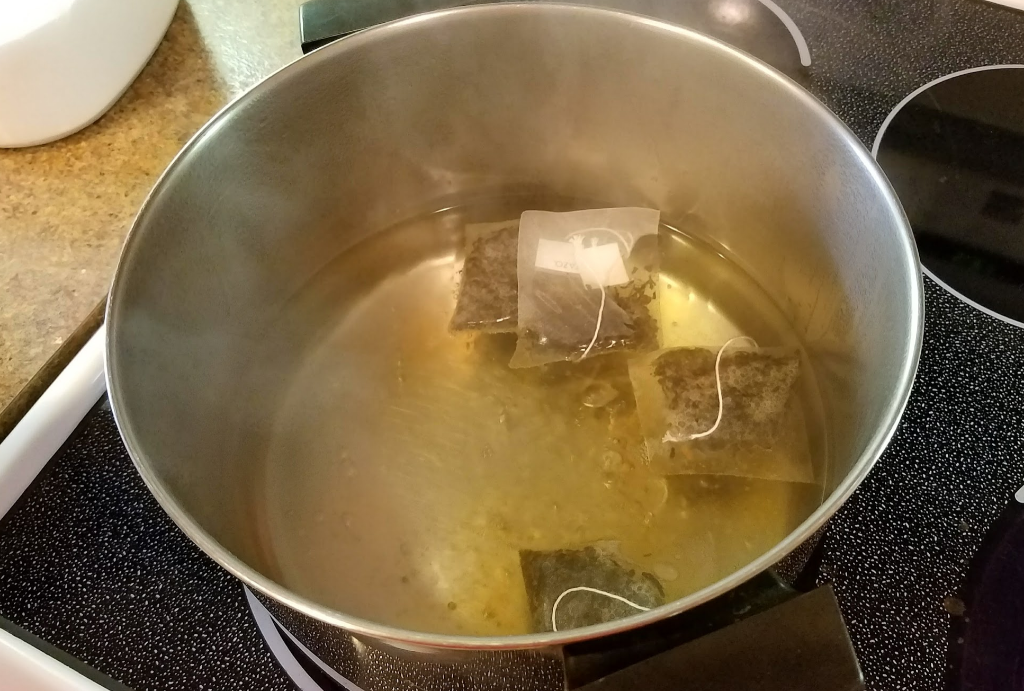
Unwrap your tea bags (4 black tea, 4 green tea), or scoop out your loose-leaf tea (2 tbsp 50/50 black-green tea blend).
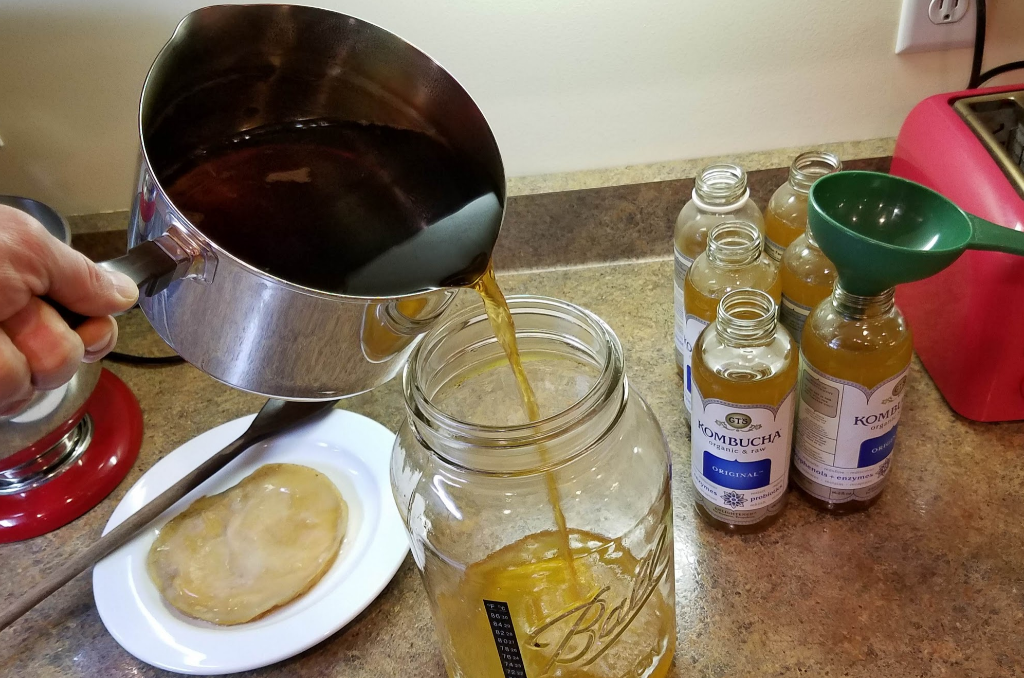
In a large pot, bring about 8 cups of water to a boil.
Turn off the heat, then add the tea and let steep 10-15 minutes.
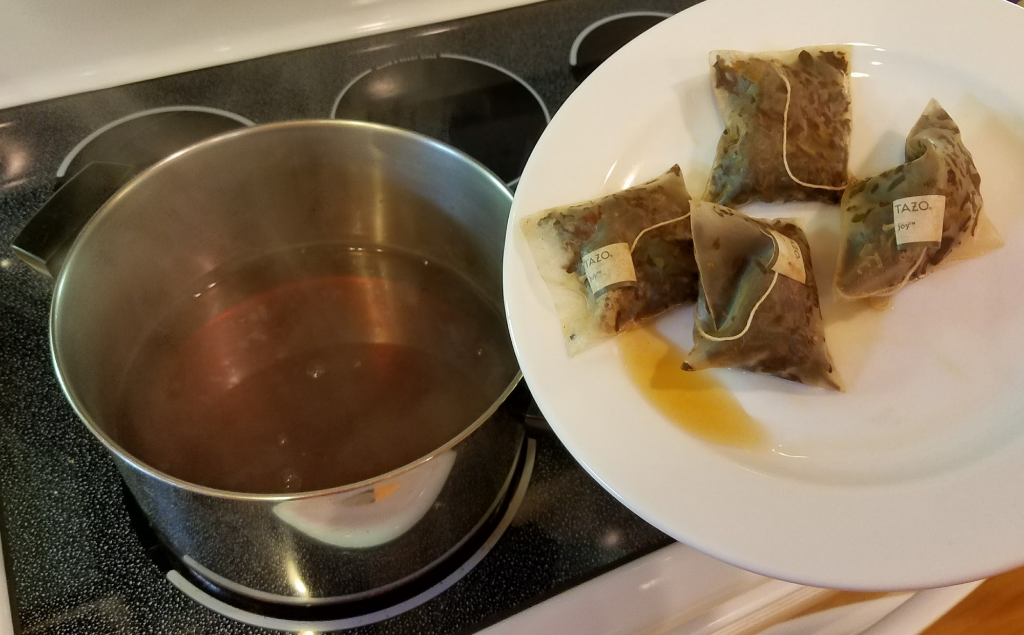
Remove the bags (or strain out the tea leaves).
Then add 1 cup of white sugar.
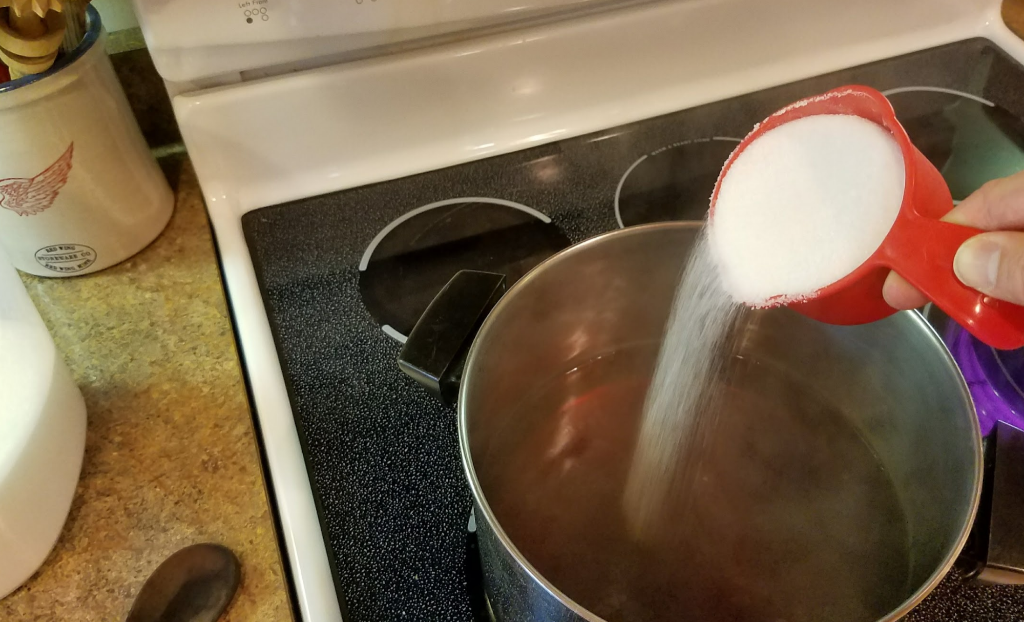
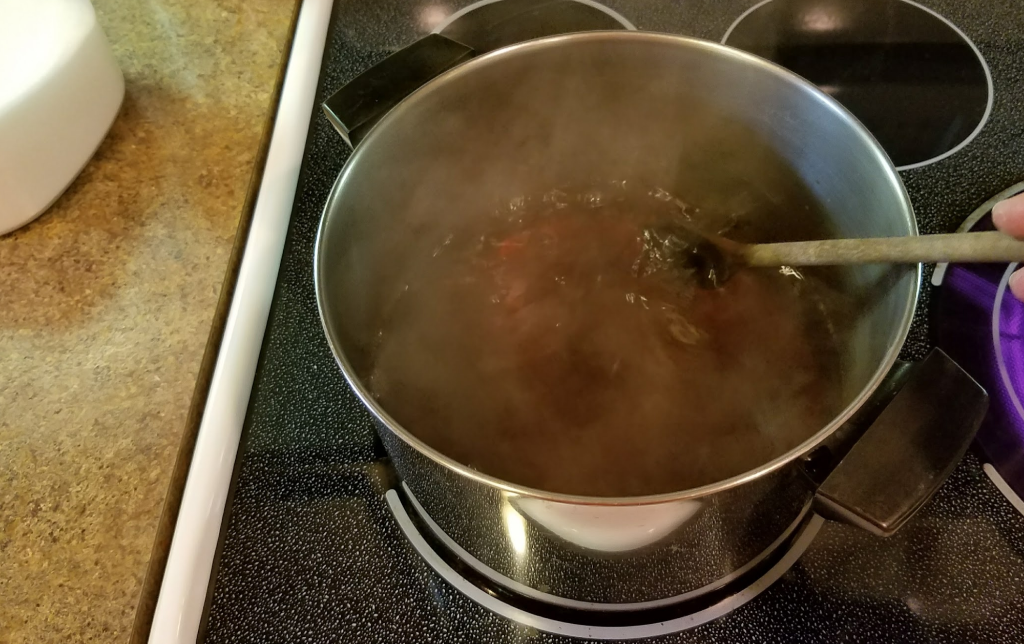
Stir the sugar and tea mixture until it dissolves.
At this point, you want the sweet tea concoction you have just made to cool down to room temperature. You can either do this by letting it sit for an hour or more, or do what I do; add ice cubes to the tea to cool it down until it is about room temperature.
Note: This step of cooling down the tea is very important. If the tea is too hot, it will kill your Scoby!
Next, pour 2 cups of kombucha starter into the gallon jar.
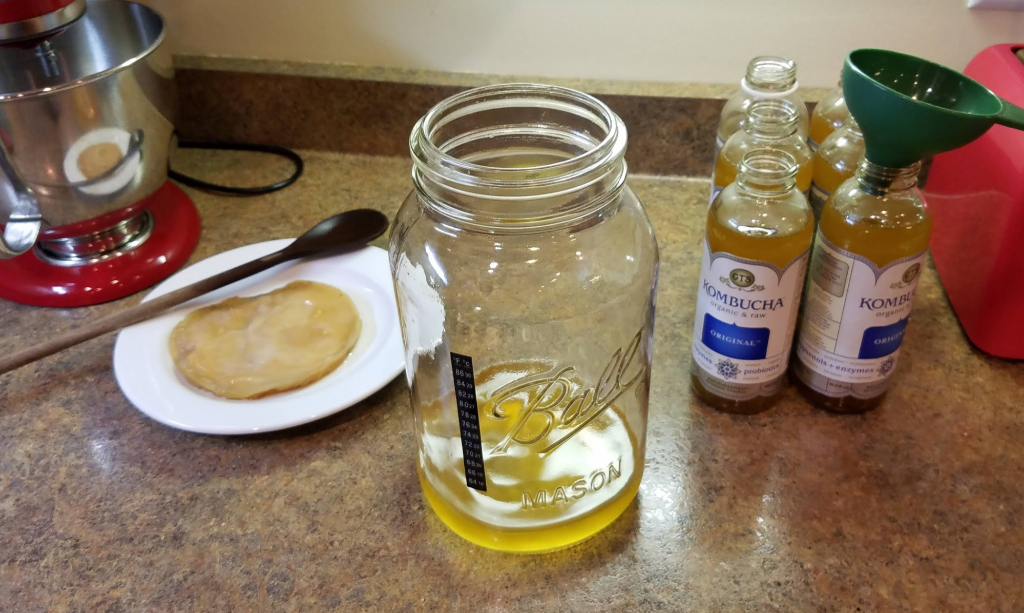
Now add the cooled sweet tea (remember, don’t add hot tea! It can scald the scoby!). Then add clean water to fill the jar up to just below the neck.
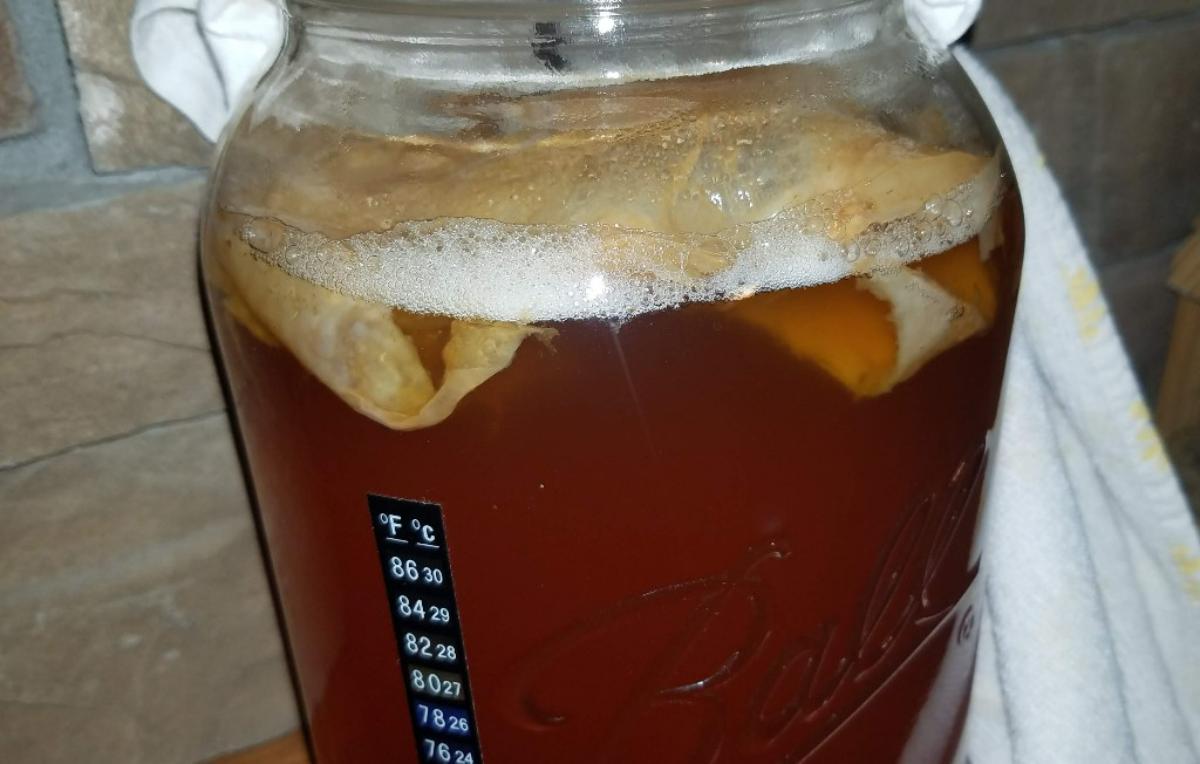
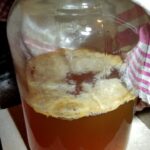
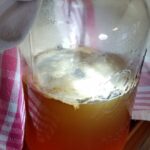
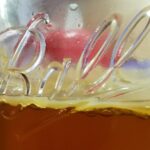
Once the jar is full, and you have verified that the tea is room temperature, gently add the SCOBY on top of the tea. Don’t worry if it sinks (like in the picture below), that is a function of temperature. The Scoby will eventually float to the top and start forming a new one on top of it in several days.
Finally, cover the jar with a fine mesh cotton cloth (such as a piece of a clean T-shirt) , then secured it with some elastic or a rubber band.
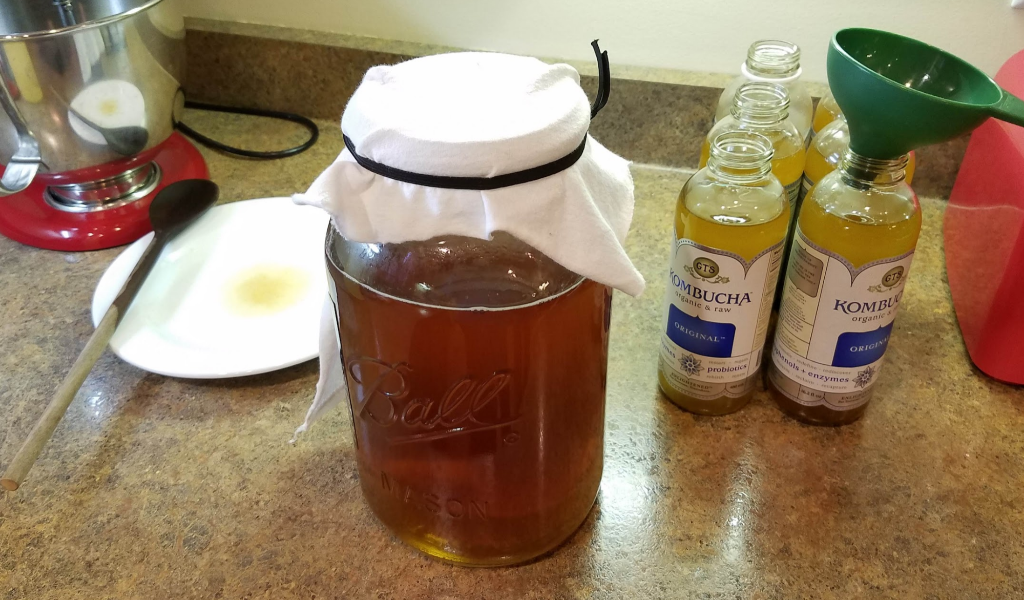
1st Fermentation
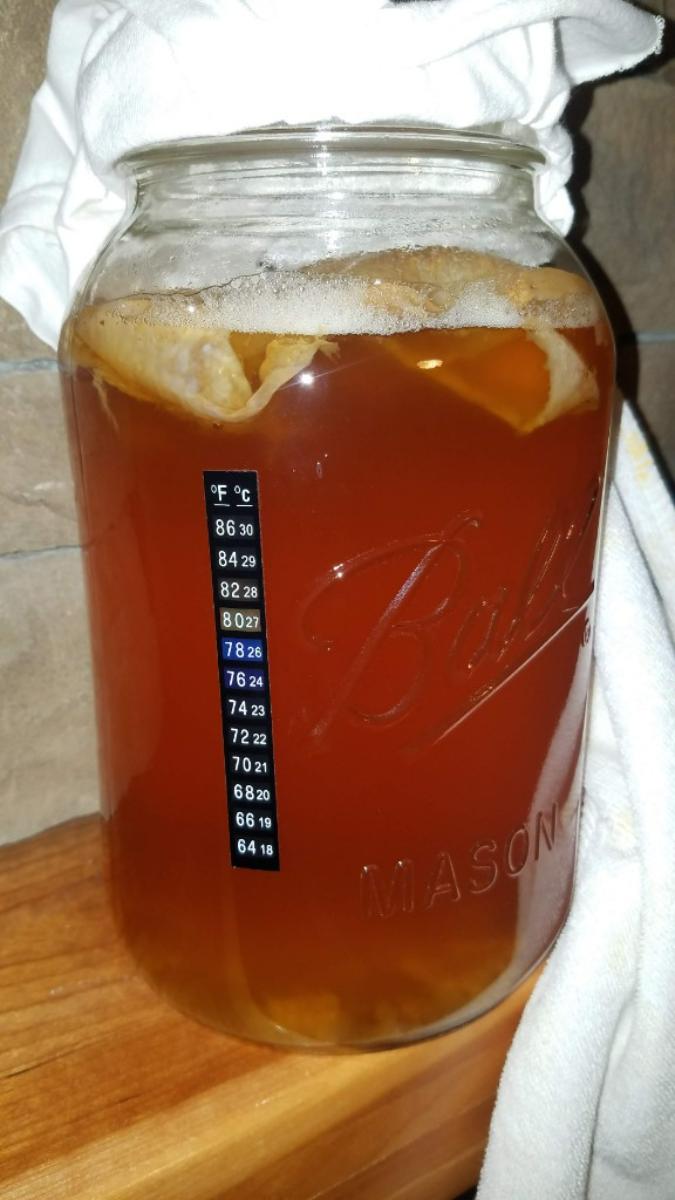
Okay, the effort is now done. Now all you need to do is let the kombucha sit for 5-10 days at warm room temperature (the ideal temp is 76 degrees F, but the acceptable range is between 65 – 85 degrees). On top of a refrigerator is usually a nice warm spot. For me, I keep it on the edge of the fireplace mantel (not in the center where it gets too hot!) The warmer the tea is kept, the less time will be required to finish the fermentation. The colder it is, the longer it will take. I put a stick-on temperature strip on the side of my kombucha jar so that I can easily monitor the temperature.
How Long Should I Brew the Kombucha For?
The biggest question I had starting out was, “When is kombucha ready?” The answers you get scouring the internet range anywhere from about 5 to 21 days! This really irritated me! I just wanted someone to tell me the ‘correct’ amount of time to let it ferment!
The answer is that it depends on 2 main things: the temperature you are keeping it at, and the way you like it to taste. Since the taste question is a bit subjective, I will address the temperature question, and assume you will like the taste similar to what I like.
Based on my experience, the following numbers are a rough estimate of the amount of time the first fermentation will take based on the ambient temperature where it is stored.
- 65° – 10 days
- 75° – 7 days (~ ideal)
- 85° – 5 days
For a more detailed analysis check out “Changes in content of organic acids and tea polyphenols during kombucha tea fermentation” published in Food Chemistry (Jayabalan, et al. 2007).
So, after a year of experimenting, here is the answer I would give now: “Store the kombucha at 76° and the 1st ferment will be done in 7 days.”
Most people don’t keep their homes at 76°, so if you keep your house around 72°, then brew it for about 8 days. I find 7 days is a nice number so I can re-brew the same day every week, usually Saturdays.
Where Should I Keep the Kombucha?
Some people emphasize that the kombucha should be in a dark cupboard. While that certainly won’t hurt, I personally have not really found this to be necessary. Just keep it out of the sun; on the counter should be fine.
What To Expect During the 1st Fermentation
The first 2 days, nothing much will appear to be happening with the brew. After about 2-3 days, you will start to see bubbles forming, that is a good sign.
As the days progress, you will continue to see bubbles forming, and the new scoby layer will be developing above the current scoby. You may even get the “hovering scoby” as enough gas forms to actually lift the scoby up as it forms a seal against the jar!

Concerning the taste, begin tasting the brew with a straw at about 6 days. It’s ready when it tastes good to you. Should be sour and not too sweet.
A fair number of people just drink the kombucha after the 1st ferment (the first 6-8 days). If you want a bit of carbonation, move on to the 2nd ferment…
2nd Fermentation
The 2nd fermentation involves added a bit more sugar and sealing off the container. This forces the carbon dioxide that is produced, into the liquid, giving a nice effervescent property to the drink!
This step is really easy. Just pour the kombucha into clean glass bottles for the second fermentation. Make sure the bottles have a tight seal. I used recycled GT’s bottles for a long time, until the caps start to wear out and not seal tight enough. Then I switched over to swing top glass bottles.
Don’t forget: Reserve 2 cups of kombucha to use as the starter tea for your next batch!
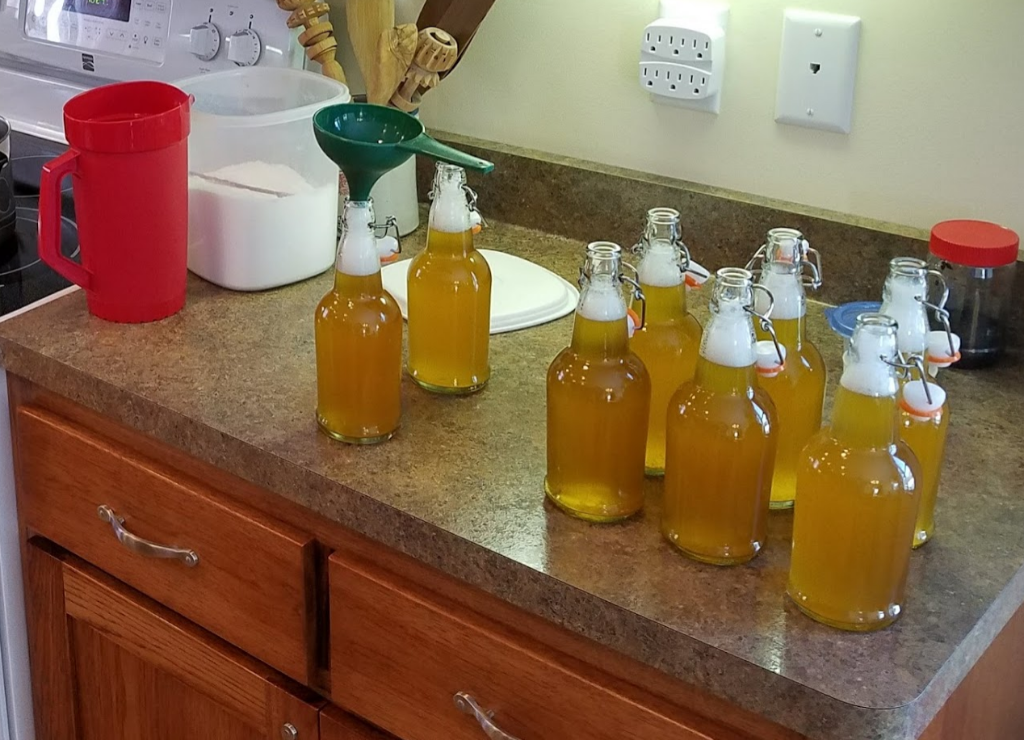
To give it an extra kick of fizz with the same great kombucha flavor, add 1 tsp of sugar to each 16 oz bottle. This will give the yeast something to feed on for extra carbonation.
For a bit of sugar and flavoring in one step, add a bit of fruit to each bottle. Surface area is key, so it is recommended to shred or dice the fruit, if possible.
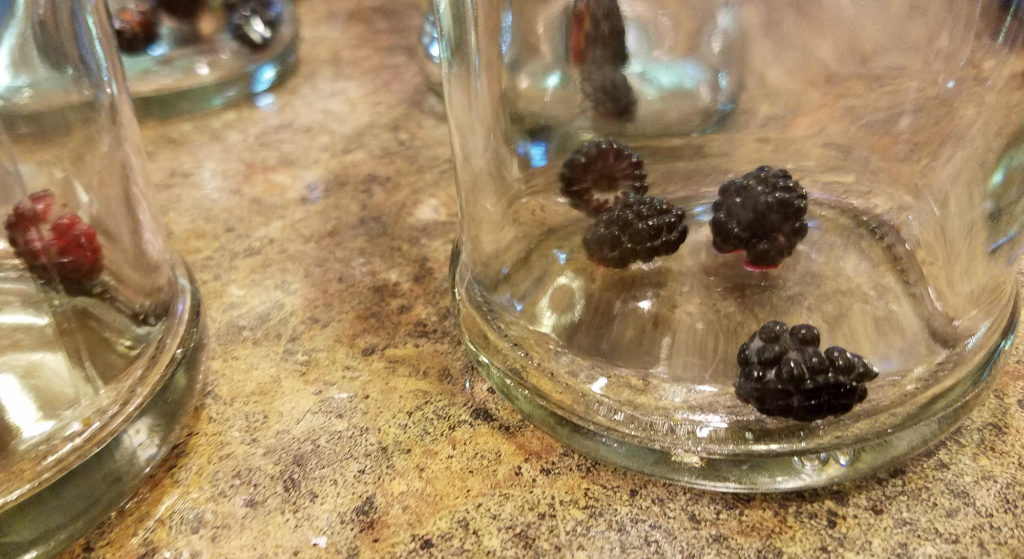
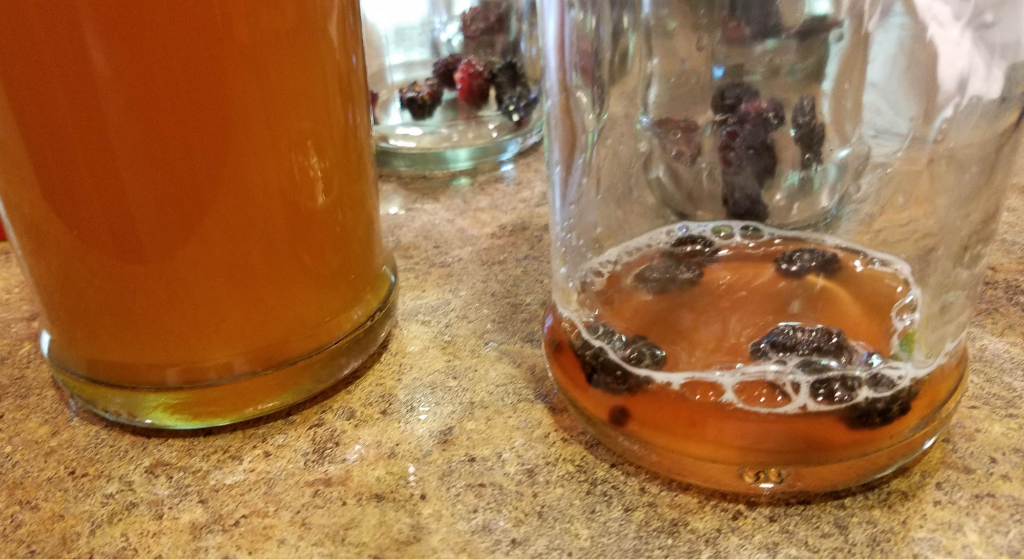
If you don’t have fresh fruit on-hand, a recipe I really like, and have been doing lately is to add about 1-2 tbsp of grape juice to each bottle. It gives a great flavor to the kombucha if you like flavoring.
Now seal the bottles air-tight and let them sit out at room temperature for 2 days.
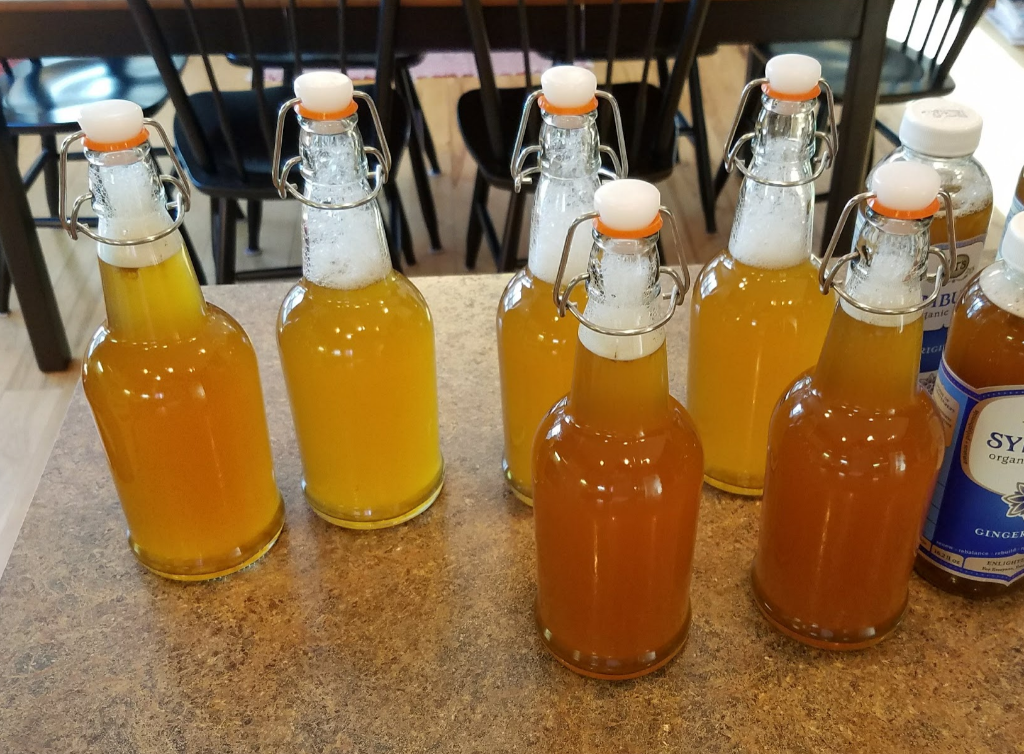
After that, put the bottles in the fridge and, once chilled, they are ready to drink!
Grow Your Own Scoby
I get questions on how to grow your own scoby, so I have added the following section on how to do this.
It is possible to grow your own Scoby from a bottle of commercially available kombucha. I grew one using a 16 oz bottle of GT’s original. This is the flavor of GT’s that I used to grow the scoby. Follow the same recipe given in this article, but use the GT’s as the starter, and skip adding the scoby (since you don’t have one yet, you will grow one!). It will take about 2 weeks. I had heard claims that this was no longer possible with the current formulations of commercially available kombucha, but it worked for me in November of 2018.
The following are pictures I took while growing a scoby from scratch. These photos were taken on days (top row) 3, 4, 6, and (bottom row) 9, 11, and 12.

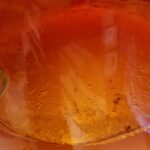

It may take several rounds of brewing to get the scoby to be thick and robust, but after the first round of about 12-14 days, for me, it was about 1/4″ thick or so.
Once again, here are the lists of ingredients and supplies necessary for this undertaking!
Ingredients:
- 8 Tea Bags (4 black tea and 4 green tea)
- or 2 tbsp Loose leaf Tea (1 tbsp black tea, 1 tbsp green tea)
- or 2 tbsp 50/50 kombucha tea blend
- 1 cup white sugar
- 2 cups kombucha (starter)
- 1 Scoby (get one from a friend, buy one off Amazon, or make your own (see end of article for instructions))
- fresh water (no fluoride or chlorine – filter it if necessary)
Supplies:
- 1-gallon glass jar
- large pot
- re-sealable bottles (~6 bottles)
- temperature strips (optional)
Addendum
A few notes on brewing kombucha tea.
- Try to use high quality ingredients. When you are first figuring things out, it is okay to go with cheap tea bags (Lipton comes to mind – black tea, green tea), but as you progress, using loose leaf teas will make a pleasant increase in quality of your product. One thing you don’t have to worry about is the sugar. White sugar is fine.
- Also, a lot is made of what type of tea to use. I experimented with this quite a bit as well, and while the taste will change, in general I always came back to the half black and half green tea. It just seemed to taste the best. Avoid herbal teas, as they don’t have caffeine which is needed by the kombucha.
- Use filtered water if possible. City water may not be a good choice due to the additives such as fluoride and chlorine. While good for you, they will not be good for your kombucha.
- The Scoby is a culture of bacteria and yeast. It will grow from batch to batch, with the new layers forming on the top. A good thickness is about 1 inch thick. After yours achieves that thickness, peel off the bottom layers and throw them out.
- Keep your operation as clean as possible. Wash out the brewing jar every time you make a new batch. Also, make sure the scoby only comes into contact with clean surfaces. If any sort of mold grows on your kombucha scoby, toss it out and start over. Mold forms on top of the scoby and is generally dry and sometimes hairy…
- Don’t use anti-bacterial soap, and if you do, make sure it is completely rinsed off before putting it in contact with your kombucha. The Scoby is bacteria! So anti-bacterial soap will harm it!
Thanks for reading, and I hope you found this helpful!
Did you try this recipe? What recipe do you prefer? Leave a comment!