How to Change Transmission Fluid – Toyota Sienna
This is a quick picture guide on how to change the transmission fluid in a Toyota Sienna. This will go over the standard drain and fill procedure to flush the ATF in the transmission.
Things to Know Before You Start
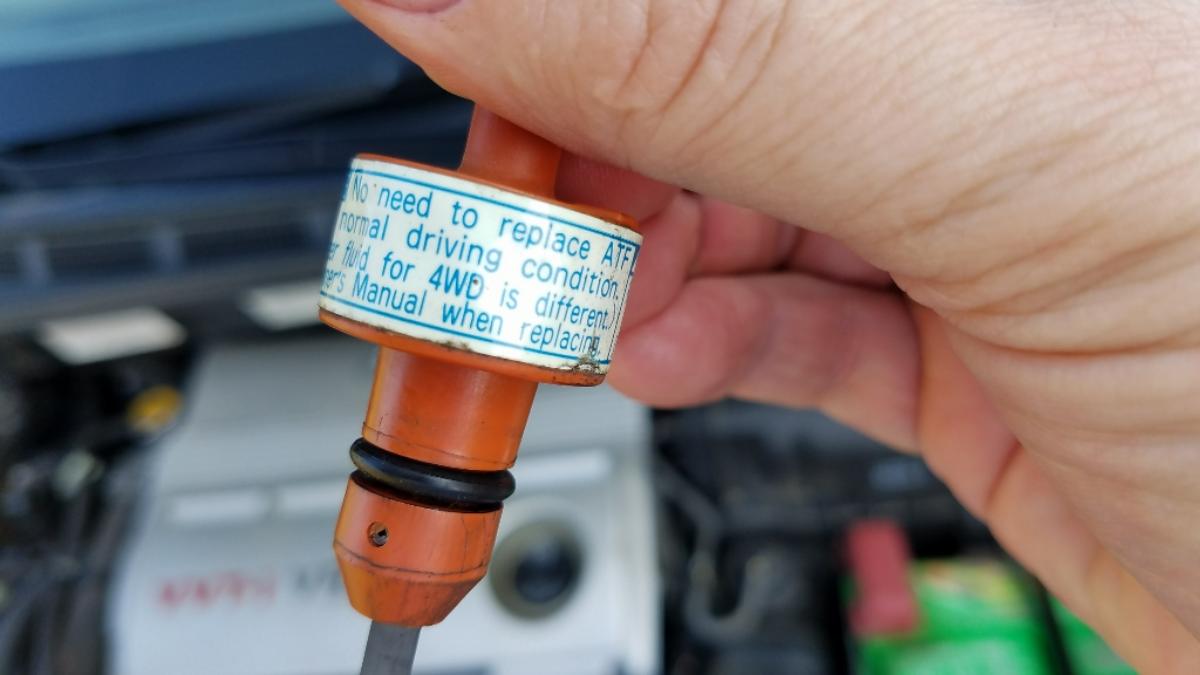
Before beginning, it is fair to mention that according to the Sienna owner’s manual, under normal driving conditions, it is not necessary to replace the automatic transmission fluid (ATF)…at all. It even says so on the ATF dipstick.
Of course, this begs the question, what are ‘normal driving conditions’?
Maybe it is easier to describe abnormal driving conditions… These would include driving that is particularly hard on a transmission, such as frequently driving in mountainous terrain, towing heavy loads, or spending inordinate amounts of time in stop and go traffic. These sorts of conditions cause extra wear and tear on the internal components of the transmission and the small bits of material that are worn off end up in the transmission fluid. When you check the ATF level and condition, if you see very dark fluid or tiny bits floating in the fluid, it is probably a good time for a change.
Note: PracticalMechanic.com is reader-supported. When you buy through links on our site, we may earn an affiliate commission – at no cost to you. Thank you for your support!
Another thing to mention is that this drain and fill will not remove all of the ATF from the system. In fact, less than half will drain out. So for a more complete flush, you may need to repeat this process after driving the vehicle about 100-200 miles or so. In this way, it is not a true flush (which Toyota discourages), rather it continually dilutes the ATF with fresh fluid, so that after 2-3 drain and fills, it is mostly fresh fluid.
Okay, so let’s assume you have checked your ATF level and condition, and determined that the fluid should be changed. Okay then, let’s get started!
Tools and supplies needed:
- socket wrench (3/8″ drive)
- Hex Drive – 10mm (3/8″ drive)
- rag for wiping up
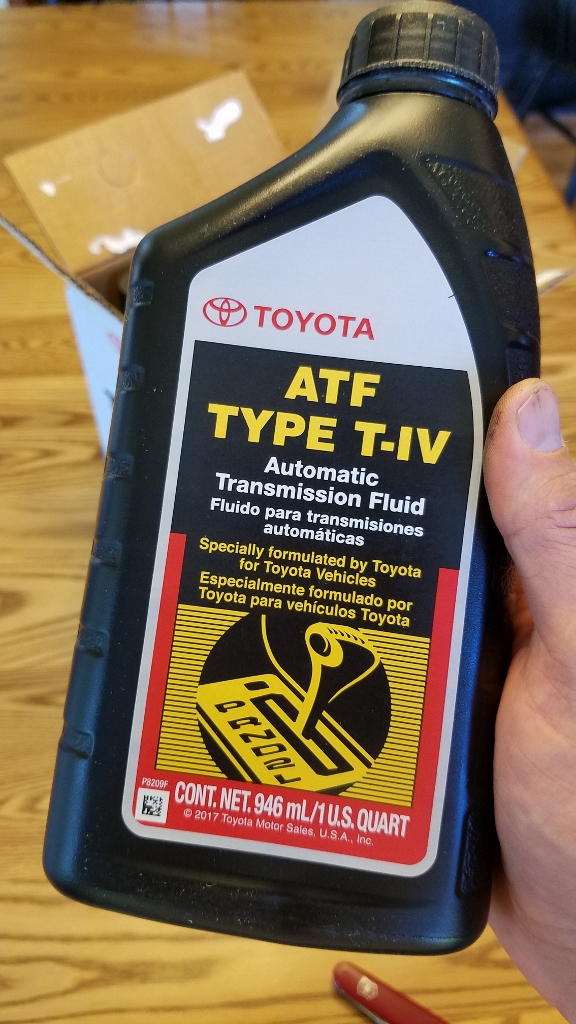
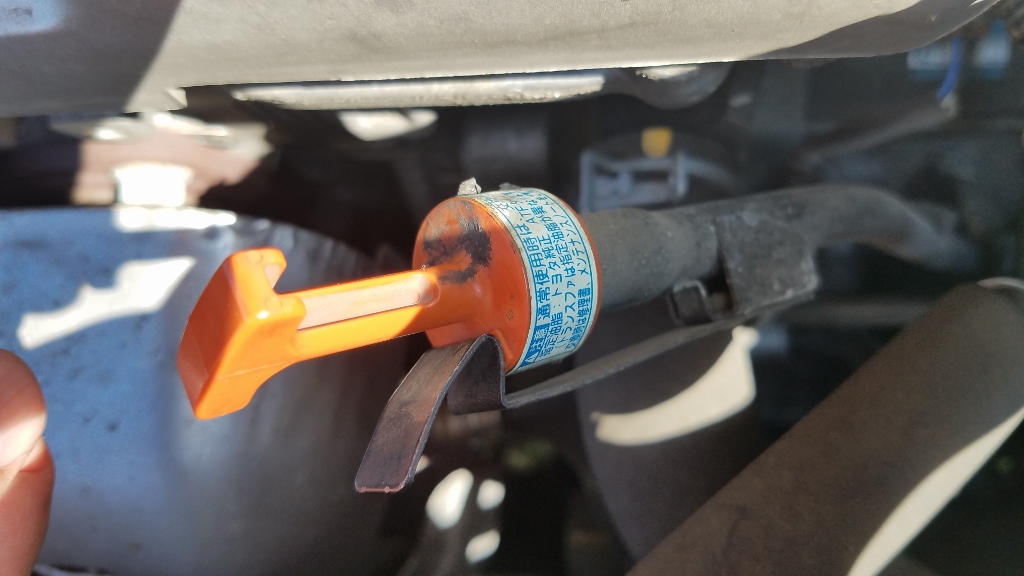
- 4 qts of Toyota type T-IV ATF (1 qt) or (case of 6 qts)
- replacement crush washers (part# 90430-18008)
- drain pan
- flexible funnel
- torque wrench (3/8″ drive)
Drain and Fill Procedure for a Sienna
These are the steps that will be covered in this picture guide:
- Acquire at least 4 qts of Genuine Toyota type T-IV ATF.
- Warm up the vehicle for at least 15 minutes.
- Turn off the vehicle.
- Using a drain pan, remove the ATF drain plug using a 10mm Allen wrench (hex drive).
- Allow the ATF to drain into the drain pan.
- Replace the crush washer then re-install the drain plug to 36 lb-ft.
- Pop the hood and remove the dipstick.
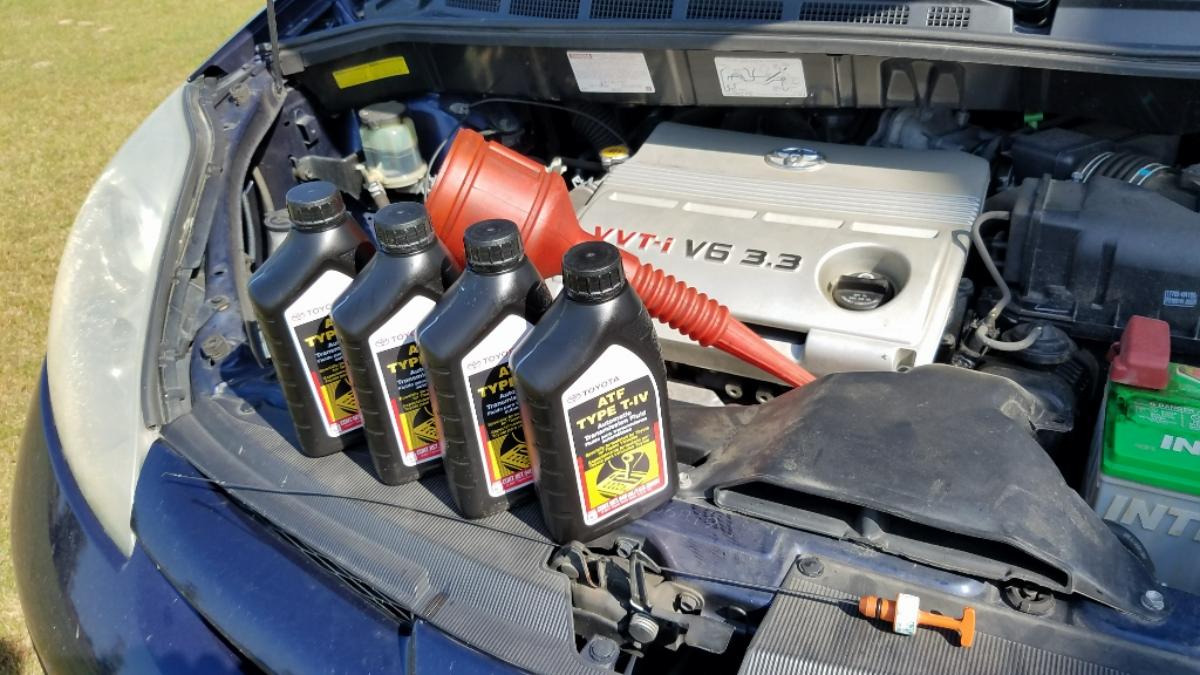
- Using a flexible funnel, add 4 qts of Genuine Toyota type T-IV ATF into the dipstick port.
- Replace the dipstick.
Detailed Step-by-Step ATF Replacement
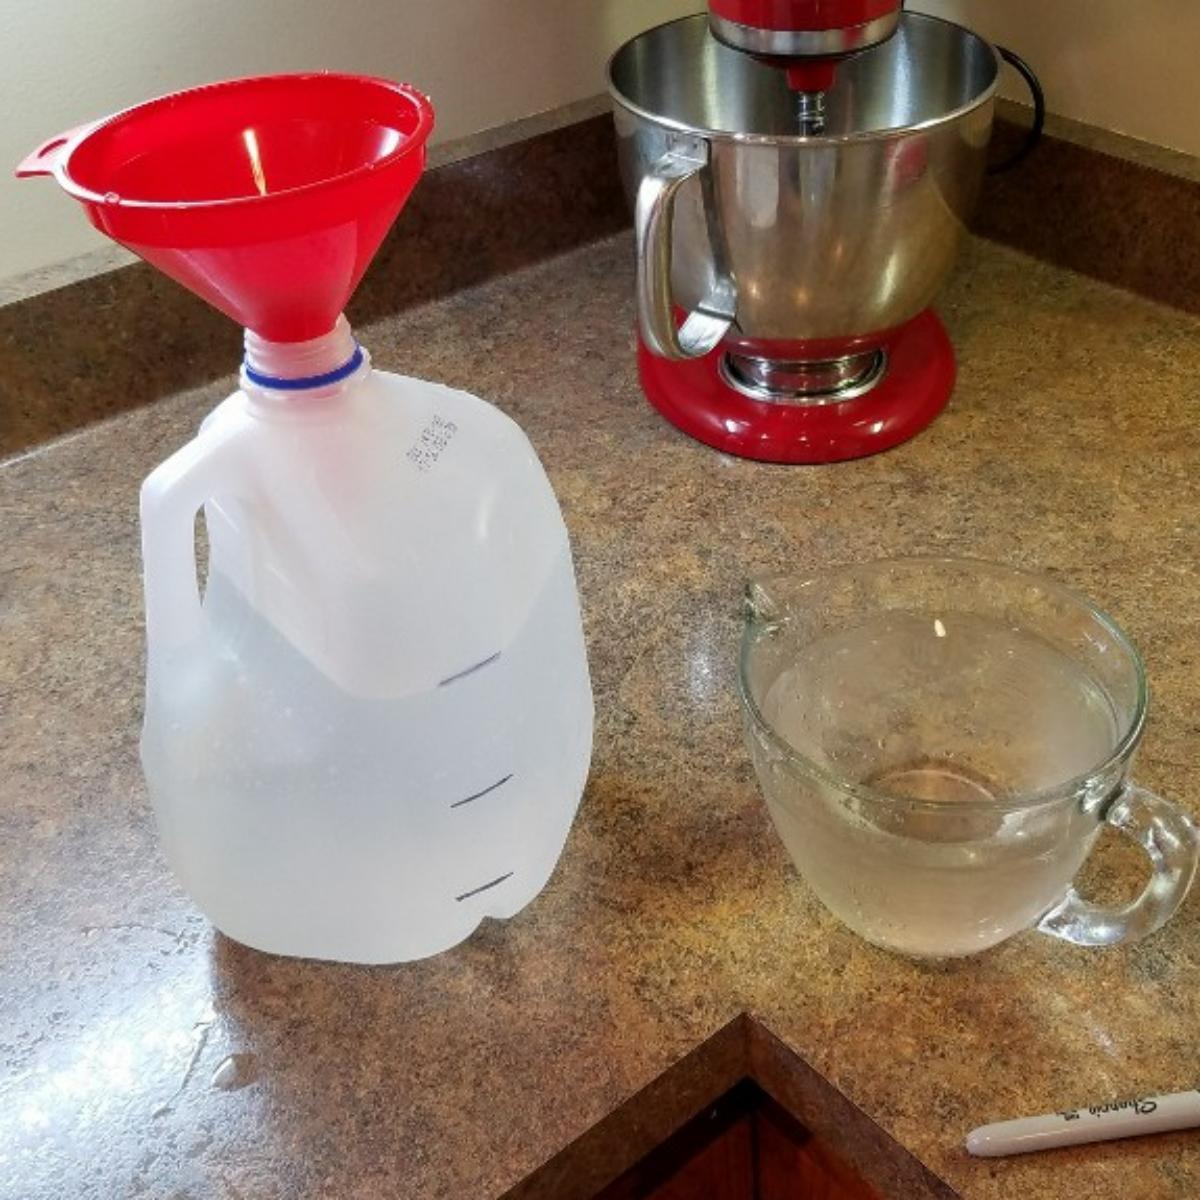
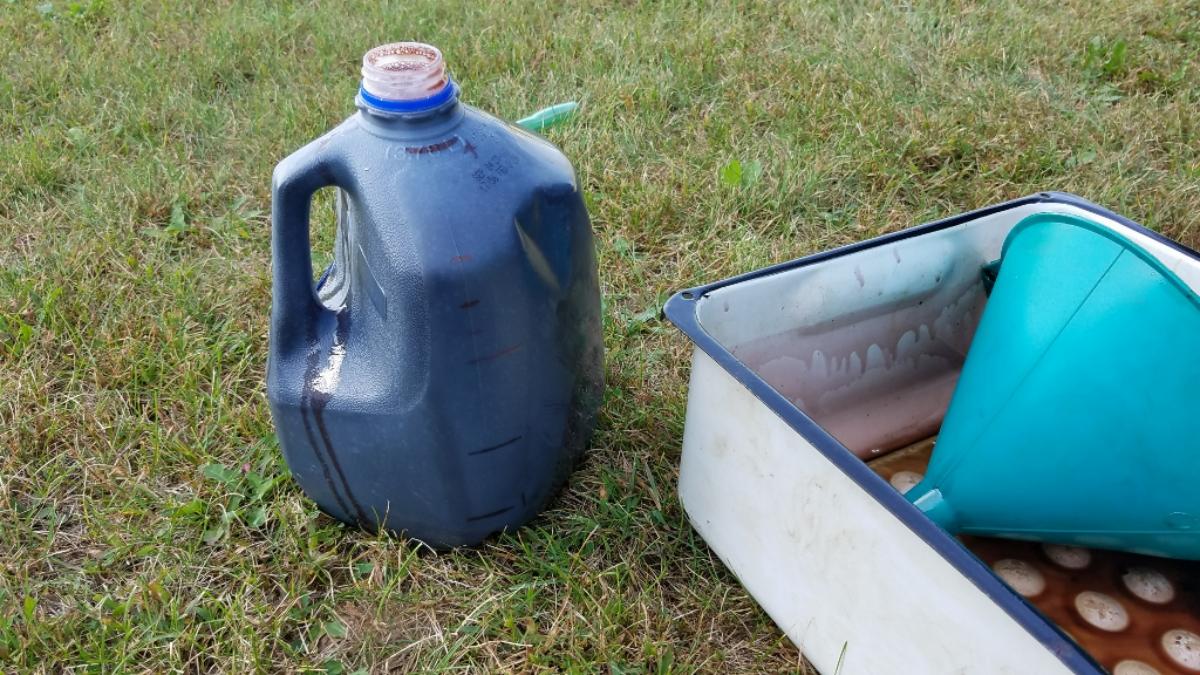
The first step is to do some preparation work. It can be handy to know exactly how much fluid you end up draining from the transmission, so that you know exactly how much you should add. If you have a nice graduated container of some sort, use that. If not, you can make your own with a gallon ice-cream bucket or milk jug. Fill it with a quart at a time, then mark the side of it with a Sharpie.
Also, before you drain any fluid, make sure you have the correct amount of fresh fluid on-hand. It will take about 3 1/2 to 4 quarts. At the time of this writing, a case of 6 qts cost the same as 4 individual qts, so that is what I bought.

Okay, once you have the supplies, we’re ready to move on to the next step, which is to get the vehicle warmed up and the transmission fluid well-mixed. So take it for a drive of at least 15-20 minutes or so, making sure to go through all of the gears, including reverse. Then, park the vehicle on a level surface, turn it off, and set the parking brake.
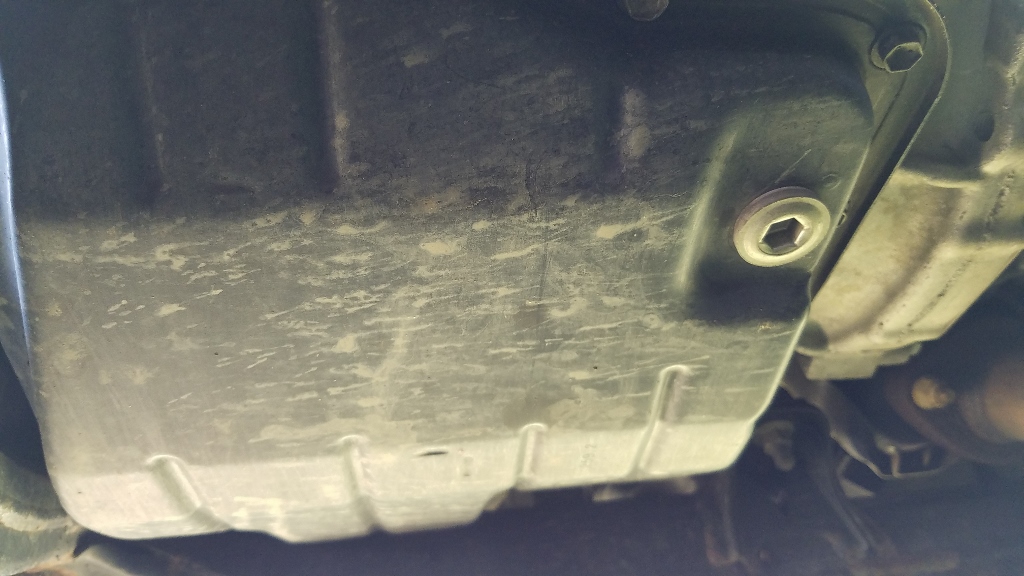
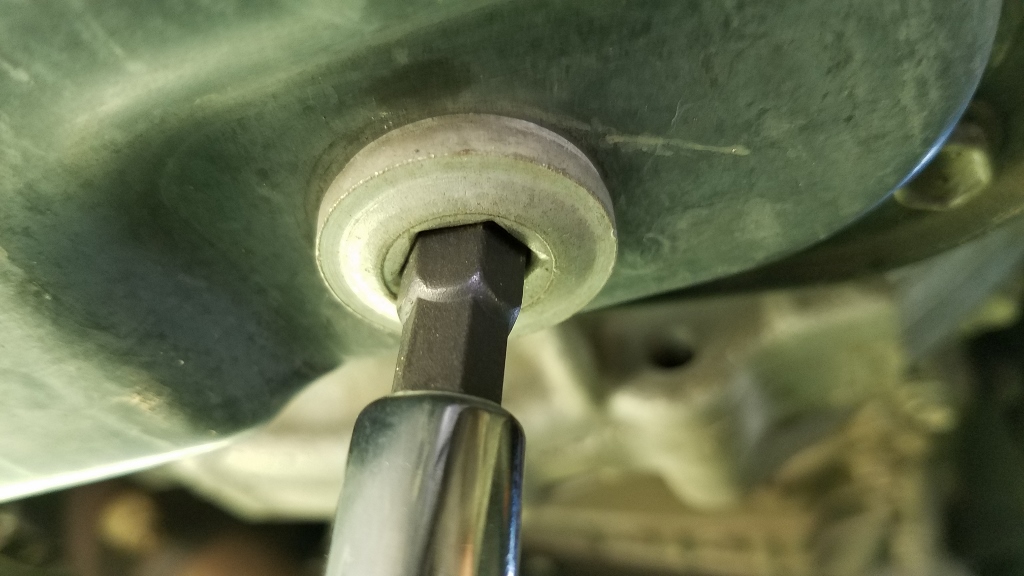
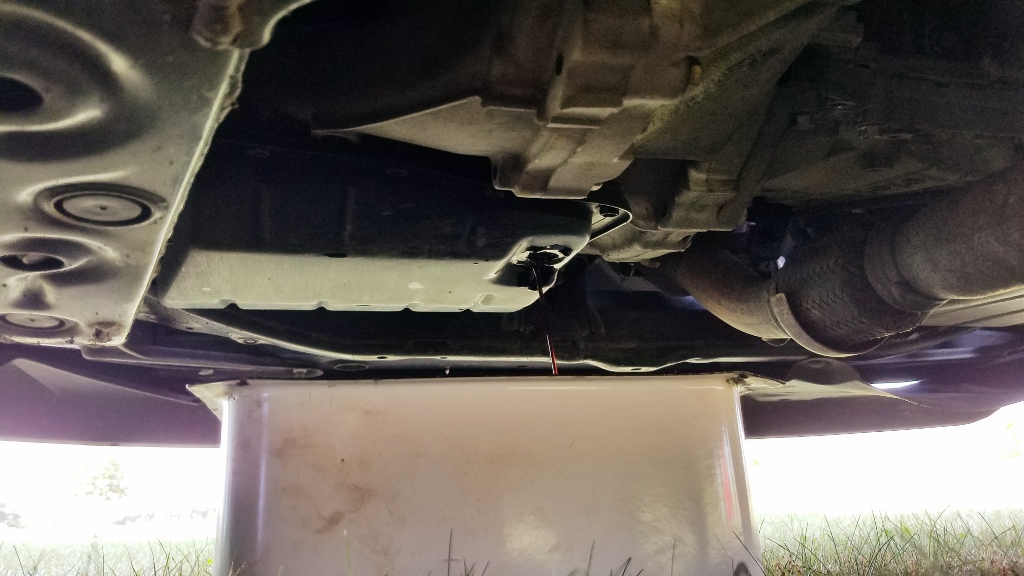
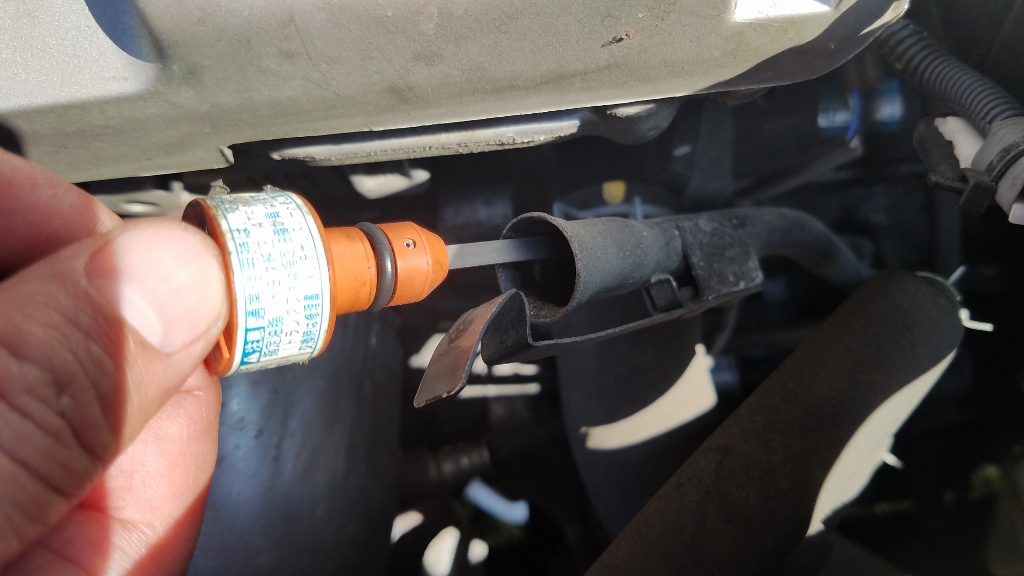
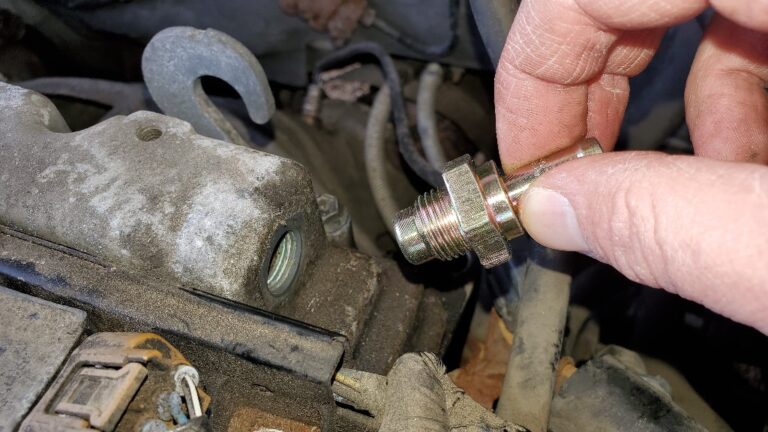
Next, crawl underneath the front end of the vehicle and locate the transmission fluid pan, shown in the following photos, and find the drain port. It has a 10 mm hex plug, as shown.
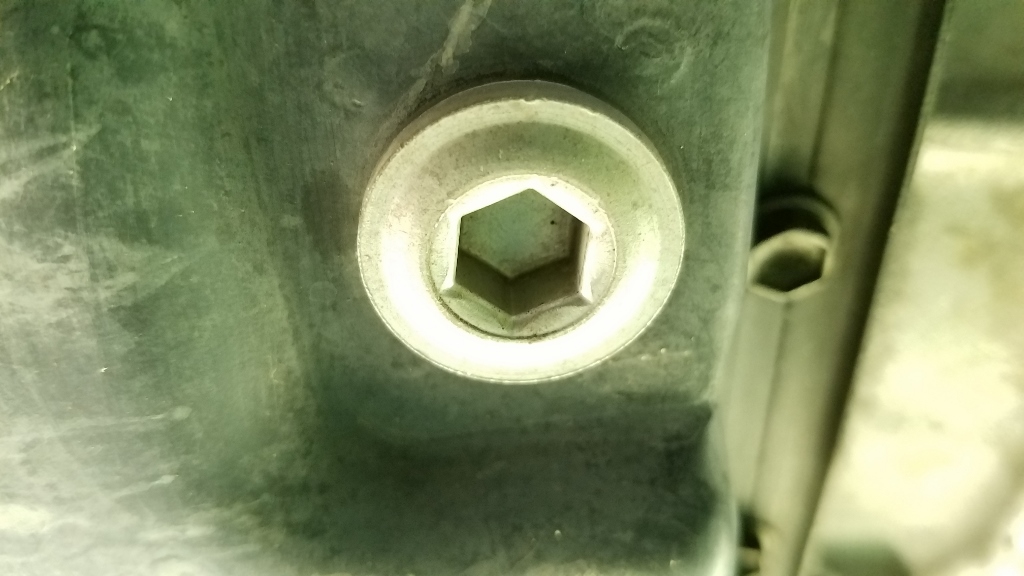
Take your 10 mm hex bit in your socket wrench and fit it in there. (If you don’t have a 10 mm, a 3/8″ will work in a pinch, but obviously it is not ideal.)
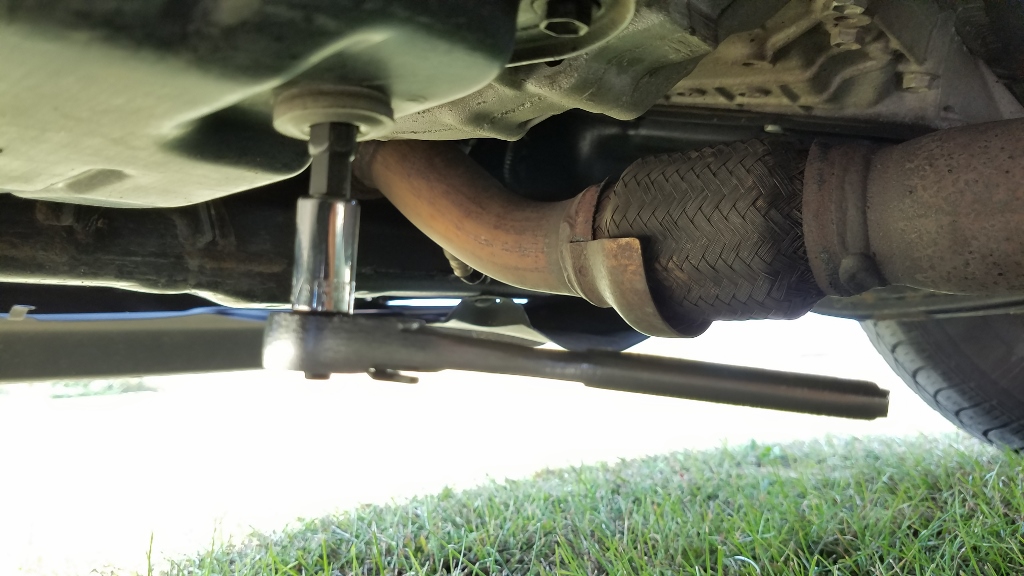
Position your drain pan underneath the wrench and then go-ahead and loosen the plug. Fluid will begin draining out almost immediately.
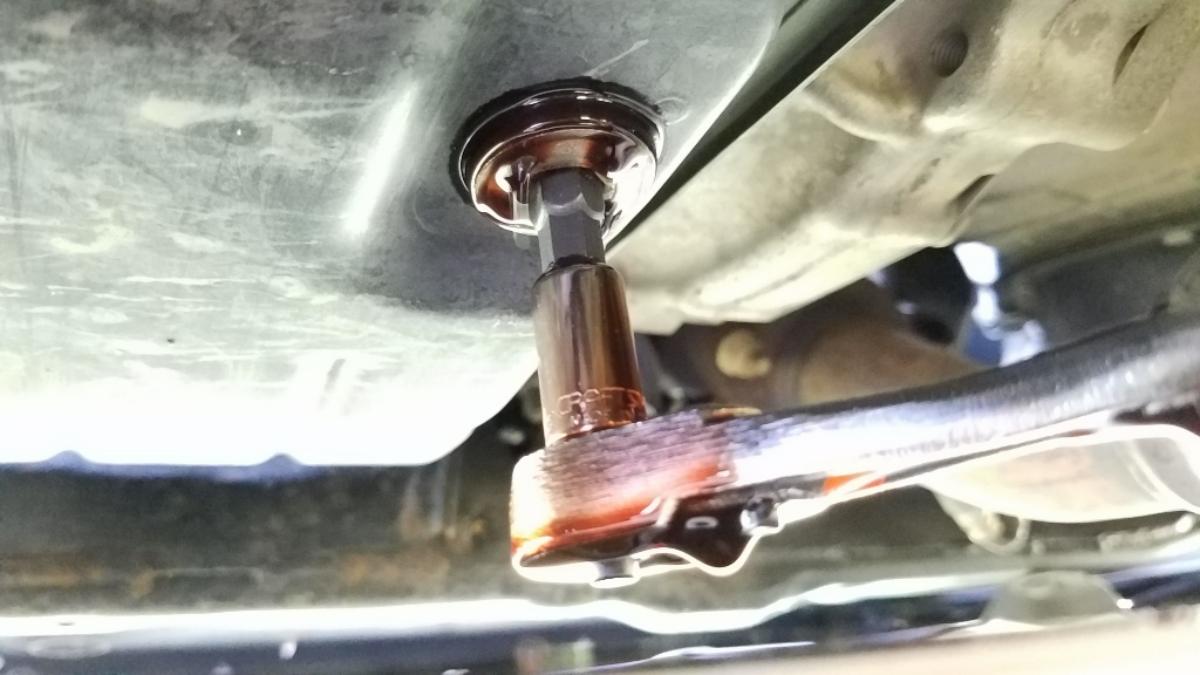
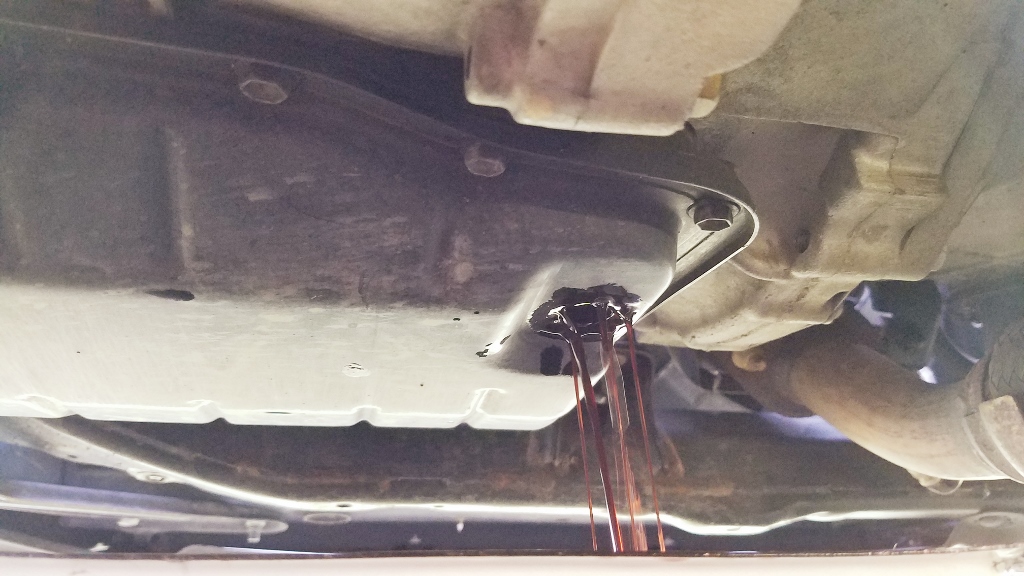
Give the fluid some time to drain out.
While the fluid is draining, let’s inspect the drain plug. Check for any silt that has accumulated. I found particles in mine that were somewhat disconcerting…
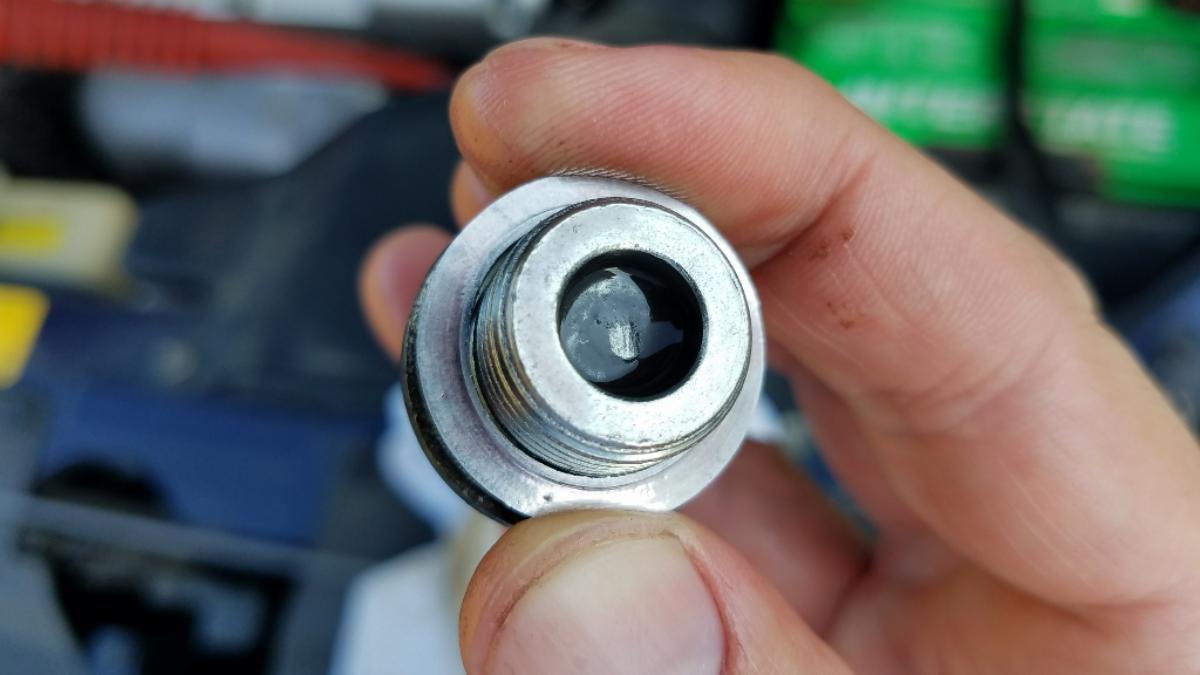
Next time a drain and fill is done, it may be wise to drop the pan as well and clean off the magnets…
But the particles were small and no large chunks were detected, so I decided not to do this at this time. Anyway, go ahead and clean off the drain plug and make sure to replace the crush washer. This is actually a pretty important step. You are a lot less likely to experience a slow dripping leak if you replace the old crush washer. Besides, these things are really cheap anyway.

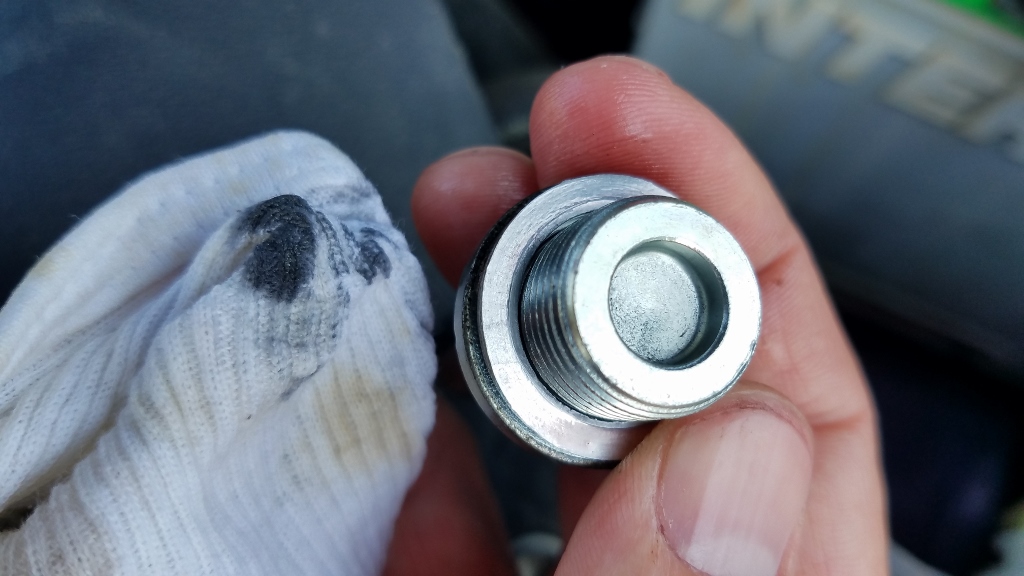
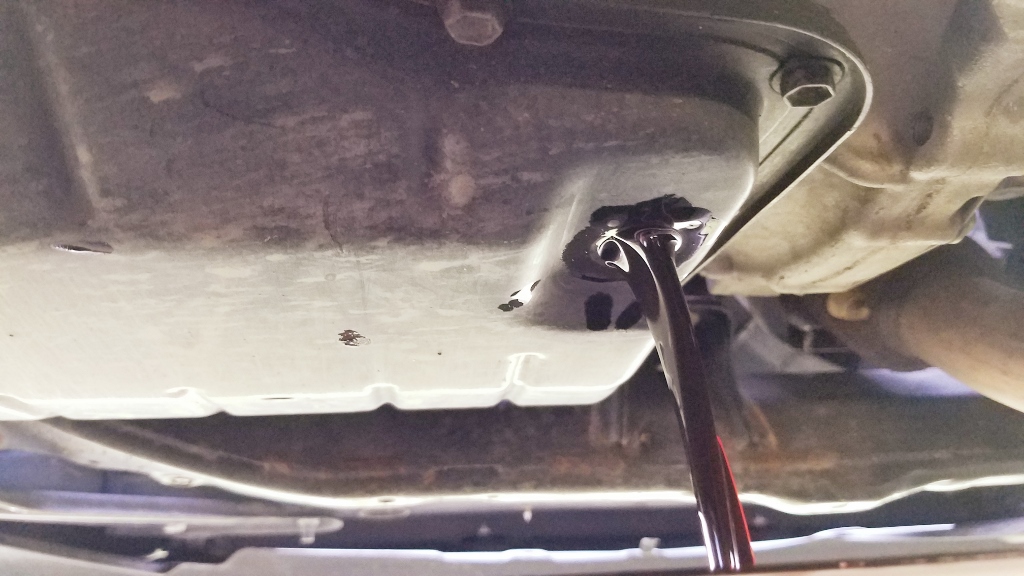
Once the fluid has finished draining, put the drain plug back in and tighten it up. Use a torque wrench to tighten it to 36 lb-ft. Also, clean up the drain area with a rag, partly to be neat, but more importantly, this will help you determine if there is a leak later on!

Pour the fluid from the drain pan into your graduated container to determine the amount that came out. In my case it was almost exactly 4 qts (note: this value can vary depending on how level the vehicle is).
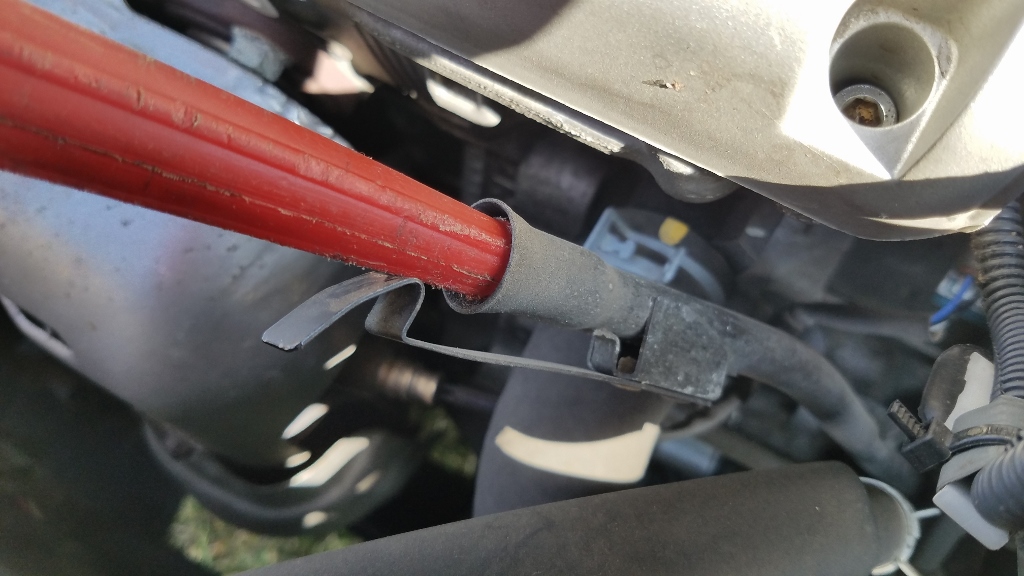
Now it is time to put in the fresh fluid. Pop the hood and prop it up.

Take out the ATF dipstick and set it aside.

Then, put your flexible funnel into the fill tube which is the same as the dipstick tube.
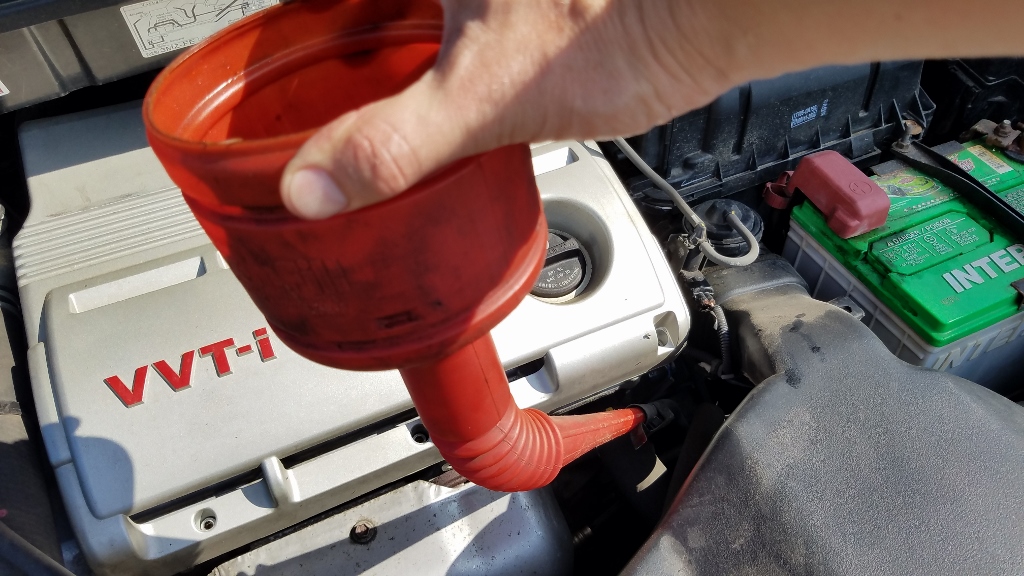
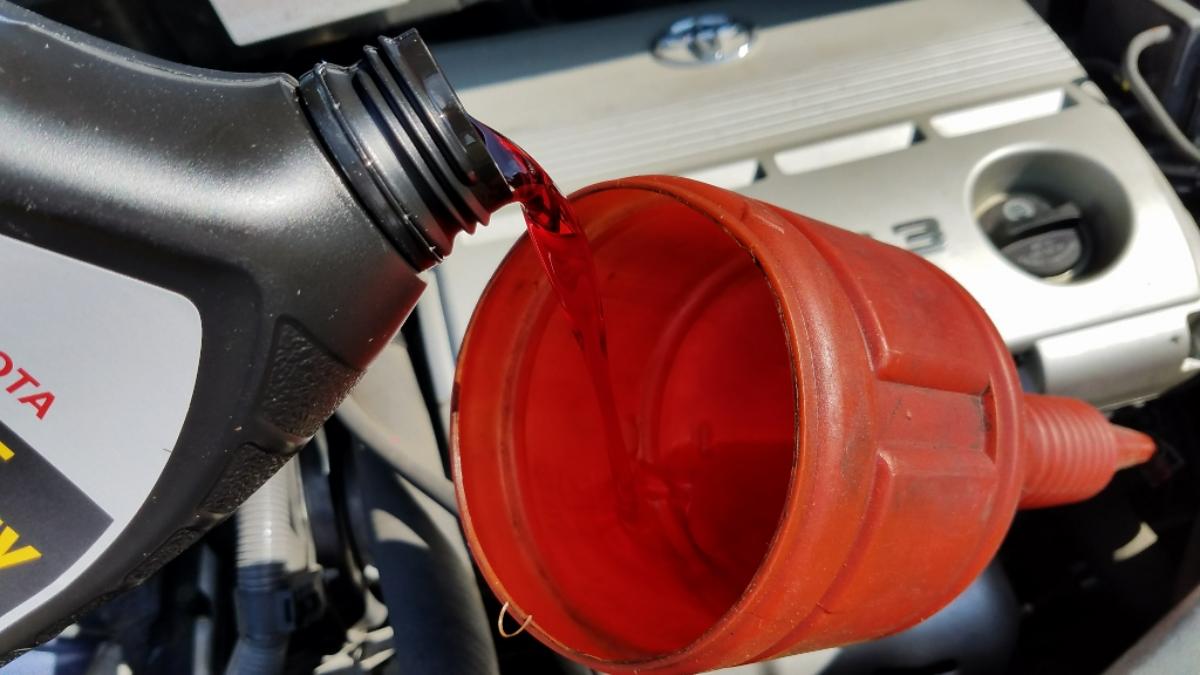
Get the fresh fluid handy as well. Make sure it is compatible with Toyota T-IV automatic transmission fluid.

Pour in the new fluid. Make sure to put in the same amount that you drained out.
Once you have poured in the fresh fluid, clean off the dipstick and re-insert it. Make sure to engage the locking clip.
Now, start the vehicle and let it run for a little while. Then with your foot on the brake, cycle through each of the gears, several times.
Turn off the vehicle and check for leaks. The most common area for leakage is the drain plug. Make sure there are no drips. If there are, re-torque the drain plug.
Next, take the vehicle for a short drive taking it up to highway speeds. Also try engaging reverse as well. Check again for leaks. With the vehicle running, also check the ATF level using the dipstick, and add fluid if necessary.
That’s about it! Thanks for reading and I hope this was helpful!
For more maintenance articles on Toyota Siennas, check out these posts!
Tools and supplies used:
- socket wrench (3/8″ drive)
- Hex Drive – 10mm (3/8″ drive)
- rag for wiping up
- 4 qts of Toyota type T-IV ATF (1 qt) or (case of 6 qts)
- replacement crush washers (part# 90430-18008)
- drain pan
- flexible funnel
- torque wrench (3/8″ drive)


So, I mistakenly topped off my 08 Sienna ATF with 12 oz of SAE 75W-140 gear oil. Am I in trouble? Should I flush (drain) and start over with Dexron IV or other standard ATF?
This is not good. Definitely get as much out as you can. Don’t drive it with gear oil in the tranny! Good luck!
Thank you from North Pacific ….. HAPPY NEW YEAR !!!!!!!
Thanks, Ngang!
Just did mine and great write-up. You may also want to link to the WS ATF transmission fluid, which is Toyota’s latest standard. I used that on my 2006 Sienna. Also, removing the old crush washer from the plug can be a bit sporty, so allocate some extra time for that, or if you want to speed things up, buy a second plug so you’re ready for a quick swap.
Thanks for the tip!
Worked it as recommended and I’m having a fine drive now with my sienna.
Thanks
I really thank and appreciate the time and effort they put on identifying the models of every Toyota sienna and it’s information making it super easy and helpful.