How to Overdub Tracks – Zoom H5 – The Easy Way
Are you struggling with the overdub feature of the Zoom H5? You definitely CAN overdub tracks while listening to your previously recorded tracks with the H5, but the procedure to do it involves a lot of steps. It does get easy once you get the hang of it!
Thinking about getting a Zoom H5? Read my Zoom H5 Review from a Musicians Perspective!
Do you like the Zoom H5, but need something a little more portable? Read my Zoom H2n Review!
Overview
In this guide, I will go over what I would consider to be the most common use-case of the overdub feature, but of course this same procedure can be used for other forms of overdubbing.
Common Use-Case for Overdubbing on the H5
The following is a common use-case for overdubbing with a Zoom H5 recorder.
- You turn on the H5, set the gain, and record a base track of a song using the X-Y Stereo capsule. This base track includes all or at least the key parts of the final song. It may also include a time-keeping click.
- While listening to the base track with monitoring headphones, you record a single track again using the X-Y Stereo mics, for example the rhythm guitar part.
- Next, while listening to the base track with monitoring headphones, you record another single track with the X-Y Stereo mics, for example the vocal track.
- You continue on in this way recording the rest of the individual tracks, such as percussion, lead guitar, keyboard, etc…
- When you are finished recording all of the parts, you copy all of the individual WAV files from the H5 into your DAW for processing and mixing.
Slight variations of this use-case may be that instead of recording from the X-Y mic capsule, you would like to record from either Channel 1 or Channel 2, or both. This is also possible. The main thing to keep in mind is that at least one of the channels must be available as a playback channel if you want to be able to monitor the base track, and in the case of the Left/Right (X-Y channels) these cannot be separated, so they act as a single channel in playback mode.
So, for example, the most channels that you can record to at the same time, while listening to a previously recorded track, is three, as long as the track you are listening to has been mixed down to a single channel, and is played through either Ch1 or Ch2.
Overdubbing Tracks on the Zoom H5 – Step by Step
Here is a quick overview, and I will go into detail with pictures after this.
A couple of notes on the terminology I’m using:
- When you see “Enter” this refers to pressing inward on the toggle switch on the right side of the H5.
- “Menu” refers to the menu button on the right side of the H5.
- A symbol like “>>” means that you should navigate to the next selection using the toggle up/down switch.
Step by Step Instructions
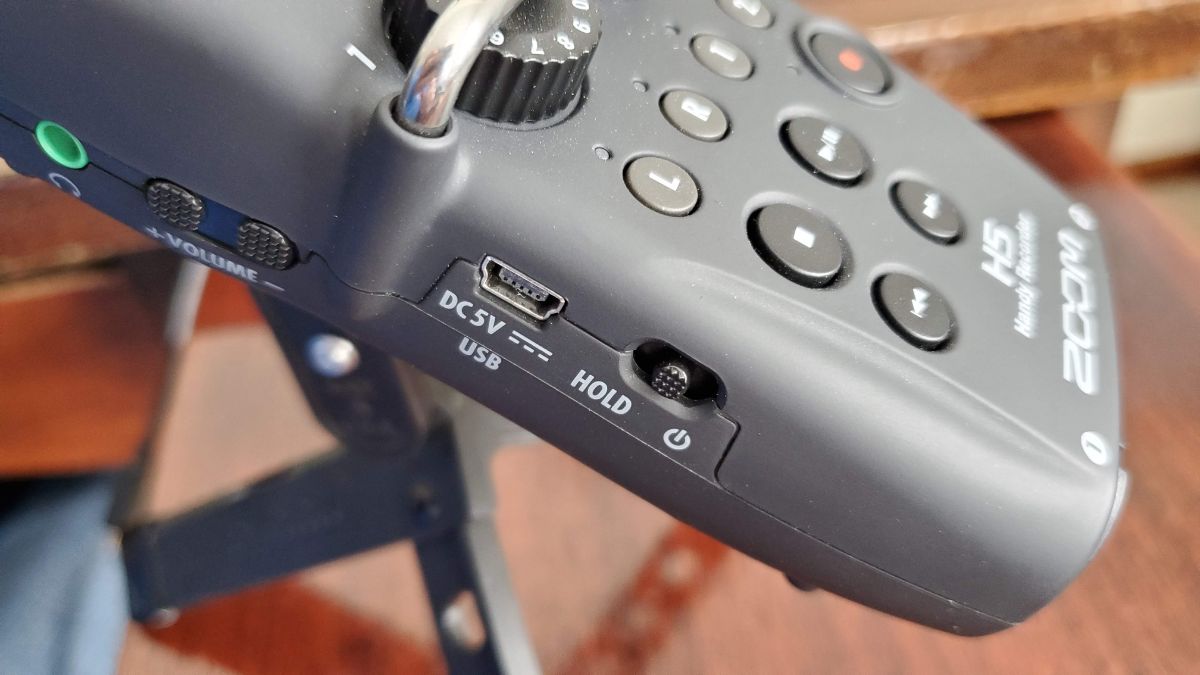
- Turn on the Zoom H5 by sliding the power switch down and holding for several seconds.
- Press Menu >> Rec Mode >> MultiFile.
- Press the L or R button (both L and R indicator lights will turn red, if not, press again until red).
- Press the Record Button and record your Base Track, press Record again to stop recording.
- Press Menu >> Project >> Select the Last Project >> Mixer/Overdub >>Mixer/Overdub.
- (The word “Overdub” appears on the screen, and the L/R indicator lights turn green)
- Toggle up/down to select the L/R Channels on the screen (brackets appear around L and R).
- Press Enter >> Select >> None.
- Press Menu.
- Press the 1 and 2 buttons simultaneously to combine them.
- Toggle up/down to select the 1/2 Channels on the screen (brackets appear around 1 and 2).
- Press Enter >> Select >> Zoom*.WAV (or whatever the last project name is) >> Enter
- (The 1 and 2 Channel indicator lights will turn green)
- Press Menu.
- Press the L or R button until both L and R indicator lights have turned Red.
- Press the Record button to record the 2nd track, press Record again to stop recording.
- Press the L or R button 2 times until both L and R indicator lights have turned Red.
- Press the Record button to record the 3rd track, press Record again to stop recording.
- Press the L or R button 2 times until both L and R indicator lights have turned Red.
- Repeat Steps 16-17 to record as many tracks as you want.
- To Exit the overdubbing, press the Menu button 5 times.
Detailed Steps with Pictures
In the following description, I’ll walk through each step with pictures.
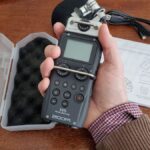
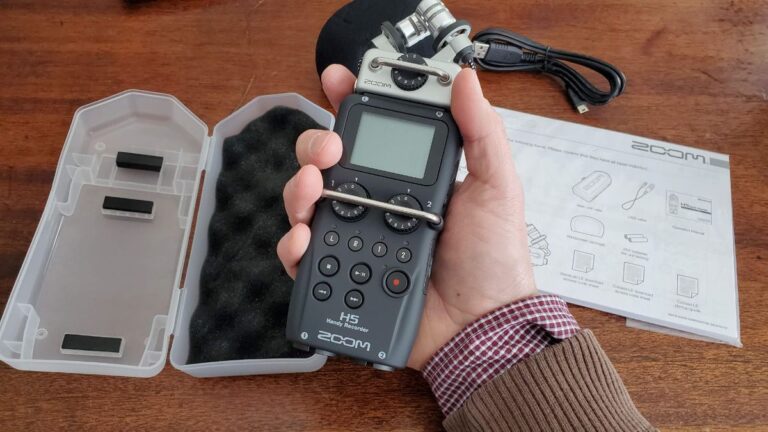
01 – Power on the H5
Turn on the Zoom H5 by sliding the power switch down and holding for several seconds.
02 – Put the H5 into Multi-File Mode
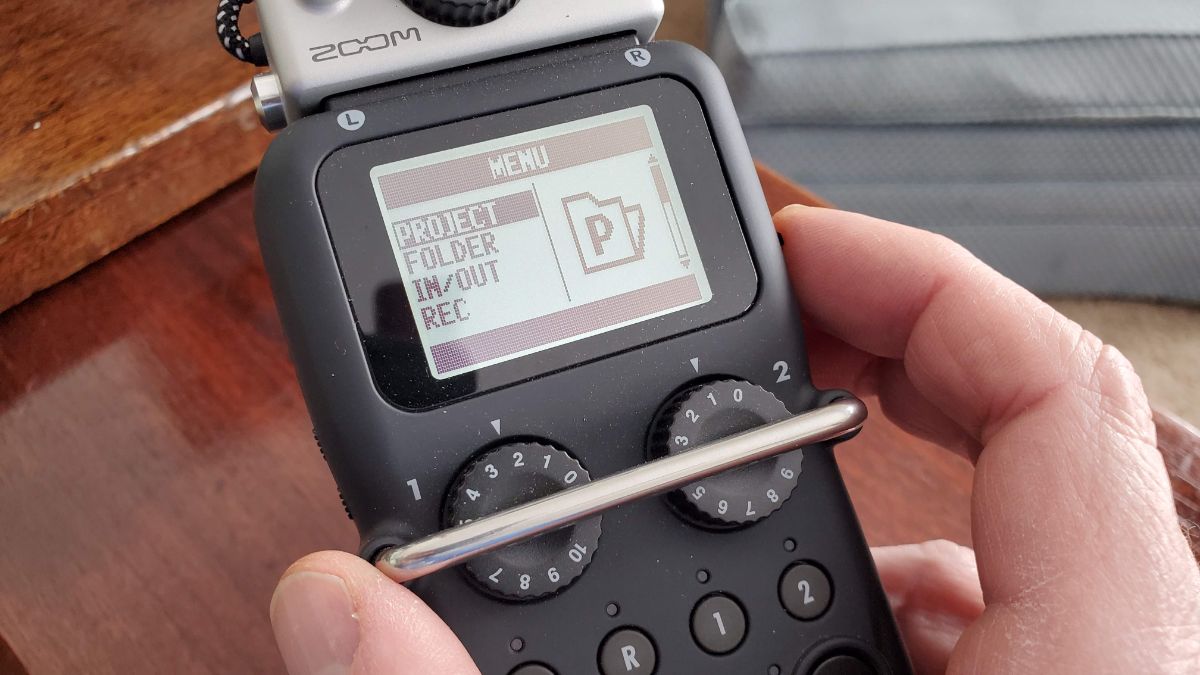
In order to use the overdub feature, you must be in Multi-File mode (as opposed to Stereo mode). To get change modes, press the Menu button.
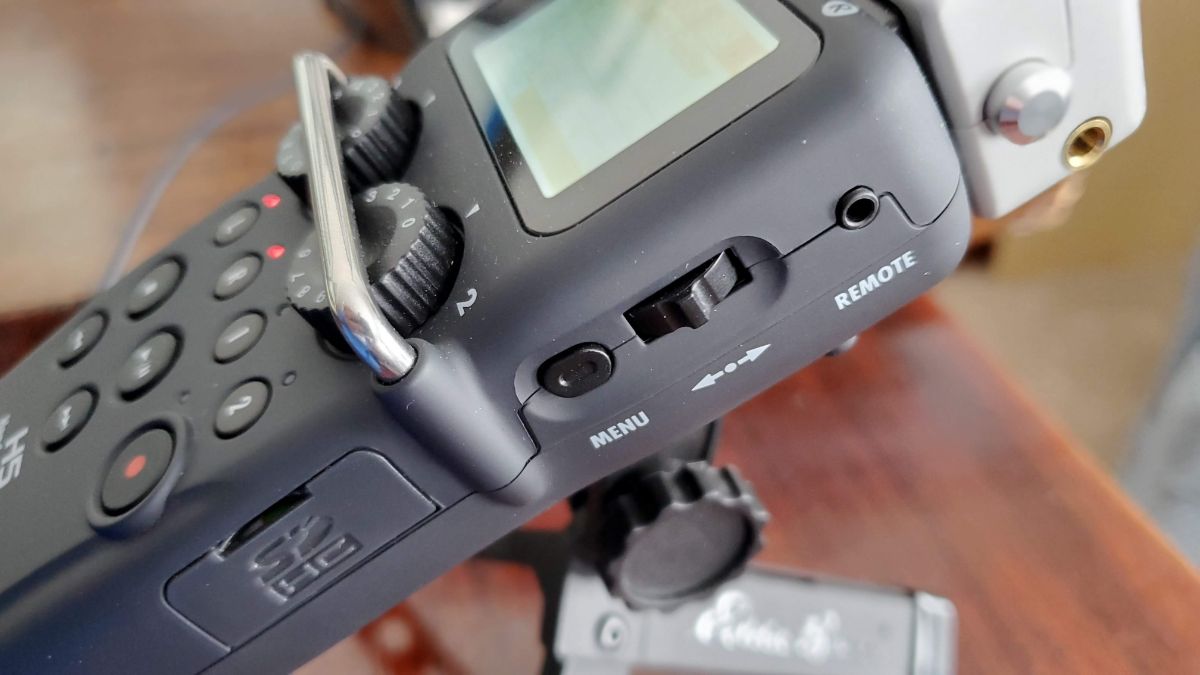
Navigate down to Rec Mode and press Enter.
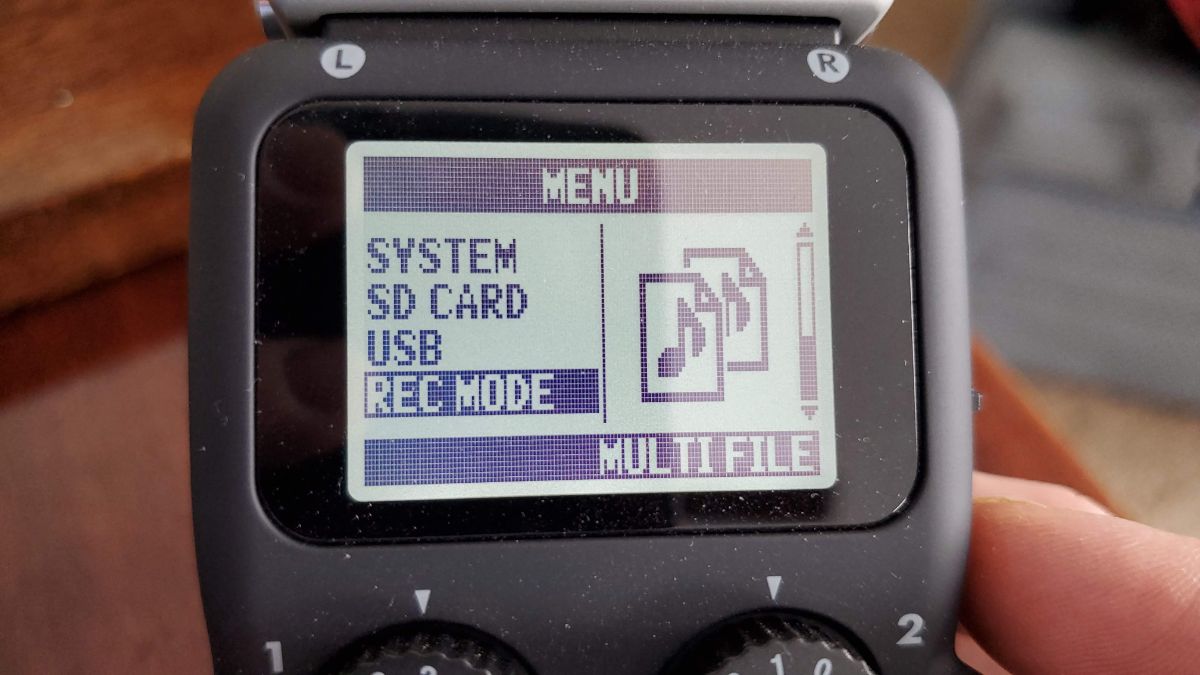
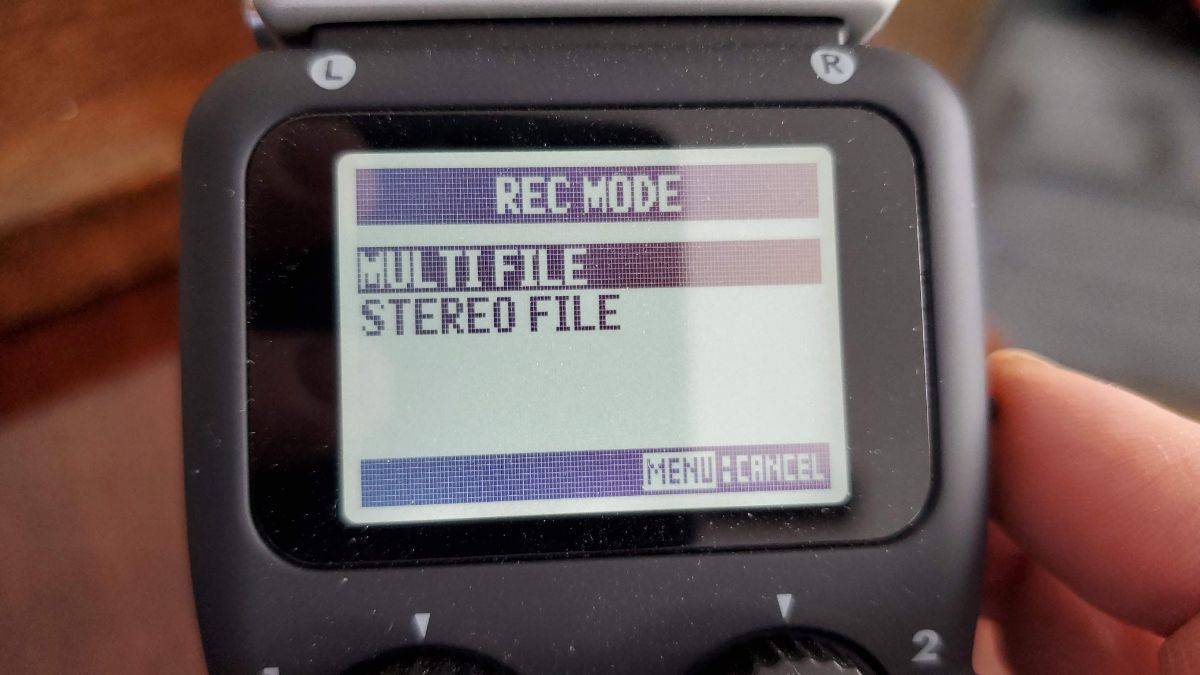
Then select MultiFile and press Enter.
03 – Activate the X-Y Microphone Module
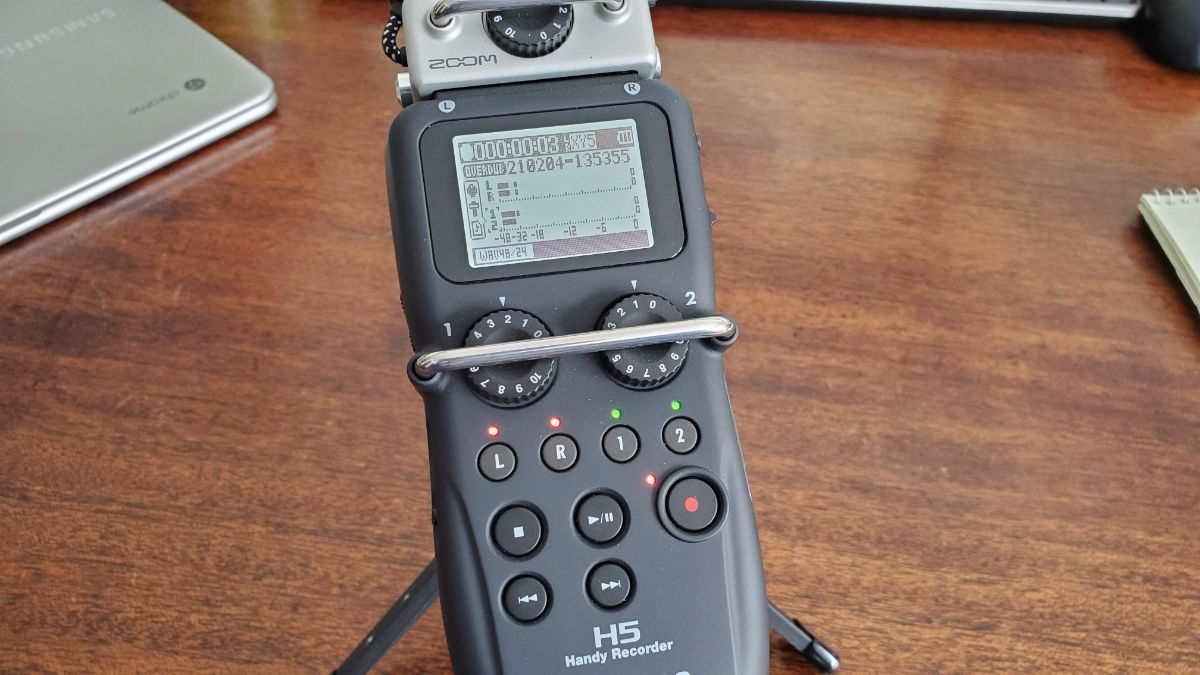
Next, active the X-Y microphone module to get it ready for recording. To do this, press either the L or R button. When you do so, the red indicator light will illuminate above both the L and R buttons.

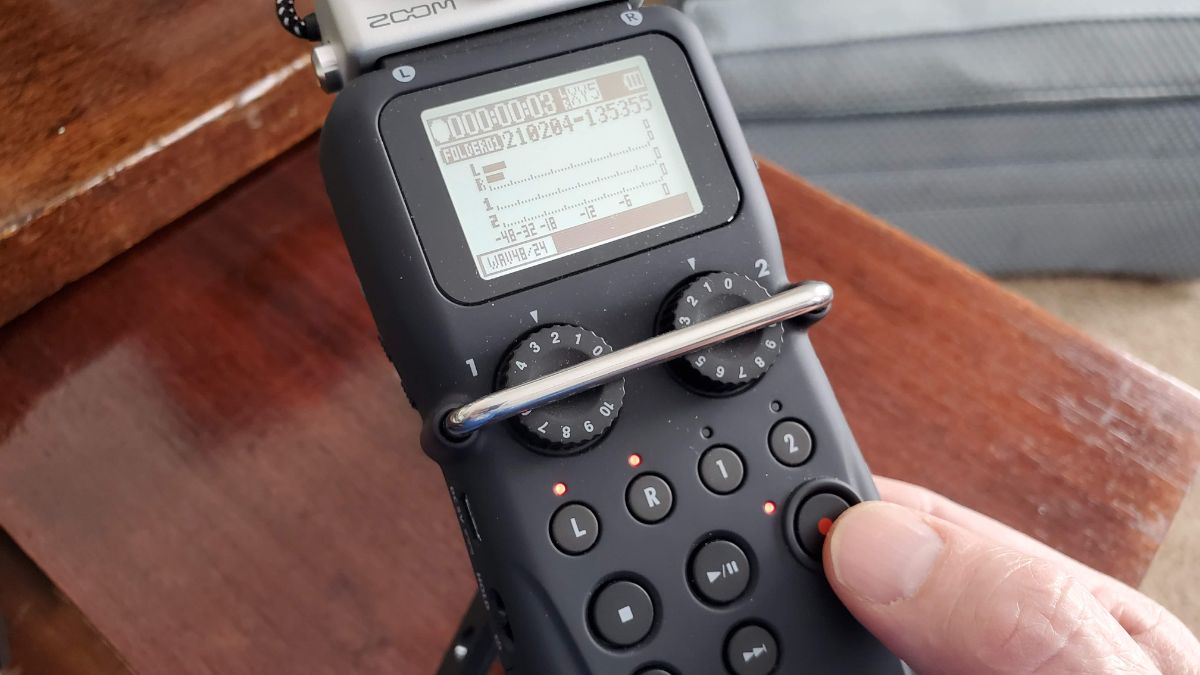
04 – Record the Base Track
Next, record the base track as you normally would by pressing the record button, playing the music, then pressing the record button again to stop the recording.
05 – Put the H5 into Overdub Mode
This is the step where we put the H5 into overdub mode.
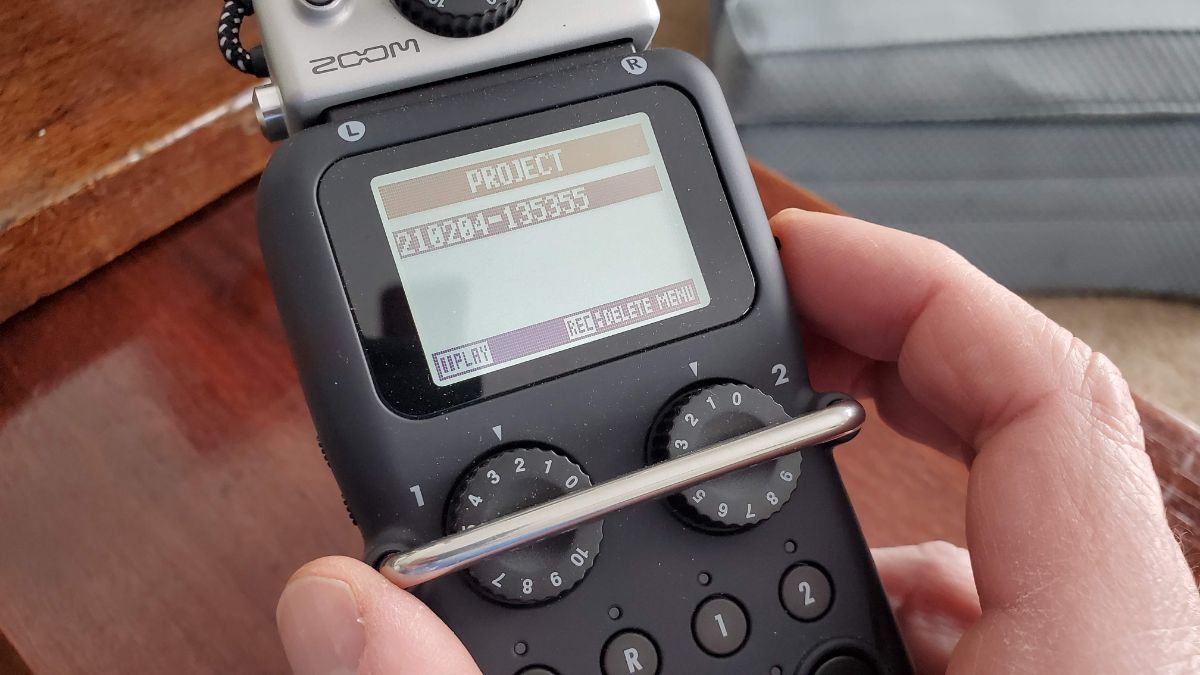
Overdub mode means that you can listen to the base track while recording another track. To put the H5 into Overdub mode, press Menu and select Project. Press Enter.
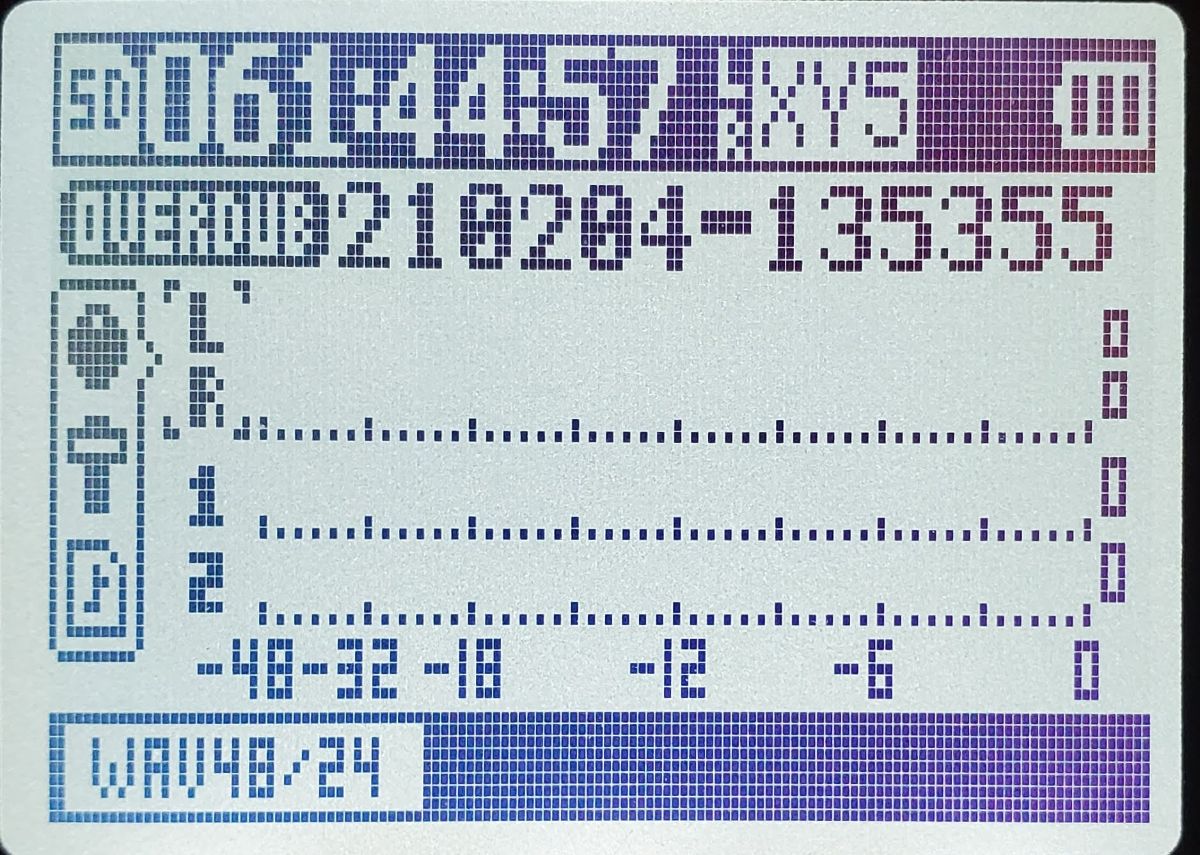
Next, select the Last Project which is the base track that you just recorded (In this example, it is 210204-135355, but yours may be something like Zoom0004, for example, depending on which naming convention your H5 is set to). Press Enter.
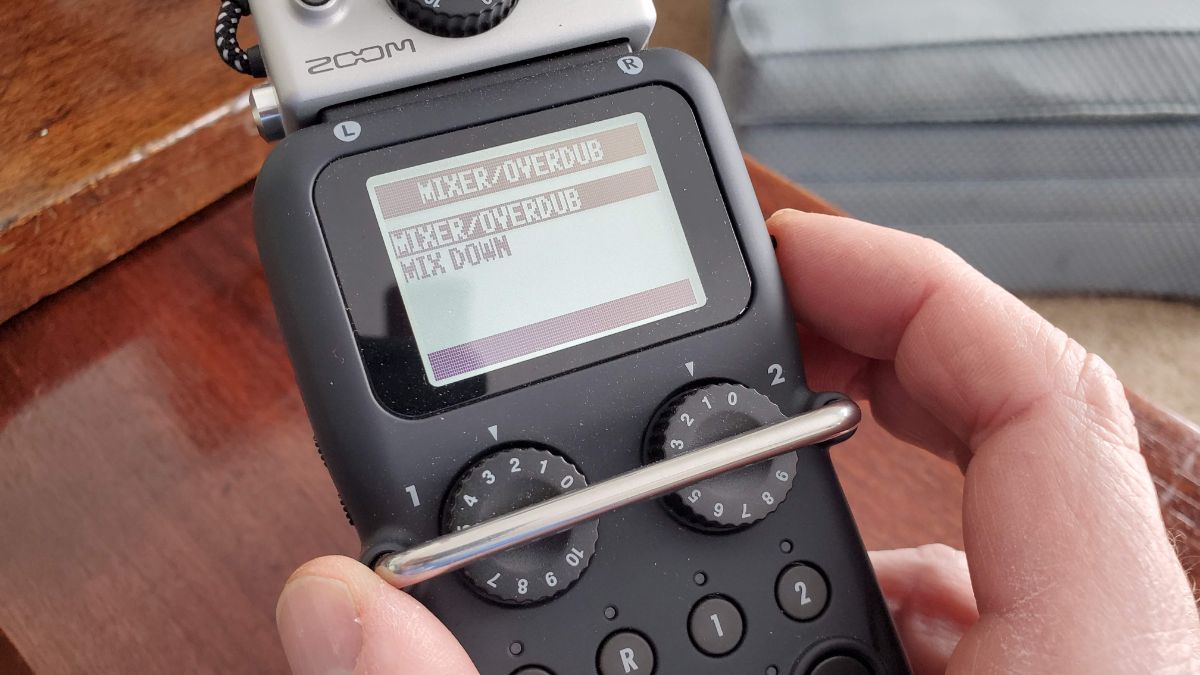
Toggle down to Mixer/Overdub and press Enter.
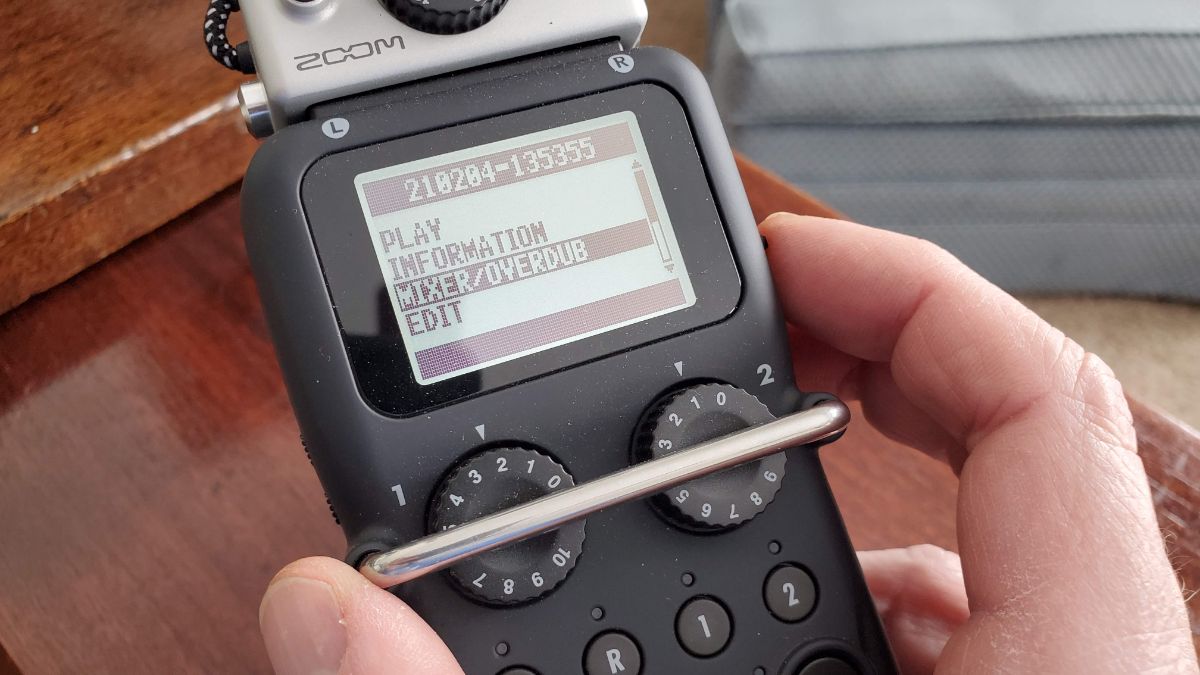
Highlight Mixer/Overdub and press Enter.
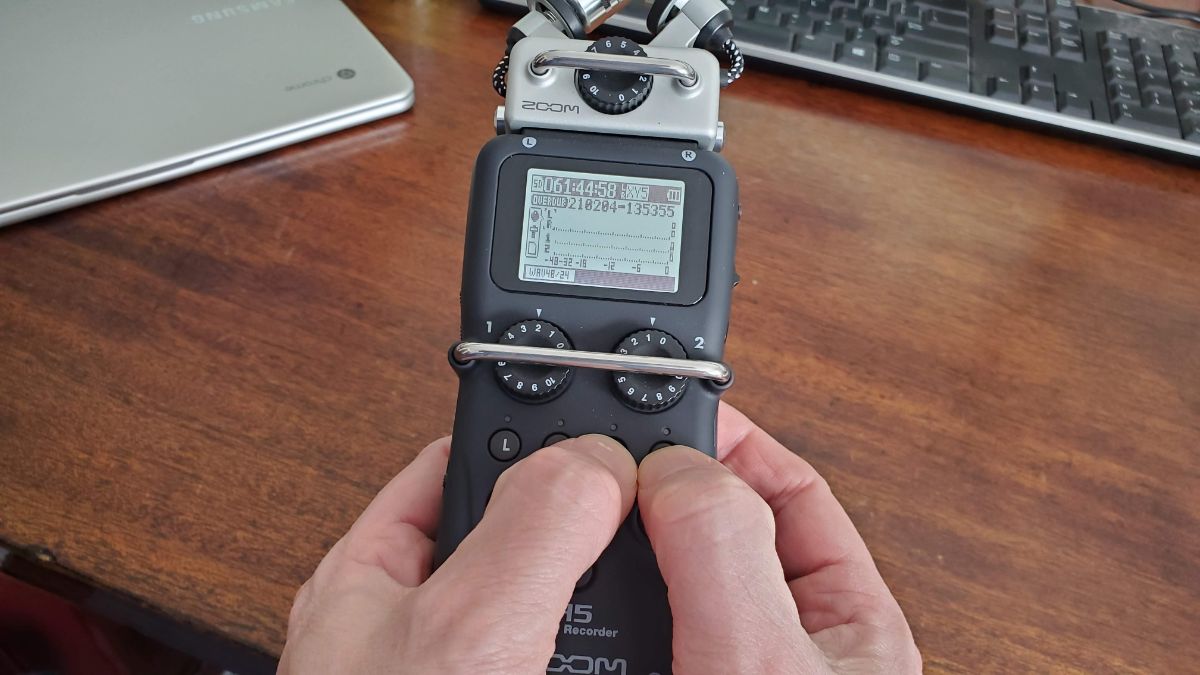
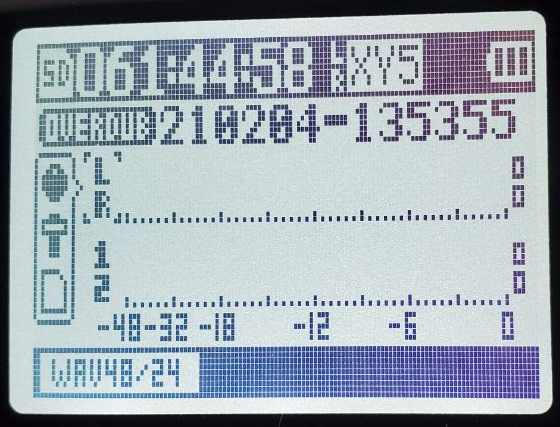
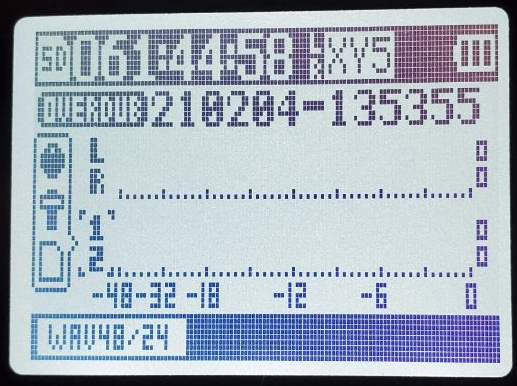
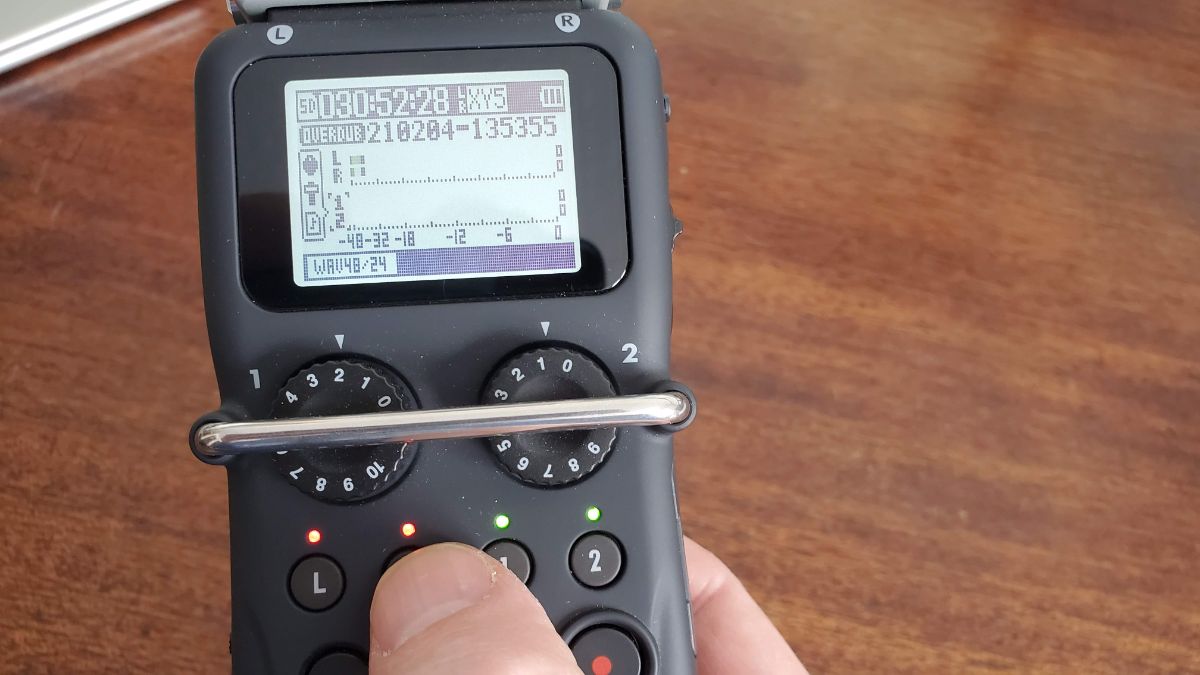
You’re now back on the Recording screen and you will notice that the L/R indicator lights turn green.
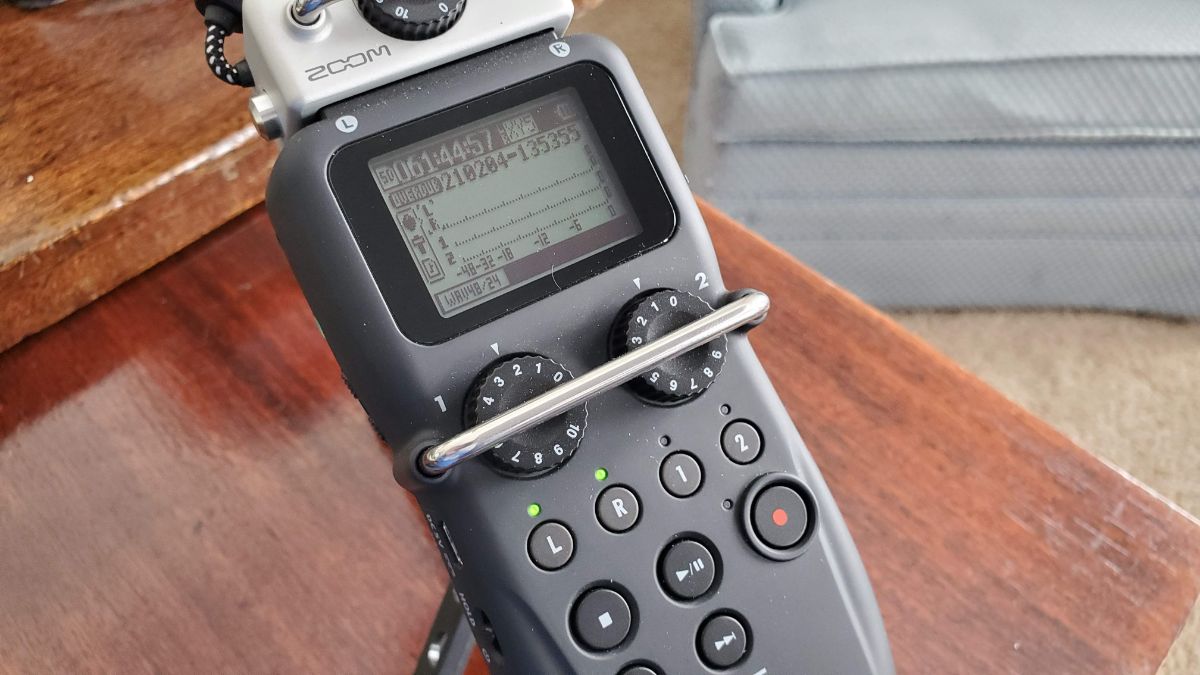
One thing to note here is that the word “Overdub” appears on the screen next to the Project Name.
If you want to overdub using a channel other than the X-Y microphone channels, for example channel 1 or channel 2, you can go ahead and do that now by pressing the 1 or 2 channel button until it turns red. Then press Record. You can monitor the base track using the internal speaker or headphones (recommended).
If you want to overdub using the same X-Y microphones, continue on to the next step.
06 – Select the L/R Channels
In this step, we are going to move the recording from the L/R channels to the 1/2 channels so that the L/R channels are ‘open’ to record again. In order to do that, we must first select these channels.
The L/R channels will already be selected [square brackets around the L and R], but in case they are not, to select the L/R channels, use the toggle switch and toggle up/down to select the L/R Channels on the screen [brackets appear around L and R].
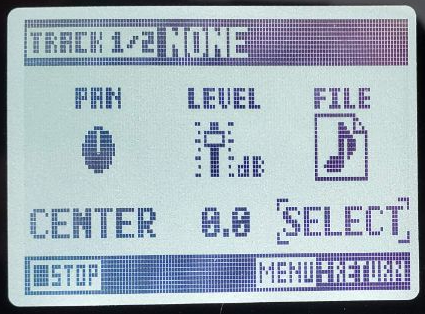
07 – Set the L/R Channels to None
Once the L/R channels are selected [with brackets], press Enter. Use the toggle switch to navigate the brackets to Select, and press Enter.
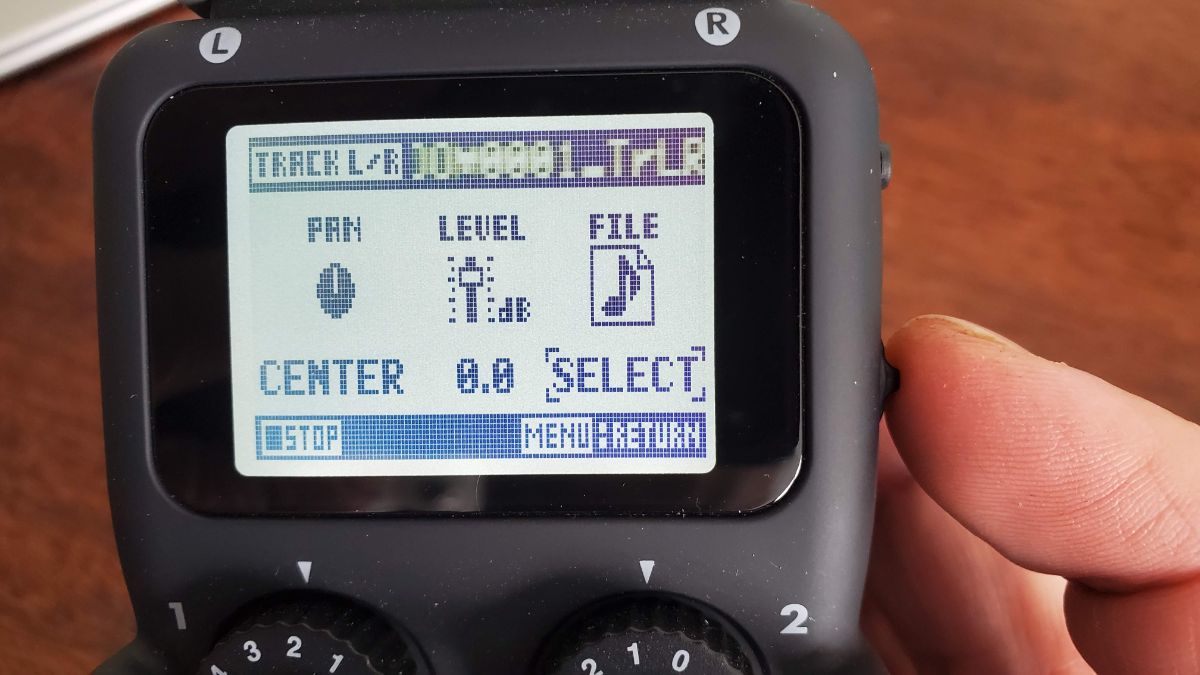
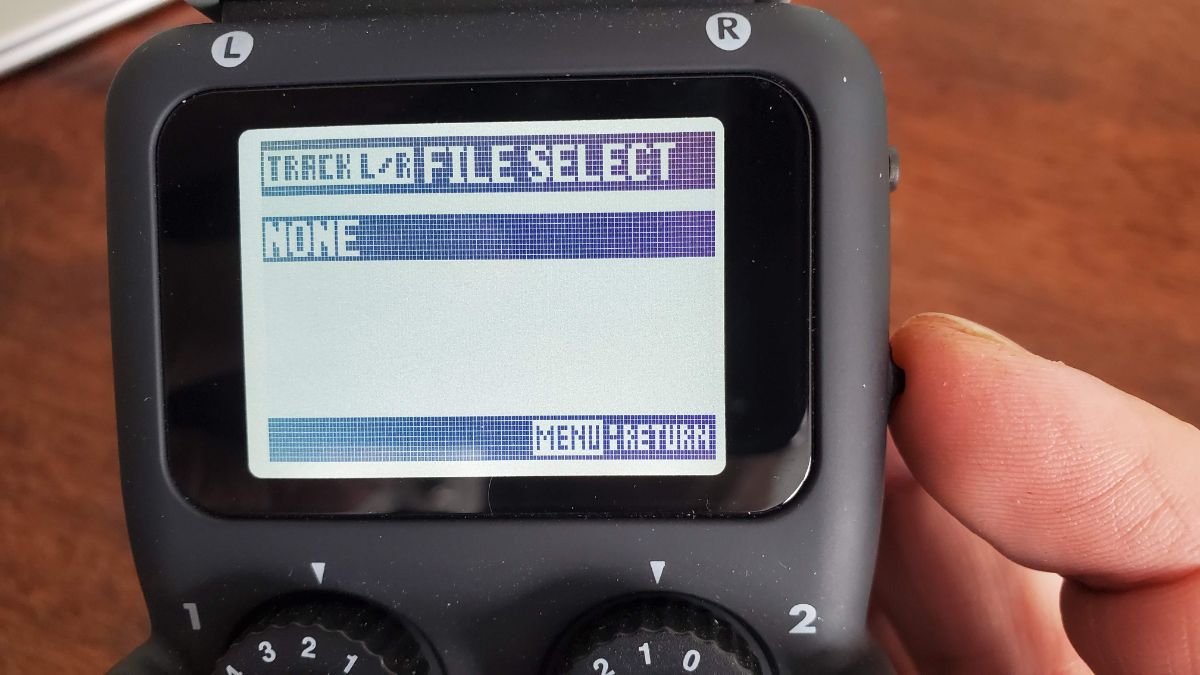
Toggle to “None” and Press Enter.
08 – Return to the Recording Screen
now return to the Recording Screen by pressing the Menu button.
09 – Combine Channels 1 and 2 into a Linked Pair
Next, we will link Channels 1 and 2 as a Stereo pair. The reason we are doing this is so that we can move the Base Track from the L/R channels to the Channel 1/2 pair.
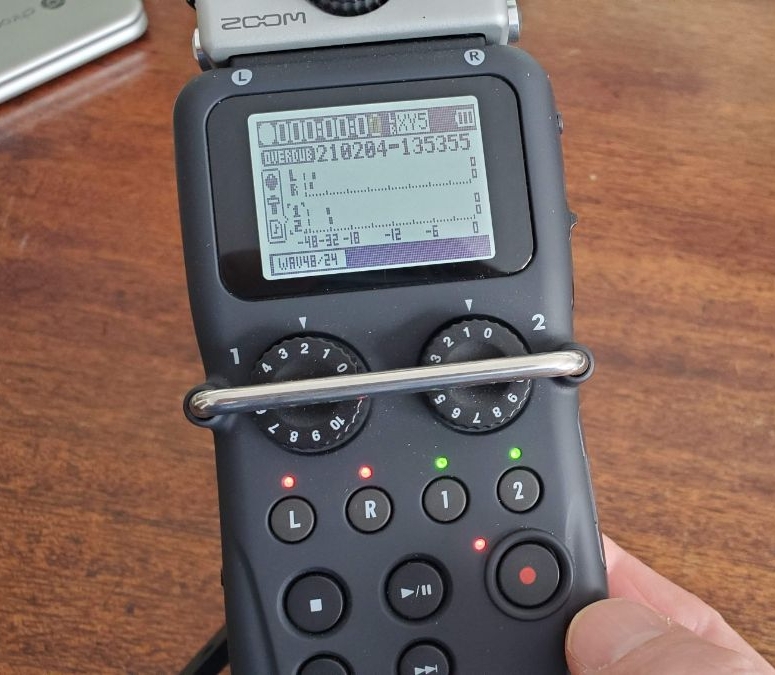
To combine Channels 1 and 2, press the 1 and 2 buttons simultaneously and release.
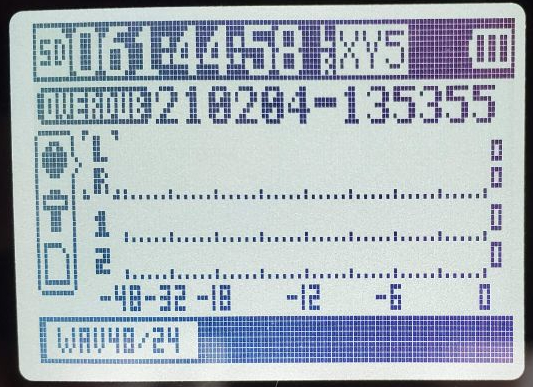
You know that Channel 1 and 2 are combined because the horizontal, dashed dB line extending from the “1” disappears, so that it looks like the following screen.
10 – Select the Channel 1/2 Linked Pair
In this step we are going to begin the process of moving the Base Track recording from the L/R channel to the 1/2 Channel.
Use the toggle switch to toggle up/down to select the 1/2 Channels on the screen [square brackets appear around 1 and 2].
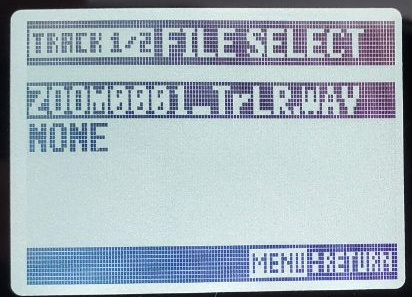
11 – Select the Current Project Name
Here we select the project that we want to move base recording to.
Press Enter. Then toggle to “Select” and press Enter.
Select the File that you want to move from the L/R to the 1/2 Channels. In this example it is called Zoom0001_TrLR.WAV (your project name may be different). Then press Enter.
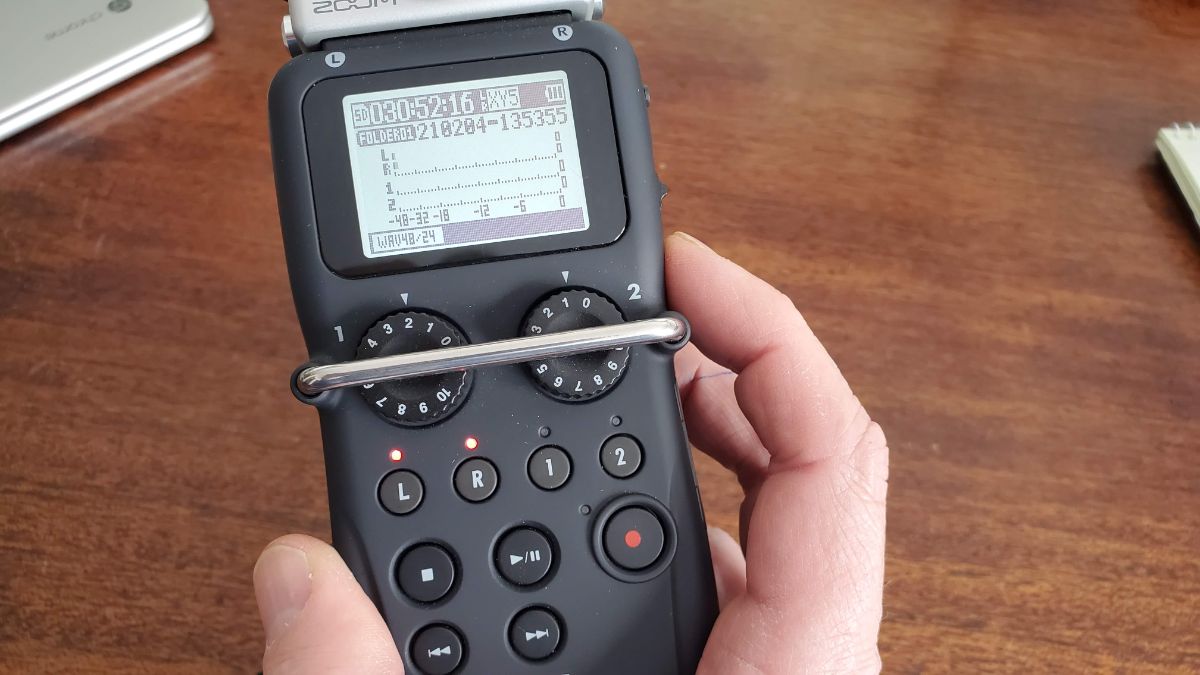
At this point, the 1 and 2 Channel indicator lights will turn green, which means that there exists a recording on these channels that can be played back (since we moved the base track from L/R to 1/2).

12 – Return to the Recording Screen
Press the Menu button to return to the Recording Screen.
13 – Activate the L/R Channels for Recording
We’re now ready to record a second track onto the L/R channels. To activate the L/R channels, press the L or R button until both L and R indicator lights have turned Red.
14 – Record the 2nd Track
Press the Record button to record the 2nd track. You will probably want to monitor the base track by using headphones, otherwise the X-Y microphone will pick up the base track as it plays through the speaker on the back of the H5. Once you are done recording, press the Record button again to stop recording.
At this point, you are done. You have recorded a second track over the first Base Track.
At this point, you can either be done (skip to step 19), or record another track over the base track. To do this, continue to step 15.
Note: When I am using the phrase ‘record over’ in this step, I should clarify to say that you are recording another track in sync with the first track. You will actually have 2 different files that begin at exactly the same time. You are not actually adding tracks together. (That would be the Mix Down step, which we are not doing here.)
In the next step we will record another track while monitoring the Base Track. It will NOT record over the first overdub, rather it will create an additional file that is synced with the first 2.
15 – Activate the L/R Channels for Recording
To record another track on the L/R Channels using the X-Y microphones, press the L or R button 2 times until both the L and R indicator lights have turned Red.


16 – Record the Next Track
Press the Record button to record the 3rd track, press Record again to stop recording.
You now have a total of 3 files that have been recorded the first one was the Base Track (that we have moved to the Channel 1/2). As well as 2 additional files. All 3 recordings begin at the same time.
To record a 4th track, continue to step 17.
17 – Activate the L/R Channels for Recording
Press the L or R button 2 times until both L and R indicator lights have turned Red.
18 – Repeat Steps 16-17 for all Subsequent Tracks
Repeat Steps 16-17 to record as many tracks as you want. Each time you record a new track, you will be monitoring the Base Track. You will not hear any of the other recordings while recording subsequent tracks.
(If you do want to combine tracks, press the Select button and choose Mix Down.)
19 – Exit Overdub Mode
To Exit the overdubbing, press the Menu button 5 times. You are now ready to record normally in a new Project.
When you export your files to your computer, you will see a list of files in the Project. The first one corresponds to the Base Track, and the subsequent recordings all begin at the same time and are all of the additional tracks that you recorded.
Thanks for reading, and I hope this was helpful to someone! If this helped you, let me know in the comments!


This was so helpful – I am completely new at this and need this level of detail and guidance – thank you!!!!!
No problem, glad to help!
I’ve really grown to love the h5. Very versatile, excellent sound, fairly portable… All around a good investment!
thanks, this is great manual! I switched from old tascam dr40 to zoom h5 and I have to say, this is incredibly complicated. In addition, my usual workflow is to overdub on mixed files, so I can hear all other instrument lines in one track. It seems possible, using mix down function, but way way more complicated and slow.. If anyone is reading this- if this is a main purpose of your recording device, I recommend Tascam..
Thanks for the comment, for this sort of purpose, it does seem overly complicated! That being said, I did find I got a bit quicker the more I did it.
Good to hear a comparison with the DR40!
Really great! Thank you. There are uTube videos explaining overdubbing per se but yours enlightened me to using the inbuilt capsules throughout.
Thanks for the feedback, glad it helped!