

Does the front end of your Toyota Sienna roar as you are driving down the street? You may need to replace a front wheel bearing. This picture guide includes all the steps and tools necessary to replace the wheel bearing yourself for a 2004-2010 Toyota Sienna.
What Can Cause Wheel Roar?
First, a couple of words on things you want to check out before you jump in and start replacing a bearing. There are other things that can cause loud noises to come from your vehicle’s front end that are less labor intensive. Check these things first!
- Badly worn tires. When was the last time you replaced your tires? If you’ve put 80,000 miles on 30,000-mile tires, you may need to get them replaced. Check the amount of tread you have left, and if you need new tires, get them replaced.
- Misaligned tires. Have you hit any bad potholes or curbs lately? Your wheel alignment may be out of whack. Symptoms of this problem include a vehicle that ‘weaves’ down the road, requires constant corrections from side to side while you are driving, and uneven wear on the tires. Check these things, and if you have these issues, consider a wheel alignment.
- Brake issues. Dragging brakes can cause loud wheel noise as well. Does your vehicle pull left or right or vibrate when you brake? You may have a stuck caliper pin or a seized brake caliper.
If you have determined that these are not the problem, but you sound like a freight train driving into your neighborhood, there is a decent chance you have a bad bearing.
When you buy through links on this site, I may earn an affiliate commission. It doesn’t cost you anything extra, and it helps me with website hosting fees!
Bearings on Toyota vehicles are designed to last for a very long time, some even say for the life of the vehicle (though given how long Toyota’s last, this may be a stretch). Things that can shorten the life of bearings include:
- Contaminants. Does your vehicle have to survive through Wisconsin winters? Are your bearings constantly being doused in road salt? Do you live on a country road? Do you park your car outside in the rain and the elements? Though your vehicle is designed to keep these contaminants out of the bearings, all of these things can cause bearing life to shorten.
- Driving with misaligned tires. Misaligned tires can cause undue wear on one side of the bearing vs the other.
- Extreme driving. Such as hitting lots of bumps and jumps.
Alright, enough of the background information, now you know what to do differently in the future. Let’s get started with the repair!
Tools required for this repair:
- Socket wrench
- Lug nut socket
- 17mm socket
- 10mm socket
- Brake caliper holders
- Torque wrench (That can handle up to 250 ft-lbs)
- Breaker bar or long pipe “cheater bar”
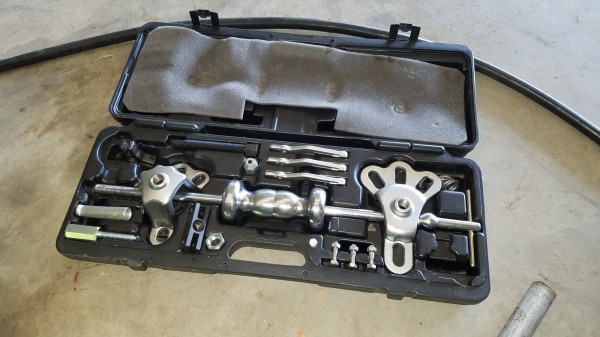
- Slide Hammer Hub Puller
- Bearing Pusher Tool
- 1 1/2″ socket
- 1 1/8″ socket
- Axle nut socket (30 mm)
- Hammer and punch
Impact Wrench (Optional)
Ear Mufflers (Optional)
Parts used:
- Sienna Wheel Bearing (pn510063)
- bearing retaining clip (optional – only needed if you destroy the existing one)
- Wheel Hub (pn930-400) (this link includes the axle nut)
- Axle nut (not needed if it came with your wheel hub)
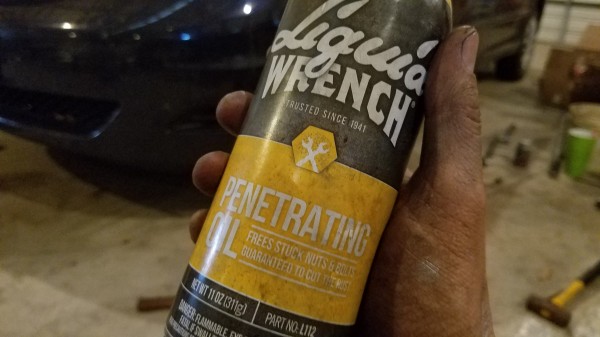
- penetrating oil spray
- grease
Bearing Replacement Picture Guide – Step by Step
The vehicle shown here is a 2006 Toyota Sienna. These steps should also apply for a 2003, 2004, 2005, 2007, 2008, and 2009 Sienna (and possibly more) as well.
These are the parts I ordered for the repair (I did both front bearings, so ordered 2 of everything):
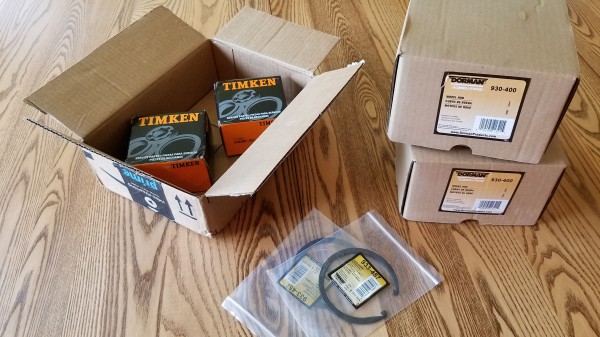
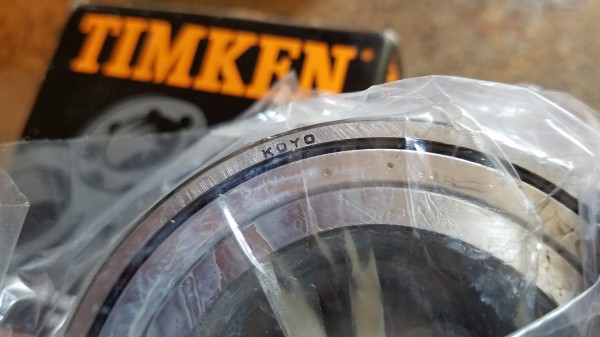
I recommend getting the Timken bearing (pn510063), which are actually the KOYO bearing – very high quality!
(Update: I have had these in my Sienna for several years now, and no sign of them wearing out.)
This Dorman Wheel Hub (pn930-400) includes the axle nut, which is nice:

A day or two before doing the repair, put the bearing in the freezer. This will make it shrink down so that it will press into the knuckle more easily.

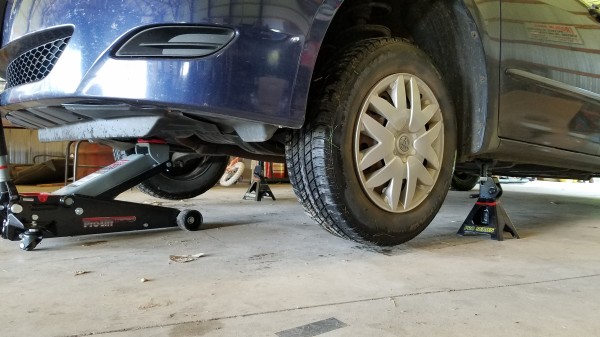
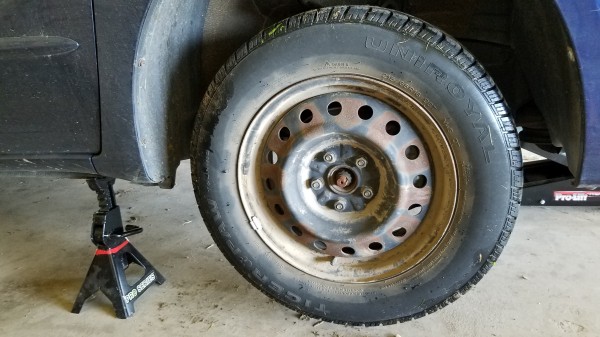
Once you’re ready to perform the repair, the first step is to set the parking brake, then jack up the vehicle and put some jack-stands underneath it.
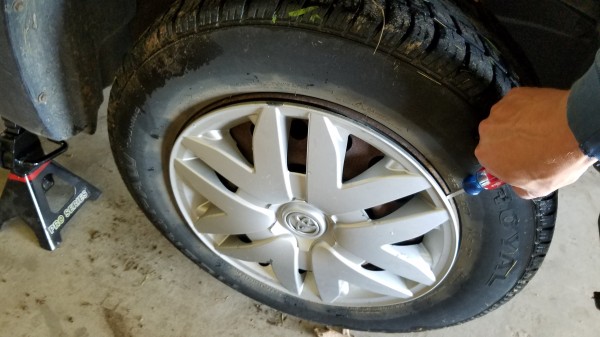
Use a large flat-bladed screwdriver to pry off the hubcap.
Now you’re ready to take off the wheel.
Sometimes it is difficult to know if you are replacing the correct wheel bearing. Which side is the sound coming from, exactly? One way to confirm this is to press something like a large screwdriver or a long socket extension against the steering knuckle and press the other end against your ear. Put the vehicle in neutral (set the parking brake!) and spin the tire. Listen for a grinding sound in the bearing. (Not to be confused with the sound of the brakes dragging – if that is unclear, perform this step after removing the brake caliper. Perform this on both sides and compare the sound. If one side gives a noticeable grinding, that is the side that has the bad bearing.
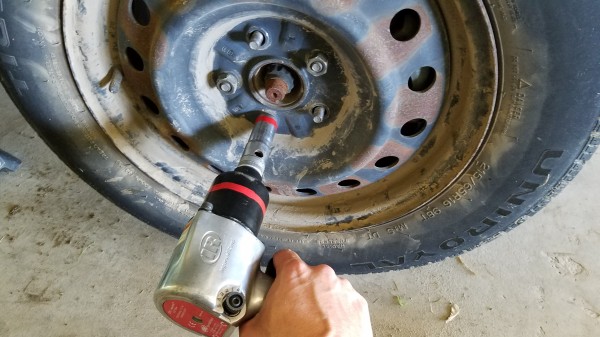
Once you have confirmed you are replacing the correct bearing, you can go ahead and remove the tire. Use your lug nut socket and impact wrench or socket wrench.
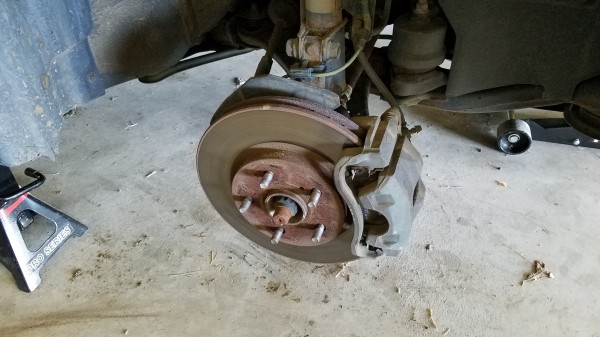
Take off the wheel and set it aside. If it is rusted on, try this. You are now looking at the brake rotor and brake caliper.
Next, remove the brake caliper and bracket. To do so, use a 17 mm socket and take out the 2 bolts located on the rear, as shown.


Now slide the brake caliper off of the rotor. It is a good idea to wire this up to the strut somewhere or use brake caliper holders, so that it does not fall down and rip off the brake lines!


Now, take off the rotor. If it is rusted on, use the threaded hole to thread in a metric bolt and force it off, as shown.


Carefully set the rotor aside. Try not to get grease or sand on the rotor surface, as this could affect braking later on.
Now is a good time to lubricate the axle nut. I used WD-40 here…
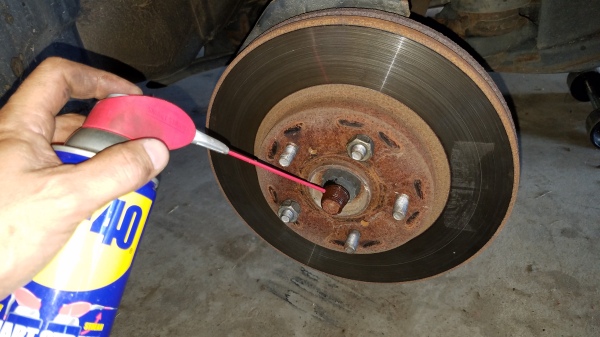
…but it would probably be a better idea to use some penetrating oil like this stuff I used later on for the bearing removal:
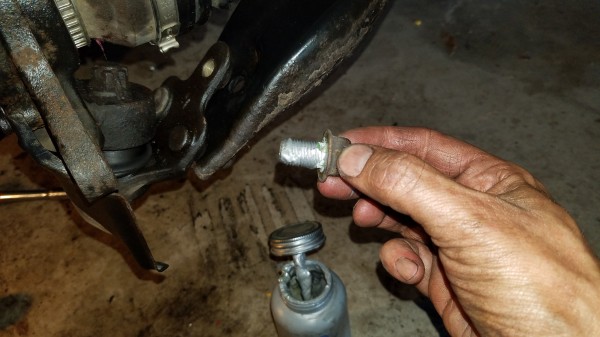
Next, we have to take out the notch in the axle nut. Use a hammer and a punch to take out this dent.


Once the dent is removed, use a 30 mm axle nut socket to remove the axle nut.


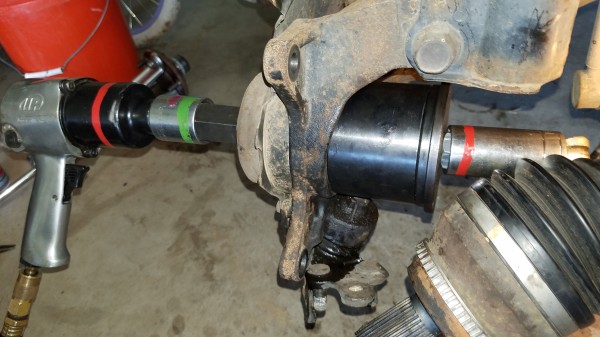
We’re now ready to pull off the hub. This is the point of no return. Why? Because in the process of pulling off the hub, we will also pull out the inner race of the existing bearing, and the old bearing will be destroyed in the process. Are you sure you want to do this? Good! Grab your hub puller tool.
I bought a Slide Hammer Puller Set off of Amazon and have replaced 5 bearings with this tool on both a Corolla and a Sienna, and I could not be happier with the quality and the way this unit works, I highly recommend this one if you are considering getting one.
Attach the claw to the hub as shown. Use your lug nuts to secure it onto the hub. Make sure it is good and tight. I put a couple of large washers on there as well, but this wouldn’t be strictly necessary.
Then thread in the slide rod.
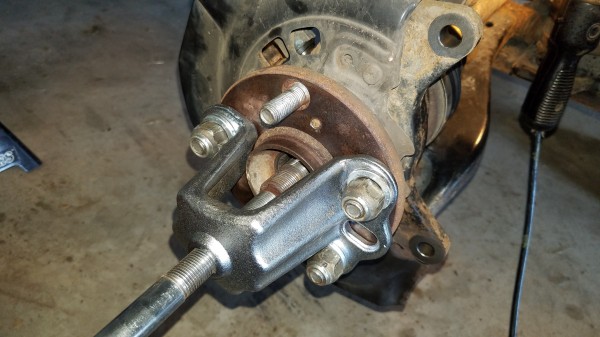
This is what the puller should look like when fully assembled on your hub.
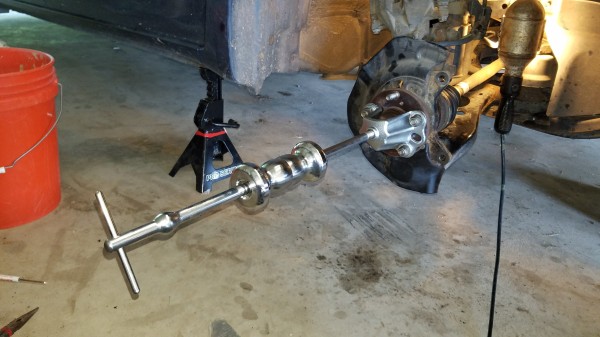
Give the slide hammer a couple of good whacks outward, until the hub comes off. In my case, it took less than about 10 hammer slides, and it was off.
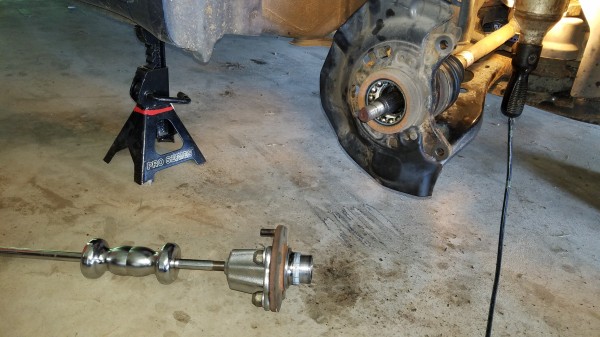
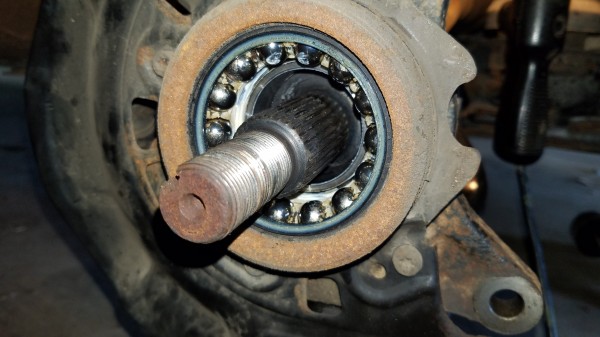
This is a view of the bearing with the hub and inner race out.
As you can see, the inner race is still on the hub. If you want to re-use the hub, take an angle grinder or a chisel and force it off. I went through this process when I changed the bearings on a Toyota Corolla, and it worked out fine, but was somewhat time-consuming. This time I just decided to go ahead and buy a new hub, they are relatively inexpensive, will save time, and then you have a new hub rather than putting the rusty one back on.
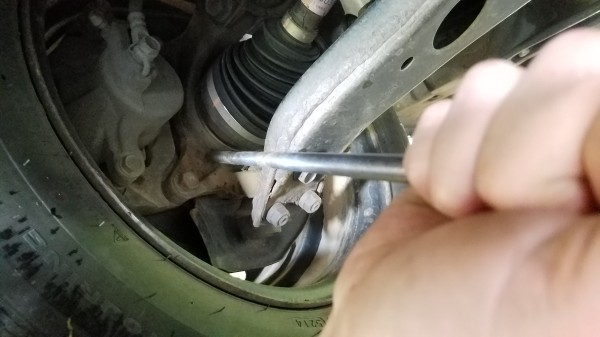
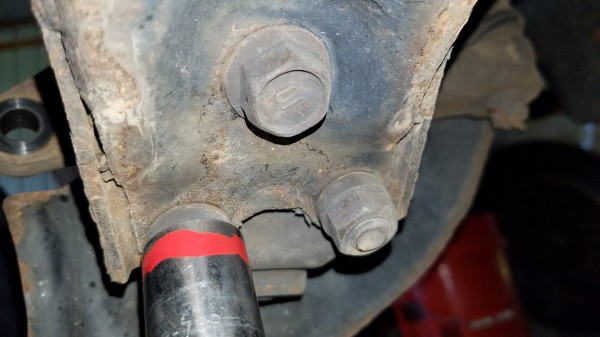
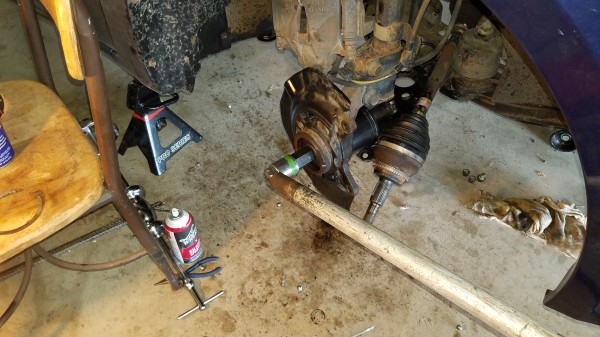
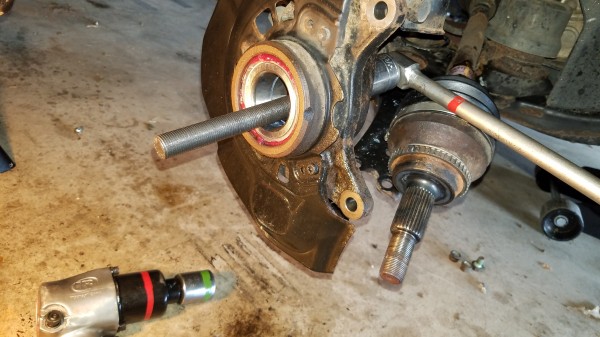
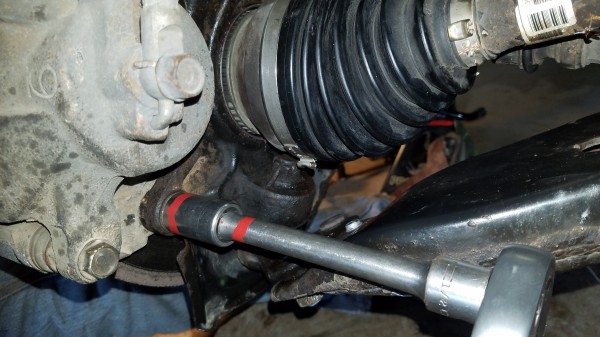
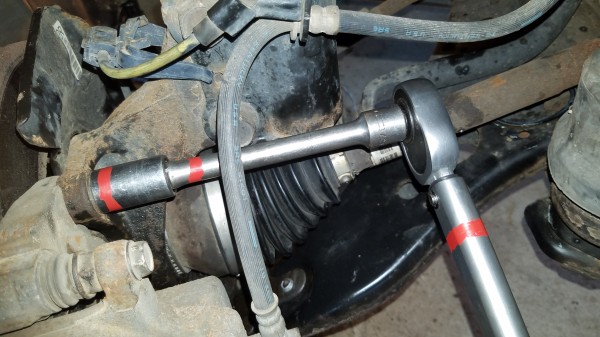
The next step is to remove the 2 nuts and the 1 bolt that connect the ball joint to the control arm. Use a 17 mm socket to remove these.
The following photo is a view from underneath showing the 2 nuts and 1 bolt that need to be taken off.
After those are out, press down on the control arm and lift the ball joint free.
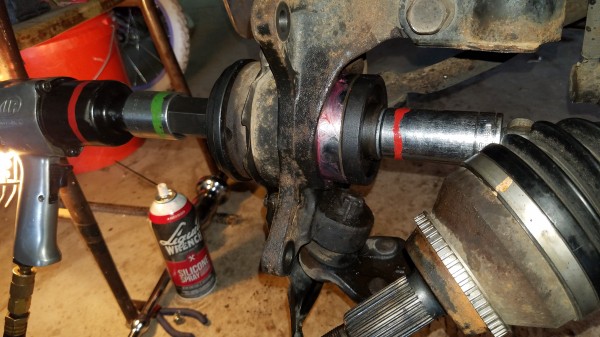
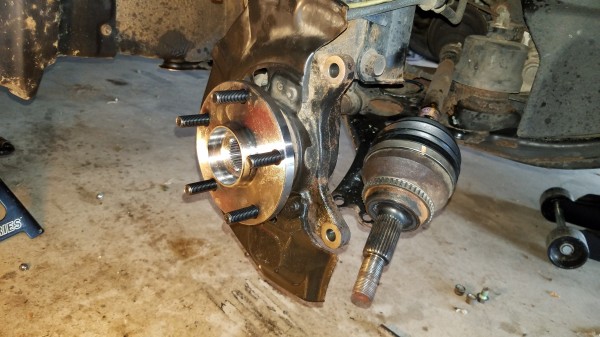
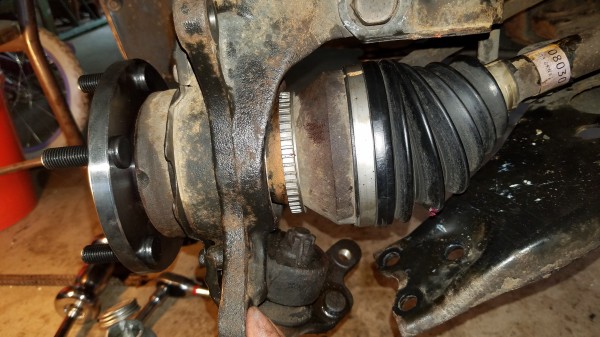
At this point you can pull the axle out. It will flex at the rubber boot, so bend it and wiggle it out and put it in the position shown (note: this photo shows the hub still on, but you will have the hub off at this point).
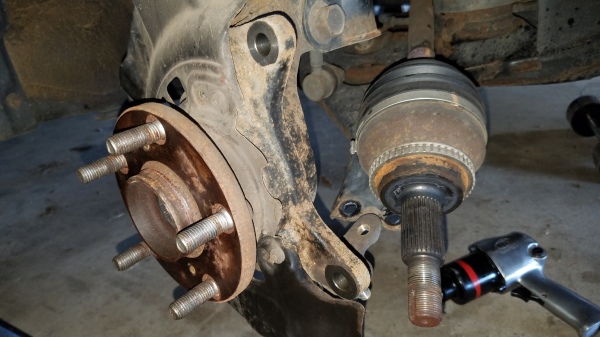
Now take a look at the rear of the knuckle. Near the top is a speed sensor. Go ahead and take this off, so that it does not get damaged in the bearing replacement process.
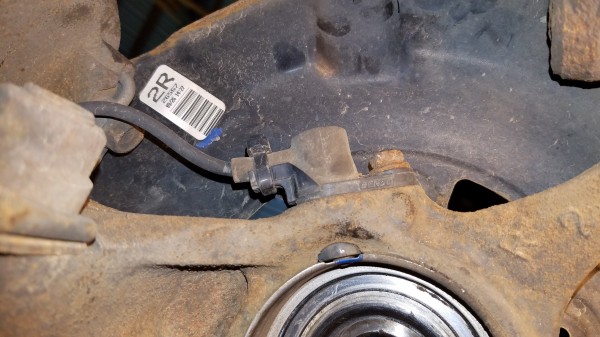
Here is a close-up of the speed sensor.

Use a 10 mm socket to remove the bolt that holds it in place.

Next, we will remove the aluminum dust cover. Go ahead and spray a little lubricant on that, if you like.

Then use a screwdriver to pry it out. It is just press fit in, so it will pop out.
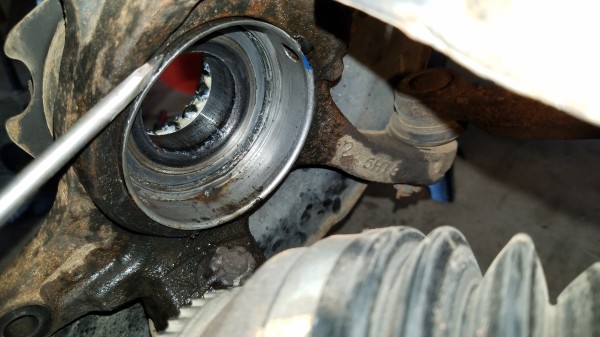
This is a shot of the dust cover removed.

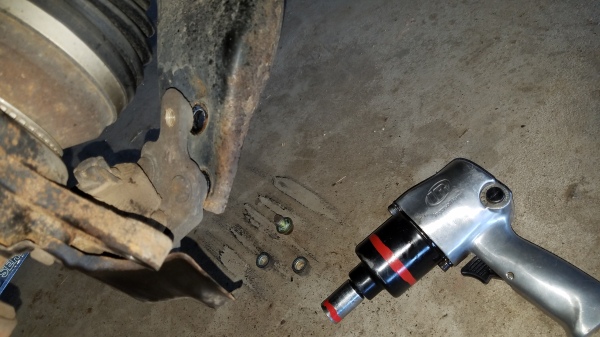
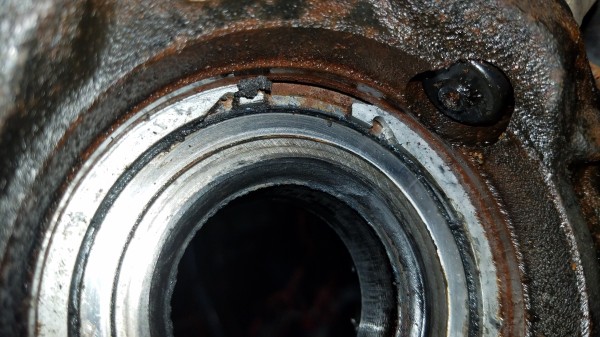
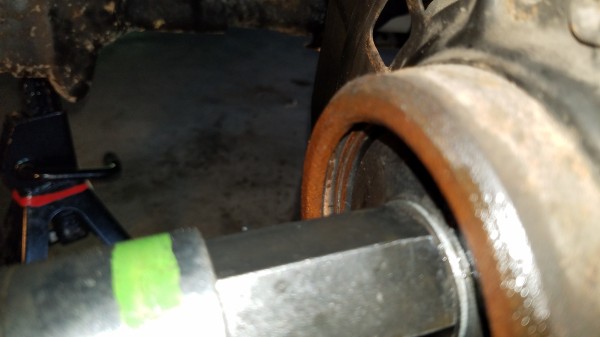
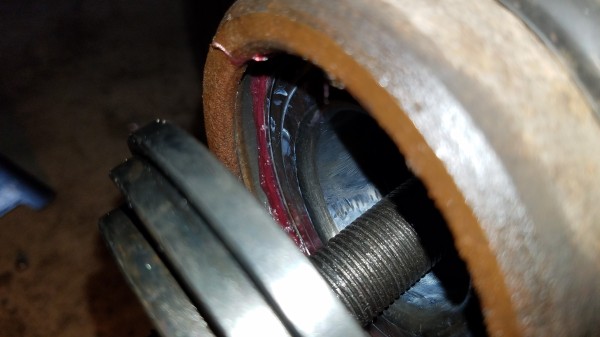
We’re almost ready to press out the bearing, but before you do, do not skip this important step. We have to remove the retaining ring. Look at the back of the bearing, and locate the retaining ring.
Use a needle-nose pliers to remove the retaining ring.
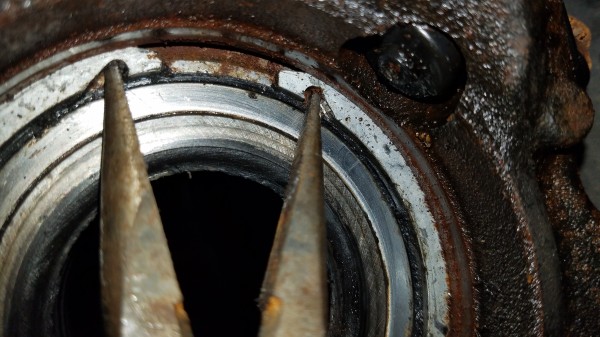
Or, if it is too rusted in place, use 2 flat-head screwdrivers to pry it out.
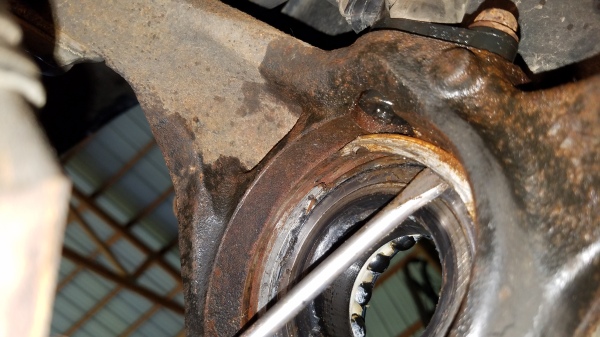
This is a shot of the old retaining ring.
This is a shot with the retaining ring removed.
We are now ready to press out the bearing. To do this, take your bearing press pusher tool.
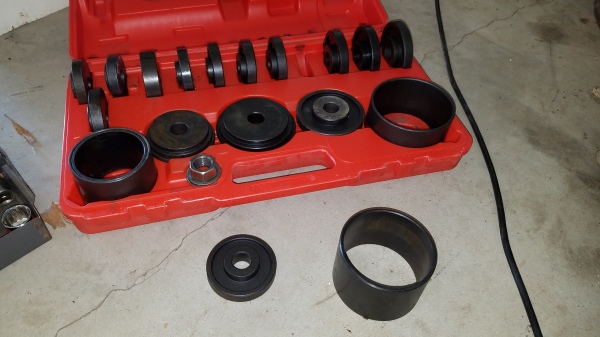
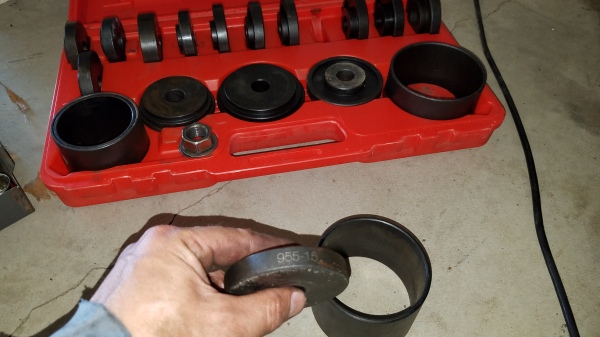
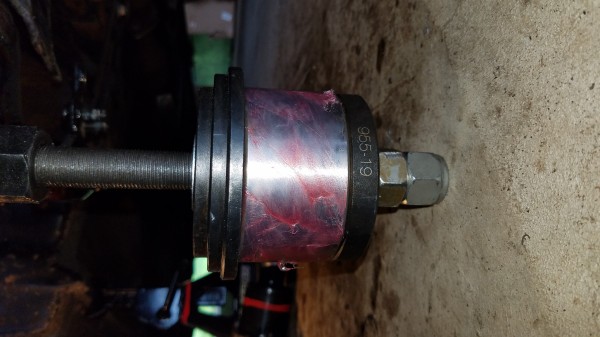
Locate the 2nd largest tube, the threaded rod, the large nut and washers, and the 955-15 ring and a ring larger than the tube to fit over its end.
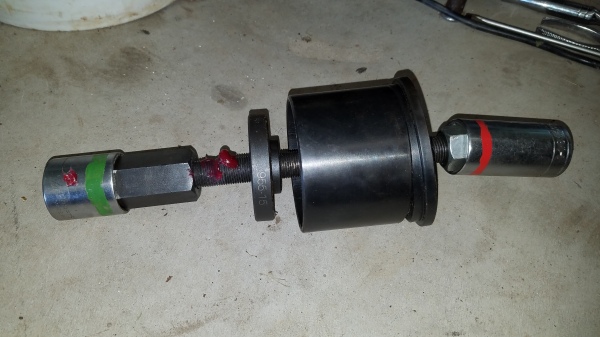
These pieces will be arranged as follows, with the bearing between the tube and the 955-15 ring. Also, a 1 1/2″ socket and another socket to fit the end of the threaded rod (in my case, a 1 1/8″ socket). Make sure you put plenty of grease on the threads! This is very important, otherwise you will damage the threaded rod and it will not work anymore. Re-apply grease often.
I also recommend that you spray some penetrating oil on the bearing as well. First, take a screwdriver or a pick, and scrape away any rust or debris that has built up. Then spray the area with the penetrating oil. Also spray the back of the bearing where it will come out, as well.


Position these pieces through the old bearing as shown. The goal is to have the outer ring pressing against only the bearing, and the tube on the other side will receive it once it is pressed out. The tube should be large enough to fit over the outside of the knuckle, LARGER than the bearing, so the bearing will fit inside of it when it is pressed out. Use the new bearing as a ‘size-guide’ to make sure you are using the correct tube.
This is another view of the arrangement.
Begin to tighten up the large nut. Once you have everything snug, double check that everything is aligned correctly. You are pressing the old bearing out the BACK of the steering knuckle into the can (tube). Also make sure that the tube is centered on the back of the knuckle.
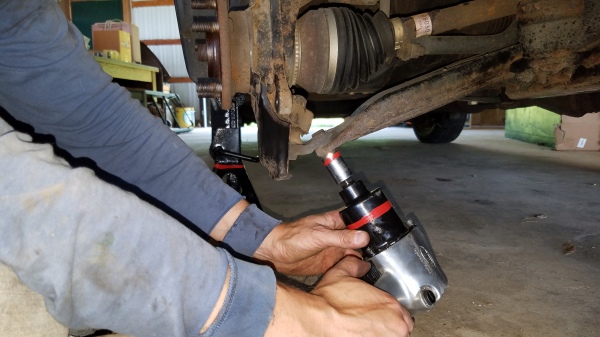
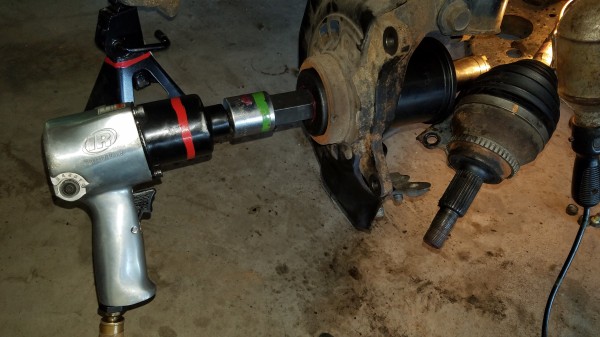
Once you are sure everything is aligned properly and everything is snug, I recommend breaking the bearing loose with a breaking bar and a long (~6′) pipe. An impact wrench may not be able to deliver the initial shock of torque that will be needed to break it loose. See the following picture.
Once the bearing has started to move, it will move very slowly. Spray some more penetrating oil in the gap. You should be able to use an impact wrench at this point.
Here is a photo showing the gap beginning to form as the old bearing is being pressed out.
Once the old bearing has been pressed all the way out, remove the press tool pieces.

Clean out the knuckle where the old bearing was.
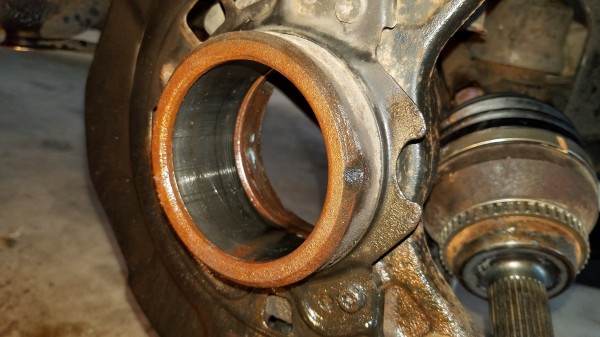
Spread some fresh grease inside in order to facilitate the pressing in of the new bearing.
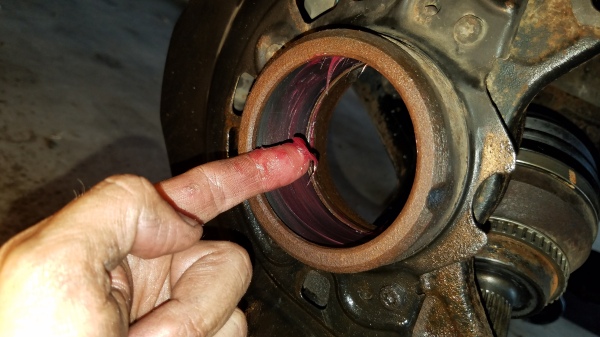
We are now ready to press in the new bearing. Go to the freezer and get the new bearing (pn 510063). Spread some grease on it, then use the following pieces from the bearing press tool. Use the 955-19 ring to press in the bearing, since it has nearly the same outer diameter.
This is a view of the pieces installed, ready to press in the new bearing.
Put a socket on the back as well to hold the end of the threaded rod as you begin tightening up the large nut to force the bearing in. Again, make sure to grease the threaded rod!
Here is a photo of the new bearing partially pressed in.
Continue to tighten the large nut until the bearing is fully seated. Be careful not to crush it, so it is a good idea to stop every now and then to check on your progress. In the following image, the new bearing needs to be pressed in about another 1/4 inch.
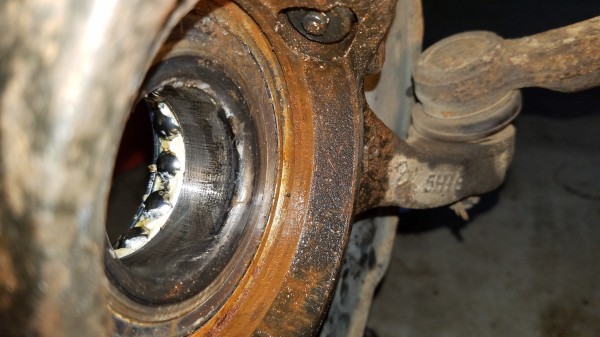
You know the new bearing is fully seated when it contacts the front of the steering knuckle in the front…
…and has cleared the retaining ring slot in the back.
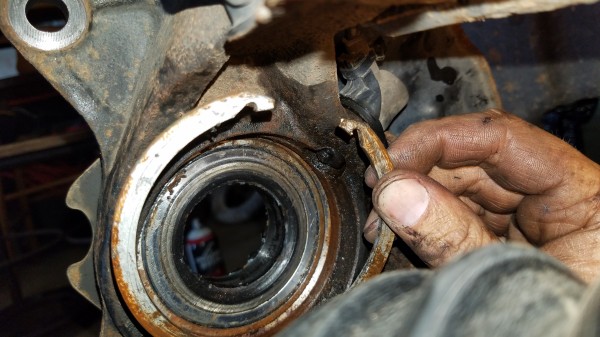
Now it is time to put the retaining ring in.
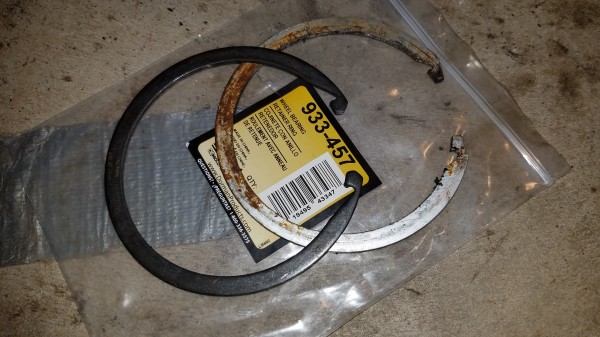
If you are re-using your old one, scrape off the rust and put a little grease on it to help reduce rust in the future. Otherwise, if the old one was damaged in removal, take the new retaining ring and compress it with a needle-nose pliers and insert it where the old one was.


Now it is time to put the dust cover back on. Line up the hole where the speed sensor is, then tap it back into place with a rubber mallet…


…or press it back in with the bearing press tool.


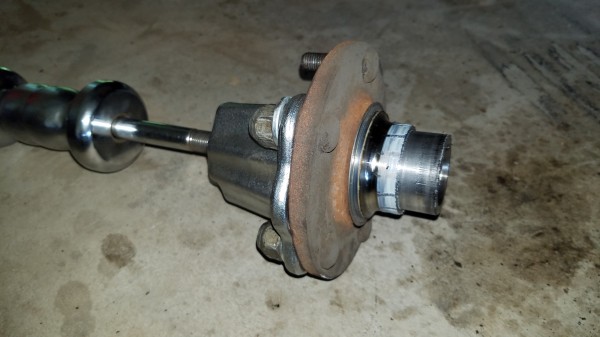
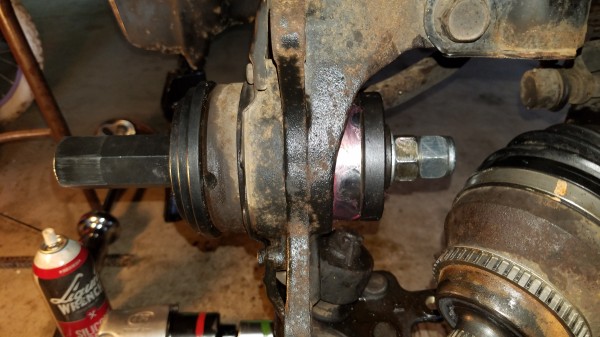
Now it is time to press the wheel hub into the new bearing. Use the bearing press tool for this as well. The key here is on the back end, you want to be pressing ONLY on the inner race of the bearing. For this reason, use the relatively small 955-11 ring to press on the new bearing. This is the order of the pieces:
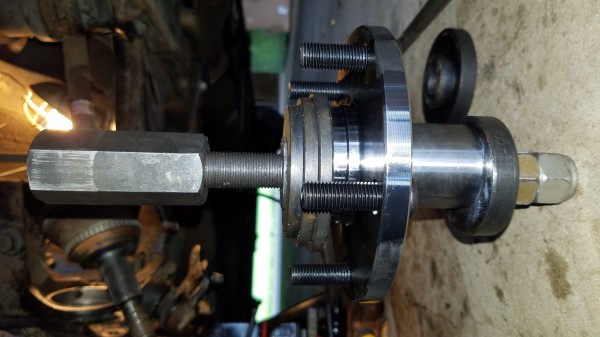
And these are the pieces in the correct order for pressing in the hub. This view is from the back. Put some grease on the hub where it will slide into the new bearing.
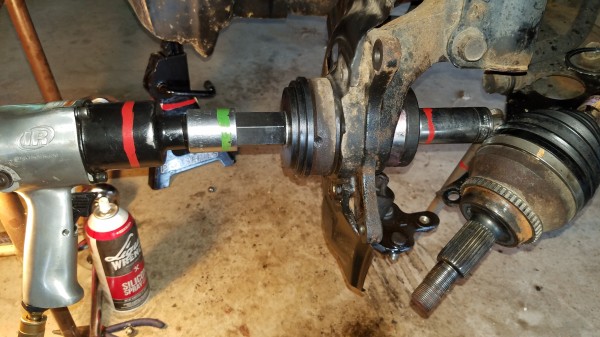
This view is from the front. Once again, make sure to grease the threaded rod well.

Begin tightening the pusher tool. Double-check frequently that everything is lined up correctly, centered, and not going crooked.
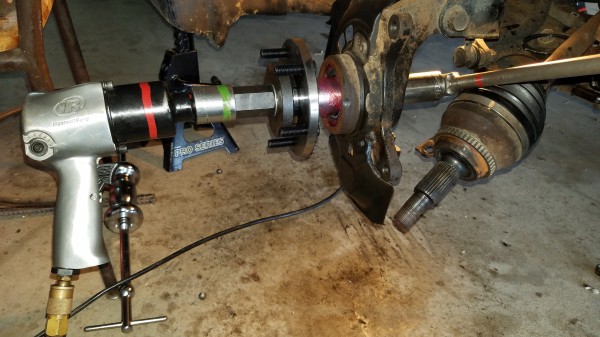
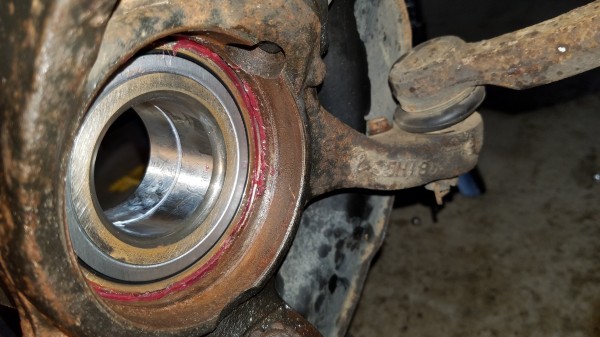
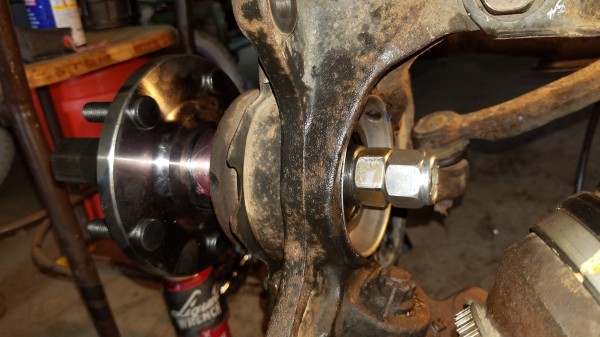
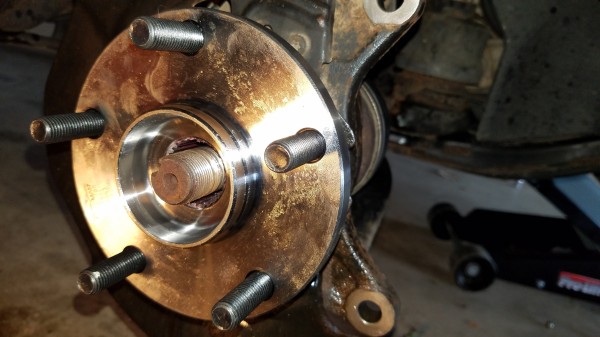
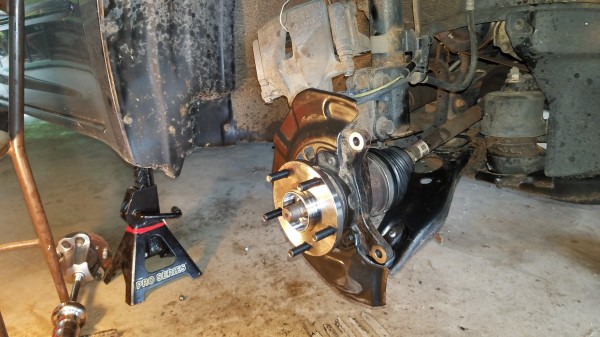
Here is a shot from the front, of the new hub after it has been pressed in.
Here is a shot from the back with the new hub pressed in.

Now, re-connect the speed sensor. Put it in place, and put the 10 mm bolt back in. Also, as a good practice, put a little anti-seize on the threads. Don’t over-tighten it; the sensor is made of plastic.


We are now ready to put the axle back through the hub. Put a little grease inside the hub and on the axle.


Then flex the axle at the rubber boot and fit it into the hub.
Press it all the way through until the threaded end of the axle protrudes out the end of the hub.
Next, re-attach the ball joint to the control arm. Press the control arm down while simultaneously pressing the steering knuckle in-ward to get the threaded studs seated in their holes.

Then put in the 17 mm bolt. Spread a little anti-seize on the threads.
Then take your torque wrench and torque the nuts and bolt to 94 ft-lbs. Not sure how to use a torque wrench? Check out this post.
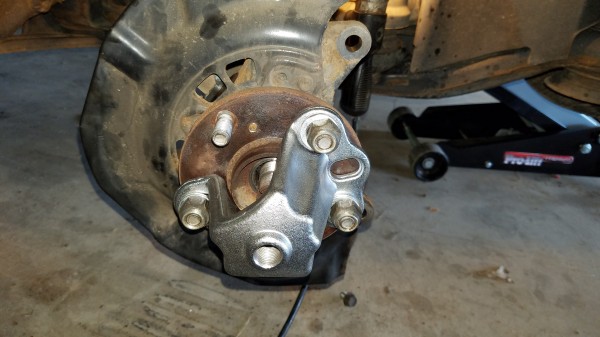
This is a photo of the re-assemble unit.
In order to make it easier to get the rotor off nest time, spread a little anti-seize on the hub. Then put the rotor back on.


Now it is time to put the caliper back on. Un-wire it from where you had it and slide it back over the rotor. Make sure the brake pads are still in it and haven’t slipped out somewhere.
Put some anti-seize on the bolts and put them back in.
Torque both bolts to 77 ft-lbs.
The bottom caliper bracket bolt…
…and the top caliper bracket bolt.
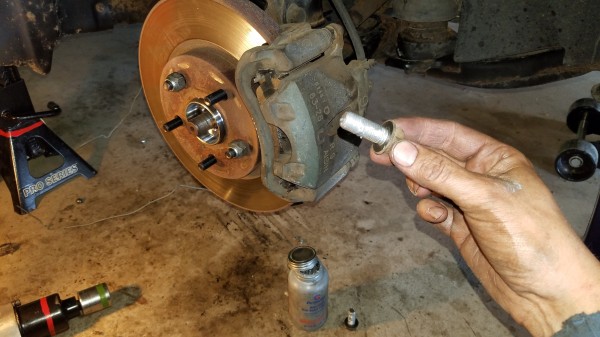
Now is a good time to clean off the rotor. Spray some brake cleaner on them to remove grease, grit, and fingerprints. Also, spread a little anti-seize on the wheel mating surface so that the wheel doesn’t rust on next time.


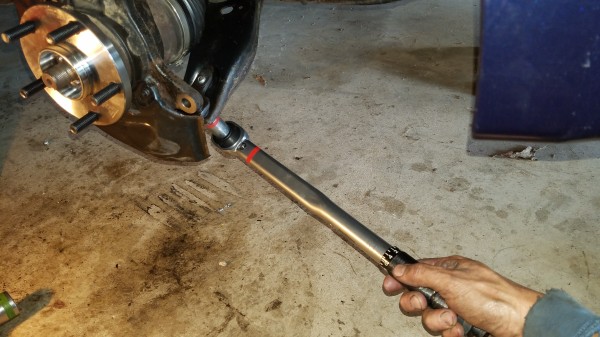
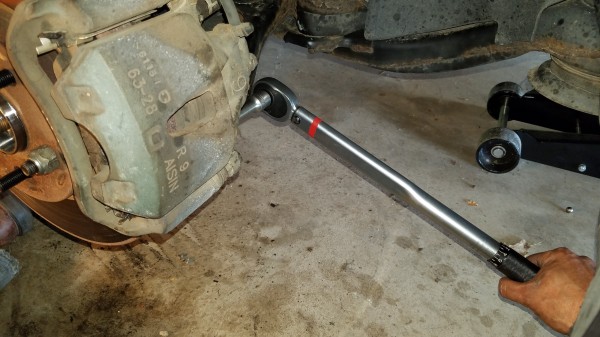
Put the axle nut on and tighten it up snugly. Then, put a screwdriver in the end of the rotor so that it butts up against the brake caliper. Torque the axle nut to 217 ft-lbs. This is a lot. This is more than typical torque wrenches can handle. This torque wrench goes up to 250 ft-lbs, so should easily be able to handle it. If your torque wrench doesn’t go up to 217 ft-lbs, consider using a torque extender like I did.
Important! As you are tightening the axle nut, snug it down, then rotate the hub about 1/4 turn and snug it up again. Continue to do this tighter and tighter until you reach the 217 ft-lbs of torque. Don’t put any weight on the bearing before doing this, as this will allow the bearing to seat properly.
Remember to remove the screwdriver from the rotor before moving on to the next step!


Once the axle nut is tightened to the correct torque, use a hammer and a chisel to dent the nut along the groove so that it does not un-thread.


Then put the wheel back on. Tighten the lug nuts in a star pattern to 76 ft-lbs each.
Remember to re-torque the lug nuts after driving for 50 miles or so.
And that’s it. I hope you found this guide helpful! On a scale of 1-10 (10 being most difficult), how difficult did you find this repair? What could have made it easier? I’d love to hear about your experience, please tell me about it in the comments section at the bottom of the page!
It is my sincerest hope that this article helped you in some way. Thanks for visiting my website, PracticalMechanic.com
Richard
For more helpful articles on Toyota Sienna Maintenance, check out these articles.
Once again, here are the tools and parts used in this repair.
Tools used for this repair:
- Socket wrench
- Lug nut socket
- 17mm socket
- 10mm socket
- Brake caliper holders
- Torque wrench (That can handle up to 250 ft-lbs)
- Breaker bar or long pipe “cheater bar”
- Slide Hammer Hub Puller
- Bearing Pusher Tool
- 1 1/2″ socket
- 1 1/8″ socket
- Axle nut socket (30 mm)
- Hammer and punch
Parts used:
- Sienna Wheel Bearing (pn510063)
- bearing retaining clip (optional – only needed if you destroy the existing one)
- Wheel Hub (pn930-400) (this link includes the axle nut)
- Axle nut (not needed if it came with your wheel hub)
- penetrating oil spray
- grease

Great write up! Any idea if this would be applicable to the Gen3 Sienna? I have a 2015 that needs a front wheel bearing replacement.
I couldn’t get the press kit to work for pressing the bearing out, just couldn’t make it budge. Took it to a friend who has a press and had it out within 10 minutes total. Your guide really helped me to press the hub back in though. Was a little nervous, but after it started moving, went in like a charm. Thanks for the detail at every point along the way. Priceless!
Excellent instructional guide! I’ve never attempted this type of repair, but your guide walked me through it. Thanks a ton!
That’s awesome, I’m glad to have helped, thanks for the feedback!
Any chance that you can show how to replace the REAR wheel bearing hub assembly?
Great suggestion, so far my rear bearing has been okay, so I haven’t had to replace it (thankfully), but I’ll keep it in mind!
Great guide! It worked well and the hints were priceless!
Thanks Bill! Glad to help!
I wanted to add that putting the hub as well as the bearings in the freezer really helped when I went to press it in. And to put the grease on the hub before putting it in the freezer. This allowed the grease to act as insulation to keep it from frosting up. I didn’t do that with the bearings and they frosted up as I was trying to grease them.
Interesting, that’s a good tip.