

My Maytag Bravos clothes dryer started squealing and squeaking while drying clothes. I used the following procedure to fix the problem. Follow along on this picture guide if you are having similar issues! I hope this can help you if you are suffering from a really loud dryer…!
Background Information
This is a relatively simple repair. The reason it is squealing is that the bearings are starting to go bad in the guide wheels of the dryer drum. Replace those wheels, and the squealing will go away.
Note: If your dryer is “Screeching,” this could be a different problem. The felt seal around the drum may have failed. Check out this post to fix a “metal-on-metal” screeching sound coming from your dryer!
This roller bearing repair takes a couple of hours one evening or on the weekend. Order the parts kit ahead of time, and have the tools handy, and you won’t have any problem finishing this repair in several hours, less if you consider yourself handy.
The exact model of dryer shown in this guide is the Maytag Bravos Model# MEDB850WQ0. This repair and kit also work for the Whirlpool Duet Model# WED8300SW0 (and WED8300SW1) with a few minor differences in taking off the front panel. In fact, it will work for most Whirlpool, Maytag (built after 2007), Kenmore and KitchenAid dryers as long as they have the door-mounted lint screen. This dryer has a 27-inch drum.
If you buy something through links on this site, I may earn an affiliate commission – at no cost to you.
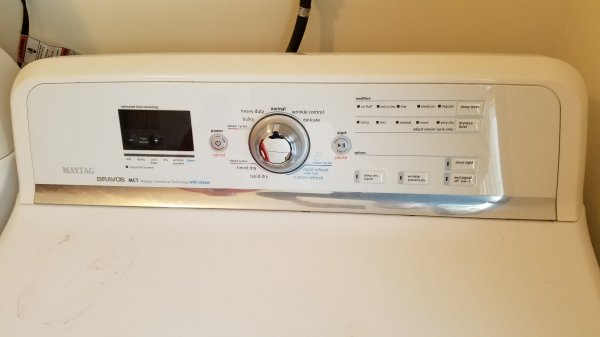
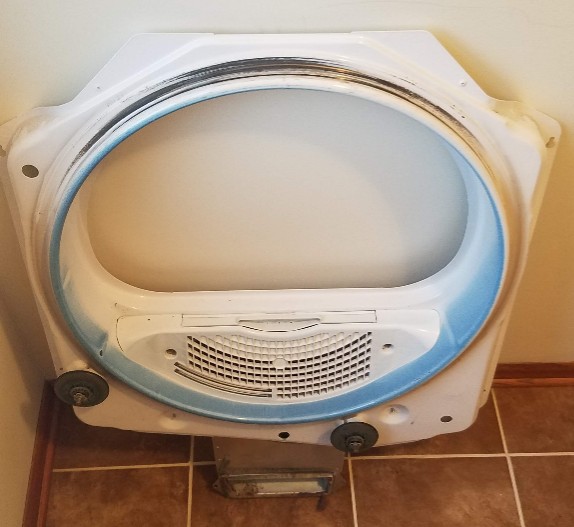
Here is a picture of the front panel of the dryer used in this repair guide in case it is helpful for identification purposes.
Parts Needed for this repair:
The link below is to the correct replacement parts kit on Amazon. The part number is included as well, in case you want to look for it somewhere else:
Whirlpool Model# 4392067RC Dryer Repair Kit
Tools Required for this repair:
- 5/16 in socket (or wrench)
- Flat screwdriver
- Metal paint scraper
Replace the Bearings in the Dryer
The first step is to unplug the unit.
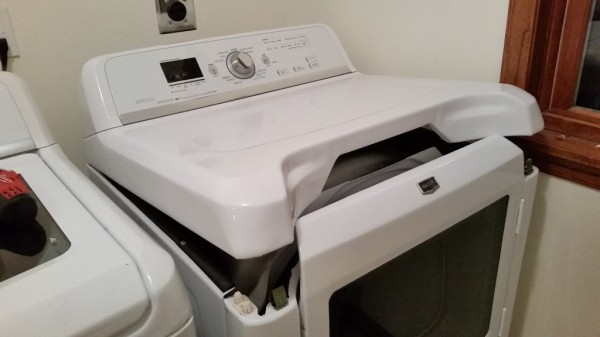
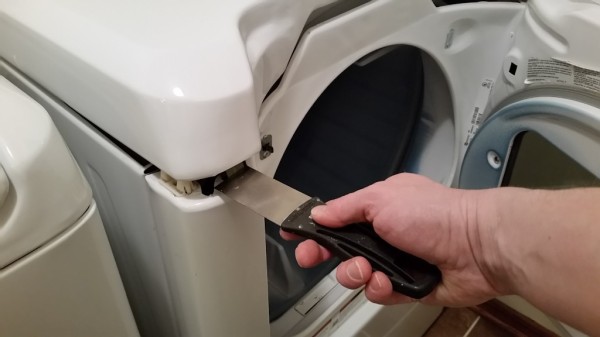
Then you will want to flip up the top of the dryer. In order to be able to do that, pull it out a little way from the wall. Then press the clips to release the top using the paint scraper.
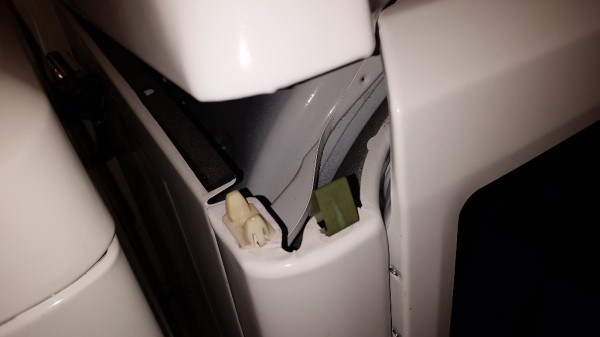
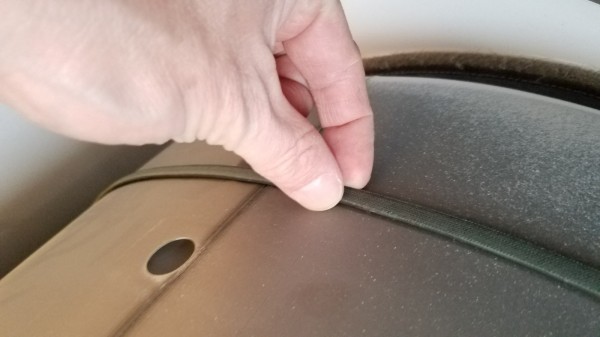
Press in the 2 tabs using a thin metal paint scraper to lift the top lid, as shown in the photo below. There are 2 tabs, one on either side of the door.
This is a close-up view of one of the metal tab (green) that you are pressing inward to release the top lid.
After the lid is flipped up, you need to remove 2 screws on the backside of the front panel, one on each side, with the 5/16th socket to take off the front panel. You can see the screw-head in the image below.

After the 2 screws are out, lift up on the front panel to unhitch it from the notches holding it in place on the bottom.
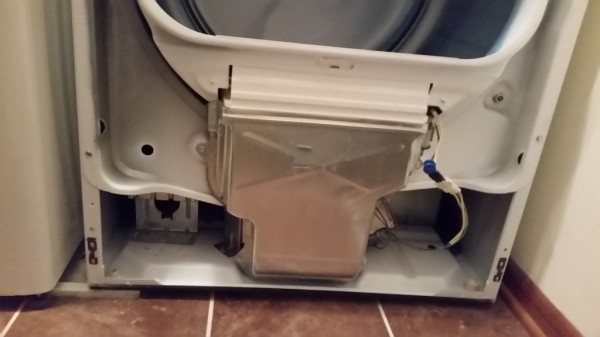
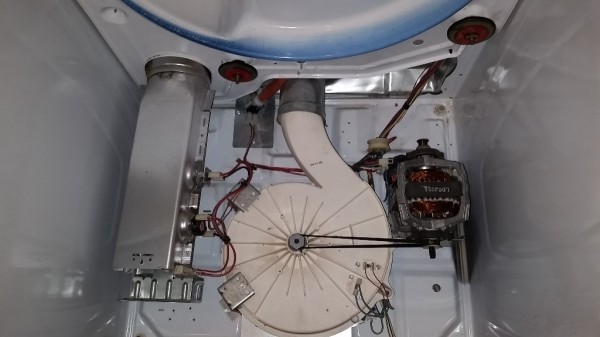
This is a view of the dryer with the top flipped up and the front panel removed.

This is a close up view of the tabs on the bottom that the front panel hitches in to.
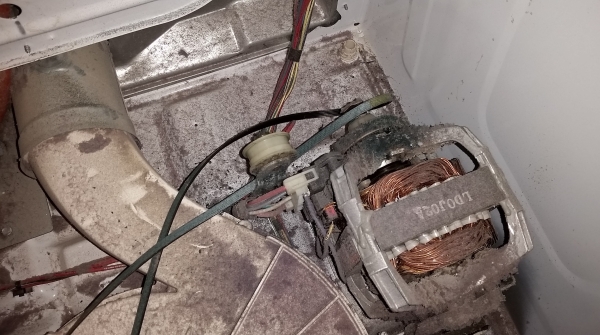
Take off 6 more screws to remove inner front panel, and set it aside. There is one wiring harness that you can unplug if you want to create more space to work, but it is not really necessary. Alternatively you can set the inner front panel off to the side.
This is the inner front panel. Notice the wheel bearings. You will be replacing those.
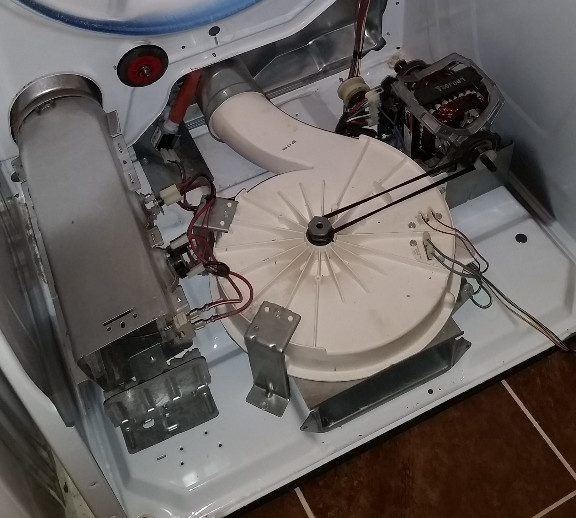
Now remove the drum and the belt.
Tip: Here’s a tip I recommend based on personal experience: Before you remove the drum and drum belt, study carefully how the belt is routed, so that you can remember how it goes when it comes time to reassemble it.
Here is a view of the way that the belt is routed around the tensioner and the drum.
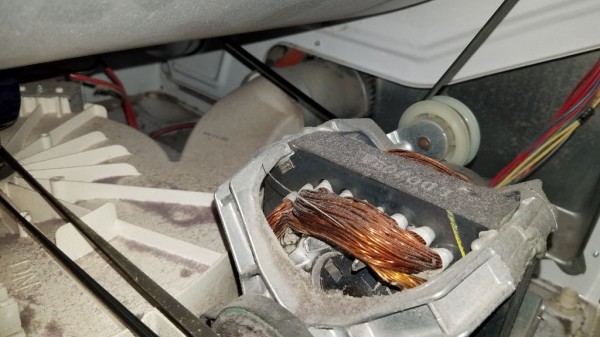
Reach under the exposed drum and press the tensioner arm to release the belt that is wrapped around the drum and the motor. It is relatively easy just to pull the belt off.
Note: The belt you want to remove is the one going around the drum (seen on the top of the drum in the photo below), not the fan belt, leave that one in place. (That one is visible several photos later).
Lift up on the drum to remove it, being careful not to damage the felt gasket around the drum.
This is a close up view of the tensioner arm (with white plastic wheel attached to it), with the belt dangling, after the drum has been removed.
This is an excellent opportunity to vacuum out the dust and lint that has accumulated!
This is a view with the drum and drum belt removed.
Now you will take the repair kit and replace the 4 wheels (they look like Rollerblade wheels).
The repair kit consists of the following items:
Whirlpool Model# 4392067RC Dryer Repair Kit
Take off all the wheels. To do this, use a flat screwdriver to pry off the triangular plastic clips holding them in place.
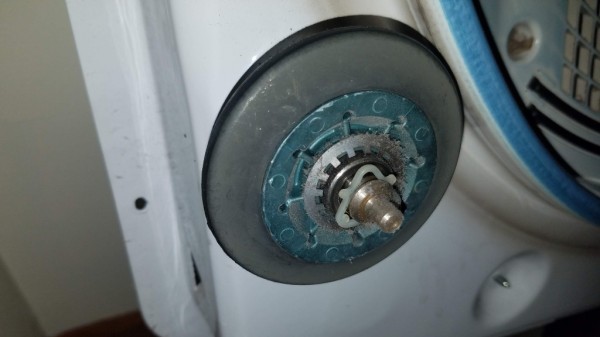
Clean off the black stuff that has undoubtedly accumulated on the wheel shafts, then put on the new wheels, and slide the plastic clips back on to hold the wheels in place.
Note: The first time I did this repair, I didn’t have the repair kit, so I just took of the wheels, cleaned them and the shafts, and reassembled the dryer, but the dryer still squealed! The second time I did the repair, I replaced the wheels, and the squealing has now stopped.
Update (November 2022): (This is information you won’t get on other websites!) The wheels I replaced in this guide, started squeaking again after 6 years. So, if you replace the wheels with this kit, I’d expect the repair to last for about 6 years.
It is not necessary to lubricate the wheels. The bearings are already pre-lubricated.
You want the wheels to spin 1-2 turns when you give them a whirl.
Also replace the white plastic tensioner wheel.
Now, put the belt around the drum and lift it into place and set it back onto the wheels. Make sure that the felt gasket is not folded under, and is even around the circumference of the drum.
Then reach under the drum and feed the belt around the motor and the tensioner arm.
Reassemble the 2 front panels in the reverse order that you took them off.
Plug in the unit and give it a try.
I hope this fixed your problem. This is quite a simple repair that requires very few tools. For more information, check out the repair kit on Amazon:
Whirlpool Model# 4392067RC Dryer Repair Kit
I hope you found this helpful! If so, please let me know about it in the comments section below!
Would you characterize your dryer as “Screeching” instead of “Squealing”? (Subtle difference, I know!) Then you may have a failed dryer seal! Check this out:
Picture Guide on How to Fix a Screeching Dryer
Having issues with your Maytag Bravos Washing Machine, too? Does it sound very loud, like a jet engine? Check out this post for the procedure to replace the bearings in your washer!
How to Replace the Bearings in a VERY Noisy Washing Machine – Maytag Bravos Washer

I have a Maytag dryer model #WED5000DW2
Serial #M54748187
That is screeching/squealing. It starts out really loud when you first put your clothes in and then in a few minutes it lightens up and then goes away. But intermittent. I saw repair kits on Amazon but not sure which one to use?
Would sure appreciate your guidance 👍
Sounds like the wheels are squealing for you. If that’s the case, this kit would work for you:
https://amzn.to/47RngaC
Good luck! 👍
Hi Richard, I have a Maytag dryer model #MEDB800vQ0, Serial #MY2516961 that is squeaking/screeching (I don’t know the difference). Will the repair kit you recommend work on my dryer? Thaks, Thomas
I read where “screeching” or metal-on-metal is likely the felt liners on the front or back of the drum.
LOL, I just realize I read that here. I’ve been reading too many sites about dryers today.
Haha! Yeah, I know the feeling!
How about showing how the NEW belt is RERIOUTED through the tensioner and motor pulley! USELESS VIDEO!
Thanks for the awesome tutorial!! I bought the kit, but the belt didn’t fit. Too short. I took the back off like others suggested. Still couldn’t get it to stretch around the pulley. Even tried using a screw driver to stretch it. Finally had to put the old belt back on. Hopefully the old belt doesn’t fail.
Thanks for the instructions! Everything went well except for putting the belt back around the tensioner and motor. The kit that everyone claimed was for my model# ended up having a slightly smaller belt and slightly larger tensioner wheel. After much cussing, I was able to fish it around properly. My screaching/squealing noise was coming from the tensioner wheel, so I couldn’t use the old one.
Hey! Saved us a ton of money, Thank you so much!
Hi, your instructions were great and fix went smoothly. Dryer seems to run louder than it did before and I’m wondering if I should put some WD40 on bearings. Functioning perfectly but seems to be “whirring.” Thanks for your post!
Hi Andrea, glad its working now! I wouldn’t apply WD-40, the bearings are internally lubricated, and shouldn’t need anything else. I’d suggest giving it a week or so to let the new wheels wear in!
About 3 days ago, I was sitting in my bedroom when I heard this crazy high pitched screaming coming from my dryer! Wow, thank you for informing me that to repair the bearings in a dryer you will have to use a paint scraper to release the top clips. I really appreciate your advice, but I am worried about damaging it more. I think that I will look into dryer repair professionals that will follow your tips and know what they are doing.
Our noice, squealing or screeching?, is loud, but intermittent. What would the most likely source be?
In your case, is sounds like the roller bearings to me. Depending on their position, they may or may not squeal until the bearing wears out more. It may also be worse depending on temperature, for example squealing when you first start up, and then dissipating, or vice versa….
Thanks – makes sense. Appreciate your help!
Thank you!
All I had to do was turn around one of the rollers (as one side was worn) No parts purchased and my Fiancée loves me!
My drier has a lint screen in rear but I was able to figure things out based on your instructions.
Mike, excellent tip, thanks for sharing!
The clips were a pain but I found mini wire cutters to be helpful in getting the old ones off. The squeaking has stopped and it runs great as long as I don’t put more than 4-5 lightweight items in. Once I put more it stops spinning. Any thoughts on what I did wrong?
I’m glad it’s not squeaking anymore!
I wonder if the drive belt is a bit loose, or perhaps not fully seated on the tensioner? Or maybe the spring on the tensioner is not fully engaged to keep adequate tension on the belt?
I took the back off to get a better look. Seems to be tensioner but since I originally did it by feel from front I’m not exactly sure how it engages. Doesn’t seem to let me post a pic either.
Richard thank you so much for this tutorial. It was extremely helpful for even a novice “handyman” like me! Like others, I found the plastic clips to be quite the pain to get all the way back on. For getting the old ones off I found a mini pair of wire cutters to be useful.
The squeaking has stopped and it dries and spins but for some reason when I put more than 4-5 items in it decides to not spin. As soon I take clothes out and leave those items it goes right back to working. Any thoughts?
If a person can move the dryer and take off back panel, it is a lot easier to get to the belt tensioner to remove and install belt.
I am back to say that thanks to you and to your article i saved 130$ to get the fuse changed by a technician.
That’s awesome! So glad to hear it; thanks for letting me know! Hearing this really makes my day, have a good one.
thank you
Great instructions. Very helpful. Little plastic clips on the wheels were frustrating to put back on and my belt also didn’t fit but like Keith I used the old one and now it runs like a champ.
Thanks!
That’s great, I’m glad to hear it’s working well now! Thanks for commenting!
This is a great set of instructions and very doable for a handy man. The only part out of the kit that didn’t fit my dryer, Maytag model# YMEDB725BW0 was the belt. for some reason it was about 2″ too short. That was not the squeaking problem on my unit so i just used the old belt. On my unit it was the idler pulley that was the problem but i replaced the the 4 wheels as well.
Glad to hear it is working, I’m happy to hear this was helpful, and thanks for the feedback. For others reading this, my dryer drum had a 25″ diameter (measured at the lip where the felt is glued on).